运行
- 以管理员身份运行cmd ,使用nexus.exe /run 命令启动nexus服务
- 打开浏览器访问访问 http://localhost:8081地址,登录
默认的用户名和密码分别是:admin/amdin123 - 安装
nexus.exe /install //安装nexus服务
nexus.exe /start //启动nexus服务
nexus.exe /stop //停止nexus服务
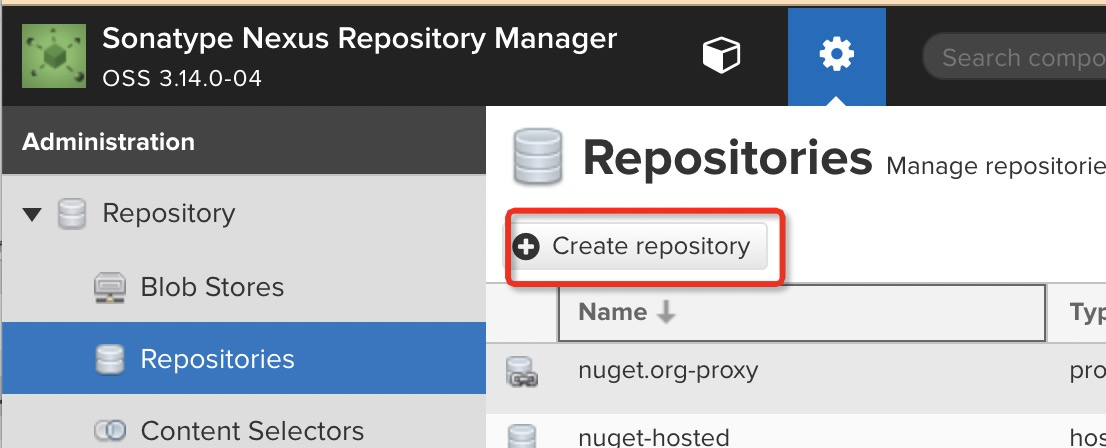
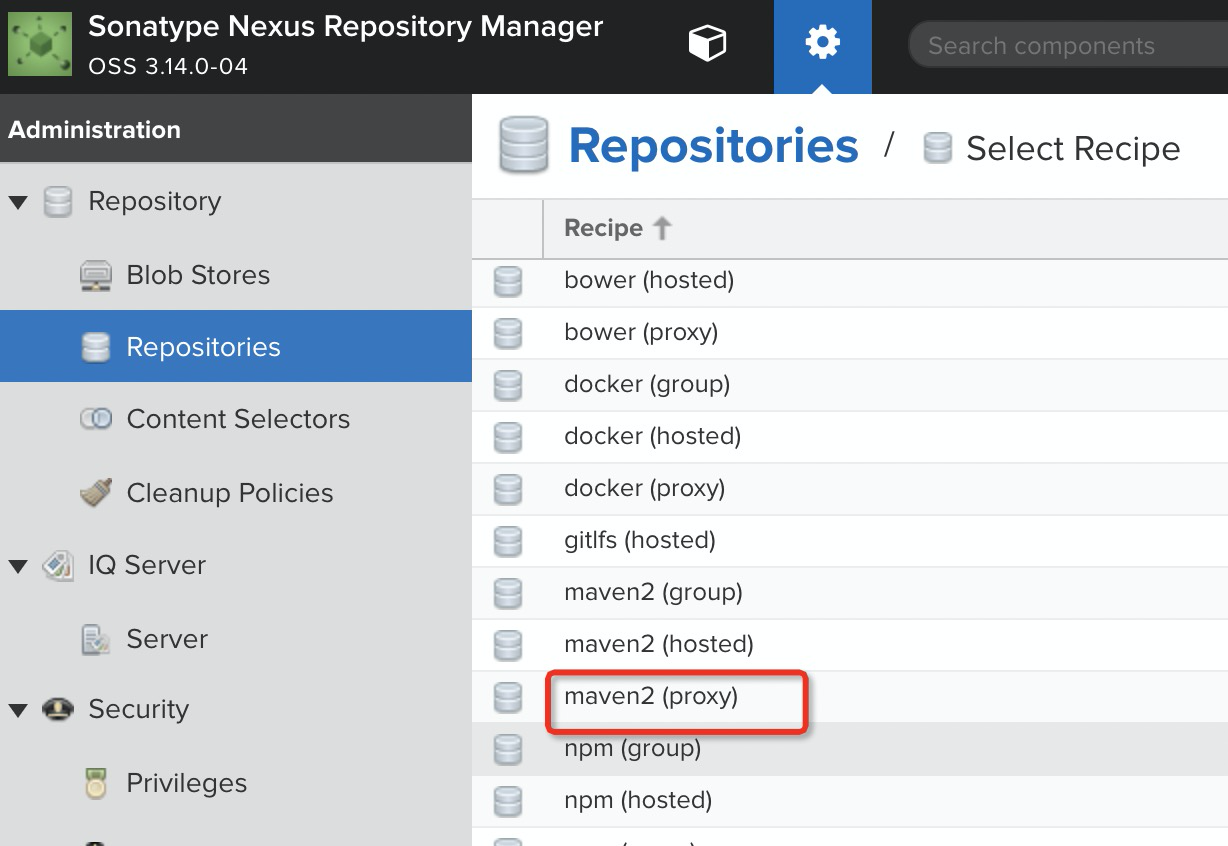
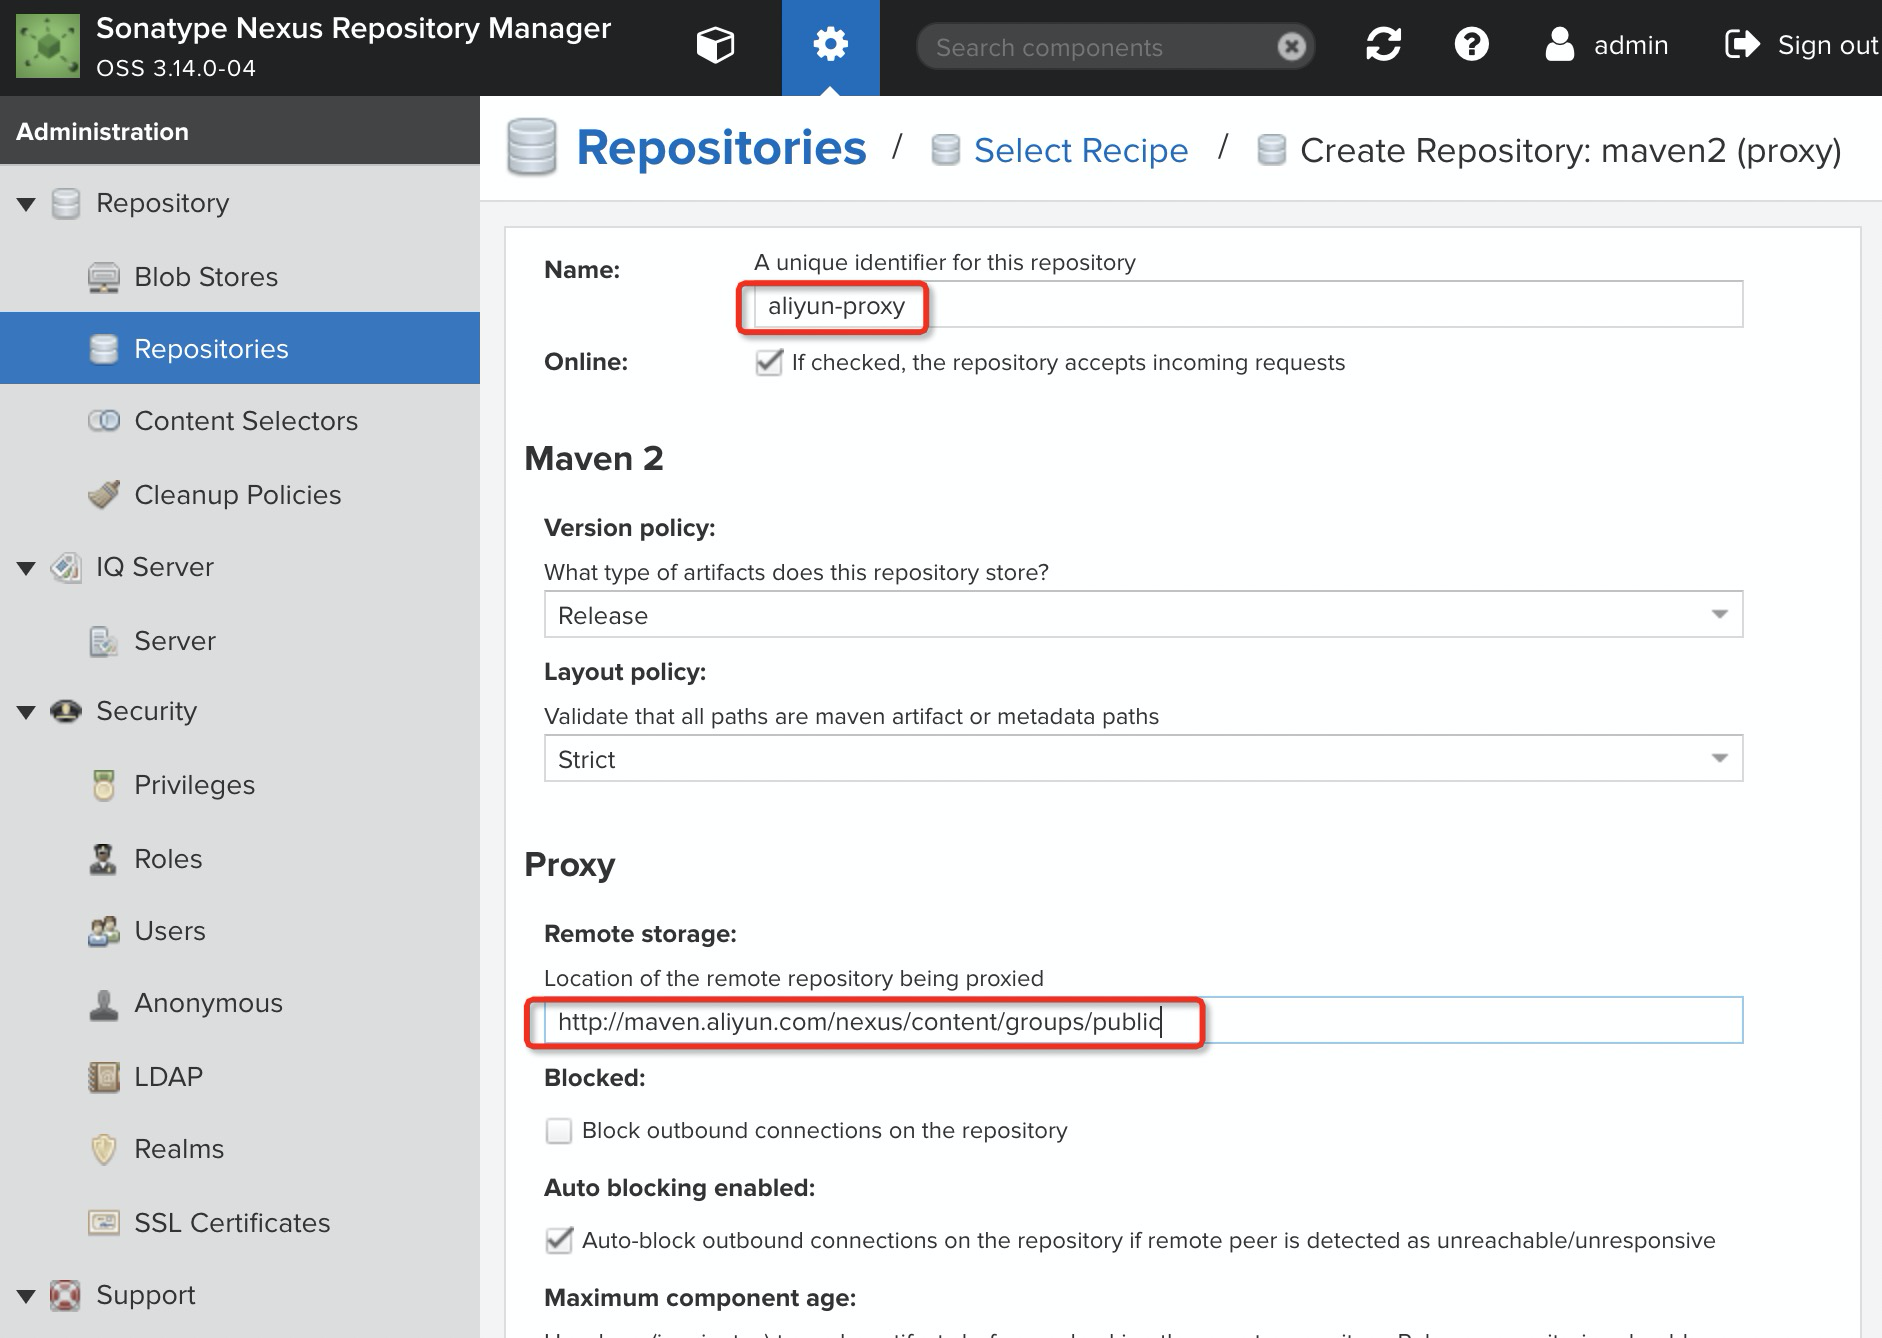
添加一个阿里云的代理仓库
仓库url为http://maven.aliyun.com/nexus/content/groups/public
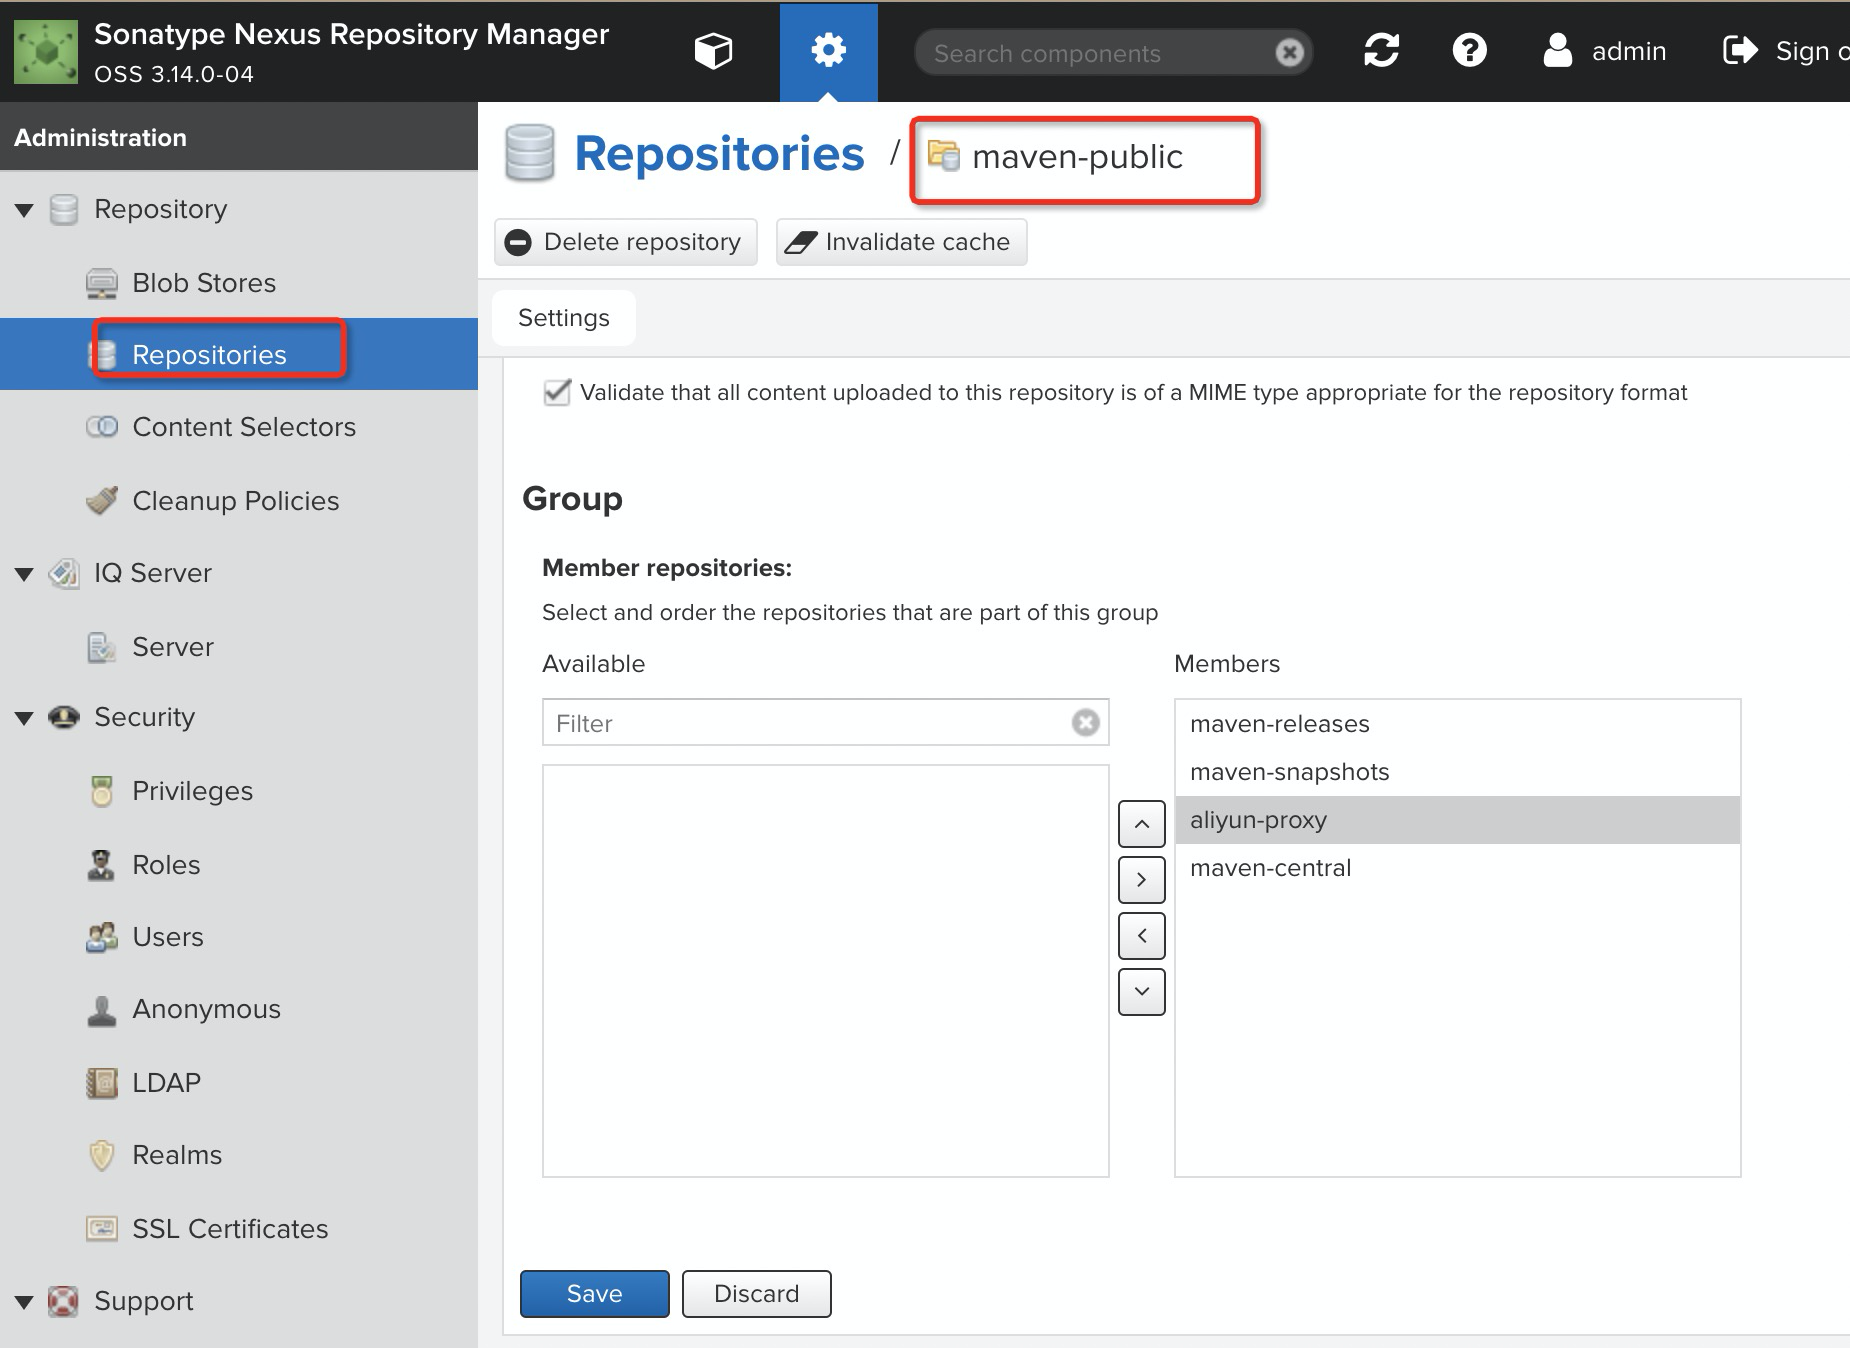
在public组里将这个aliyun-proxy仓库加入,排在maven-central之前
修改maven配置setting.xml文件
<?xml version="1.0" encoding="UTF-8"?>
<settings xmlns="http://maven.apache.org/SETTINGS/1.0.0"
          xmlns:xsi="http://www.w3.org/2001/XMLSchema-instance"
          xsi:schemaLocation="http://maven.apache.org/SETTINGS/1.0.0 http://maven.apache.org/xsd/settings-1.0.0.xsd">
  <!-- localRepository
   | Default: ${user.home}/.m2/repository
  <localRepository>/path/to/local/repo</localRepository>
    <localRepository>D:Maven
epository</localRepository>
-->

  <pluginGroups>
  </pluginGroups>

  <proxies>
  </proxies>

  <servers>
	<server>
		<id>maven-releases</id><!-- 对应nexus仓库的Name,老版本是id的 -->
		<username>admin</username>
		<password>admin123</password>
	</server>

	<server>
		 <id>maven-snapshots</id>
		<username>admin</username>
		<password>admin123</password>
	</server>
  </servers>

    <!--可配制多个镜像地址,但mirrorOf中的*优先于central,mirrorof一般就是repository的id,一般情况别用*,除非是私服仓库出问题,再改成*号,直接从远程下载-->
  <mirrors>
	<mirror>
      <id>nexus</id>
      <url>http://172.16.81.154:8081/repository/maven-public/</url><!-- 私服仓库地址 -->
      <mirrorOf>*</mirrorOf><!-- 可指定为repository中的id,*为全部 -->
	</mirror>
  </mirrors>

  <profiles>
	<profile>
    <id>public</id>
      <repositories>
        <repository>
          <id>releases</id><!--正式仓库id ,私有仓库的要与server中的id 一致-->
		  <name>Releases</name>
          <url>http://172.16.81.154:8081/repository/maven-central/</url>
          <releases><enabled>true</enabled></releases>
          <snapshots><enabled>true</enabled></snapshots>
        </repository>
      </repositories>
     <pluginRepositories><!--插件仓库地址-->
        <pluginRepository>
          <id>releases</id>
		   <name>Releases</name>
          <url>http://172.16.81.154:8081/repository/maven-central/</url>
          <releases><enabled>true</enabled></releases>
          <snapshots><enabled>true</enabled></snapshots>
        </pluginRepository>
      </pluginRepositories>
    </profile>
  </profiles>

  <activeProfiles>
	<activeProfile>public</activeProfile> <!--profile的id,看激活哪个吧-->
  </activeProfiles>
</settings>
maven pom文件
pom配置,这里的id要和settings.xml里
     <!-- 配置远程发布到私服,mvn deploy -->
     <distributionManagement>
       <repository>
          <id>maven-releases</id>
           <name>Nexus Release Repository</name>
           <url>http://172.16.81.154:8081/repository/maven-releases/</url>
       </repository>
       <snapshotRepository>
            <id>maven-snapshots</id>
            <name>Nexus Snapshot Repository</name>
           <url>http://172.16.81.154:8081/repository/maven-snapshots/</url>
       </snapshotRepository>
     </distributionManagement>
pom中指定仓库
与setting中的
<repositories>
	<repository>
		 <id>maven-releases</id>
		<name>maven2</name>
		<url>http://172.16.81.154:8081/repository/maven-public/</url>
	</repository>
</repositories>
上传jar
方式一:使用nexus自带操作界面
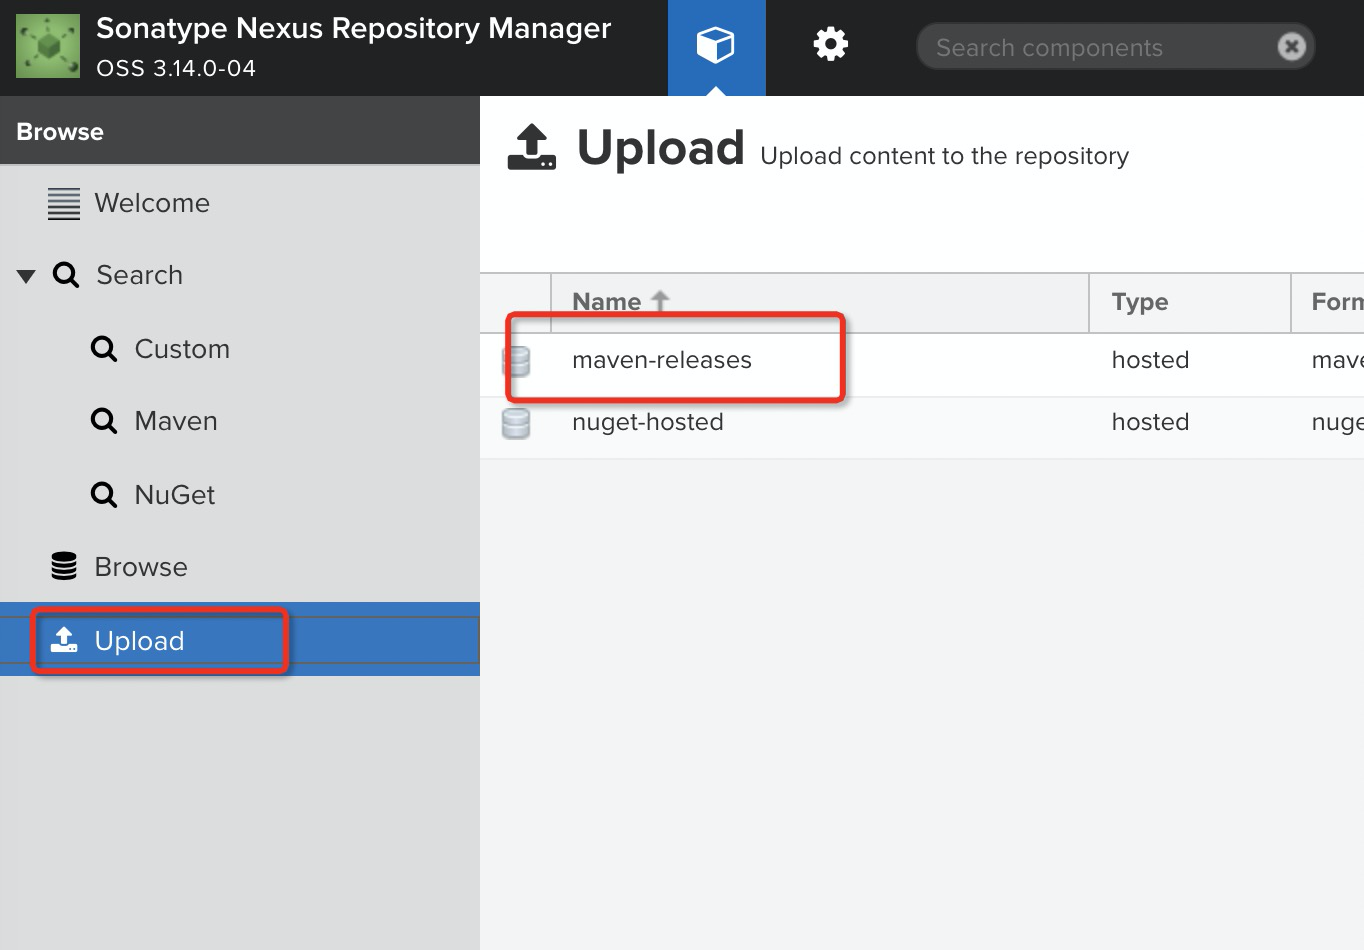
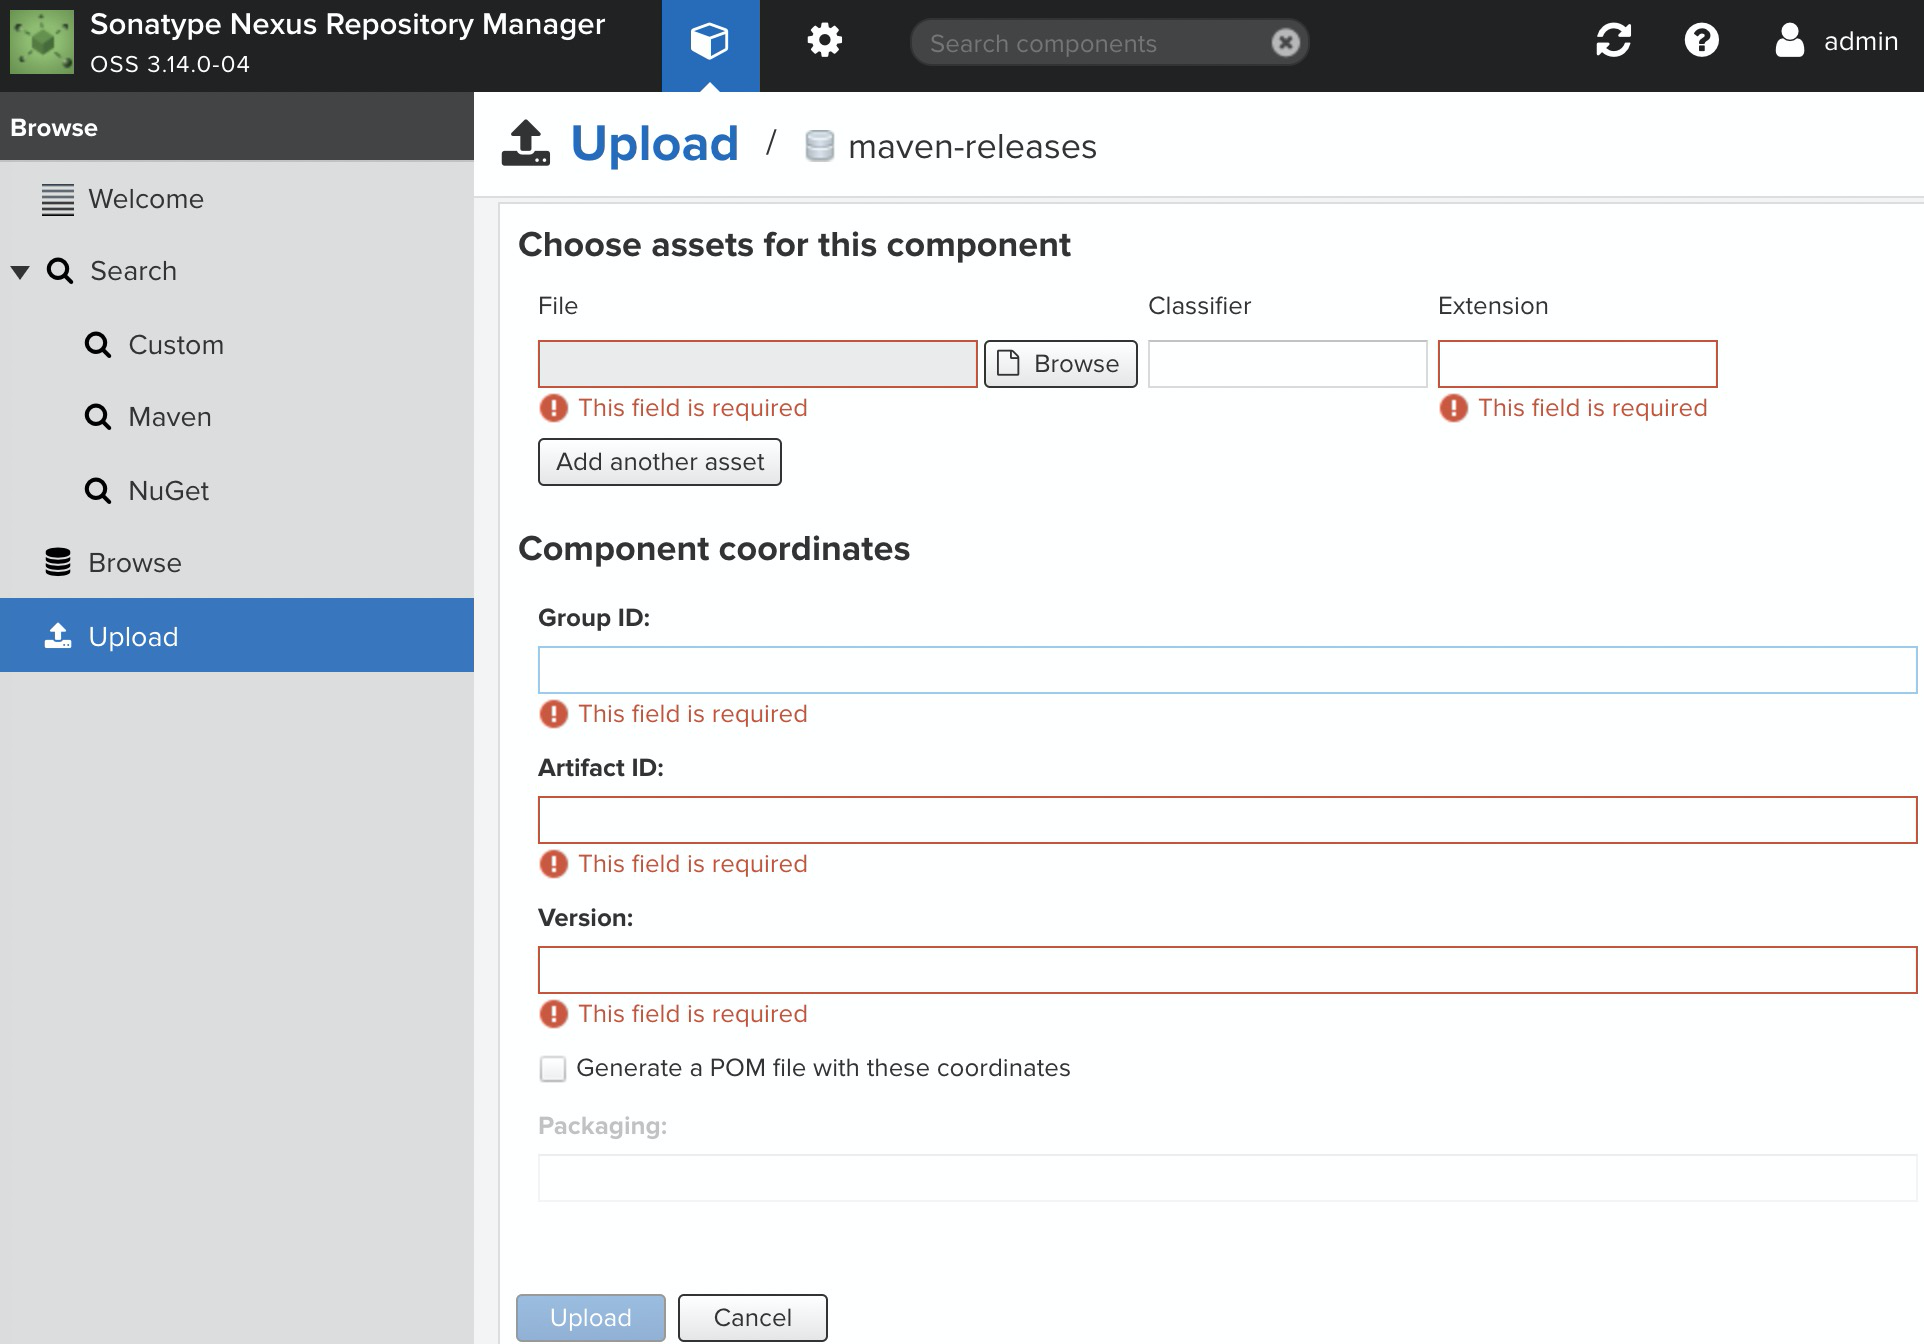
方式二:在cmd中使用命令
mvn deploy:deploy-file -DgroupId=xxx.xxx -DartifactId=xxx -Dversion=0.0.2 -Dpackaging=jar -Dfile=D:xxx.jar -Durl=http://xxx.xxx.xxx.xxx:8081/repository/3rdParty/ -DrepositoryId=3rdParty --settings D:setting.xml
-DgroupId 为上传的jar的groupId-DartifactId 为上传的jar的artifactId-Dversion 为上传的jar的需要被依赖的时候的版本号-Dpackaging为jar,-Dfile为jar包路径-Durl 为要上传的路径,可以通过以下方式获取到
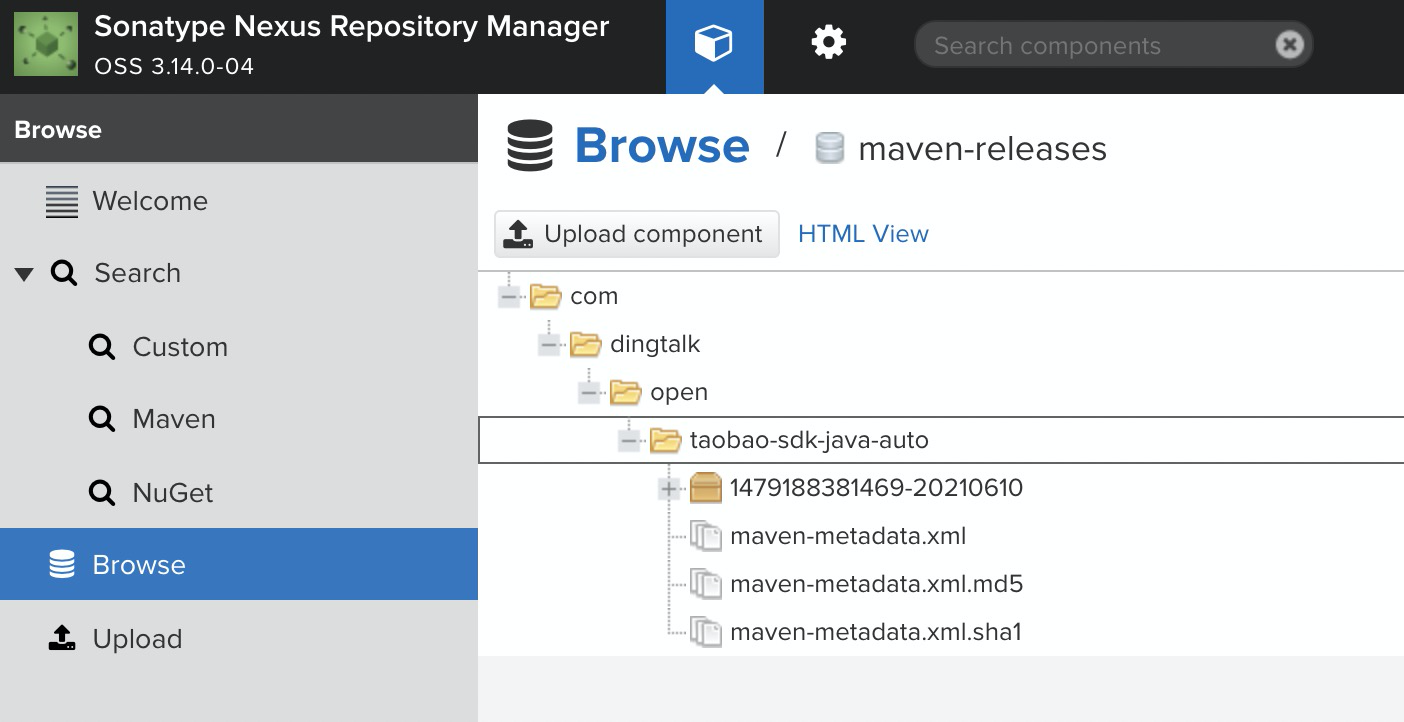
mvn deploy:deploy-file -DgroupId=com.dingtalk.open -DartifactId=taobao-sdk-java-auto -Dversion=1479188381469-20210610 -Dpackaging=jar -Dfile=I: aobao-sdk-java-auto-1479188381469-20210610.jar -Durl=http://172.16.81.154:8081/repository/maven-releases/ -DrepositoryId=maven-releases --settings D:setting.xml

权限
-
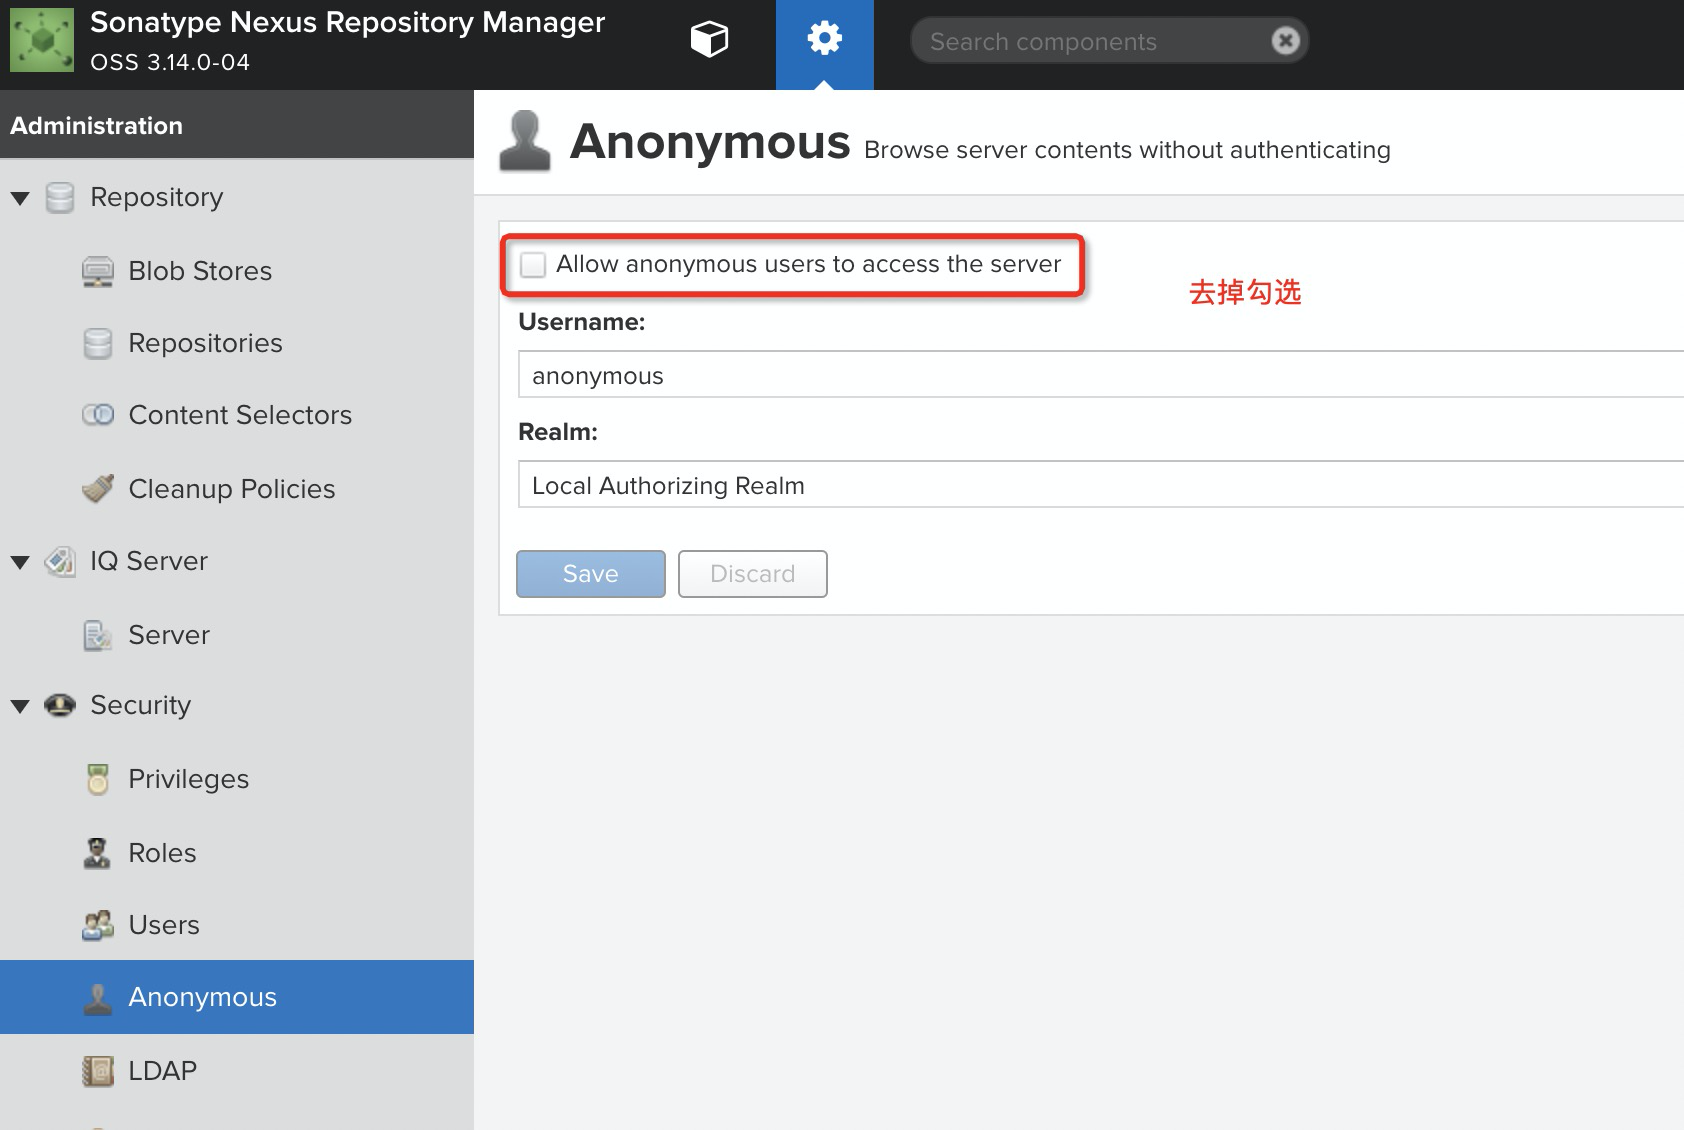
禁用匿名访问
-
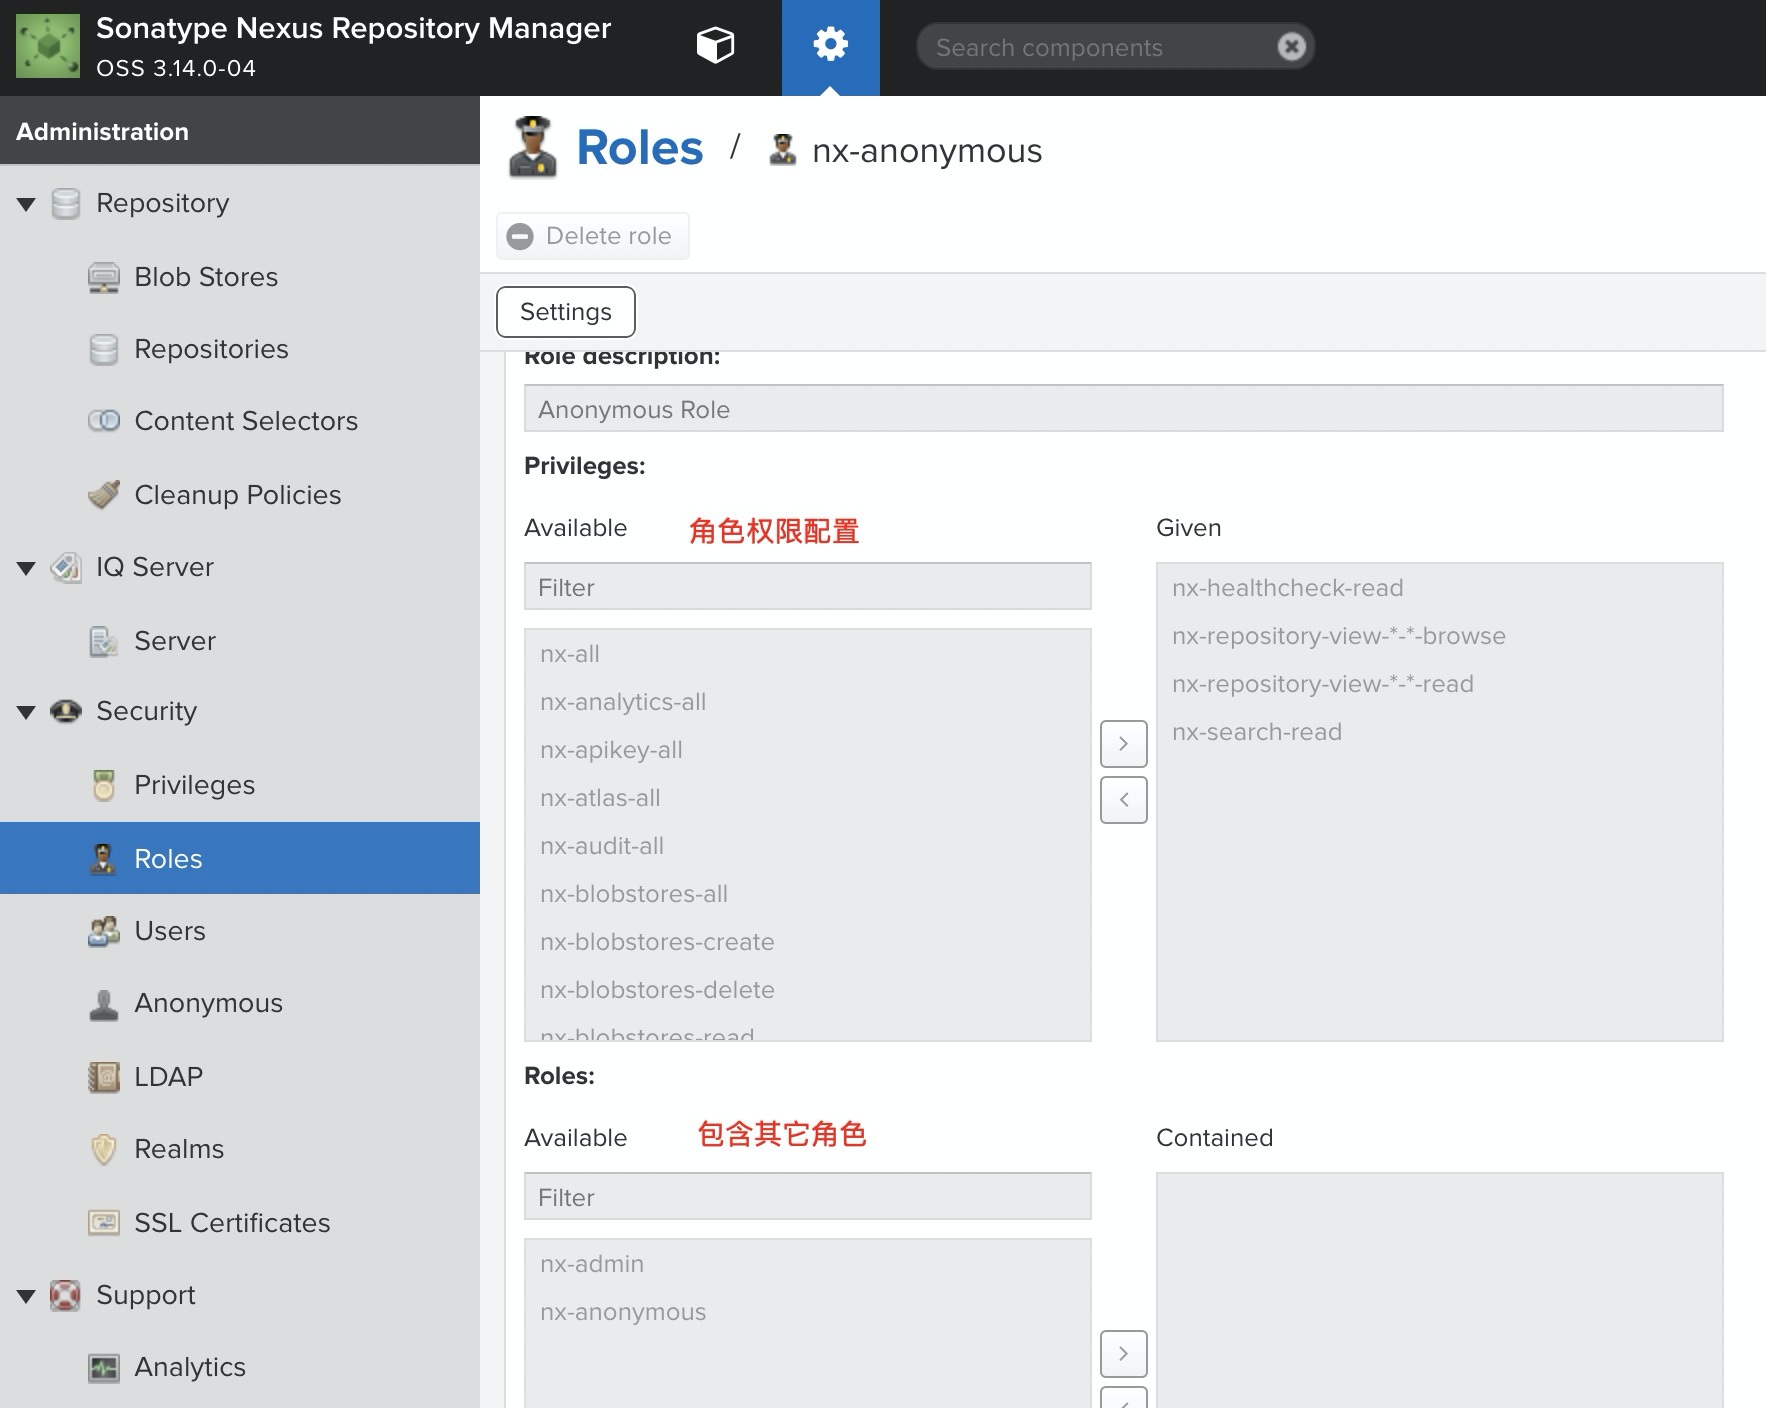
角色
-
用户
