建议:初学者看之前请先看一遍菜鸟教程
可以安装一个ATOM编辑器,本人觉得很好用
一、安装并启动项目:网址
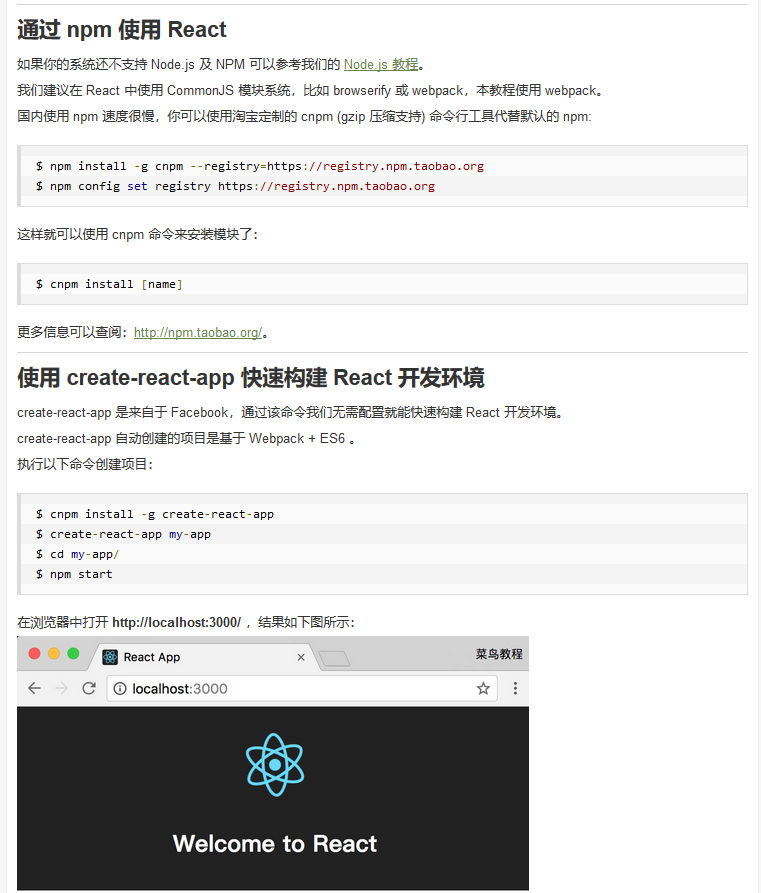
搭建好的项目目录为:

二、开始写项目:
1.组件到界面流程:
定义一个组件app.js导出------->index.js获取app.js组件------->渲染到index.html中
1.组件:app.js
import React, { Component } from 'react';

class App extends React.Component{
    render(){
        return (<div>这是一个组件</div>);
    }
}
export default  App;
1)组件的return函数里返回的HTML节点必须是一个
2)定义一个组件的方式ES6语法:
class APP extends React.Component{......}
也可以使用React.creactClass({})
3)可以给外部使用的组件:使用 export default 导出组件
export default class APP extends React.Component{......}
或者是
class App extends React.Component{
    render(){
        return (<div>这是一个组件</div>);
    }
}
export default  App;
2.入口的定义:index.js文件
import React from 'react';
import ReactDOM from 'react-dom';
import App from './App';

ReactDOM.render(<App />, document.getElementById('root'));
3.页面:index.html
<!DOCTYPE html>
<html lang="en">
  <head>
    <meta charset="utf-8">
    <meta name="viewport" content="width=device-width, initial-scale=1, shrink-to-fit=no">
    <meta name="theme-color" content="#000000">
    <title>React App</title>
  </head>
  <body>
    <div id="root"></div>
  </body>
</html>
2.同时渲染多个组件的写法:

3.代码初始化和this.state的使用:
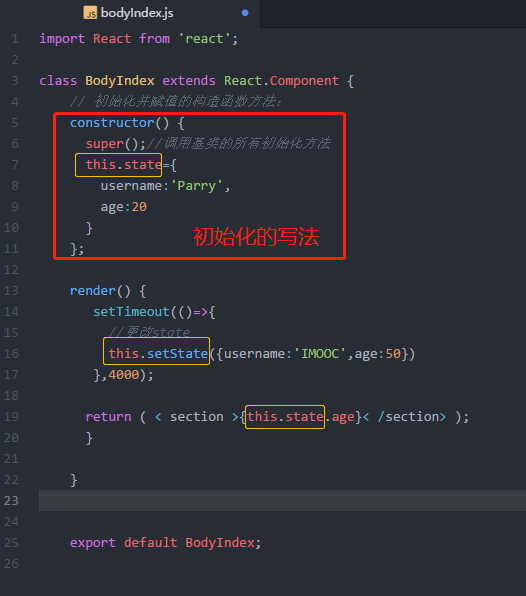
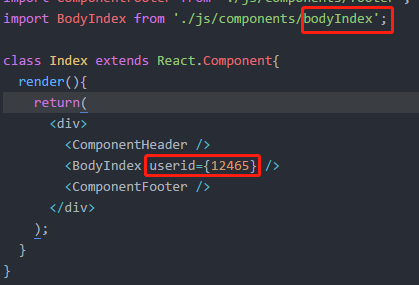
4.父页面向子页面传递参数:

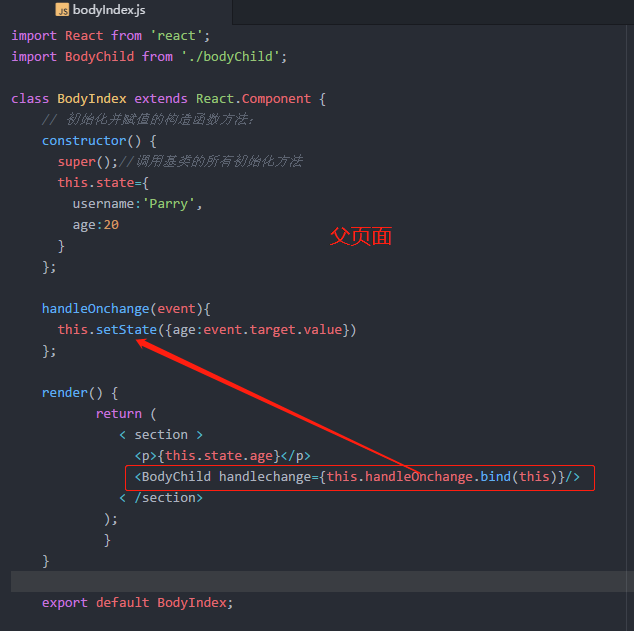
5.子组件向父页面传递参数:
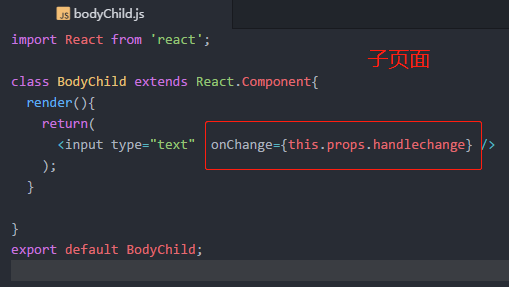
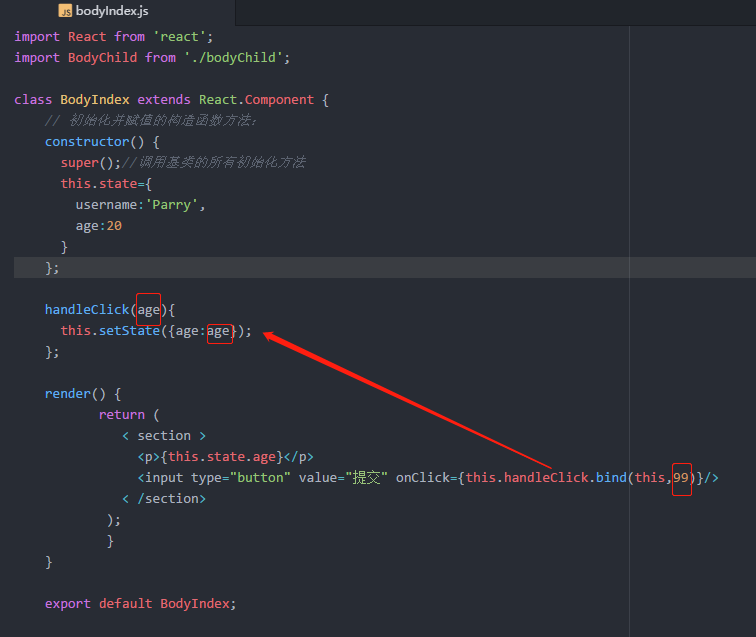
6.从onClick点击事件中向函数传递参数的方式:
7.表单验证使用propTypes属性
注意:react15.5.0版本以后废除了这个属性,要想使用这个属性在组件中必须引入propTyps:
import PropTypes from 'prop-types'
可以在package.json中查看react的版本号;
具体写法:
15.5.0以后版本写法为:必须导入propTypes包
isRequired表示:是一个必须传入的参数import PropTypes from 'prop-types'
组件名.propTypes = {
name: PropTypes.string.isRequired
}
15.5.0以前的写法:不需要导入proptypes包
组件名.propTypes = {
   name: React.PropTypes.string.isRequired,
};
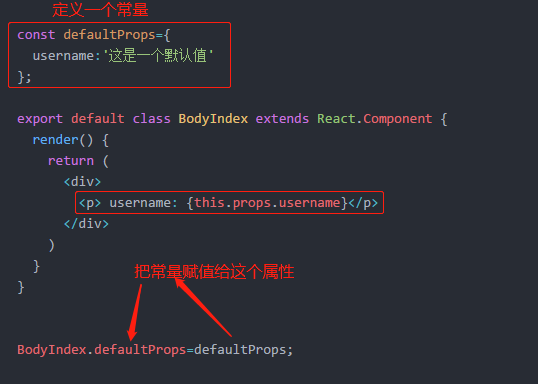
8、给组件定义默认的参数使用:defaultProps
如果父页面中传递的参数会覆盖默认参数
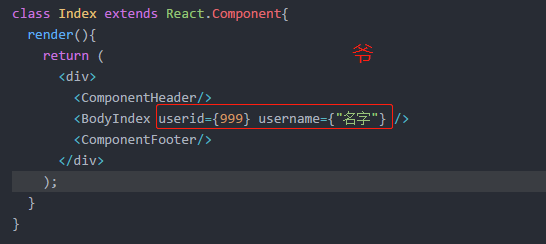
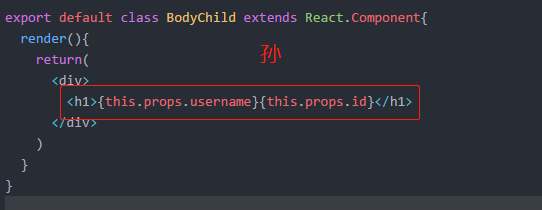
9、爷爷向孙子页面传递参数:


10、组件的Refs:从组件获取真实的DOM
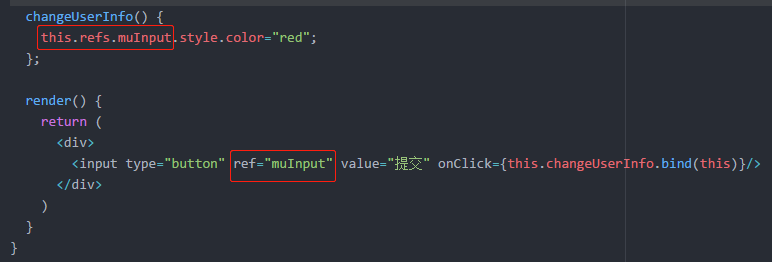
方法的定义:<input ref="myInput" />
方法的获取:this.refs.myInput
Refs是访问到组件内部DOM节点唯一可靠的方法
Refs会自动销毁对子组件的引用
不要再render或render之前对Refs进行调用
不要滥用Refs
具体用法如下:
11、独立组件间共享:Mixin
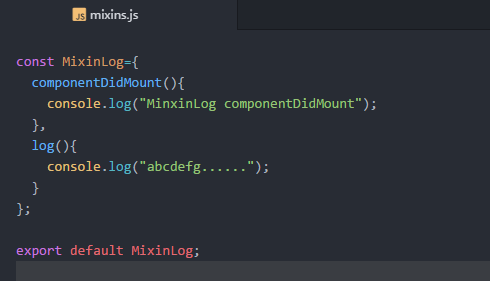
不同的组件间共用功能,共享代码
和页面具有类似的生命周期
cmd中安装Mixin的命令:
npm install --save react-mixin
在文件中导入包:import ReactMixin from 'react-mixin';

12、样式:
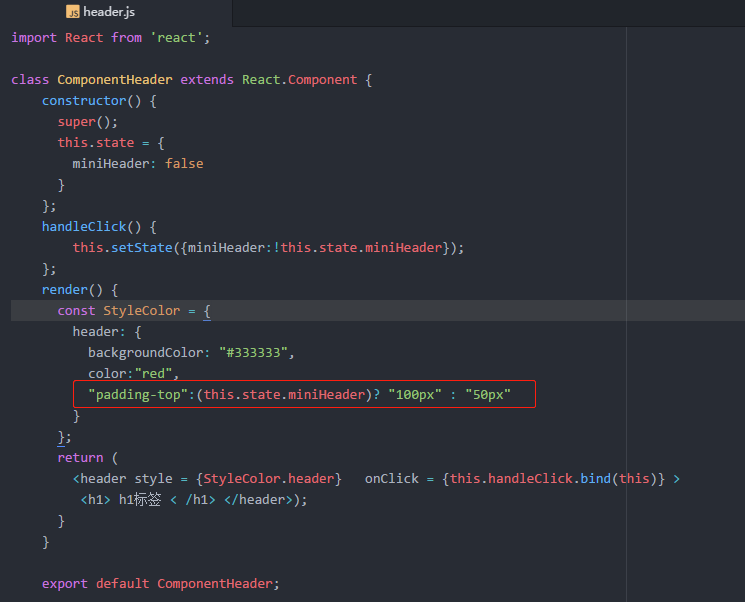
1)内联样式的写法:
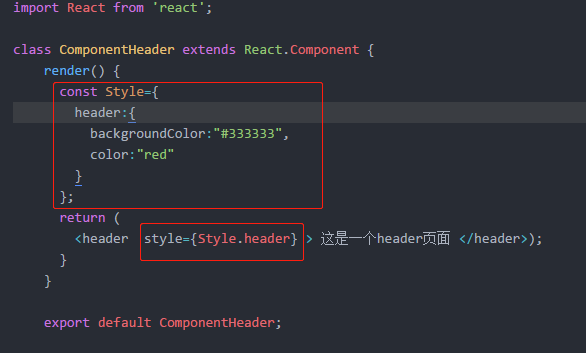
2)内联样式中的表达式:
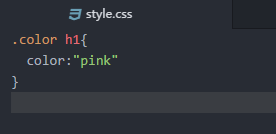
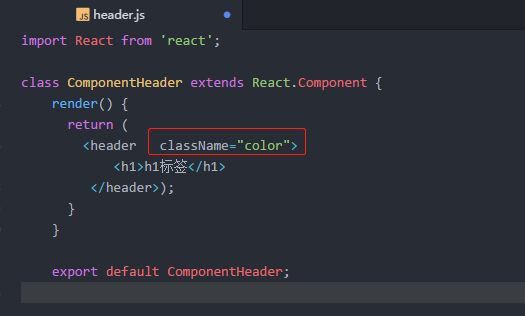
3)外部引用css文件:

13.react-router 4的使用方法:参考网站
安装react-router:默认安装4.0.0以上版本:
npm install --save react-router
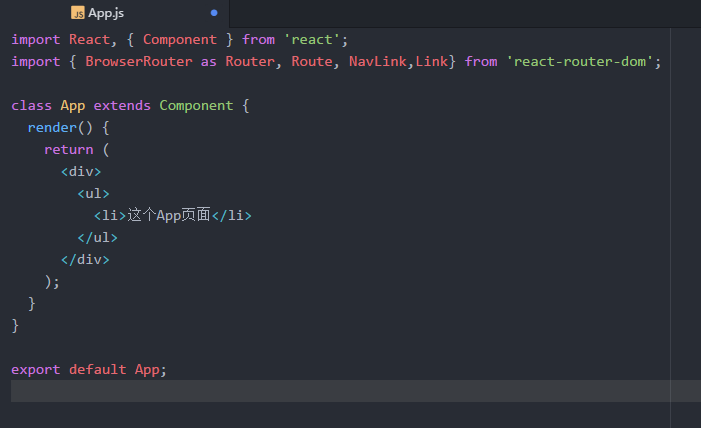
1)react-router 中默认加载一个页面App.js

2)Link的使用方法:
Router标签一定要包住return中的所有的标签才不会报错
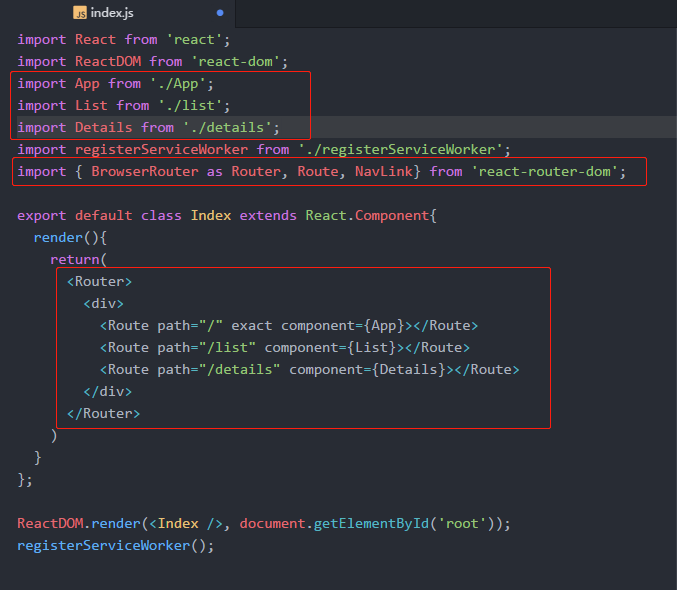

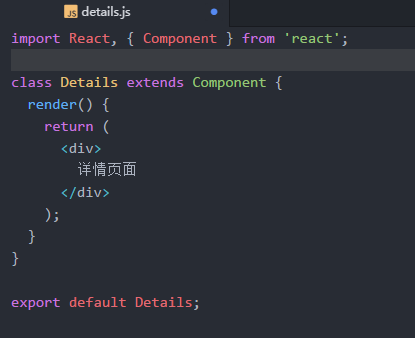
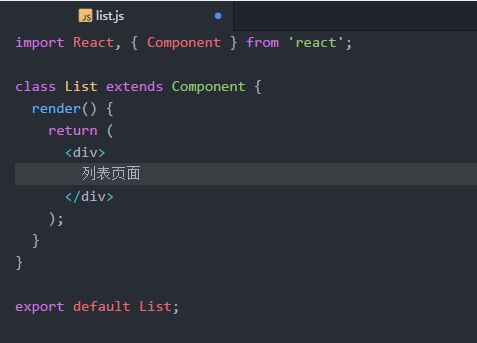
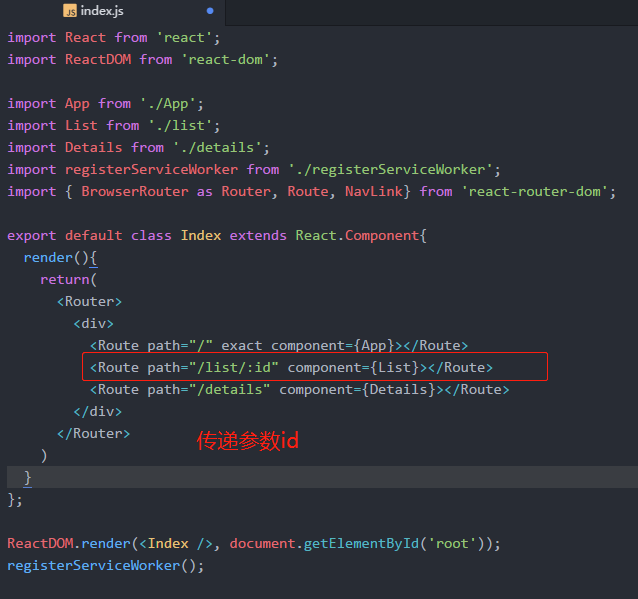
3)Link传参及获取参数:
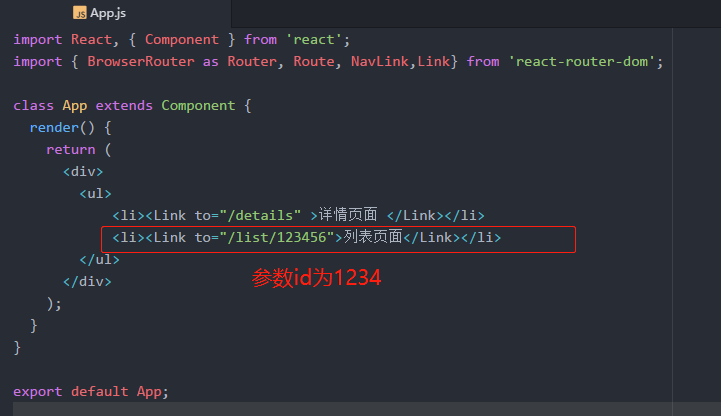

14、Ant Design插件的使用:网址
安装命令:
cnpm install antd --save

注意:如果安装完antd后,出现编译错误,使用如下方法解决:
1)把项目中的node_modeules删除
2) 执行npm install重新加载包
15.新闻类接口:
https://www.juhe.cn/docs/api/id/235
16.免费图标使用网站:
https://www.iconfinder.com/


17.导入本地图片的方法:
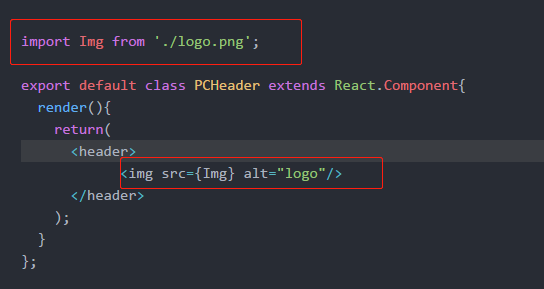
18、react-responsive插件的使用:自适应插件
https://github.com/contra/react-responsive
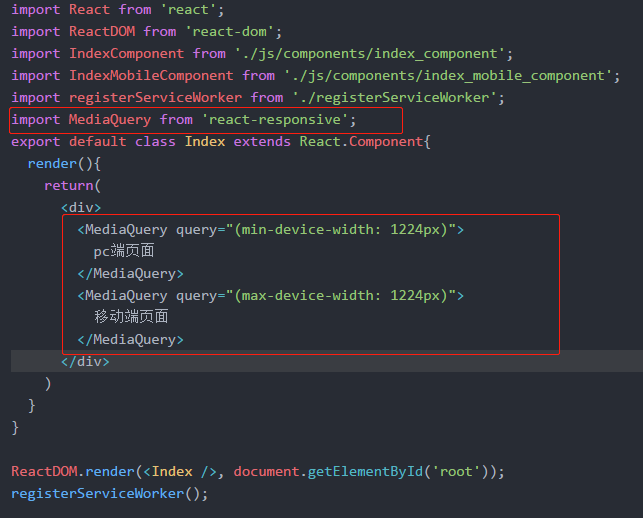
19、fetch网址:ajax ,json:
安装命令:
npm install fetch --save