pytorch 0.4.1 docker地址:
https://hub.docker.com/r/linkoffate/torchen
https://hub.docker.com/r/airaria/pytorch0.4.1
直接上干货,CUDA9.0版本对应的pytorch是0.4.1,使用其他版本pytorch不支持,一定要安装0.4.1版本,github上的mmdetection安装对应CUDA9.0的在branch0.4.1里,但是注意!!!!!!!!!!github上不知道为什么,pytorch0.4.1分支里的少一些文件我安装了好几次进到提示少deform_conv_cuda等文件,又对比主分支才发现少了很多文件.
解决办法:
1.git项目(不在github上)
git clone https://gitee.com/mirrors/mmdetection.git
2.切换到pytorch-0.4.1分支(针对CUDA9.0用户)
cd mmdetection
git checkout pytorch-0.4.1
3.安装
3.1创建虚拟环境(需要python3.5+)
conda create -n python3.5 python=3.5.4
conda activate python3.5
3.2安装依赖库(两种安装方式二选一)
conda install pytorch=0.4.1 -c pytorch #pip install pytorch=0.4.1 -c pytorch
conda install cython #pip install cython
cd mmdetection#如果已经在此目录不需要此条命令
./compile.sh
3.3安装mmcv
git clone https://github.com/open-mmlab/mmcv.git
cd mmcv
pip install .
4.安装mmdet
cd mmdetection#如果已经在此目录不需要此条命令
python setup.py install #pip install .
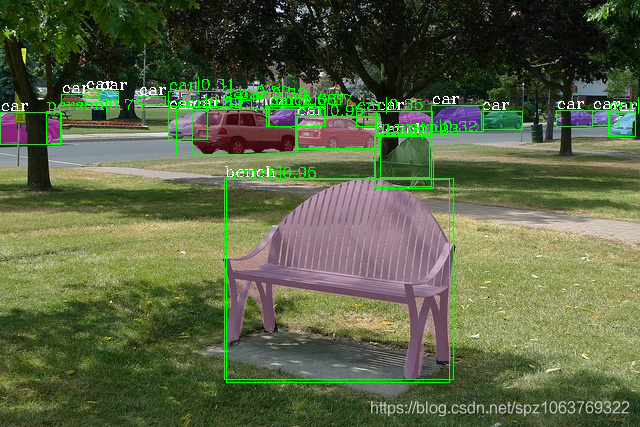
测试代码
预训练模型需要自己下载
-
import mmcv
-
from mmcv.runner import load_checkpoint
-
from mmdet.models import build_detector
-
from mmdet.apis import inference_detector, show_result
-
-
cfg = mmcv.Config.fromfile('/home/stardust/mmdetection/configs/faster_rcnn_r50_fpn_1x.py')
-
cfg.model.pretrained = None
-
-
# 构建网络,载入模型
-
model = build_detector(cfg.model, test_cfg=cfg.test_cfg)
-
-
# _ = load_checkpoint(model, 'https://s3.ap-northeast-2.amazonaws.com/open-mmlab/mmdetection/models/faster_rcnn_r50_fpn_1x_20181010-3d1b3351.pth')
-
# 如果通过网盘下载,取消下一行代码的注释,并且注释掉上一行
-
_ = load_checkpoint(model, 'model/faster_rcnn_r50_fpn_1x_20181010-3d1b3351.pth')
-
-
# 测试一张图片
-
img = mmcv.imread('test.jpg')
-
result = inference_detector(model, img, cfg)
-
show_result(img, result)
-
-
# 测试多张图片
-
# imgs = ['test1.jpg', 'test2.jpg']
-
# for i, result in enumerate(inference_detector(model, imgs, cfg, device='cuda:0')):
-
# print(i, imgs[i])
-
# show_result(imgs[i], result)


