所有文章
https://www.cnblogs.com/lay2017/p/12078232.html
正文
在上一篇文章中,我们简单地了解了一下什么是seata。它是来自阿里巴巴的内部项目不断地发展出来的。2019年以fescar命名开源于apache开源协议,同年改名为seata。
本文将入手seata,官方的文档和demo主要以dubbo和springcloud体系的接入为主。本文选取springboot作为项目构建框架,快速构建示例。
环境说明
seata的发展还是比较快的,而版本的更新带来的使用变化可能会导致文档的过时。本文在阅读官方提供的quickStart基础上完成。为了过程顺利最好保持环境版本一致,否则你可能得自己debug问题所在。
- jdk1.8
- mysql8.0.18
- springboot 2.2.5.RELEASE
- spring-cloud-alibaba-dependencies 2.2.0.RELEASE
- seata-server v1.1.0
当然,版本并不一定需要完全一样。比如你可以使用mysql5+,但是就得强制指定对应的mysql-connector-java.jar的版本。
步骤说明
要完成这个示例项目,需要不少的步骤。这里提前罗列一下,比较心里有数
- 搭建springboot项目
- 引入seata依赖
- 配置
- 添加并修改file.conf和registry.conf配置
- 添加数据源配置
- 数据源添加undo_log表
- 测试
- 数据源添加业务表和数据
- 编写业务代码
- 全局回滚测试
搭建springboot项目
搭建springboot项目比较简单,本文采用idea构建了两个项目
1)user-service
application.properties配置为:
server.port=8080
server.servlet.context-path=/user-service
spring.application.name=user-service
2) good-service
server.port=8081
server.servlet.context-path=/good-service
spring.application.name=good-service
继承自

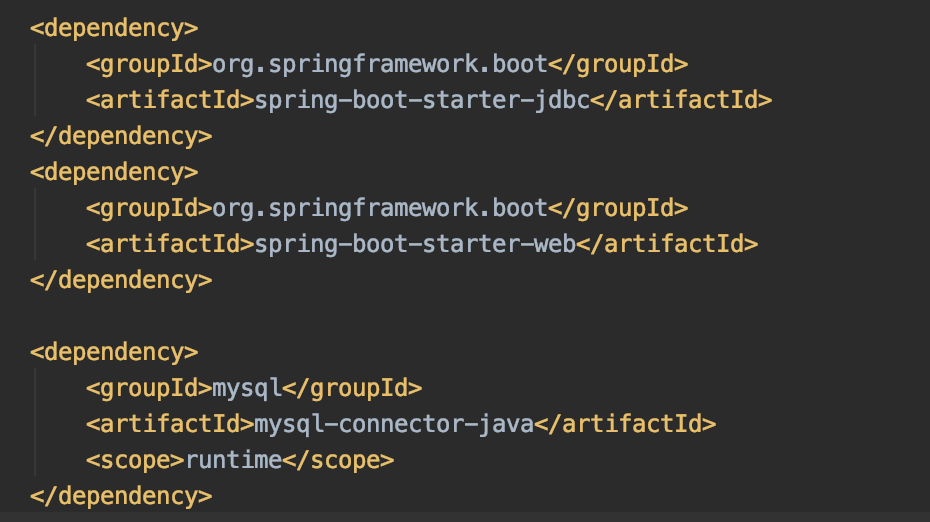
基础依赖为

引入seata依赖
首先Import一下dependencies,注意:groupId和官方文档写的不一样,版本是2.2.0.RELEASE
<dependencyManagement>
    <dependencies>
        <dependency>
            <groupId>com.alibaba.cloud</groupId>
            <artifactId>spring-cloud-alibaba-dependencies</artifactId>
            <version>2.2.0.RELEASE</version>
            <type>pom</type>
            <scope>import</scope>
        </dependency>
    </dependencies>
</dependencyManagement>
接着引入seata的依赖
<dependency>
    <groupId>com.alibaba.cloud</groupId>
    <artifactId>spring-cloud-starter-alibaba-seata</artifactId>
</dependency>
配置
添加并修改file.conf和registry.conf
我们需要在resources目录下,创建file.conf和registry.conf这两个文件。

registry.conf文件不需要修改,直接拷贝即可
registry {
  # file 、nacos 、eureka、redis、zk、consul、etcd3、sofa
  type = "file"

  nacos {
    serverAddr = "localhost"
    namespace = "public"
    cluster = "default"
  }
  eureka {
    serviceUrl = "http://localhost:8761/eureka"
    application = "default"
    weight = "1"
  }
  redis {
    serverAddr = "localhost:6379"
    db = "0"
  }
  zk {
    cluster = "default"
    serverAddr = "127.0.0.1:2181"
    session.timeout = 6000
    connect.timeout = 2000
  }
  consul {
    cluster = "default"
    serverAddr = "127.0.0.1:8500"
  }
  etcd3 {
    cluster = "default"
    serverAddr = "http://localhost:2379"
  }
  sofa {
    serverAddr = "127.0.0.1:9603"
    application = "default"
    region = "DEFAULT_ZONE"
    datacenter = "DefaultDataCenter"
    cluster = "default"
    group = "SEATA_GROUP"
    addressWaitTime = "3000"
  }
  file {
    name = "file.conf"
  }
}

config {
  # file、nacos 、apollo、zk、consul、etcd3
  type = "file"

  nacos {
    serverAddr = "localhost"
    namespace = "public"
    cluster = "default"
  }
  consul {
    serverAddr = "127.0.0.1:8500"
  }
  apollo {
    app.id = "seata-server"
    apollo.meta = "http://192.168.1.204:8801"
  }
  zk {
    serverAddr = "127.0.0.1:2181"
    session.timeout = 6000
    connect.timeout = 2000
  }
  etcd3 {
    serverAddr = "http://localhost:2379"
  }
  file {
    name = "file.conf"
  }
}
file.conf内容如下,但是要service节点下的一个配置。我们示例项目是user-service和good-service,分别在对应的项目中要做修改。
transport {
  # tcp udt unix-domain-socket
  type = "TCP"
  #NIO NATIVE
  server = "NIO"
  #enable heartbeat
  heartbeat = true
  #thread factory for netty
  thread-factory {
    boss-thread-prefix = "NettyBoss"
    worker-thread-prefix = "NettyServerNIOWorker"
    server-executor-thread-prefix = "NettyServerBizHandler"
    share-boss-worker = false
    client-selector-thread-prefix = "NettyClientSelector"
    client-selector-thread-size = 1
    client-worker-thread-prefix = "NettyClientWorkerThread"
    # netty boss thread size,will not be used for UDT
    boss-thread-size = 1
    #auto default pin or 8
    worker-thread-size = 8
  }
  shutdown {
    # when destroy server, wait seconds
    wait = 3
  }
  serialization = "seata"
  compressor = "none"
}
service {
  #vgroup->rgroup
  vgroup_mapping.取spring.application.name的值-seata-service-group = "default"
  #only support single node
  default.grouplist = "127.0.0.1:8091"
  #degrade current not support
  enableDegrade = false
  #disable
  disable = false
  #unit ms,s,m,h,d represents milliseconds, seconds, minutes, hours, days, default permanent
  max.commit.retry.timeout = "-1"
  max.rollback.retry.timeout = "-1"
}

client {
  async.commit.buffer.limit = 10000
  lock {
    retry.internal = 10
    retry.times = 30
  }
  report.retry.count = 5
}

## transaction log store
store {
  ## store mode: file、db
  mode = "file"

  ## file store
  file {
    dir = "sessionStore"

    # branch session size , if exceeded first try compress lockkey, still exceeded throws exceptions
    max-branch-session-size = 16384
    # globe session size , if exceeded throws exceptions
    max-global-session-size = 512
    # file buffer size , if exceeded allocate new buffer
    file-write-buffer-cache-size = 16384
    # when recover batch read size
    session.reload.read_size = 100
    # async, sync
    flush-disk-mode = async
  }

  ## database store
  db {
    ## the implement of javax.sql.DataSource, such as DruidDataSource(druid)/BasicDataSource(dbcp) etc.
    datasource = "dbcp"
    ## mysql/oracle/h2/oceanbase etc.
    db-type = "mysql"
    url = "jdbc:mysql://127.0.0.1:3306/seata"
    user = "mysql"
    password = "mysql"
    min-conn = 1
    max-conn = 3
    global.table = "global_table"
    branch.table = "branch_table"
    lock-table = "lock_table"
    query-limit = 100
  }
}
lock {
  ## the lock store mode: local、remote
  mode = "remote"

  local {
    ## store locks in user's database
  }

  remote {
    ## store locks in the seata's server
  }
}
recovery {
  committing-retry-delay = 30
  asyn-committing-retry-delay = 30
  rollbacking-retry-delay = 30
  timeout-retry-delay = 30
}

transaction {
  undo.data.validation = true
  undo.log.serialization = "jackson"
}

## metrics settings
metrics {
  enabled = false
  registry-type = "compact"
  # multi exporters use comma divided
  exporter-list = "prometheus"
  exporter-prometheus-port = 9898
}
添加数据源配置
分布式事务的实现,数据源代理是很重要的方式。在2.2.0.RELEASE中,数据源代理自动实现了,不需要我们去配置一个代理类。但是我们还是需要配置一下数据源的。
首先在application.properties中添加配置
user-service的配置
spring.datasource.driverClassName=com.mysql.cj.jdbc.Driver
spring.datasource.url=jdbc:mysql://localhost:3306/db_user?useUnicode=true&characterEncoding=utf8&allowMultiQueries=true&useSSL=false
spring.datasource.username=root
spring.datasource.password=
good-service的配置
spring.datasource.driverClassName=com.mysql.cj.jdbc.Driver
spring.datasource.url=jdbc:mysql://localhost:3306/db_good?useUnicode=true&characterEncoding=utf8&allowMultiQueries=true&useSSL=false
spring.datasource.username=root
spring.datasource.password=
注意:你可能选择了与本文不同的MySQL版本,那么driverClassName或许并不是com.mysql.cj.jdbc.Driver而是早期的com.mysql.jdbc.Driver 。否则会报驱动类找不到的问题
然后我们添加一个配置类,这里以druid数据源为例。
@Configuration
public class DataSourceProxyConf {

    @Bean
    @ConfigurationProperties(prefix = "spring.datasource")
    public DataSource dataSource() {
        return new DruidDataSource();
    }
}
这样,数据源就配置好了。后面的测试中,我们将会使用JdbcTemplate进行数据源操作,以及resttemplate作为服务调用。所以这里也顺便配置两个Bean吧
@Configuration
public class DataSourceProxyConf {

    @Bean
    @ConfigurationProperties(prefix = "spring.datasource")
    public DataSource dataSource() {
        return new DruidDataSource();
    }

    @Bean
    public JdbcTemplate jdbcTemplate(DataSource dataSource) {
        return new JdbcTemplate(dataSource);
    }

    @Bean
    public RestTemplate restTemplate() {
        return new RestTemplate();
    }
}
这里要注意,jdbcTemplate注入的dataSource不是纯粹的DruidDataSource,而是DataSourceProxy。前面我们说过,seata在2.2.0版本进行了自动代理,不需要像2.1.0那种配置代理对象了。
添加undo_log表
配置的最后一个项目,就是在两个数据源中添加undo_log表。我们将两个db分别命名为db_user和db_good吧。
undo_log表用于保存回滚数据,直接将以下sql在db里面执行一下即可。
CREATE TABLE `undo_log`
(
    `id`            BIGINT(20)   NOT NULL AUTO_INCREMENT,
    `branch_id`     BIGINT(20)   NOT NULL,
    `xid`           VARCHAR(100) NOT NULL,
    `context`       VARCHAR(128) NOT NULL,
    `rollback_info` LONGBLOB     NOT NULL,
    `log_status`    INT(11)      NOT NULL,
    `log_created`   DATETIME     NOT NULL,
    `log_modified`  DATETIME     NOT NULL,
    `ext`           VARCHAR(100) DEFAULT NULL,
    PRIMARY KEY (`id`),
    UNIQUE KEY `ux_undo_log` (`xid`, `branch_id`)
) ENGINE = InnoDB
  AUTO_INCREMENT = 1
  DEFAULT CHARSET = utf8
到这里,配置的部分就结束了,后续进入测试的部分
测试
数据源添加业务表和业务数据
在db_user和db_good分别添加表t_user和t_good
CREATE TABLE `t_good` (
  `id` bigint(20) NOT NULL AUTO_INCREMENT,
  `amount` int(255) DEFAULT NULL,
  PRIMARY KEY (`id`)
) ENGINE=InnoDB AUTO_INCREMENT=1 DEFAULT CHARSET=utf8 COLLATE=utf8_bin;
CREATE TABLE `t_user` (
  `id` bigint(20) NOT NULL AUTO_INCREMENT,
  `account` decimal(10,2) DEFAULT NULL,
  PRIMARY KEY (`id`)
) ENGINE=InnoDB AUTO_INCREMENT=1 DEFAULT CHARSET=utf8 COLLATE=utf8_bin;
并添加数据如下
t_user

t_good

编写业务代码
数据准备好了,我们简单编写一下controller
GoodController对t_good表的amount字段-1操作,再1/0发生算术异常
@RestController
@RequestMapping("good")
public class GoodController {

    @Autowired
    private JdbcTemplate jdbcTemplate;

    @GetMapping("amount/reduce")
    public String reduceAmount() {
        jdbcTemplate.update("update t_good set amount = amount - 1 where id = 1");

        int i = 1/0;

        return "success";
    }
}
UserController先对t_user表的account字段-1操作,然后调用GoodController。
这里我们注意到@GlobalTransactional这个注解,表示开启分布式事务。
@RestController
@RequestMapping("user")
public class UserController {

    @Autowired
    private JdbcTemplate jdbcTemplate;

    @Autowired
    private RestTemplate restTemplate;

    @GetMapping("account/reduce")
    @GlobalTransactional(rollbackFor = Exception.class)
    public String reduceAccount() {
        jdbcTemplate.update("update t_user set account = account - 1 where id = 1");

        restTemplate.getForEntity("http://localhost:8081/good-service/good/amount/reduce", String.class);
        return "success";
    }
}
全局回滚测试
1、我们先启动seata-server,直接执行.seata-server.sh(mac或linux) 或者 seata-server.bat(windows)。seata-server下载地址为:https://github.com/seata/seata/releases/download/v1.1.0/seata-server-1.1.0.zip
2、接着启动user-service和good-service
3、当调用接口:http://localhost:8080/user-service/user/account/reduce的时候会爆出500内部错误。这时候检查一下数据源或者seata-server的console你会发现数据没有变化,console出现了两个branchId对应的doRollback输出。再看看undo_log表,自增ID从1变成了2.
总结
本文到此结束了,简单搭建并测试了一下commit和rollback。虽然阿里已经尽量把使用变得很简单了,但是明显的是搭建一个示例项目还是经历了不少步骤。可见分布式项目带来的成本降低,但是复杂度上升的困难是很难逾越的。
后续的文章中将从源码角度了解seata的实现,虽然很麻烦,但是...莫名地其乐无穷吧~