configparser模块:
此模块用于生成和修改常见配置文档。
一个常见配置文件(.ini的后缀名)格式如下:
[DEFAULT]    #  DEFAULT 是指后面的字典里都会默认有的内容
ServerAliveInterval = 45
Compression = yes
CompressionLevel = 9
ForwardX11 = yes

[bitbucket.org]
User = hg

[topsecret.server.com]
Port = 50022
ForwardX11 = no
解析配置文件:
>>> import configparser
>>> config = configparser.ConfigParser()   # 开始解析配置文件  # 生成ConfigParser的一个对象config
>>> config.sections()  # 返回配置文件中的key
[]       # 没有read之前 config.sections()是个空列表

>>> config.read('example.ini')   #  read之后, config这个变量就变成了类似字典的数据类型,用法跟字典差不多  # read()之后,就往config这个对象里面添加了 配置文件中的信息
['example.ini']
>>> config.sections()    # read之后就得到了配置文件中的keys
['bitbucket.org', 'topsecret.server.com']

# 判断是否存在某个key
>>> 'bitbucket.org' in config
True
>>> 'bytebong.com' in config
False

>>> config['bitbucket.org']['User']
'hg'
>>> config['DEFAULT']['Compression']
'yes'
>>> topsecret = config['topsecret.server.com']
>>> topsecret['ForwardX11']
'no'
>>> topsecret['Port']
'50022'
>>> for key in config['bitbucket.org']: print(key)    # 循环某个key下的value  # 由于DEFAULT是每个里面都有的 ,所以也会打印出DEFAULT里面的内容
...
user
compressionlevel
serveraliveinterval
compression
forwardx11
>>> config['bitbucket.org']['ForwardX11']
'yes'
增删改查语法:
配置文件如下:
[group1]
k1 = v1
k2:v2

[group2]
k1 = v1
对上面的配置文件增删改查(以Python2为例):(和字典的增删改查类似)
import ConfigParser

config = ConfigParser.ConfigParser()  # 在Python3中改成了小写 configparser
config.read('i.cfg')

# ########## 读 ##########
secs = config.sections()
print secs
options = config.options('group2')
print options

item_list = config.items('group2')
print item_list

val = config.get('group1','key')
val = config.getint('group1','key')

# ########## 改写 ##########
sec = config.remove_section('group1')
config.write(open('i.cfg', "w"))

sec = config.has_section('wupeiqi')
sec = config.add_section('wupeiqi')
config.write(open('i.cfg', "w"))


config.set('group2','k1',11111)
config.write(open('i.cfg', "w"))

config.remove_option('group2','age')
config.write(open('i.cfg', "w"))
hashlib加密模块:
同一个内容经过 MD5加密后得到结果永远都是唯一的。而且经过MD5处理后的结果是不可逆的, 由密文无法反推明文,只能够利用撞库的方式去尝试反解,所以密码尽量设置的没有规律、复杂一点。
import hashlib

m = hashlib.md5()
m.update(b'hello')   # 如下面关于update的解释, update括号里面必须是二进制格式的bytes,只有这种形式才是可编译的数据类型
m.update(b'neo')

print(m.digest())
print(m.hexdigest())  # digest()和hexdigest()的区别看下面的解释

# 打印结果:
# b'xadxf1x11xe0&x80;xdax00xd6xfcxb6 xf0&x9c'
# adf111e026803bda00d6fcb620f0269c

'''
hash.update(arg)
Update the hash object with the object arg, which must be interpretable as a buffer of bytes. Repeated calls are equivalent to a single call with the concatenation of all the arguments: m.update(a); m.update(b) is equivalent to m.update(a+b).

hash.digest()
Return the digest of the data passed to the update() method so far. This is a bytes object of size digest_size( the size of the resulting hash in bytes. ) which may contain bytes in the whole range from 0 to 255.

hash.hexdigest()
Like digest() except the digest is returned as a string object of double length, containing only hexadecimal digits. This may be used to exchange the value safely in email or other non-binary environments.
'''
字符串转成bytes的方法:
一:
a = "abc"
b = bytes(a,encoding="utf-8")   #  利用bytes()把变量a转换成bytes类型
二:
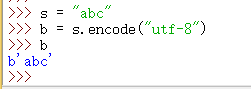
>>> s = "abc"
>>> b = s.encode("utf-8")
.encode()用法:

subprocess模块:
标准写法:
subprocess.run(['df','-h'],stderr=subprocess.PIPE,stdout=subprocess.PIPE,check=True)
涉及到管道|的命令需要这样写:
subprocess.run('df -h|grep disk1',shell=True) #shell=True的意思是这条命令直接交给系统去执行,不需要python负责解析
Popen()方法
常用参数:
- args:shell命令,可以是字符串或者序列类型(如:list,元组)
- stdin, stdout, stderr:分别表示程序的标准输入、输出、错误句柄
- preexec_fn:只在Unix平台下有效,用于指定一个可执行对象(callable object),它将在子进程运行之前被调用
- shell:同上
- cwd:用于设置子进程的当前目录
- env:用于指定子进程的环境变量。如果env = None,子进程的环境变量将从父进程中继承。
Popen会在发起命令后立刻返回,而不等命令执行结果。
剩下的。。。真的憋不出该怎么写了,,, 以后慢慢学吧