利用ArrayAdapter向ListView中添加数据

<?xml version="1.0" encoding="utf-8"?>
<LinearLayout xmlns:android="http://schemas.android.com/apk/res/android"
              android:orientation="vertical"
              android:layout_width="match_parent"
              android:layout_height="match_parent">
    <!-- 设置使用红色的分隔条 -->
    <ListView
            android:id="@+id/list1"
            android:layout_width="match_parent"
            android:layout_height="wrap_content"
            android:divider="#f00"
            android:dividerHeight="1dp"
            android:headerDividersEnabled="false"/>
    <!-- 设置使用绿色的分隔条 -->
    <ListView
            android:id="@+id/list2"
            android:layout_width="match_parent"
            android:layout_height="wrap_content"
            android:divider="#0f0"
            android:dividerHeight="1dp"
            android:headerDividersEnabled="false"/>
</LinearLayout>
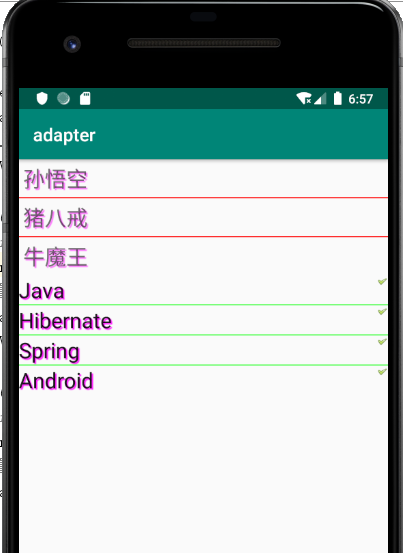
我们创建数组,并且将之添加到ArrayAdapter,然后跟ListView关联起来。
val list1 = findViewById<ListView>(R.id.list1)
        // 定义一个数组
        val arr1 = arrayOf("孙悟空", "猪八戒", "牛魔王")
        // 将数组包装为ArrayAdapter
        val adapter1 = ArrayAdapter(this, R.layout.array_item, arr1)
        // 为ListView设置Adapter
        list1.adapter = adapter1
        val list2 = findViewById<ListView>(R.id.list2)
        // 定义一个数组
        val arr2 = arrayOf("Java", "Hibernate", "Spring", "Android")
        // 将数组包装为ArrayAdapter
        val adapter2 = ArrayAdapter(this, R.layout.checked_item, arr2)
        // 为ListView设置Adapter
        list2.adapter = adapter2
这里注意,创建adapter是传入三个参数:
- contex
- textViewResourceId,这个是布局文件。
- 数组或list
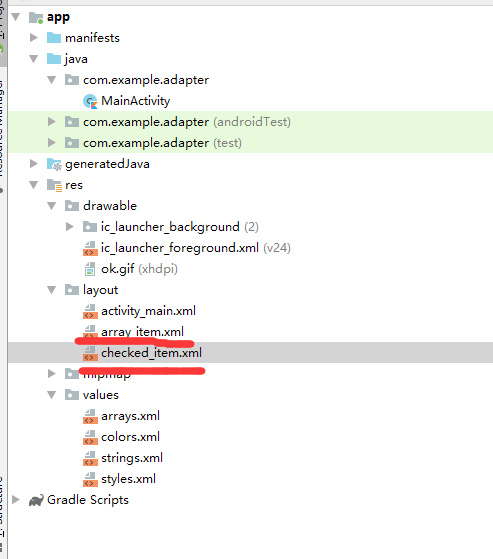
布局文件是这样的:

详情是这样的:
<?xml version="1.0" encoding="utf-8"?>
<CheckedTextView
    xmlns:android="http://schemas.android.com/apk/res/android"
    android:id="@+id/TextView"
    android:layout_width="match_parent"
    android:layout_height="wrap_content"
    android:textSize="24sp"
    android:checkMark="@drawable/ok"
    android:shadowColor="#f0f"
    android:shadowDx="4"
    android:shadowDy="4"
    android:shadowRadius="2"/>
<?xml version="1.0" encoding="utf-8"?>
<TextView
    xmlns:android="http://schemas.android.com/apk/res/android"
    android:id="@+id/TextView"
    android:layout_width="match_parent"
    android:layout_height="wrap_content"
    android:textSize="24dp"
    android:padding="5dp"
    android:shadowColor="#f0f"
    android:shadowDx="4"
    android:shadowDy="4"
    android:shadowRadius="2"/>
