第一步 关闭selinux以及防火墙,被这两个东西坑过很多次了


[root@localhost ~]# cat /etc/selinux/config

# This file controls the state of SELinux on the system.
# SELINUX= can take one of these three values:
#     enforcing - SELinux security policy is enforced.
#     permissive - SELinux prints warnings instead of enforcing.
#     disabled - No SELinux policy is loaded.
SELINUX=disabled      ###关闭selinux
# SELINUXTYPE= can take one of three values:
#     targeted - Targeted processes are protected,
#     minimum - Modification of targeted policy. Only selected processes are protected.
#     mls - Multi Level Security protection.
SELINUXTYPE=targeted

[root@localhost ~]# getenforce
Enforcing
[root@localhost ~]# setenforce 0  #临时关闭
[root@localhost ~]# getenforce
Permissive
[root@localhost ~]# systemctl status firewalld
● firewalld.service - firewalld - dynamic firewall daemon
   Loaded: loaded (/usr/lib/systemd/system/firewalld.service; enabled; vendor preset: enabled)
   Active: active (running) since 六 2019-10-12 16:53:25 CST; 3 days ago
     Docs: man:firewalld(1)
 Main PID: 8309 (firewalld)
   CGroup: /system.slice/firewalld.service
           └─8309 /usr/bin/python -Es /usr/sbin/firewalld --nofork --nopid

10月 12 16:53:24 localhost.localdomain systemd[1]: Starting firewalld - dynamic firewall daemon...
10月 12 16:53:25 localhost.localdomain systemd[1]: Started firewalld - dynamic firewall daemon.
[root@localhost ~]# systemctl stop firewalld
[root@localhost ~]# systemctl disable firewalld
Removed symlink /etc/systemd/system/multi-user.target.wants/firewalld.service.
Removed symlink /etc/systemd/system/dbus-org.fedoraproject.FirewallD1.service.
第二步 部署lamp或者lnmp环境,这里以部署lamp环境做演示。
首先apache的安装: 01 [root@localhost ~]# yum -y install httpd
接着mysql/mariadb的安装: yum install mysql mysql-server -y (yum install mariadb mariadb-server -y ,启动服务器后,输入mysql_secure_installation回车进行修改命令)
这里安装mariadb 02 [root@localhost ~]# yum install mariadb mariadb-server -y
然后php的安装:03 [root@localhost ~]# yum install php php-mysql php-devel -y
接着启动对应服务和设置开机自启
[root@localhost ~]# systemctl start httpd
[root@localhost ~]# systemctl enable httpd
Created symlink from /etc/systemd/system/multi-user.target.wants/httpd.service to /usr/lib/systemd/system/httpd.service.
[root@localhost ~]# systemctl start mariadb
[root@localhost ~]# systemctl enable mariadb
Created symlink from /etc/systemd/system/multi-user.target.wants/mariadb.service to /usr/lib/systemd/system/mariadb.service.
[root@localhost ~]#
设置数据库账号密码
mysql_secure_installation #在Set root password? [Y/n]后面输入 y,设置密码123456,在Disallow root login remotely? [Y/n] 后面输入n,允许root用户远程登录,其他选项直接回车默认就可以了
[root@localhost ~]# mysql_secure_installation

NOTE: RUNNING ALL PARTS OF THIS SCRIPT IS RECOMMENDED FOR ALL MariaDB
      SERVERS IN PRODUCTION USE!  PLEASE READ EACH STEP CAREFULLY!

In order to log into MariaDB to secure it, we'll need the current
password for the root user.  If you've just installed MariaDB, and
you haven't set the root password yet, the password will be blank,
so you should just press enter here.

Enter current password for root (enter for none):
OK, successfully used password, moving on...

Setting the root password ensures that nobody can log into the MariaDB
root user without the proper authorisation.

Set root password? [Y/n] Y
New password:
Re-enter new password:
Password updated successfully!
Reloading privilege tables..
 ... Success!


By default, a MariaDB installation has an anonymous user, allowing anyone
to log into MariaDB without having to have a user account created for
them.  This is intended only for testing, and to make the installation
go a bit smoother.  You should remove them before moving into a
production environment.

Remove anonymous users? [Y/n] n
 ... skipping.

Normally, root should only be allowed to connect from 'localhost'.  This
ensures that someone cannot guess at the root password from the network.

Disallow root login remotely? [Y/n] n
 ... skipping.

By default, MariaDB comes with a database named 'test' that anyone can
access.  This is also intended only for testing, and should be removed
before moving into a production environment.

Remove test database and access to it? [Y/n] n
 ... skipping.

Reloading the privilege tables will ensure that all changes made so far
will take effect immediately.

Reload privilege tables now? [Y/n] Y
 ... Success!

Cleaning up...

All done!  If you've completed all of the above steps, your MariaDB
installation should now be secure.

Thanks for using MariaDB!
[root@localhost ~]#
写一个页面测试php和mariadb是否已经在Apache里正常运行,以下内容是用来检测用php连接mariadb的,连接成功显示success,失败显示fail(说明哪里没配置正确,需要检查)
直接复制一下内容到终端中执行就可以了(注意,$link之类的变量前面必须加个斜杆转义,否则系统会把他当做一个变量,不能将这个变量名打印到文本中)
cat > /var/www/html/test.php <<EOF
<?php
$link=mysql_connect('localhost','root','123456');
if(!$link) echo "fail";
else echo "success";
mysql_close();
?>
EOF
访问服务器ip/test.php,如果返回success则说明可以了
第三步 编译安装zabbix
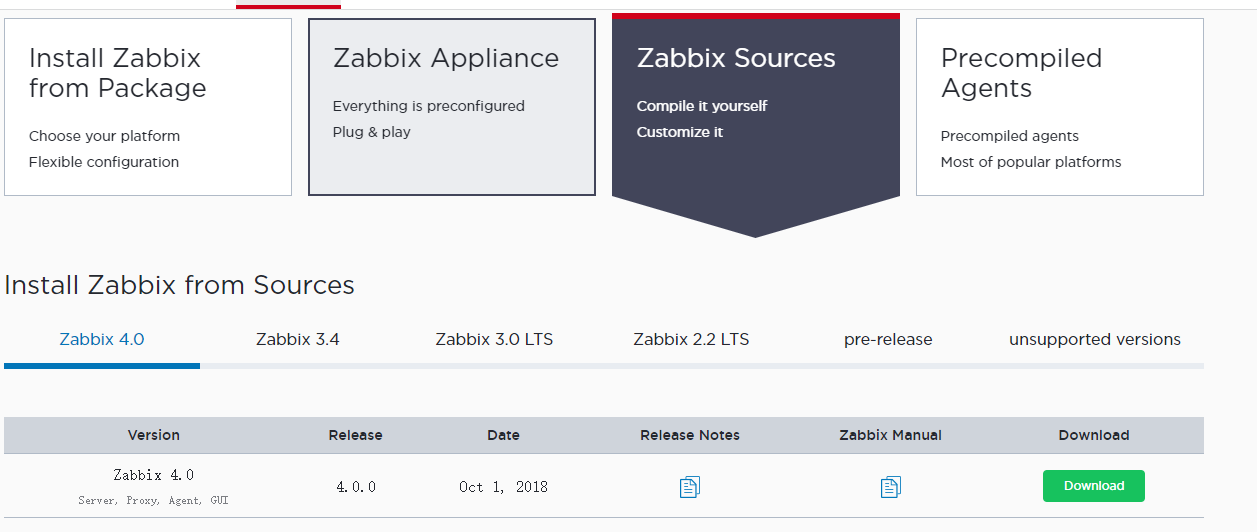
3.1 下载源码包就行,我下载的是4.0版本 LTS 的 https://www.zabbix.com/download
3.2 解压
[root@localhost ~]# cd /opt/
[root@localhost opt]# ls /opt/
zabbix-4.0.13.tar.gz
[root@localhost opt]# tar -zxvf zabbix-4.0.13.tar.gz
[root@localhost opt]# ls
zabbix-4.0.13  zabbix-4.0.13.tar.gz
[root@localhost opt]#
3.3 开始编译,执行sql文本时注意导入顺序
设置zabbix用户与数据库
[root@localhost opt]# cd zabbix-4.0.13
[root@localhost zabbix-4.0.13]# groupadd --system zabbix
[root@localhost zabbix-4.0.13]# useradd --system -g zabbix -d /usr/lib/zabbix -s /sbin/nologin -c "Zabbix Monitoring System" zabbix
[root@localhost zabbix-4.0.13]# mysql -uroot -p
Enter password:
Welcome to the MariaDB monitor.  Commands end with ; or g.
Your MariaDB connection id is 9
Server version: 5.5.64-MariaDB MariaDB Server

Copyright (c) 2000, 2018, Oracle, MariaDB Corporation Ab and others.

Type 'help;' or 'h' for help. Type 'c' to clear the current input statement.

MariaDB [(none)]> create database zabbix character set utf8 collate utf8_bin;
Query OK, 1 row affected (0.00 sec)

MariaDB [(none)]> grant all privileges on zabbix.* to zabbix@localhost identified by 'zabbix';
Query OK, 0 rows affected (0.00 sec)

MariaDB [(none)]> flush privileges;
Query OK, 0 rows affected (0.01 sec)

MariaDB [(none)]> quit
Bye
导入zabbix的数据
[root@localhost ~]# cd /opt/zabbix-4.0.13/database/mysql/
[root@localhost mysql]# mysql -uzabbix -pzabbix
Welcome to the MariaDB monitor.  Commands end with ; or g.
Your MariaDB connection id is 11
Server version: 5.5.64-MariaDB MariaDB Server

Copyright (c) 2000, 2018, Oracle, MariaDB Corporation Ab and others.

Type 'help;' or 'h' for help. Type 'c' to clear the current input statement.

MariaDB [(none)]> use zabbix
Database changed
MariaDB [zabbix]> source schema.sql;
MariaDB [zabbix]> source images.sql;
MariaDB [zabbix]> source data.sql;
MariaDB [zabbix]> quit
Bye
[root@localhost mysql]#
[root@localhost ~]# yum install net-snmp gcc mysql-devel libxml2-devel net-snmp-devel libevent-devel curl-devel -y
[root@localhost ~]# cd /opt/zabbix-4.0.13
[root@localhost zabbix-4.0.13]# ./configure --prefix=/usr/local/zabbix --enable-server --enable-agent --with-mysql --enable-ipv6 --with-net-snmp --with-libcurl --with-libxml2
[root@localhost zabbix-4.0.13]# make install
[root@localhost zabbix-4.0.13]# cd /usr/local/zabbix/
[root@localhost zabbix]# tree -L 3
.
├── bin
│   ├── zabbix_get
│   └── zabbix_sender
├── etc
│   ├── zabbix_agentd.conf
│   ├── zabbix_agentd.conf.d
│   ├── zabbix_server.conf
│   └── zabbix_server.conf.d
├── lib
│   └── modules
├── sbin
│   ├── zabbix_agentd
│   └── zabbix_server
└── share
    ├── man
    │   ├── man1
    │   └── man8
    └── zabbix
        ├── alertscripts
        └── externalscripts
接下来还需要修改zabbix的配置文件,[root@localhost zabbix]# vim /usr/local/zabbix/etc/zabbix_server.conf 取消DBPassword的注释并将其值改为zabbix。这个不修改回导致zabbix_server起不来

现在可以启动zabbix_server了
[root@localhost zabbix]# /usr/local/zabbix/sbin/zabbix_server
[root@localhost zabbix]#
自动启动systemd 参考:https://www.cnblogs.com/linux985/p/11691774.html
[root@localhost ~]# netstat -anput | grep zabbix #查看服务是否起来了
tcp 0 0 0.0.0.0:10051 0.0.0.0:* LISTEN 9427/zabbix_server
tcp6 0 0 :::10051 :::* LISTEN 9427/zabbix_server
[root@localhost ~]#
注意:zabbix_server默认日志文件位于/tmp/zabbix_server.log,有问题可以查看这个日志文件
[root@localhost zabbix-4.0.13]# cp -r frontends/php/ /var/www/html/zabbix #先返回到解压后的目录再执行这条命令,这个迁移的是zabbix前端文件
现在我们先来尝试访问zabbix ,访问地址服务器ip/zabbix
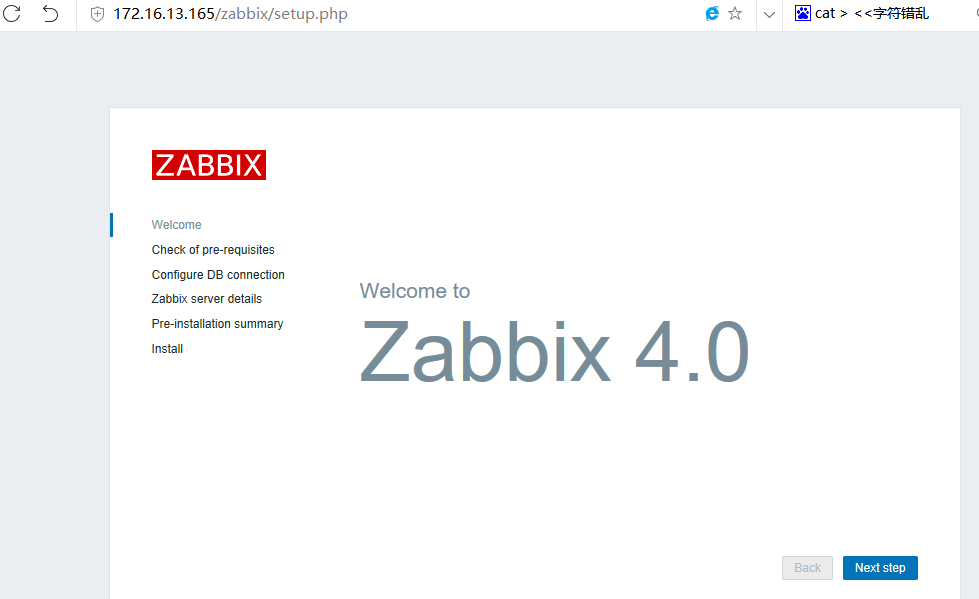
点击下一步

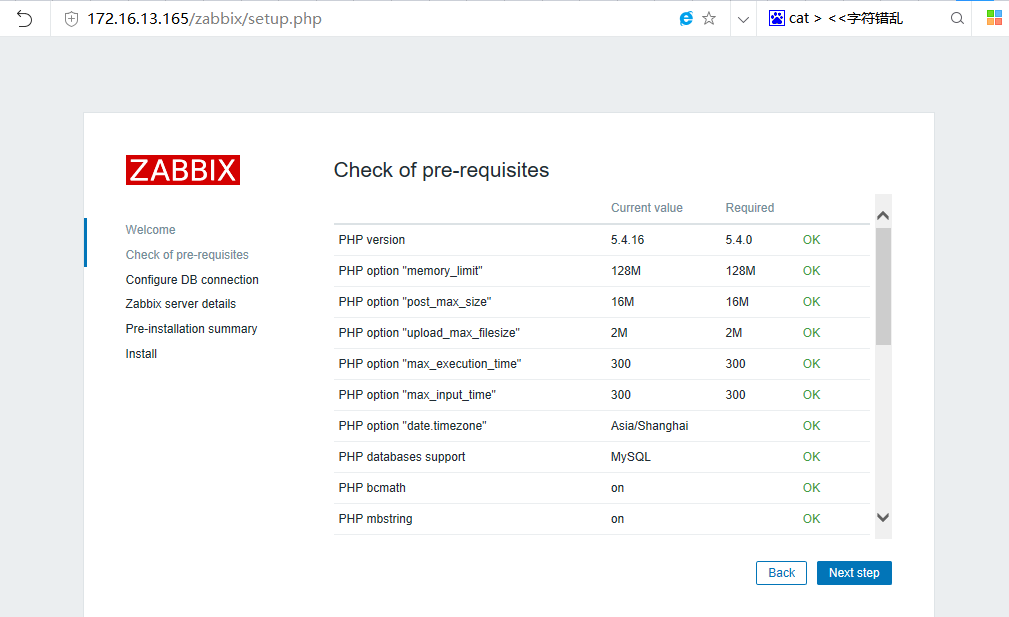
这个需要修改php配置文件和添加php扩展就可以了
我们先修改/etc/php.ini文件,将对应参数做如下修改
[root@localhost zabbix-4.0.13]# vim /etc/php.ini
[root@localhost zabbix-4.0.13]# sed -i s/'^max_execution_time.*'/'max_execution_time = 300'/g /etc/php.ini
[root@localhost zabbix-4.0.13]# sed -i s/'^max_input_time.*'/'max_input_time = 300'/g /etc/php.ini
[root@localhost zabbix-4.0.13]# sed -i s/'^post_max_size.*'/'post_max_size = 16M'/g /etc/php.ini
[root@localhost zabbix-4.0.13]# sed -i s/'^;date.timezone.*'/'date.timezone = Asia/Shanghai'/g /etc/php.ini
修改后的参数
max_execution_time = 300
max_input_time = 300
post_max_size = 16M
date.timezone =Asia/Shanghai
添加扩展
[root@localhost zabbix-4.0.13]# yum install php-gd php-xml php-bcmath php-mbstring -y
PHP ldap Warning警告问题解决
[root@localhost ~]# scp /usr/lib64/php/modules/ldap.so root@10.192.27.112:/usr/lib64/php/modules/
root@10.192.27.112's password:
ldap.so
[root@localhost ~]# vim /etc/php.ini
; If you wish to have an extension loaded automatically, use the following
; syntax:
;   extension=modulename.extension
   extension=ldap.so  #增加一行
找到这两个rpm包安装,注意一下版本,刚开始,我使用的是php-bcmath-5.4.16-45.el7.x86_64.rpm这个版本的,后面发现会有依赖问题,所以后面下了另一个版本的php-bcmath-5.4.16-42.el7.x86_64.rpm,安装方式rpm -ivh rpm包名
systemctl restart httpd 重启一下httpd,刷新页面就发现不会报错了
那个警告可以忽略,点击下一步。第二次安装时我遇到了另一个问题,那就是提示The frontend does not match Zabbix database. Current database version (mandatory/optional): 3050047/3050047. Required mandatory version: 4000000. Contact your system administrator.之类的问题,具体解决方法是
mysql> use zabbix;
mysql> update dbversion set mandatory=4000000; 将后面的4000000根据情况改为对应的值
mysql> flush privileges;

随便起个名
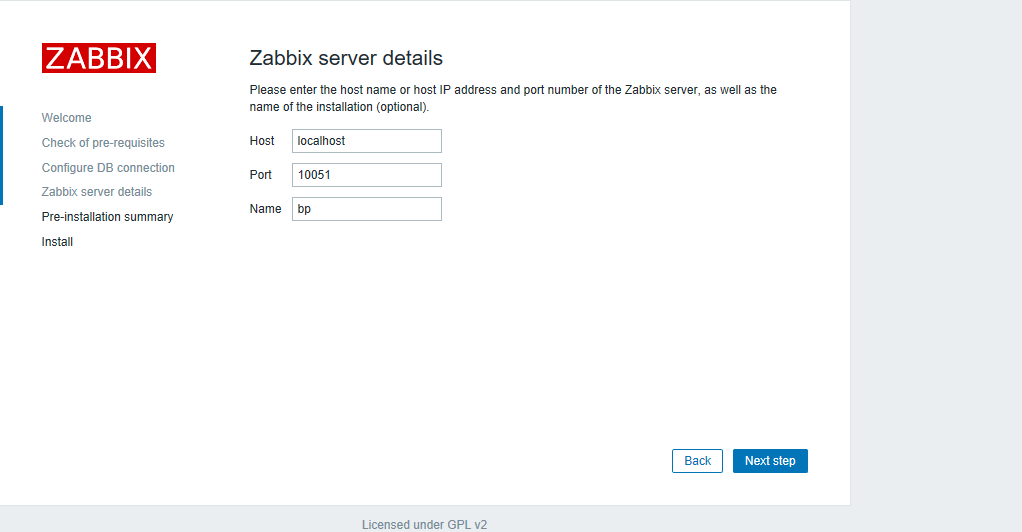
下一步
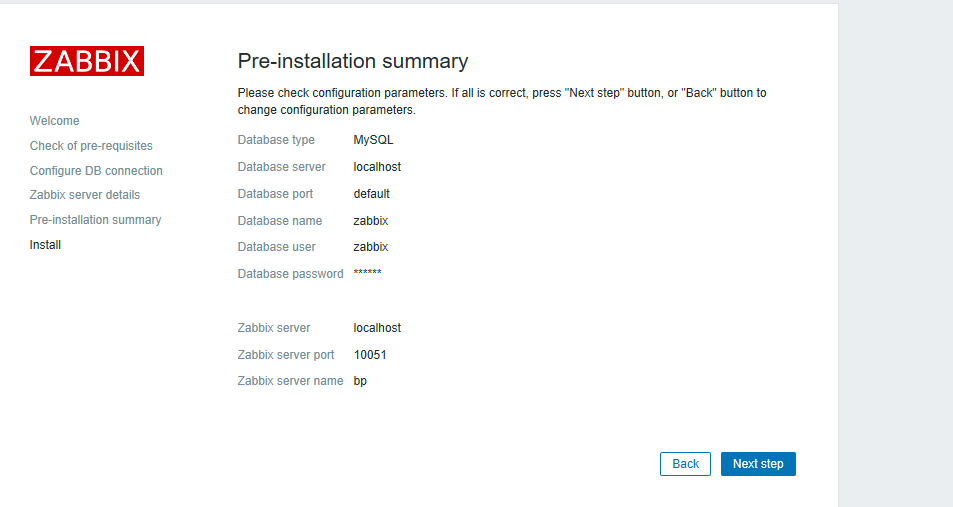
再下一步
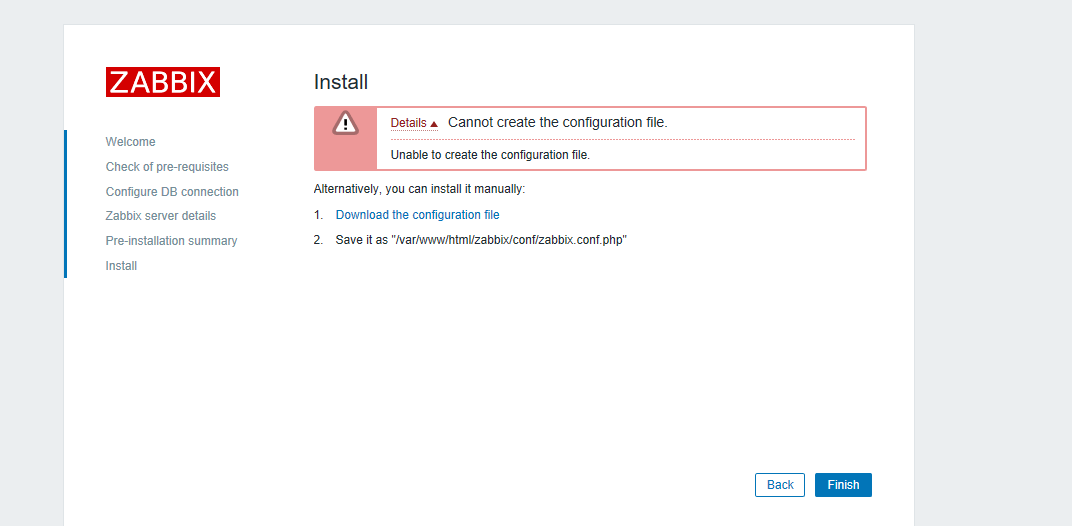
按操作提示,下载配置文件,放到指定位置就可以了

点击下一步

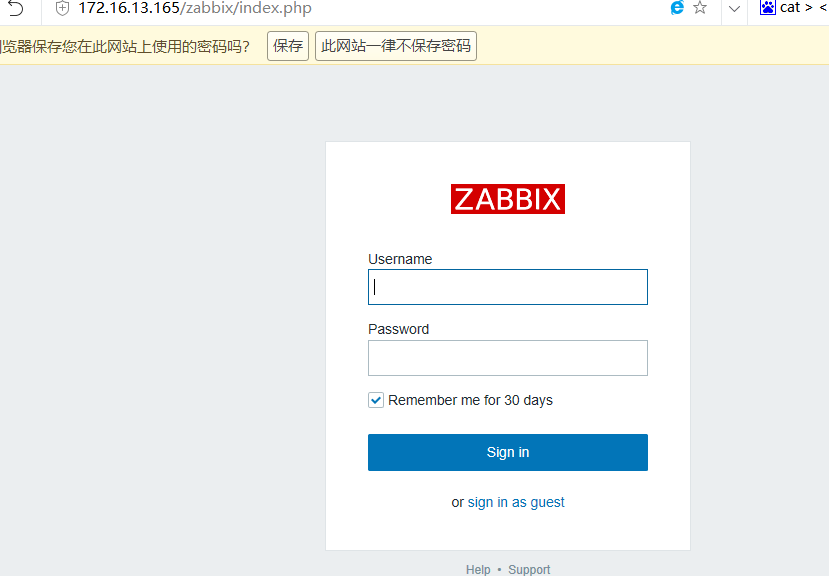
点击完成,默认账号Admin密码zabbix
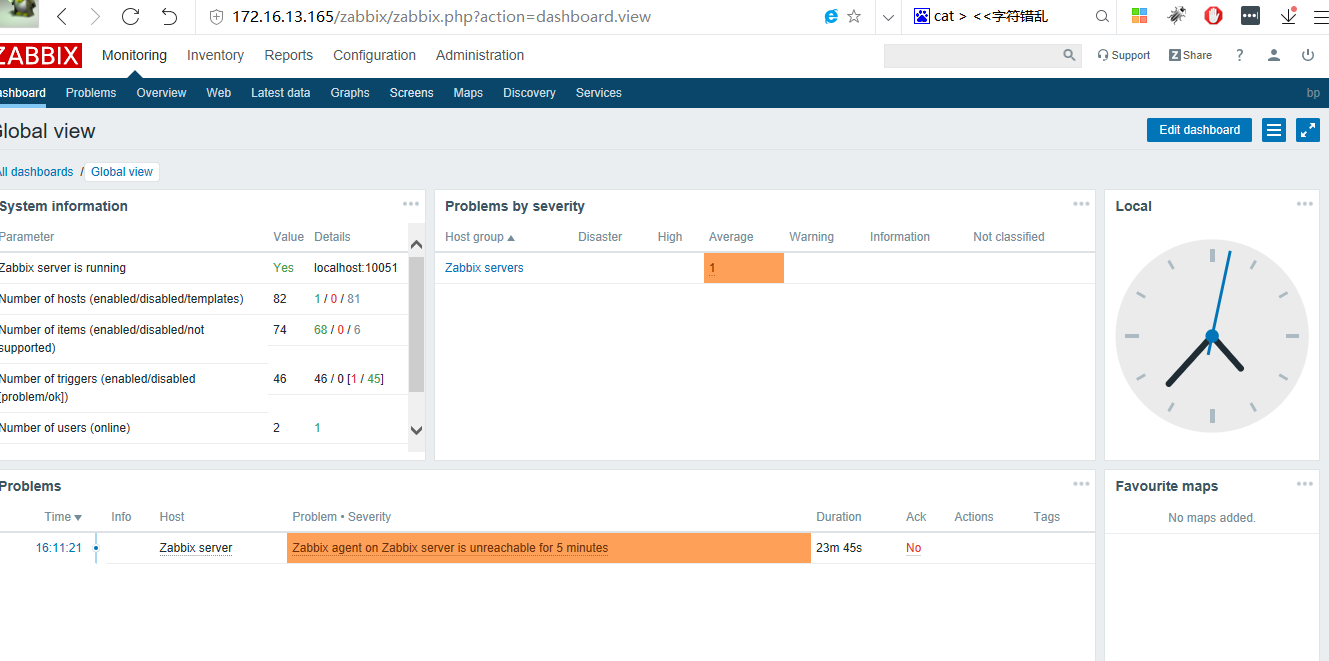
登录效果
###参考以下文档
zabbix4.0离线快速编译安装(编译安装方法)
本博客已整理更新至第三版。更新于2019.5.28
其实这个主要是想试一下离线编译安装的具体步骤,记得要配置好本地yum云,因为我们需要使用yum,yum能帮我们自动解决很多依赖问题。发现最主要的问题是,当编译安装时,会提示没有对应包,所以有一个网站我们需要到上面去找依赖包,网址http://rpm.pbone.net/,当我们找不到某些要用到的包时,可以考虑到这个网址里下载。值得注意的是php缺少的某些扩展,可以通过yum安装,php会自动识别这些扩展的
一般来说,直接执行以下脚本也可以了。脚本统一放在root目录下
脚本1
systemctl stop firewalld
systemctl disable firewalld
sed -i 's/=enforcing/=disabled/g' /etc/selinux/config
setenforce 0
yum install httpd mariadb mariadb-server php php-mysql php-devel php-xml  php-bcmath  php-mbstring php-gd wget expect net-snmp gcc  mysql-devel  libxml2-devel  net-snmp-devel  libevent-devel  curl-devel -y
wget https://nchc.dl.sourceforge.net/project/zabbix/ZABBIX%20Latest%20Stable/4.2.1/zabbix-4.2.1.tar.gz
systemctl start httpd
systemctl enable httpd
systemctl enable mariadb
systemctl start mariadb
chmod +x initmysqlpassword.sh
/root/initmysqlpassword.sh
tar -zxvf zabbix-4.2.1.tar.gz
cd zabbix-4.2.1
groupadd --system zabbix
useradd --system -g zabbix -d /usr/lib/zabbix -s /sbin/nologin -c "Zabbix Monitoring System" zabbix
cd database/mysql/
mysql -uroot -p123456 -e "create database zabbix character set utf8 collate utf8_bin;"
mysql -uroot -p123456 -e "grant all privileges on zabbix.* to zabbix@localhost identified by 'zabbix';"
mysql -uroot -p123456 -e "flush privileges;"
mysql -uzabbix -pzabbix -e "use zabbix;source schema.sql;source images.sql;source data.sql;"
cd ../..
./configure --enable-server --enable-agent --with-mysql --enable-ipv6 --with-net-snmp --with-libcurl --with-libxml2
make install
sed -i s/'# DBPassword='/'DBPassword=zabbix'/g  /usr/local/etc/zabbix_server.conf
cp -r  frontends/php/ /var/www/html/zabbix
sed -i s/'^max_execution_time.*'/'max_execution_time = 300'/g /etc/php.ini
sed -i s/'^max_input_time.*'/'max_input_time = 300'/g /etc/php.ini
sed -i s/'^post_max_size.*'/'post_max_size = 16M'/g /etc/php.ini
sed -i s/'^;date.timezone.*'/'date.timezone = Asia/Shanghai'/g /etc/php.ini
systemctl restart httpd
systemctl restart mariadb
zabbix_server
脚本2,无需手动自行,只需将该脚本命名为initmysqlpassword.sh
#!/usr/bin/expect
spawn mysql_secure_installation
expect "Enter current password for root (enter for none):"
send "
"
expect "Set root password? "
send "Y
"
expect "New password:"
send "123456
"
expect "Re-enter new password:"
send "123456
"
expect "Remove anonymous users? "
send "y
"
expect "Disallow root login remotely? "
send "n
"
expect "Remove test database and access to it? "
send "y
"
expect "Reload privilege tables now? "
send "y
"
expect eof
常见错误
源码安装zabbix3.2.7时PHP ldap Warning
问题如下
解决方法:
1、首先查看源码安装的php模块中是否有ldap.so
[root@nms ldap]# ll  /usr/local/php/lib/php/extensions/no-debug-non-zts-20160303/
total 1576
-rwxr-xr-x 1 root root  129484 Aug 22 10:18 ldap.so               # 出现告警是因为此模块不存在,须要编译生成此模块并重新加载
-rwxr-xr-x 1 root root 1430846 Aug 21 19:38 opcache.so
[root@nms ldap]#
2、如何本机中已经有ldap.so,只须要在php.ini文件中添加extension=ldap.so
    864 ; Dynamic Extensions ;
    865 ;;;;;;;;;;;;;;;;;;;;;;
    866
    867 ; If you wish to have an extension loaded automatically, use the following
    868 ; syntax:
    869     extension=ldap.so          #新添加内容
    870 ;
    871 ;   extension=modulename.extension
    872 ;
    873 ; For example, on Windows:
    874 ;
    875 ;   extension=msql.dll
    876 ;
    877 ; ... or under UNIX:
    878 ;
    879 ;   extension=msql.so
    880 ;
    881 ; ... or with a path:
    882 ;
    883 ;   extension=/path/to/extension/msql.so
    884 ;
3、如果相应的模块不存在
3.1下载相应的php版本源码到主目录,进行源码编译ldap模块(重点,其他模块如果缺失编译方法一样)
[root@nms ~]# tar jxvf php-7.1.7.tar.bz2
[root@nms ~]# ls
anaconda-ks.cfg                  install.log         lnmp-install.log  php-7.1.7.tar.bz2
databases_backup_20170821115223  install.log.syslog  php-7.1.7
[root@nms ldap]# cd /root/php-7.1.7/ext/ldap/            #进入模块所在的源码位置
[root@nms ldap]# ll
total 144
-rw-rw-r-- 1 1000 1000   7374 Jul  6 17:30 config.m4
-rw-rw-r-- 1 1000 1000   1008 Jul  6 17:30 config.w32
-rw-rw-r-- 1 1000 1000     77 Jul  6 17:30 CREDITS
-rw-rw-r-- 1 1000 1000 102189 Jul  6 17:30 ldap.c
-rw-rw-r-- 1 1000 1000   4464 Jul  6 17:30 ldap.mak
-rw-rw-r-- 1 1000 1000   1546 Jul  6 17:30 LDAP_Win32_HOWTO.txt
-rw-rw-r-- 1 1000 1000   2315 Jul  6 17:30 php_ldap.h
drwxrwxr-x 2 1000 1000  12288 Jul  6 17:30 tests
[root@nms ldap]# /usr/local/php/bin/phpize             #编译PHP扩展的工具,主要是根据系统信息生成对应的configure文件
Configuring for:
PHP Api Version:         20160303
Zend Module Api No:      20160303
Zend Extension Api No:   320160303
[root@nms ldap]# ./configure  --with-php-config=/usr/local/php/bin/php-config  --with-ldap   #编译
checking for grep that handles long lines and -e... /bin/grep
checking for egrep... /bin/grep -E
checking for a sed that does not truncate output... /bin/sed
........

[root@nms ldap]# make && make install                                                #安装
/bin/sh /root/php-7.1.7/ext/ldap/libtool --mode=compile cc -DLDAP_DEPRECATED=1 -I. -I/root/php-7.1.7/ext/ldap -DPHP_ATOM_INC -I/root/php-7.1.7/ext/ldap/include -I/root/php-7.1.7/ext/ldap/main -I/root/php-7.1.7/ext/ldap -I/usr/local/php/include/php -I/usr/local/php/include/php/main -I/usr/local/php/include/php/TSRM -I/usr/local/php/include/php/Zend -I/usr/local/php/include/php/ext -I/usr/local/php/include/php/ext/date/lib  -DHAVE_CONFIG_H  -g -O2   -c /root/php-7.1.7/ext/ldap/ldap.c -o ldap.lo
mkdir .libs
 cc -DLDAP_DEPRECATED=1 -I. -I/root/php-7.1.7/ext/ldap -DPHP_ATOM_INC -I/root/php-7.1.7/ext/ldap/include -I/root/php-7.1.7/ext/ldap/main -I/root/php-7.1.7/ext/ldap -I/usr/local/php/include/php -I/usr/local/php/include/php/main -I/usr/local/php/include/php/TSRM -I/usr/local/php/include/php/Zend -I/usr/local/php/include/php/ext -I/usr/local/php/include/php/ext/date/lib -DHAVE_CONFIG_H -g -O2 -c /root/php-7.1.7/ext/ldap/ldap.c  -fPIC -DPIC -o .libs/ldap.o
/bin/sh /root/php-7.1.7/ext/ldap/libtool --mode=link cc -DPHP_ATOM_INC -I/root/php-7.1.7/ext/ldap/include -I/root/php-7.1.7/ext/ldap/main -I/root/php-7.1.7/ext/ldap -I/usr/local/php/include/php -I/usr/local/php/include/php/main -I/usr/local/php/include/php/TSRM -I/usr/local/php/include/php/Zend -I/usr/local/php/include/php/ext -I/usr/local/php/include/php/ext/date/lib  -DHAVE_CONFIG_H  -g -O2   -o ldap.la -export-dynamic -avoid-version -prefer-pic -module -rpath /root/php-7.1.7/ext/ldap/modules  ldap.lo -lldap -llber
cc -shared  .libs/ldap.o  -lldap -llber  -Wl,-soname -Wl,ldap.so -o .libs/ldap.so
creating ldap.la
(cd .libs && rm -f ldap.la && ln -s ../ldap.la ldap.la)
/bin/sh /root/php-7.1.7/ext/ldap/libtool --mode=install cp ./ldap.la /root/php-7.1.7/ext/ldap/modules
cp ./.libs/ldap.so /root/php-7.1.7/ext/ldap/modules/ldap.so
cp ./.libs/ldap.lai /root/php-7.1.7/ext/ldap/modules/ldap.la
PATH="$PATH:/sbin" ldconfig -n /root/php-7.1.7/ext/ldap/modules
----------------------------------------------------------------------
Libraries have been installed in:
   /root/php-7.1.7/ext/ldap/modules

If you ever happen to want to link against installed libraries
in a given directory, LIBDIR, you must either use libtool, and
specify the full pathname of the library, or use the `-LLIBDIR‘
flag during linking and do at least one of the following:
   - add LIBDIR to the `LD_LIBRARY_PATH‘ environment variable
     during execution
   - add LIBDIR to the `LD_RUN_PATH‘ environment variable
     during linking
   - use the `-Wl,--rpath -Wl,LIBDIR‘ linker flag
   - have your system administrator add LIBDIR to `/etc/ld.so.conf‘

See any operating system documentation about shared libraries for
more information, such as the ld(1) and ld.so(8) manual pages.
----------------------------------------------------------------------

Build complete.
Don‘t forget to run ‘make test‘.

Installing shared extensions:     /usr/local/php/lib/php/extensions/no-debug-non-zts-20160303/          #make 生成模块安装位置
[root@nms ldap]#
[root@nms php-7.1.7]# ll /usr/local/php/lib/php/extensions/no-debug-non-zts-20160303/                   #确认ldap.so模块存在
total 1576
-rwxr-xr-x 1 root root  129484 Aug 22 10:18 ldap.so
-rwxr-xr-x 1 root root 1430846 Aug 21 19:38 opcache.so

[root@nms php-7.1.7]# vi /usr/local/php/etc/php.ini                                         #编辑php.ini,添加新生成的ldap.so模块

    853 default_socket_timeout = 60
    854
    855 ; If your scripts have to deal with files from Macintosh systems,
    856 ; or you are running on a Mac and need to deal with files from
    857 ; unix or win32 systems, setting this flag will cause PHP to
    858 ; automatically detect the EOL character in those files so that
    859 ; fgets() and file() will work regardless of the source of the file.
    860 ; http://php.net/auto-detect-line-endings
    861 ;auto_detect_line_endings = Off
    862
    863 ;;;;;;;;;;;;;;;;;;;;;;
    864 ; Dynamic Extensions ;
    865 ;;;;;;;;;;;;;;;;;;;;;;
    866
    867 ; If you wish to have an extension loaded automatically, use the following
    868 ; syntax:
    869     extension=ldap.so                                     #新添加模块
    870 ;
    871 ;   extension=modulename.extension
    872 ;
    873 ; For example, on Windows:
    874 ;
    875 ;   extension=msql.dll
    876 ;
    877 ; ... or under UNIX:
    878 ;
    879 ;   extension=msql.so
    880 ;


[root@nms php-7.1.7]# service httpd restart           #重启httpd
restart apache...  done