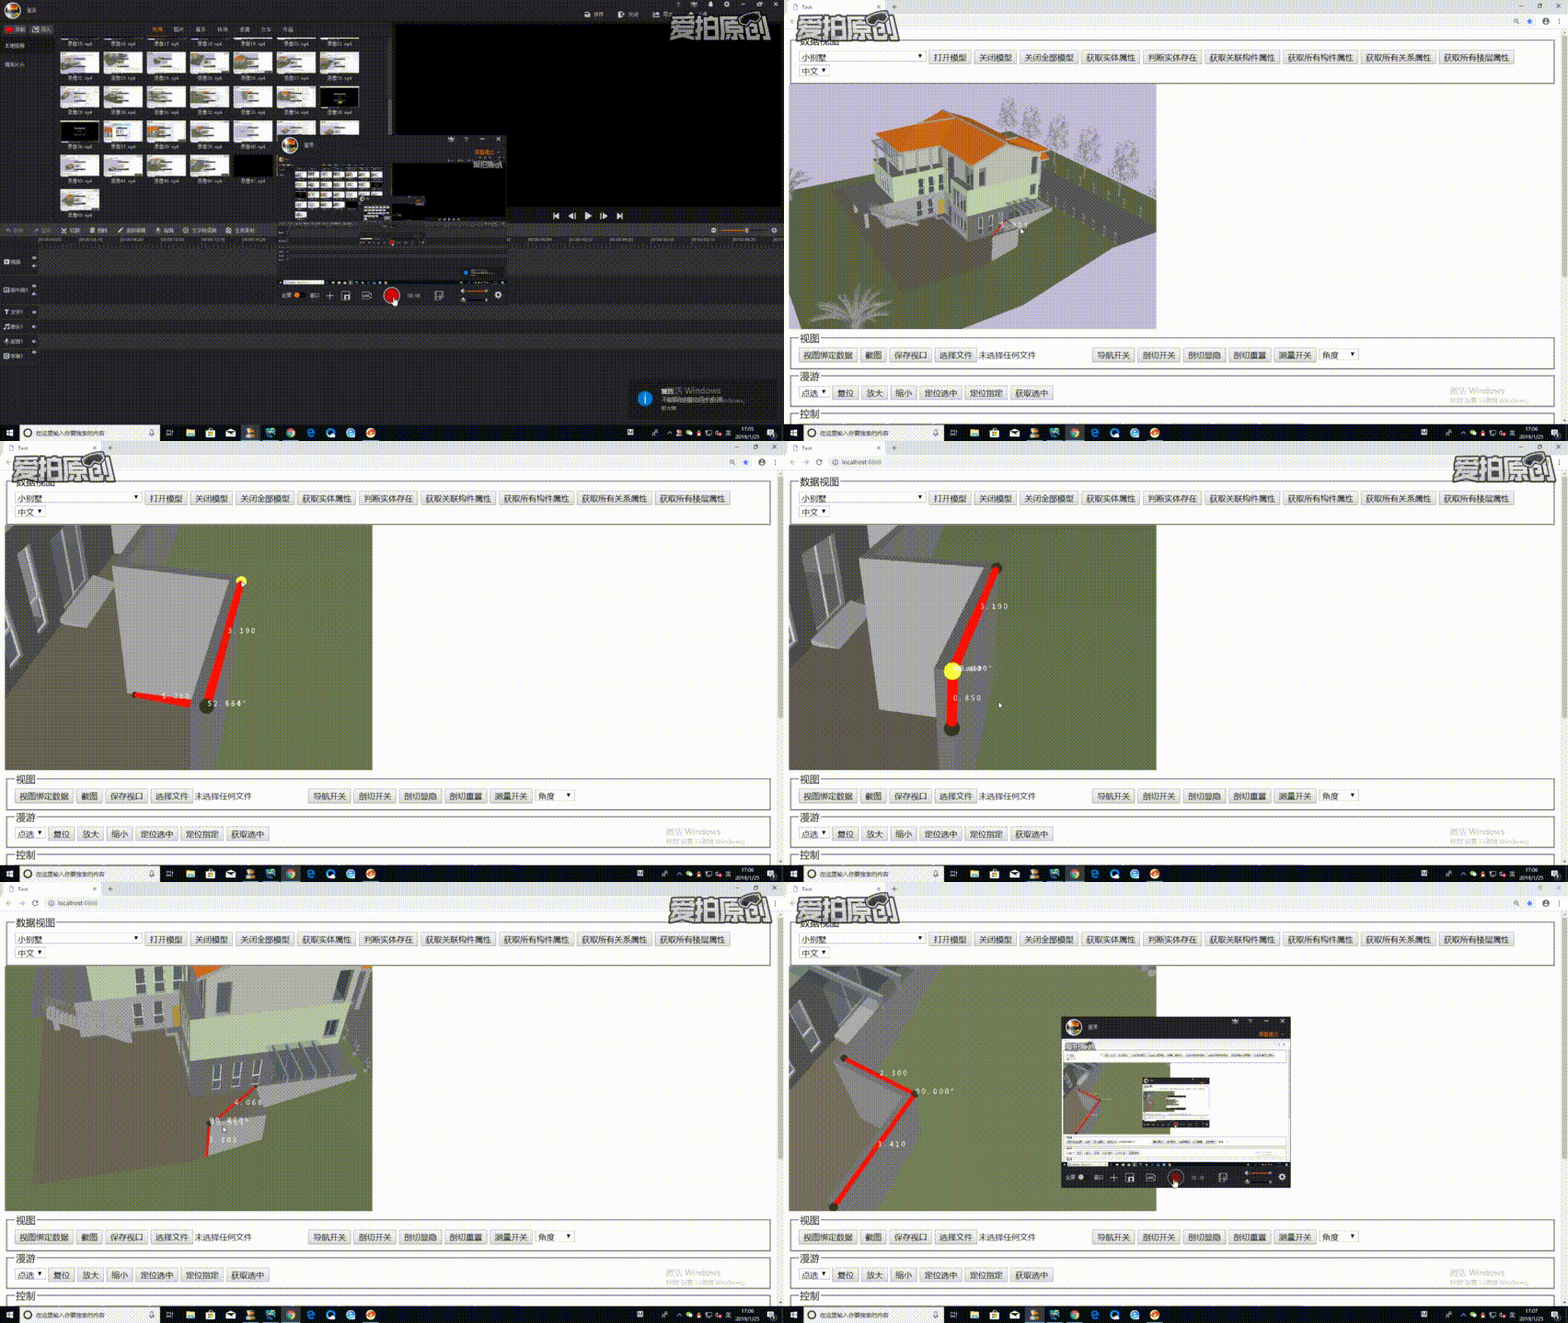
接着前一篇《WebGL实现sprite精灵效果的GUI控件》,我们继续开发我们的数字系统GUI控件,因为这套数字系统是基于sprite效果的,所以数字随相机转动而旋转(永远面对相机),随场景缩放而逆向缩放(数字在屏幕上看上去大小不变)。实现sprite效果的核心方法在前一篇文章里已经详细说明,这里不再赘述,本文要讨论的是如何将用户输入的数字文本转变成GUI控件的数字贴图。请看demo。

我们能清楚地看到,在角度测量模式下,我们动态地绘制了两条边的长度数字贴图和角度大小的数字贴图。对于我们来说,计算边长和夹角是非常简单的工作,但怎么把结果数字转变成对应的图片呢,这里鲫鱼是通过uv坐标和数字图片一一映射实现的。其实原理非常简单,鲫鱼有一张包含0~9和小数点,角度的°的图片png,用户输入是一串包含0~9,小数点和°的字符串,鲫鱼将每一个字符都绑定图片的uv坐标,这样构造出的函数输入是字符串,返回就是对应输入字符串的uv坐标数组。我们知道构造纹理texture的贴图就是利用图片的uv坐标来定位图片在texture上的位置信息,利用这个原理,鲫鱼拿回的uv数组就完成了将一个一个数字贴到一片显式数字的矩形模型中,用户看到的就会是一片显式一串数字的矩形(当然矩形是透明的,用户只能看到数字)。
以上是原理的解释,我们先来看一下数字的png图片长啥样。

这张就是包含数字和小数点和°的png图片,注意它是正方形的,且尺寸是2的幂次方。这两点前者是为了优化webgl的材质渲染,后者是为了能被webgl的材质所识别。为了做成正方形,我们用空白填充。好了,接下来我们来看看代码,关于uv贴图的映射和texture绑定图片,我们先来看uv映射。
  1 /**
  2  * 字库
  3  * */
  4 let TextImage = function(){
  5     this._library = {
  6         ZERO_UV:[0, 1, 0, 0.75, 0.25, 1, 0.25, 0.75],
  7         ONE_UV:[0, 0.75, 0, 0.5, 0.25, 0.75, 0.25, 0.5],
  8         TWO_UV:[0, 0.5, 0, 0.25, 0.25, 0.5, 0.25, 0.25],
  9         THREE_UV:[0, 0.25, 0, 0, 0.25, 0.25, 0.25, 0],
 10         FOUR_UV:[0.25, 1, 0.25, 0.75, 0.5, 1, 0.5, 0.75],
 11         FIVE_UV:[0.25, 0.75, 0.25, 0.5, 0.5, 0.75, 0.5, 0.5],
 12         SIX_UV:[0.25, 0.5, 0.25, 0.25, 0.5, 0.5, 0.5, 0.25],
 13         SEVEN_UV:[0.25, 0.25, 0.25, 0, 0.5, 0.25, 0.5, 0],
 14         EIGHT_UV:[0.5, 1, 0.5, 0.75, 0.75, 1, 0.75, 0.75],
 15         NINE_UV:[0.5, 0.75, 0.5, 0.5, 0.75, 0.75, 0.75, 0.5],
 16         DOT_UV:[0.5, 0.5, 0.5, 0.25, 0.75, 0.5, 0.75, 0.25],
 17         DEGREE_UV:[0.5, 0.25, 0.5, 0, 0.75, 0.25, 0.75, 0]
 18     };
 19 };
 20
 21 TextImage.prototype.constructor = TextImage;
 22 TextImage.prototype = {
 23
 24     /**
 25      * 通过输入文字返回图片,小数点后保留3位
 26      * text:输入的文字
 27      * */
 28     getImagesByText:function(text){
 29         text = this.changeUnit(0.001, text);
 30         text = this.keepEffectNum(3, text);
 31         text = text.toString();
 32         //逐字符匹配图片
 33         let imgUVs = [];
 34         for(let i=0; i<text.length; i++){
 35             let imgUV = this.match(text[i]);
 36             imgUVs = imgUVs.concat(imgUV);
 37         }
 38         return imgUVs;
 39     },
 40
 41     /**
 42      * 通过输入角度返回图片,小数点后保留3位
 43      * angle:输入的文字
 44      * */
 45     getAngleImagesByText:function(angle){
 46         angle = this.keepEffectNum(3, angle);
 47         angle = angle.toString();
 48         angle = angle + "#";
 49         //逐字符匹配图片
 50         let imgUVs = [];
 51         for(let i=0; i<angle.length; i++){
 52             let imgUV = this.match(angle[i]);
 53             imgUVs = imgUVs.concat(imgUV);
 54         }
 55         return imgUVs;
 56     },
 57
 58     /**
 59      * 单位换算
 60      * ratio:换算率
 61      * text:输入的值
 62      * */
 63     changeUnit:function(ratio, text){
 64         return ratio * text;
 65     },
 66
 67     /**
 68      * 小数点后保存n位
 69      * effect:有效数字
 70      * text:原始数字
 71      * */
 72     keepEffectNum:function(effect, text){
 73         return text.toFixed(effect);
 74     },
 75
 76     /**
 77      * 匹配字符和图片
 78      * char:字符
 79      * */
 80     match:function(char){
 81         let imgUV = undefined;
 82         if(char === "0"){
 83             imgUV = this._library.ZERO_UV;
 84         }else if(char === "1"){
 85             imgUV = this._library.ONE_UV;
 86         }else if(char === "2"){
 87             imgUV = this._library.TWO_UV;
 88         }else if(char === "3"){
 89             imgUV = this._library.THREE_UV;
 90         }else if(char === "4"){
 91             imgUV = this._library.FOUR_UV;
 92         }else if(char === "5"){
 93             imgUV = this._library.FIVE_UV;
 94         }else if(char === "6"){
 95             imgUV = this._library.SIX_UV;
 96         }else if(char === "7"){
 97             imgUV = this._library.SEVEN_UV;
 98         }else if(char === "8"){
 99             imgUV = this._library.EIGHT_UV;
100         }else if(char === "9"){
101             imgUV = this._library.NINE_UV;
102         }else if(char === "."){
103             imgUV = this._library.DOT_UV;
104         }else if(char === "#"){
105             imgUV = this._library.DEGREE_UV;
106         }
107         return imgUV;
108     }
109 };
110
111 module.exports = TextImage;
我们看到这个TextImage类拥有一个this._library字库,其中每一个数字都绑定了一串uv坐标,即图片中每一个数字的左上角->左下角->右下角->右上角逆时针绕向的4组坐标值。在match函数中通过函数输入参数的字符来返回对应的uv坐标数组。这就是数字绑定uv的原理。再来看我们拿到uv数组怎么绑定到材质对象中去。请看下面代码。
 1 /**
 2      * 创建几何
 3      * viewer:视图对像
 4      * textNode:文字节点
 5      * 宽
 6      * height:高
 7      * position:位置坐标
 8      * imgUVs:图片uv数组
 9      * texture:数字纹理
10      * */
11     addGeometry:function(viewer, textNode, width, height, position, imgUVs, texture){
12         //顶点缓存
13         let w = width;
14         let h = height;
15         //缩放比
16         let scaleRatio = 1;
17         scaleRatio = this.againstScale(position, viewer);
18         w = w*scaleRatio;
19         h = h*scaleRatio;
20         //顶点数组
21         let vertices = [];
22         //首先确定有几张图片
23         let imgNum = imgUVs.length/8;
24         if(imgNum !== 0){
25             for(let i=0; i<imgNum; i++){
26                 vertices.push(w*i, h, 0, w*i, 0, 0, w*(i+1), h, 0, w*(i+1), 0, 0);
27             }
28         }
29         let array = new Float32Array(vertices);
30         let vertexBuffer = new BufferArray(BufferArray.ARRAY_BUFFER, array, 3);
31         //索引缓存
32         let indices = [];
33         if(imgNum !== 0){
34             for(let i=0; i<imgNum; i++){
35                 indices.push(4*i, 4*i+1, 4*i+3, 4*i+3, 4*i+2, 4*i);
36             }
37         }
38         let index = new Int8Array(indices);
39         let indexBuffer = new BufferArray(BufferArray.ELEMENT_ARRAY_BUFFER, index, index.length);
40         //绘制图元
41         let prim = new DrawElements(Primitives.TRIANGLES, indexBuffer);
42         //几何对象
43         let geom = new Geometry();
44         geom.setBufferArray('Vertex', vertexBuffer);
45         geom.setPrimitive(prim);
46         //纹理坐标
47         let uv = new Float32Array(imgUVs);
48         let uvBuffer = new BufferArray(BufferArray.ARRAY_BUFFER, uv, 2);
49         geom.setBufferArray('Texture', uvBuffer);
50         //将texture加入geometry
51         geom.getStateSet(true).addAttribute(texture, StateAttribute.OVERRIDE);
52         //图片背景透明
53         let bf = new BlendFunc(BlendFunc.SRC_ALPHA, BlendFunc.ONE_MINUS_SRC_ALPHA);
54         geom.getStateSet(true).addAttribute(bf, StateAttribute.OVERRIDE);
55         //几何对象加入根节点
56         textNode.addChild(geom);
57         //将textNode的位置平移到position位置
58         let translateMat = Mat4.MemoryPool.alloc();
59         Mat4.fromTranslation(translateMat, position);
60         Mat4.copy(textNode._matrix, translateMat);
61         //根据主相机视口调整模型旋转,保证文字总是面向相机
62         this.computeMatrix4MainCamera(textNode._matrix, viewer);
63         //析构
64         Mat4.MemoryPool.free(translateMat);
65     },
我们看到,我们的uv转成BufferArray后被geometry对象所接收,let uv = new Float32Array(imgUVs); let uvBuffer = new BufferArray(BufferArray.ARRAY_BUFFER, uv, 2); geom.setBufferArray('Texture', uvBuffer);通过这三行代码,我们的几何体对象里就包含了材质信息,鲫鱼接下来很欢快地发现,数字贴图完整地绘制到模型节点中去了。
以上就是对数字GUI组建的完整说明,谢谢同学们的关注与支持,鲫鱼和大家一起进步,鲫鱼和同学们下周再见。
本文系原创,如需引用,请注明出处:https://www.cnblogs.com/ccentry/p/10322832.html