尝试编译spring源码,搞了好多次,问题也是出了一大堆,今天终于搞好了,现在记录一下操作步骤,以及其中的一些坑。
前言
-
在github上尝试下了好多次,都不见成功,最后还是选择了码云, 地址: https://gitee.com/mirrors/Spring-Framework
-
spring版本很多,我最开始下了master分支,结果需要jdk11去编译,废,所以选了一个早些的版本分支 5.1.x
-
码云支持打包下载和git下载,我最开始使用了打包下载,然后导入idea中进行编译,最终错误一大堆,即使将idea版本升到最新版本也不行,所以最后选择使用git clone的方式下载源码,后来发现,还是此方式好用
准备工作
- spring-framework-5.1.x 分支地址: https://gitee.com/mirrors/Spring-Framework/tree/5.1.x , spring官方提供了编译源码的步骤, 点击下面的链接[https://github.com/spring-projects/spring-framework/wiki/Build-from-Source]即可

- Before You Start 部分要求先安装git 和 jdk8, 而且jdk8 的版本号后262之后(我之前编译失败,也不知有没有这方面的原因)。

-
因为我们是使用git clone方式下载spring源码的,所以git肯定是安装好了的
git clone -b 5.1.x https://gitee.com/mirrors/Spring-Framework.git -
最终很关键,很重要
4.1 修改 ${spring-framework}/gradle/wrapper/gradle-wrapper.properties 文件的
distributionUrl配置项distributionBase=GRADLE_USER_HOME distributionPath=wrapper/dists distributionUrl=https://services.gradle.org/distributions/gradle-4.10.3-bin.zip // 默认配置 zipStoreBase=GRADLE_USER_HOME zipStorePath=wrapper/distsspring的默认配置是需要去在线下载gradle的,反正我是下了半天没有成功。所以最终选择了离线下载。
修改之后的配置文件如下所示:
distributionBase=GRADLE_USER_HOME distributionPath=wrapper/dists distributionUrl=file:/D:/work/maven/gradle-4.10.3-bin.zip // 这是我本地的gradle存放路径 zipStoreBase=GRADLE_USER_HOME zipStorePath=wrapper/dists注意:
-
gradle插件的版本一定要与spring提供的版本一致,我最开始没有弄成一致,结果就导致编译失败了。
-
配置gradle的环境变量(略)
4.2 将gradle镜像地址修改成aliyun镜像,需要修改这几个文件
docs.gradle,build.gradle 将
docs.gradle文件中repositories改成aliyun镜像。repositories { maven { url "https://maven.aliyun.com/repository/spring" } maven { url "https://maven.aliyun.com/repository/spring-plugin" } //gradlePluginPortal() //maven { url "https://repo.spring.io/plugins-release" } } 将
build.gradle文件中的repositories改成aliyun镜像(有两处)buildscript { repositories { maven { url "https://maven.aliyun.com/repository/spring" } maven { url "https://maven.aliyun.com/repository/spring-plugin" } } }repositories { maven { url "https://maven.aliyun.com/repository/spring" } maven { url "https://maven.aliyun.com/repository/spring-plugin" } maven { url "https://maven.aliyun.com/repository/public" } }将上面这些修改完毕之后,就可以编译了。
-
编译
- cd 到spring-framework的根目录
- 执行
./gradlew build
注意: 需要使用git bash , 否则windows根本就识别不了这个命令
-
等待,漫长的等待,如果报错,就再执行一次这个问题,如果再报错,就再执行。 反正我是连续执行了四次才最终编译成功的
-
如下图,Task并没有完全跑完,卡在这儿,死也不动了, 不过我猜测只要跑完Test类型的Task就应该可以了。

导入IDEA
- 官网提供了导入IDEA的操作步骤,具体可见官方文档: https://github.com/spring-projects/spring-framework/blob/master/import-into-idea.md
- 在git bash中编译成功之后, 我导入idea直接就成功,并没有官方文档中出现的问题, 很幸运!!!
测试
-
我在spring-framework工程下面创建了一下
srping-zhengqinfeng-test模块 -
在该模块的
build.gradle文件中引入依赖dependencies { compile(project(":spring-context")) compile(project(":spring-core")) testCompile group: 'junit', name: 'junit', version: '4.12' } -
创建测试代码
import org.springframework.stereotype.Component;

/**
 * @Author ZhengQinfeng
 * @Date 2020/12/6 22:37
 * @dec
 */
@Component
public class UserComponent {
	public void test() {
		System.out.println("this is a test!");
	}
}
/** * @Author ZhengQinfeng * @Date 2020/12/06 22:26 * @dec */ @Configuration @ComponentScan("qinfeng.zheng") public class SpringConfig { }import org.springframework.context.annotation.AnnotationConfigApplicationContext; import qinfeng.zheng.component.UserComponent; /** * @Author ZhengQinfeng * @Date 2020/12/06 22:26 * @dec */ public class App { public static void main(String[] args) { AnnotationConfigApplicationContext ac = new AnnotationConfigApplicationContext(SpringConfig.class); UserComponent userComponent = ac.getBean(UserComponent.class); userComponent.test(); } }刷新依赖之后,测试运行成功!!!
优化配置

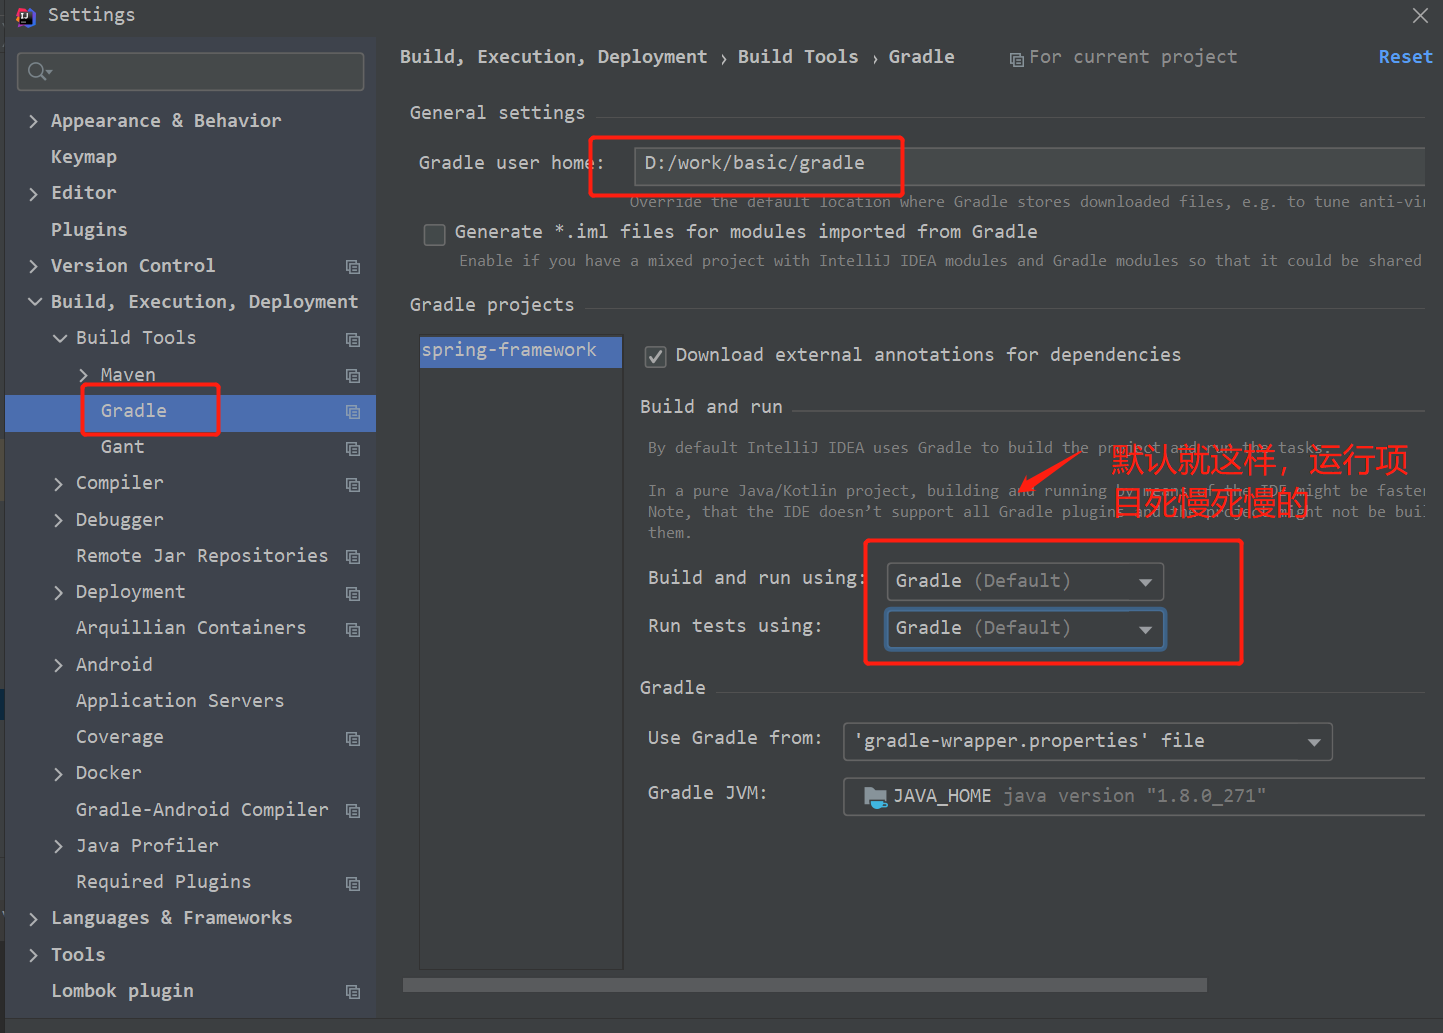
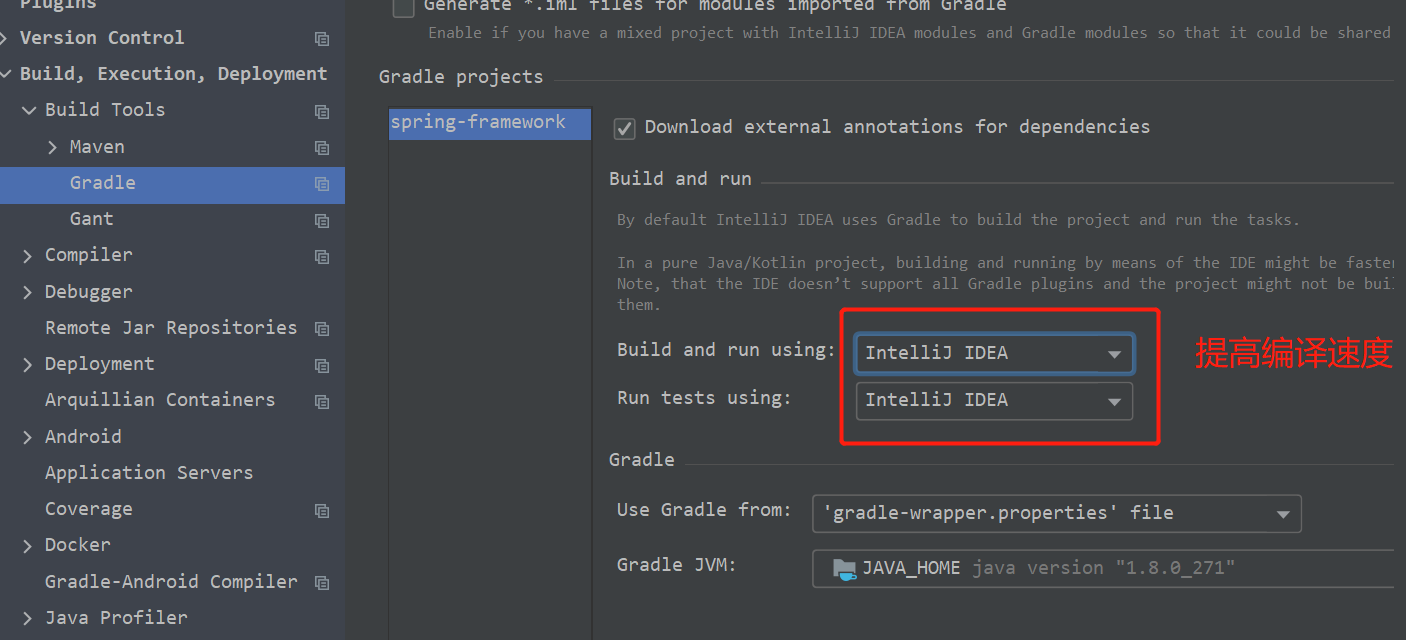
我看网上说,使用idea编译会快很多,因此我将其改了一下下

但是,报错了,报错如下:

百度,说是修改spring-context.gradle 文件, 将optional(project(":spring-instrument")) 改成 compile(project(":spring-instrument"))。
gradle刷新依赖,测试成功,代码编译速度也提升了, 完美!