前言
在上一篇文章中,我们介绍了如何根据不同的租户进行数据分离,分离的办法是一个租户一个数据库。
也提到了这种模式还是相对比较重,所以本文会介绍一种更加普遍使用的办法: 按表分离租户。
这样做的好处是什么:
在目前的to B的系统中,其实往往会有一个Master数据库,里面使用的是系统中主要的数据,各个租户的数据,往往只是对应的订单、配置、客户信息。
这就造成了,租户的数据不会有很多的种类,他的数据表的数量相对Master来说还是比较少的。
所以在单一租户数据量没有十分庞大的时候,就没有必要对单一租户数据独立到单一数据库。多个租户数据共享使用一个数库是一个折中的选择。
下图就是对应的数据表结构,其中store1和store2使用不同的数据表,但有同一个表名后缀和相同结构。

实施
项目介绍
本文的项目还是沿用上一篇文章的代码,进行加以修改。所以项目中的依赖项还是那些。
但由于代码中有很多命名不好的地方我进行了修改。并且,由于代码结构太简单,对这个示例实现起来不好,进行了少量的结构优化。
项目中新增的对象有什么:
1. ModelCacheKeyFactory,这个是EF core提供的对象,主要是要来产生ModelCacheKey
2. ModelCacheKey, 这个跟ModelCacheKeyFactory是一对的,如果需要自定义的话一般要同时实现他们俩
3. ConnectionResolverOption,这个是项目自定义的对象,用于配置。因为我们项目中现在需要同时支持多种租户数据分离的方式
实施步骤
1. 添加 ITenantDbContext 接口,它的作用是要来规定StoreDbContext中,必须可以返回TenantInfo。
1 public interface ITenantDbContext
2 {
3     TenantInfo TenantInfo{get;}
4 }
我们同时也需要修改StoreDbContext去实现 ITenantDbContext 接口,并且在构造函数上添加TenantInfo的注入
其中Products已经不是原来简单的一个Property,这里使用DbSet来获取对应的对象,因为表对象还是使用只读Property会好点。
新增一个方法的重写OnModelCreating,这个方法的主要规定EF core 的表实体(本文是Product)怎么跟数据库匹配的,简单来说就是配置。
可以看到表名的规则是TenantInfo.Name+"_Products"


 1     public class StoreDbContext : DbContext,ITenantDbContext
 2     {
 3         public DbSet<Product> Products => this.Set<Product>();
 4
 5         public TenantInfo TenantInfo => tenantInfo;
 6
 7         private readonly TenantInfo tenantInfo;
 8
 9         public StoreDbContext(DbContextOptions options, TenantInfo tenantInfo) : base(options)
10         {
11             this.tenantInfo = tenantInfo;
12         }
13
14         protected override void OnModelCreating(ModelBuilder modelBuilder)
15         {
16             modelBuilder.Entity<Product>().ToTable(this.tenantInfo.Name + "_Products");
17         }
18     }
2. 创建 TenantModelCacheKeyFactory 和 TenantModelCacheKey
TenantModelCacheKeyFactory的作用主要是创建TenantModelCacheKey实例。TenantModelCacheKey的作用是作为一个键值,标识dbContext中的OnModelCreating否需要调用。
为什么这样做呢?因为ef core为了优化效率,避免在dbContext每次实例化的时候,都需要重新构建数据实体模型。
在默认情况下,OnModelCreating只会调用一次就会存在缓存。但由于我们创建了TenantModelCacheKey,使得我们有机会判断在什么情况下需要重新调用OnModelCreating
这里是本文中最关键的改动
 1 using System;
 2 using Microsoft.EntityFrameworkCore;
 3 using Microsoft.EntityFrameworkCore.Infrastructure;
 4
 5 namespace kiwiho.Course.MultipleTenancy.EFcore.Api.Infrastructure
 6 {
 7     internal sealed class TenantModelCacheKeyFactory<TContext> : ModelCacheKeyFactory
 8         where TContext : DbContext, ITenantDbContext
 9     {
10
11         public override object Create(DbContext context)
12         {
13             var dbContext = context as TContext;
14             return new TenantModelCacheKey<TContext>(dbContext, dbContext?.TenantInfo?.Name ?? "no_tenant_identifier");
15         }
16
17         public TenantModelCacheKeyFactory(ModelCacheKeyFactoryDependencies dependencies) : base(dependencies)
18         {
19         }
20     }
21
22     internal sealed class TenantModelCacheKey<TContext> : ModelCacheKey
23         where TContext : DbContext, ITenantDbContext
24     {
25         private readonly TContext context;
26         private readonly string identifier;
27         public TenantModelCacheKey(TContext context, string identifier) : base(context)
28         {
29             this.context = context;
30             this.identifier = identifier;
31         }
32
33         protected override bool Equals(ModelCacheKey other)
34         {
35             return base.Equals(other) && (other as TenantModelCacheKey<TContext>)?.identifier == identifier;
36         }
37
38         public override int GetHashCode()
39         {
40             var hashCode = base.GetHashCode();
41             if (identifier != null)
42             {
43                 hashCode ^= identifier.GetHashCode();
44             }
45
46             return hashCode;
47         }
48     }
49 }
3. 添加 ConnectionResolverOption 类和 ConnectionResolverType 枚举。
 1 using System;
 2
 3 namespace kiwiho.Course.MultipleTenancy.EFcore.Api.Infrastructure
 4 {
 5     public class ConnectionResolverOption
 6     {
 7         public string Key { get; set; } = "default";
 8
 9         public ConnectionResolverType Type { get; set; }
10
11         public string ConnectinStringName { get; set; }
12     }
13
14     public enum ConnectionResolverType
15     {
16         Default = 0,
17         ByDatabase = 1,
18         ByTabel = 2
19     }
20 }
4. 调整 MultipleTenancyExtension 的代码结构,并且添加2个扩展函数用于对配置相关的注入。
下面贴出修改过后最主要的3个方法
 1 internal static IServiceCollection AddDatabase<TDbContext>(this IServiceCollection services,
 2                 ConnectionResolverOption option)
 3             where TDbContext : DbContext, ITenantDbContext
 4         {
 5             services.AddSingleton(option);
 6
 7             services.AddScoped<TenantInfo>();
 8             services.AddScoped<ISqlConnectionResolver, TenantSqlConnectionResolver>();
 9             services.AddDbContext<TDbContext>((serviceProvider, options) =>
10             {
11                 var resolver = serviceProvider.GetRequiredService<ISqlConnectionResolver>();
12
13                 var dbOptionBuilder = options.UseMySql(resolver.GetConnection());
14                 if (option.Type == ConnectionResolverType.ByTabel)
15                 {
16                     dbOptionBuilder.ReplaceService<IModelCacheKeyFactory, TenantModelCacheKeyFactory<TDbContext>>();
17                 }
18             });
19
20             return services;
21         }
22
23         public static IServiceCollection AddTenantDatabasePerTable<TDbContext>(this IServiceCollection services,
24                 string connectionStringName, string key = "default")
25             where TDbContext : DbContext, ITenantDbContext
26         {
27             var option = new ConnectionResolverOption()
28             {
29                 Key = key,
30                 Type = ConnectionResolverType.ByTabel,
31                 ConnectinStringName = connectionStringName
32             };
33
34             return services.AddTenantDatabasePerTable<TDbContext>(option);
35         }
36
37         public static IServiceCollection AddTenantDatabasePerTable<TDbContext>(this IServiceCollection services,
38                 ConnectionResolverOption option)
39             where TDbContext : DbContext, ITenantDbContext
40         {
41             if (option == null)
42             {
43                 option = new ConnectionResolverOption()
44                 {
45                     Key = "default",
46                     Type = ConnectionResolverType.ByTabel,
47                     ConnectinStringName = "default"
48                 };
49             }
50
51
52             return services.AddDatabase<TDbContext>(option);
53         }
其中有一个关键的配置, 需要把上文提到的 TenantModelCacheKeyFactory 配置到dbOptionBuilder
1 if (option.Type == ConnectionResolverType.ByTabel)
2 {
3     dbOptionBuilder.ReplaceService<IModelCacheKeyFactory,TenantModelCacheKeyFactory<TDbContext>>();
4 }
5. 在 TenantSqlConnectionResolver 的GetConnection方法中修改逻辑,让它同时支持按表分离数据和前文的按数据库分离数据
这个类的名字已经改了,前文的命名不合适。 方法中用到的 option 是 ConnectionResolverOption 类型,需要加到构造函数。
 1 public string GetConnection()
 2 {
 3     string connectionString = null;
 4     switch (this.option.Type)
 5     {
 6         case ConnectionResolverType.ByDatabase:
 7             connectionString = configuration.GetConnectionString(this.tenantInfo.Name);
 8             break;
 9         case ConnectionResolverType.ByTabel:
10             connectionString = configuration.GetConnectionString(this.option.ConnectinStringName);
11             break;
12     }
13
14     if (string.IsNullOrEmpty(connectionString))
15     {
16         throw new NullReferenceException("can not find the connection");
17     }
18     return connectionString;
19 }
验证效果
前提条件
在本文中,并没有使用Code First配置数据库。所以数据库和数据表需要自行创建。
这样做其实更加贴合项目实际,因为具有这种软件架构的项目,往往需要在新增租户的时候进行自动化处理,普遍做法是准备好一批sql,在新增租户的时候自动在对应的数据库中创建一批表
可能会有人提出疑问,觉得ef core提供的Migration是具有同样的作用的。这个的确是,但是我们这里的表是动态的,ef core生成的Migration plan其实是需要做手动修改的。
Migration 的修改和自定义话是一个大话题,这个需要开另外的文章谈
关于本示例的ef core Migration 实操,请参阅我的另一篇文章
EF core (code first) 通过自定义 Migration History 实现多租户使用同一数据库时更新数据库结构
建表脚本
 1 CREATE TABLE `store1_Products` (
 2   `Id` int(11) NOT NULL AUTO_INCREMENT,
 3   `Name` varchar(50) CHARACTER SET utf8mb4 NOT NULL,
 4   `Category` varchar(50) CHARACTER SET utf8mb4 DEFAULT NULL,
 5   `Price` double DEFAULT NULL,
 6   PRIMARY KEY (`Id`)
 7 ) ENGINE=InnoDB AUTO_INCREMENT=3 DEFAULT CHARSET=latin1;
 8
 9 CREATE TABLE `store2_Products` (
10   `Id` int(11) NOT NULL AUTO_INCREMENT,
11   `Name` varchar(50) CHARACTER SET utf8mb4 NOT NULL,
12   `Category` varchar(50) CHARACTER SET utf8mb4 DEFAULT NULL,
13   `Price` double DEFAULT NULL,
14   PRIMARY KEY (`Id`)
15 ) ENGINE=InnoDB AUTO_INCREMENT=3 DEFAULT CHARSET=latin1;
调用接口
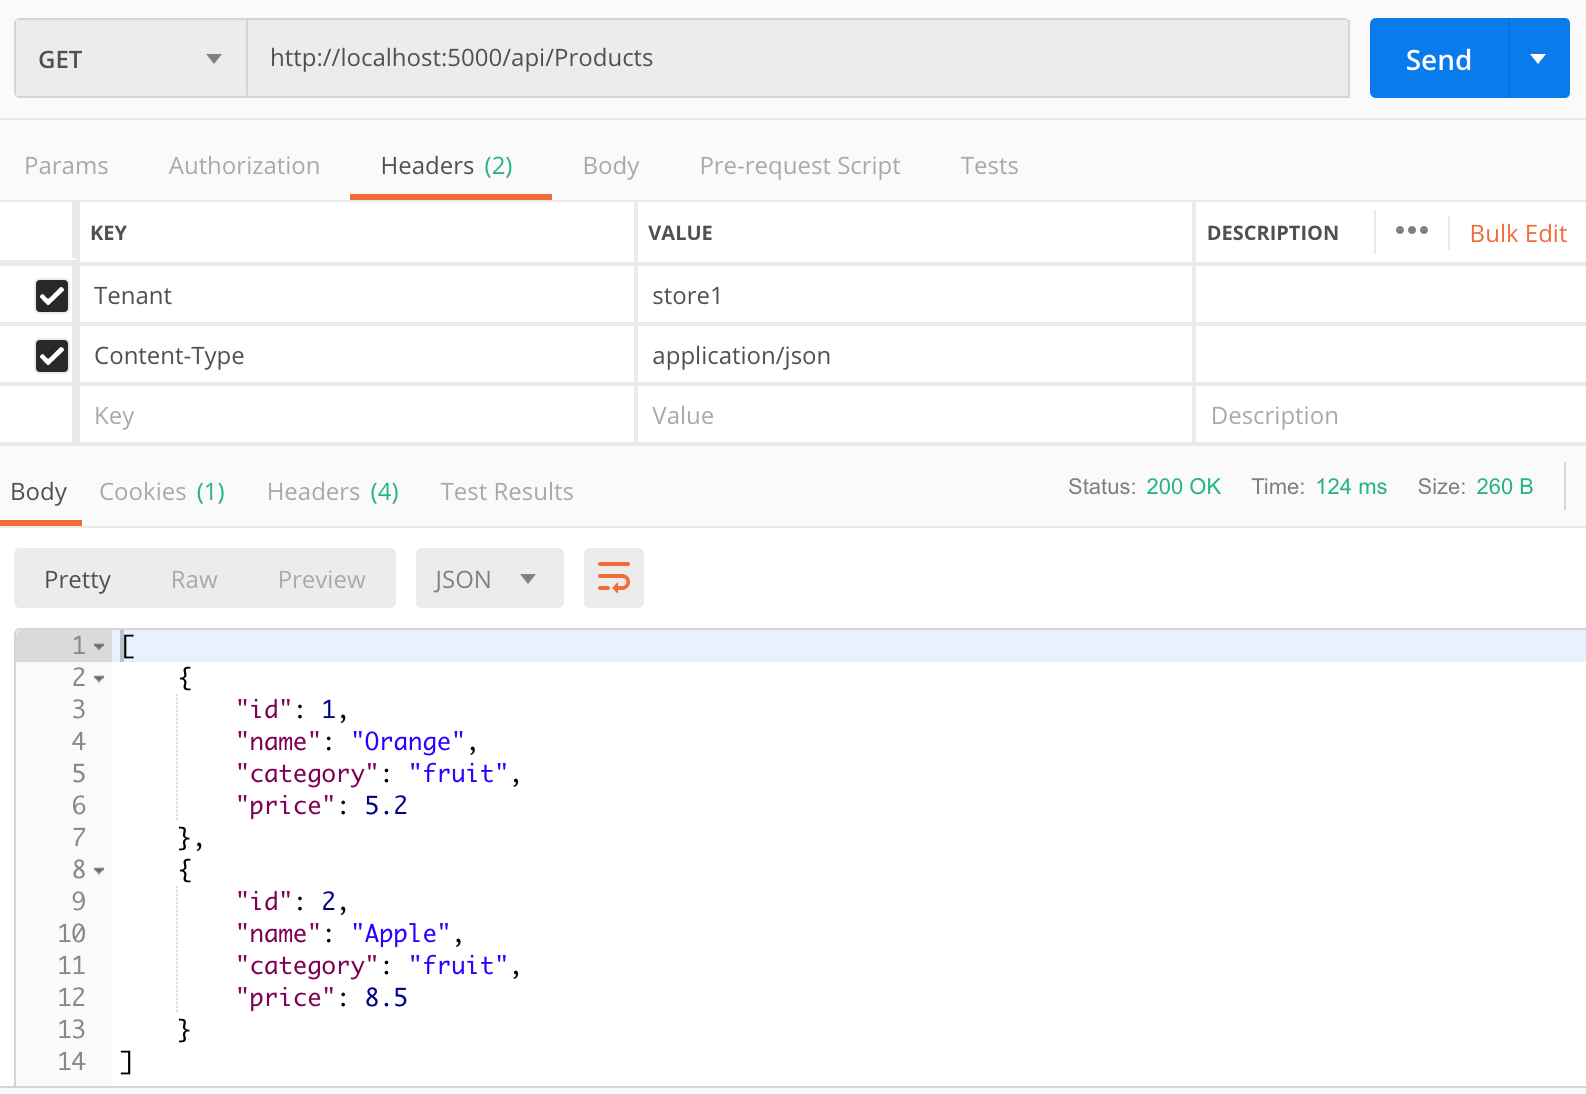
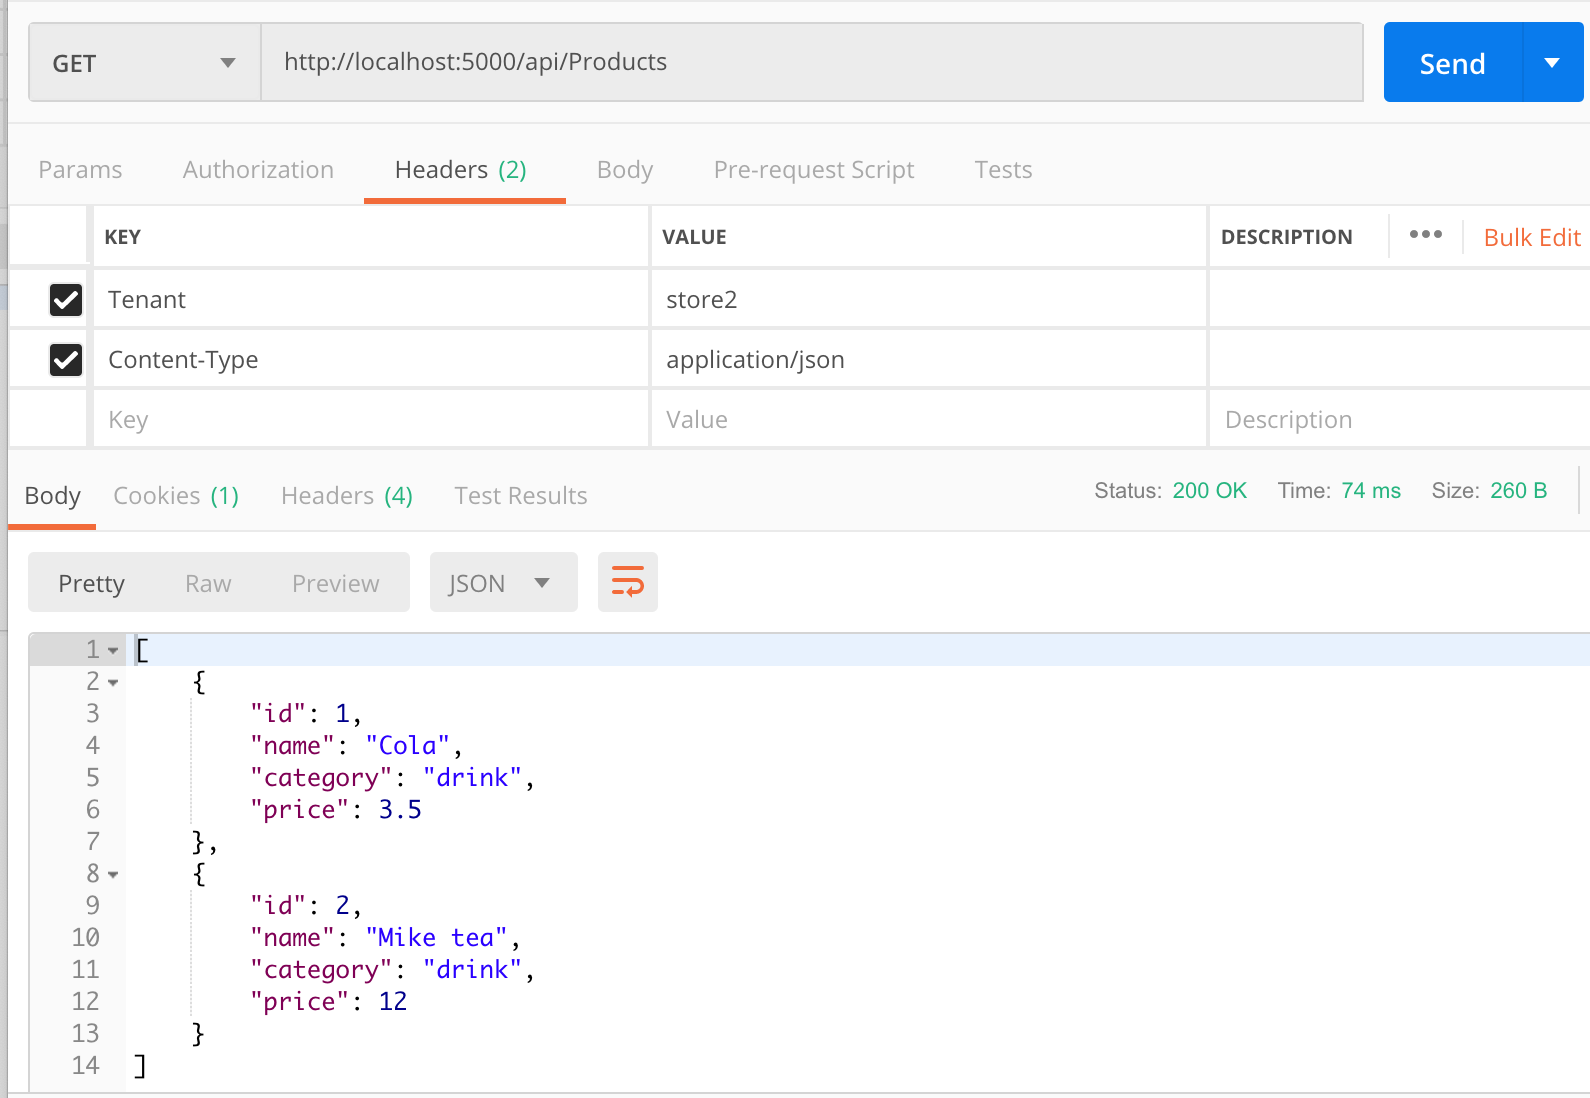
我们还是跟前文一样,分别使用store1和store2仲添加一些数据。
调动查询所有product接口
store1:
store2:
总结
这个示例已经完成了。跟前文一样,是一个实操类型的文章。
下一步是什么:
下一次我们谈谈怎么根据Schema分离数据。但是Mysql是没有Schema这个概念的,所以我们需要把SqlServer集成进来
但这样把项目的复杂性又提高的。所以这一次必须把代码抽象好了。
关于代码
代码已经传上github,请查看part2的分支或查看commit tag是part2的代码内容。
https://github.com/woailibain/EFCore.MultipleTenancyDemo/tree/part2