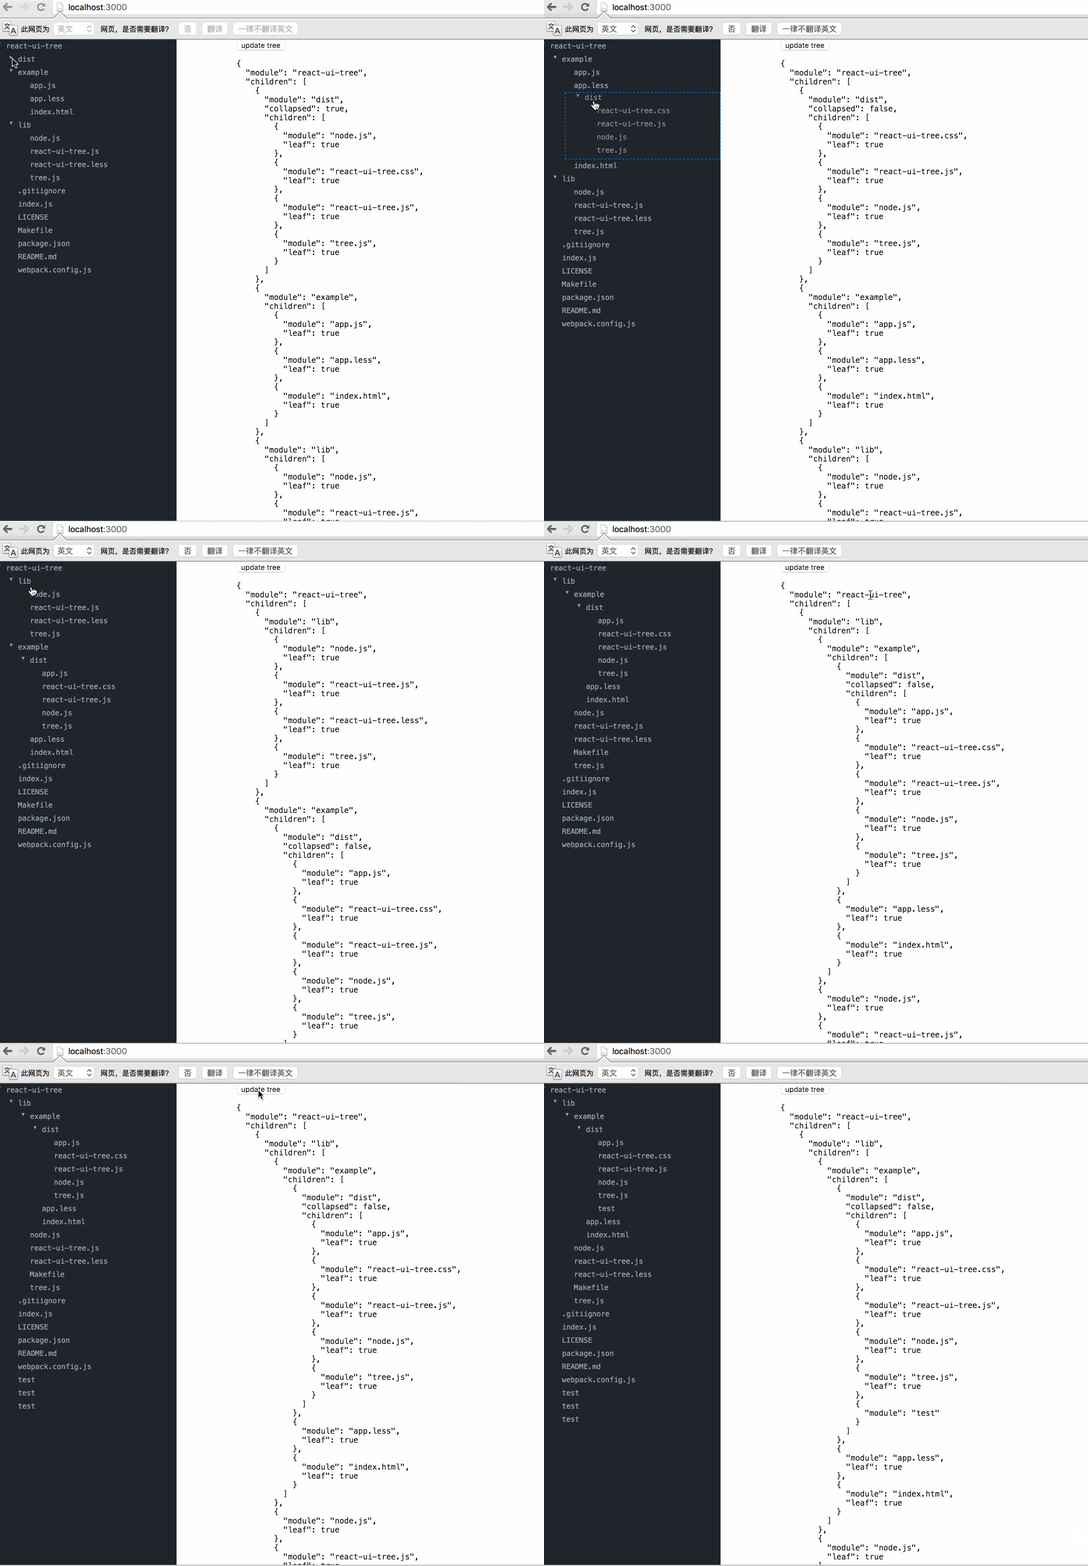
公司需要做一个IDE,要做IDE当然少不了文件列表了。下面我就来展示一下刚刚研究的一个库。

下面是链接:https://react.rocks/example/react-ui-tree
至于如何导入module,官方文档都写的很清楚我就不再贴出。
这里由于给的介绍太过简单。我就将我的代码贴出:
第一个文件就是我们组件文件:
var cx = require('classnames');
var React = require('react');
var ReactDOM = require('react-dom');
var Tree = require('react-ui-tree');
var tree = require('./tree');
require('react-ui-tree/dist/react-ui-tree.css')
require('./css.css')

var UiTree = React.createClass({
  getInitialState() {
    return {
      active: null,
      tree: tree
    };
  },

  renderNode(node) {
    return (
      <span className={cx('node', {
        'is-active': node === this.state.active
        })} onClick={this.onClickNode.bind(null, node)}>
        {node.module}
      </span>
    );
  },

  onClickNode(node) {
    this.setState({
      active: node
    });
  },

  render() {
    return (
      <div className="app">
        <div className="tree">
          <Tree
            paddingLeft={20}
            tree={this.state.tree}
            onChange={this.handleChange}
            isNodeCollapsed={this.isNodeCollapsed}
            renderNode={this.renderNode}
          />
        </div>
        <div className="inspector">
          <button onClick={this.updateTree}>update tree</button>
          <pre>
          {JSON.stringify(this.state.tree, null, '  ')}
          </pre>
        </div>
      </div>
    );
  },

  handleChange(tree) {
    this.setState({
      tree: tree
    });
  },

  updateTree() {
    var tree = this.state.tree;
    tree.children.push({module: 'test'});
    this.setState({
      tree: tree
    });
  }
});


module.exports = UiTree;
下面是数据:
module.exports = {
  module: 'react-ui-tree',
  children: [{
    module: 'dist',
    collapsed: true,
    children: [{
      module: 'node.js',
      leaf: true
    }, {
      module: 'react-ui-tree.css',
      leaf: true
    }, {
      module: 'react-ui-tree.js',
      leaf: true
    }, {
      module: 'tree.js',
      leaf: true
    }]
  }, {
    module: 'example',
    children: [{
      module: 'app.js',
      leaf: true
    }, {
      module: 'app.less',
      leaf: true
    }, {
      module: 'index.html',
      leaf: true
    }]
  }, {
    module: 'lib',
    children: [{
      module: 'node.js',
      leaf: true
    }, {
      module: 'react-ui-tree.js',
      leaf: true
    }, {
      module: 'react-ui-tree.less',
      leaf: true
    }, {
      module: 'tree.js',
      leaf: true
    }]
  }, {
    module: '.gitiignore',
    leaf: true
  }, {
    module: 'index.js',
    leaf: true
  }, {
    module: 'LICENSE',
    leaf: true
  }, {
    module: 'Makefile',
    leaf: true
  }, {
    module: 'package.json',
    leaf: true
  }, {
    module: 'README.md',
    leaf: true
  }, {
    module: 'webpack.config.js',
    leaf: true
  }]
}
这里有个坑,就是当我们将程序运行起来的时候发现样式是不对的,查阅它的源码才知道他是将样式放入了“.less”的文件之中,所以我们需要将文件先转化成css文件,然后添加文件手动导入:
.tree {
  position: fixed;
  top: 0;
  left: 0;
  bottom: 0;
  width: 300px;
  overflow-x: hidden;
  overflow-y: auto;
  background-color: #21252B;
}
.m-node.placeholder {
  border: 1px dashed #1385e5;
}
.m-node .inner {
  color: #9DA5B4;
  font-size: 12px;
  font-family: Menlo;
}
.m-node .node {
  display: inline-block;
  width: 100%;
  padding: 4px 5px;
}
.m-node .node.is-active {
  background-color: #31363F;
}
.m-node .children {
  transition: 1s;
}

*,
*:before,
*:after {
  -webkit-box-sizing: border-box;
  -moz-box-sizing: border-box;
  box-sizing: border-box;
}
body {
  margin: 0;
  padding: 0;
  font-size: 100%;
}
.inspector {
  margin-left: 400px;
}
.inspector pre {
  font-family: Menlo;
  font-size: 13px;
}
最后还有一个坑就是他跟bootstrap是有冲突的,所以如果你使用了bootstrap再使用它,可能样式会有所改变。
demo可以从我的github上看到: