参照了这篇博客,但是里面有些地方进行了更改
在昨天添加struts2和hibernate的中间添加spring,比较简单,方法类似,直接finish就可以。hibernate需要next进行相应的选择。
然后自动生成了applicationContext.xml。
注意三个框架的顺序是struts2,spring,hibernate。然后我们可以看到数据库的配置信息加入到了applicationContext.xml。
后面反向生成实体类和dao的时候配置信息也加入到了applicationContext.xml。
但是我们自己编写的dao,impl,service需要自己进行配置
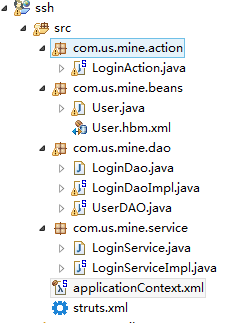
User.java和User.hbm.xml反向生成


package com.us.mine.beans;

/**
 * User entity. @author MyEclipse Persistence Tools
 */

public class User implements java.io.Serializable {

    // Fields

    private Integer userId;
    private String userName;
    private String password;
    private Integer gender;

    // Constructors

    /** default constructor */
    public User() {
    }

    /** full constructor */
    public User(String userName, String password, Integer gender) {
        this.userName = userName;
        this.password = password;
        this.gender = gender;
    }

    // Property accessors

    public Integer getUserId() {
        return this.userId;
    }

    public void setUserId(Integer userId) {
        this.userId = userId;
    }

    public String getUserName() {
        return this.userName;
    }

    public void setUserName(String userName) {
        this.userName = userName;
    }

    public String getPassword() {
        return this.password;
    }

    public void setPassword(String password) {
        this.password = password;
    }

    public Integer getGender() {
        return this.gender;
    }

    public void setGender(Integer gender) {
        this.gender = gender;
    }

}
<?xml version="1.0" encoding="utf-8"?>
<!DOCTYPE hibernate-mapping PUBLIC "-//Hibernate/Hibernate Mapping DTD 3.0//EN"
"http://hibernate.sourceforge.net/hibernate-mapping-3.0.dtd">
<!--
    Mapping file autogenerated by MyEclipse Persistence Tools
-->
<hibernate-mapping>
    <class name="com.us.mine.beans.User" table="user" catalog="world">
        <id name="userId" type="java.lang.Integer">
            <column name="userId" />
            <generator class="native" />
        </id>
        <property name="userName" type="java.lang.String">
            <column name="userName" length="16" not-null="true" />
        </property>
        <property name="password" type="java.lang.String">
            <column name="password" length="16" not-null="true" />
        </property>
        <property name="gender" type="java.lang.Integer">
            <column name="gender" not-null="true" />
        </property>
    </class>
</hibernate-mapping>
然后是登录页,注意元素的name要和action类中的一致,form的action要和struts.xml中一致。加一个登录成功页main.jsp。
<body>
    <form method="post" action="Login">
           用户名:<input name="username" type="text" />
                密码:<input name="password" type="password" />        <input
            name="Submits" type="submit" value="登录" />       <input name="ReSet"
            type="reset" value="重置" />
    </form>
</body>
然后LoginDao,LoginDaoImpl,LoginService,LoginServiceImpl
package com.us.mine.dao;

public interface LoginDao {
    boolean login(String username, String password);
}
package com.us.mine.dao;

import java.util.List;

import org.springframework.orm.hibernate3.support.HibernateDaoSupport;

import com.us.mine.beans.User;

public class LoginDaoImpl extends HibernateDaoSupport implements LoginDao {

    @Override
    public boolean login(String username, String password) {
        List<User> u=this.getHibernateTemplate().find("from User where userName=? and password=?",username,password);
        Boolean flag=false;
        if(u.size()>0){
            flag=true;
        }
        return flag;
    }

}
package com.us.mine.service;

public interface LoginService {
    boolean login(String username, String password);
}
package com.us.mine.service;

import com.us.mine.dao.LoginDao;
import com.us.mine.dao.LoginDaoImpl;

public class LoginServiceImpl implements LoginService {

    private LoginDao logindao;

    public void setLogindao(LoginDaoImpl loginDao) {
        this.logindao = loginDao;
    }

    @Override
    public boolean login(String username, String password) {
        return logindao.login(username, password);
    }

}
然后是LoginAction 并在struts.xml中进行配置,注意action的class填写的和application里面注入的action的id相同
package com.us.mine.action;

import com.opensymphony.xwork2.ActionSupport;
import com.us.mine.service.LoginService;

public class LoginAction extends ActionSupport{
    private LoginService loginservice;
    private String password;
    private String username;


    public LoginService getLoginservice() {
        return loginservice;
    }


    public void setLoginservice(LoginService loginservice) {
        this.loginservice = loginservice;
    }


    public String getPassword() {
        return password;
    }


    public void setPassword(String password) {
        this.password = password;
    }


    public String getUsername() {
        return username;
    }


    public void setUsername(String username) {
        this.username = username;
    }


    public String login(){
        Boolean flag=loginservice.login(username, password);
        if(flag){
            return SUCCESS;
        }else{
            return INPUT;
        }
    }
}
<?xml version="1.0" encoding="UTF-8" ?>
<!DOCTYPE struts PUBLIC "-//Apache Software Foundation//DTD Struts Configuration 2.1//EN" "http://struts.apache.org/dtds/struts-2.1.dtd">
<struts>
    <package name="default" extends="struts-default" namespace="/">
        <action name="Login" class="logina" method="login">
            <result name="input">/index.jsp</result>
            <result name="success">/main.jsp</result>
        </action>
    </package>
</struts>
最后是applicationContext.xml。主要是最下面3个bean,可以看到类之间的注入关系
<?xml version="1.0" encoding="UTF-8"?>
<beans xmlns="http://www.springframework.org/schema/beans"
    xmlns:xsi="http://www.w3.org/2001/XMLSchema-instance" xmlns:p="http://www.springframework.org/schema/p"
    xsi:schemaLocation="http://www.springframework.org/schema/beans http://www.springframework.org/schema/beans/spring-beans-3.1.xsd">


    <bean id="dataSource" class="org.apache.commons.dbcp.BasicDataSource">
        <property name="url" value="jdbc:mysql://localhost:3306/world"></property>
        <!-- 加入后解决数据库连接不上错误 -->
        <property name="driverClassName" value="com.mysql.jdbc.Driver"></property>
        <property name="username" value="root"></property>
        <property name="password" value="1234"></property>
    </bean>
    <bean id="sessionFactory"
        class="org.springframework.orm.hibernate3.LocalSessionFactoryBean">
        <property name="dataSource">
            <ref bean="dataSource" />
        </property>
        <property name="hibernateProperties">
            <props>
                <prop key="hibernate.dialect">
                    org.hibernate.dialect.MySQLDialect
                </prop>
            </props>
        </property>
        <property name="mappingResources">
            <list>
                <value>com/us/mine/beans/User.hbm.xml</value>
            </list>
        </property>
    </bean>
    <bean id="UserDAO" class="com.us.mine.dao.UserDAO">
        <property name="sessionFactory">
            <ref bean="sessionFactory" />
        </property>
    </bean>

    <!-- Dao注入sessionFactory -->
    <bean id="logind" class="com.us.mine.dao.LoginDaoImpl">
        <!-- 注入持久化操作所需的SessionFactory -->
        <property name="sessionFactory">
            <ref bean="sessionFactory" />
        </property>
    </bean>

    <!-- service注入dao id为下面的ref class为service实现类 -->
    <bean id="logins" class="com.us.mine.service.LoginServiceImpl">
        <property name="logindao" ref="logind"></property>
    </bean>

    <!-- Action注入service id="" 注入 class="action路径" name="loginservice"与LoginAction中声明的要保持一致
        ref随便取 -->
    <bean id="logina" class="com.us.mine.action.LoginAction" scope="prototype">
        <property name="loginservice" ref="logins"></property>
    </bean>
</beans>
运行后一直报错,发现上面的配置文件少了
<property name="driverClassName" value="com.mysql.jdbc.Driver"></property>加上后可以运行
输入
结果
