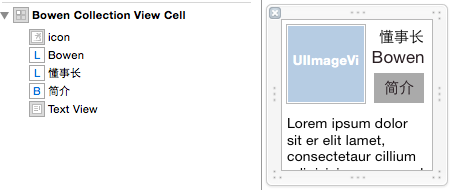
BowenCollectionViewCell.xib

  1 #import <UIKit/UIKit.h>
  2
  3 @interface BowenCollectionViewCell : UICollectionViewCell
  4
  5 @property (weak, nonatomic) IBOutlet UIImageView *iconImageView;
  6
  7 @property (weak, nonatomic) IBOutlet UILabel *lalName;
  8 @property (weak, nonatomic) IBOutlet UILabel *lblPosition;
  9 @property (weak, nonatomic) IBOutlet UIButton *btnManInfo;
 10 @property (weak, nonatomic) IBOutlet UITextView *textViewStory;
 11
 12 @end
 13
 14 #import "BowenCollectionViewCell.h"
 15
 16 @implementation BowenCollectionViewCell
 17
 18 - (void)awakeFromNib {
 19     // Initialization code
 20 }
 21
 22 @end
 23
 24 #import "ViewController.h"
 25 #import "BowenCollectionViewCell.h"
 26
 27 /*
 28  集合视图:UICollertionView
 29  三个协议、两个代理、四或五个方法
 30
 31  UICollectionViewDataSource          加载数据
 32  UICollectionViewDelegate            执行代理
 33  UICollectionViewDelegateFlowLayout  布局
 34
 35  使用步骤
 36  0.创建单元格ID
 37  1.创建布局(横向布局、纵向布局)
 38  2.创建集合视图,设置代理
 39  3.注册单元格
 40  4.加载视图
 41  */
 42
 43 @interface ViewController ()<UICollectionViewDataSource,UICollectionViewDelegate,UICollectionViewDelegateFlowLayout>
 44
 45 @property (nonatomic, strong) UICollectionView *collectionView;
 46 @property (nonatomic, strong) NSIndexPath *indexPath;
 47
 48 @end
 49
 50 @implementation ViewController
 51
 52 static NSString *cellIdentyfier = @"cellIndentyfier";
 53
 54 - (void)viewDidLoad {
 55     [super viewDidLoad];
 56
 57 //    1.创建布局(横向布局、纵向布局)
 58     UICollectionViewFlowLayout *layout = [[UICollectionViewFlowLayout alloc] init];
 59     [layout setScrollDirection:UICollectionViewScrollDirectionHorizontal];
 60
 61 //    2.创建集合视图,设置代理
 62     self.collectionView = [[UICollectionView alloc] initWithFrame:self.view.bounds collectionViewLayout:layout];
 63     self.collectionView.dataSource =self;
 64     self.collectionView.delegate = self;
 65 //    3.注册单元格(item)
 66     [self.collectionView registerClass:[UICollectionViewCell class] forCellWithReuseIdentifier:cellIdentyfier];
 67 //    4.加载视图
 68     [self.view addSubview:self.collectionView];
 69 //      加载nib文件
 70     [self.collectionView registerNib:[UINib nibWithNibName:@"BowenCollectionViewCell" bundle:[NSBundle mainBundle]] forCellWithReuseIdentifier:cellIdentyfier];
 71
 72
 73 }
 74
 75 #pragma mark - 数据源
 76 // 加载组数
 77 - (NSInteger)numberOfSectionsInCollectionView:(UICollectionView *)collectionView
 78 {
 79     return 2;
 80
 81 }
 82 // item的个数
 83 - (NSInteger)collectionView:(UICollectionView *)collectionView numberOfItemsInSection:(NSInteger)section
 84 {
 85     return 2;
 86 }
 87 // item中的单元格加载数据的方法
 88 - (UICollectionViewCell *)collectionView:(UICollectionView *)collectionView cellForItemAtIndexPath:(NSIndexPath *)indexPath
 89 {
 90     //集合视图的单元格本身就是一个View,什么自带控件都没有
 91     //如果想使用集合视图的item
 92     //1.直接往上面添加控件(不推荐) 官方规定:这个加载方法只能加载数据
 93     //2.自定义item使用
 94     BowenCollectionViewCell *cell = [collectionView dequeueReusableCellWithReuseIdentifier:cellIdentyfier forIndexPath:indexPath];
 95     cell.contentView.backgroundColor = [UIColor whiteColor];
 96
 97     //每个button都是不一样的
 98     cell.btnManInfo.tag = indexPath.section*100 + indexPath.row;
 99     [cell.btnManInfo addTarget:self action:@selector(btnManInfoClick:) forControlEvents:UIControlEventTouchUpInside];
100
101     return cell;
102 }
103 // 按钮关联方法
104 - (void)btnManInfoClick:(id)sender
105 {
106     UIButton *tempBtn = (UIButton*)sender;
107     NSInteger section = tempBtn.tag/100;
108     NSInteger row = tempBtn.tag%100;
109     switch (section) {
110         case 0:
111             if (row ==0) {
112                 NSLog(@"第0分组第0元素");
113             }
114             else{
115                 NSLog(@"第0分组第1元素");
116             }
117             break;
118         case 1:
119             if (row ==0) {
120                 NSLog(@"第1分组第0元素");
121             }
122             else{
123                 NSLog(@"第1分组第1元素");
124             }
125             break;
126         default:
127             break;
128     }
129 }
130
131 #pragma mark - 代理方法
132 // 监听行被选中执行的代理方法
133 - (void)collectionView:(UICollectionView *)collectionView didSelectItemAtIndexPath:(NSIndexPath *)indexPath
134 {
135     NSLog(@"%@",indexPath);
136 }
137
138 #pragma mark - 布局
139 // item的尺寸
140 - (CGSize)collectionView:(UICollectionView *)collectionView layout:(UICollectionViewLayout*)collectionViewLayout sizeForItemAtIndexPath:(NSIndexPath *)indexPath
141 {
142     return CGSizeMake(150, 150);
143
144 }
145 // 每组的Header尺寸
146 - (CGSize)collectionView:(UICollectionView *)collectionView layout:(UICollectionViewLayout*)collectionViewLayout referenceSizeForHeaderInSection:(NSInteger)section
147 {
148     return CGSizeMake(25, 25);
149
150 }
151
152 #pragma mark - 状态栏
153 // 隐藏状态栏
154 - (BOOL)prefersStatusBarHidden
155 {
156     return YES;
157 }
158
159 - (void)didReceiveMemoryWarning {
160     [super didReceiveMemoryWarning];
161     // Dispose of any resources that can be recreated.
162 }
163
164 @end
一、UICollectionViewController的使用
[self.collectionView registerClass:[UICollectionViewCell class] forCellWithReuseIdentifier:@"product"];
- (UICollectionViewCell *)collectionView:(UICollectionView *)collectionView cellForItemAtIndexPath:(NSIndexPath *)indexPath
{
UICollectionViewCell *cell = [collectionView dequeueReusableCellWithReuseIdentifier:@"product" forIndexPath:indexPath];
return cell;
}
- (id)init
{
// 1.流水布局
UICollectionViewFlowLayout *layout = [[UICollectionViewFlowLayout alloc] init];
// 2.每个cell的尺寸
layout.itemSize = CGSizeMake(100, 100);
return [super initWithCollectionViewLayout:layout];
}
二、UICollectionViewFlowLayout
@property (nonatomic) CGSize itemSize;
@property (nonatomic) CGFloat minimumInteritemSpacing;
@property (nonatomic) CGFloat minimumLineSpacing;
@property (nonatomic) UIEdgeInsets sectionInset;
三、UICollectionView常用数据源方法
- (NSInteger)numberOfSectionsInCollectionView:(UICollectionView *)collectionView;
- (NSInteger)collectionView:(UICollectionView *)collectionView numberOfItemsInSection:(NSInteger)section;
- (UICollectionViewCell *)collectionView:(UICollectionView *) collectionView cellForItemAtIndexPath:(NSIndexPath *)indexPath;
UICollectionView的数据源必须实现第二个方法和第三个方法,第一个方法不实现默认就是1组
@property (nonatomic, strong) UICollectionViewLayout *collectionViewLayout;
@property (nonatomic, strong) UIView *backgroundView;
@property (nonatomic) BOOL allowsSelection;
@property (nonatomic) BOOL allowsMultipleSelection;
五、UICollectionViewFlowLayout常用属性
七、注册cell的三种方式:
1> 用nib(xib)来注册cell,表示cell如何去创建, 在注册同时必须给cell设置重用标识
2> 用类(纯代码)来注册cell,表示cell用代码来创建,在注册同时必须cell设置重用标识
3> 在storyboard中给cell,设置重用标识时会同时注册cell
1纯代码实现
常见错误
错误1> ICollectionView must be initialized with a non-nil layout parameter
实例化(创建)UICollectionView的同时必须指定一个非空的layout
用UICollectionViewLayout这个类直接创建出来的布局对应就是一个空的布局,里面什么也没有
一般情况用UICollectionViewFlowLayout(流水布局,它创建出来有默认的itemSize,和行间距等等)
错误警告
negative or zero item sizes are not supported in the flow layout
UICollectionViewFlowLayout 不支持负得或为0尺寸cell
当itemSize等于 CGSizeZero 数据源方法返回每一个cell的方法不会执行,说明只有cell有尺寸时才能返回cell
layout.itemSize = CGSizeZero;
用class来注册 cell(告诉collectionView中的cell如何创建),并给cell添加重用标识
[collectionView registerClass:[CZAppCell class] forCellWithReuseIdentifier:ID];
2.用xib实现
// 加载xib
UINib *nib = [UINib nibWithNibName:@"CZAppCell" bundle:nil];
// 通过xib来注册,告诉collectionView如何去创建cell,并指定重用标识
[self.collectionView registerNib:nib forCellWithReuseIdentifier:ID];
// 实例化xib
CZAppCell *cell = [[nib instantiateWithOwner:nil options:nil] lastObject];
// 根据xib中的cell的尺寸来设置布局属性中cell的尺寸
self.flowLayout.itemSize = cell.bounds.size;
3.用storyboard实现
给storyboard的cell会只需添加重用标识即可自动注册