1.安装powerDesigner
1. 傻瓜式的安装
2.在安装的过程中选择地区后才可以点击同意和下一步
3.安装地址,建议直接把c改为d
4.其他选项直接下一步
2.使用powerDesigner做流程图
1.

2.
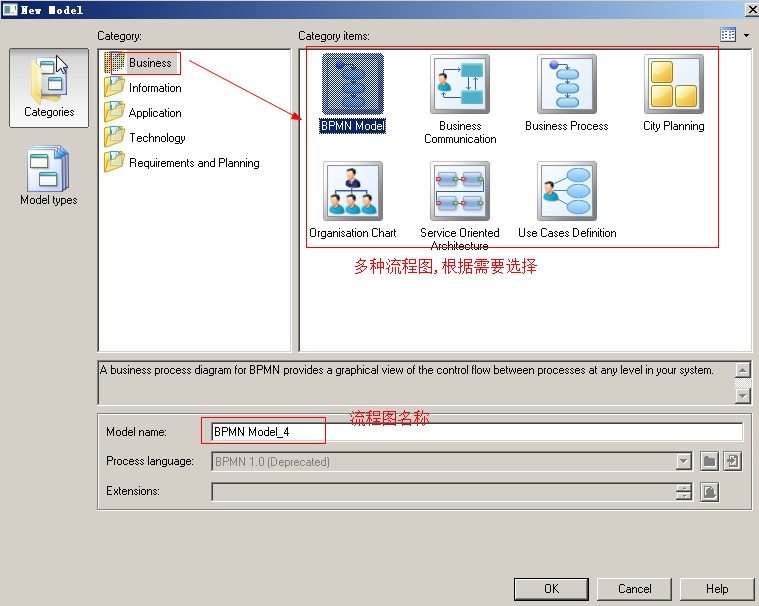
3.
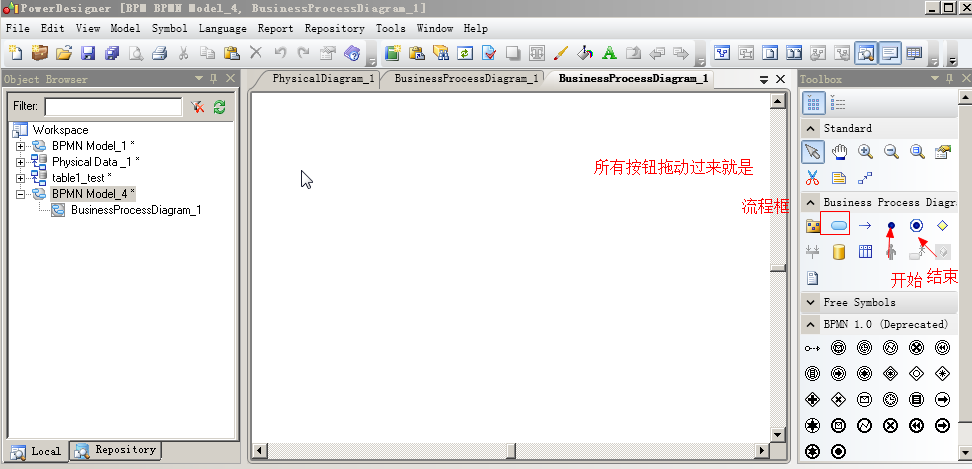
4. 两个重要快捷键:
ctrl+home:左右对齐
ctrl+end:上下对齐
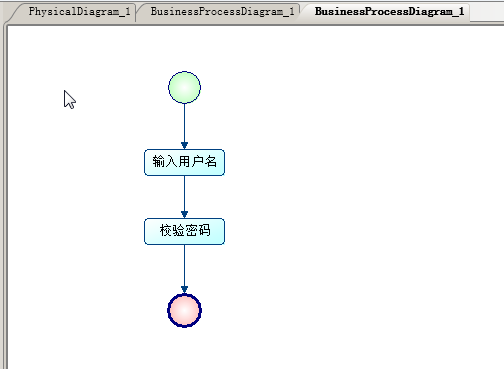
3.使用powerDesigner创建数据库表
步骤如下:
1.
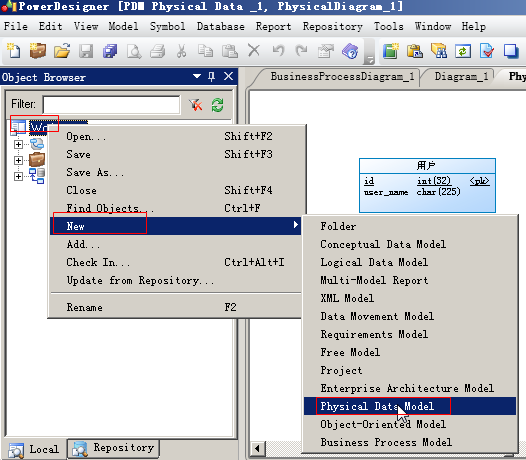
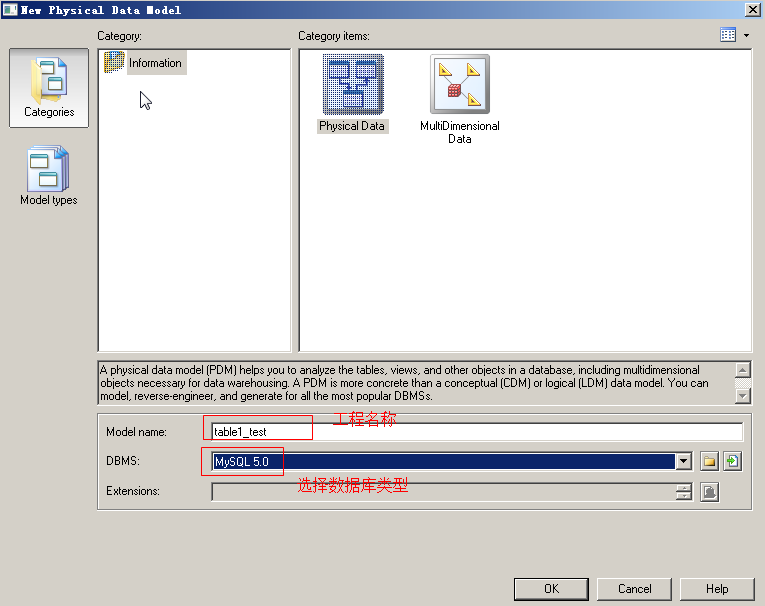
2.设置数据库类型以及工程名称
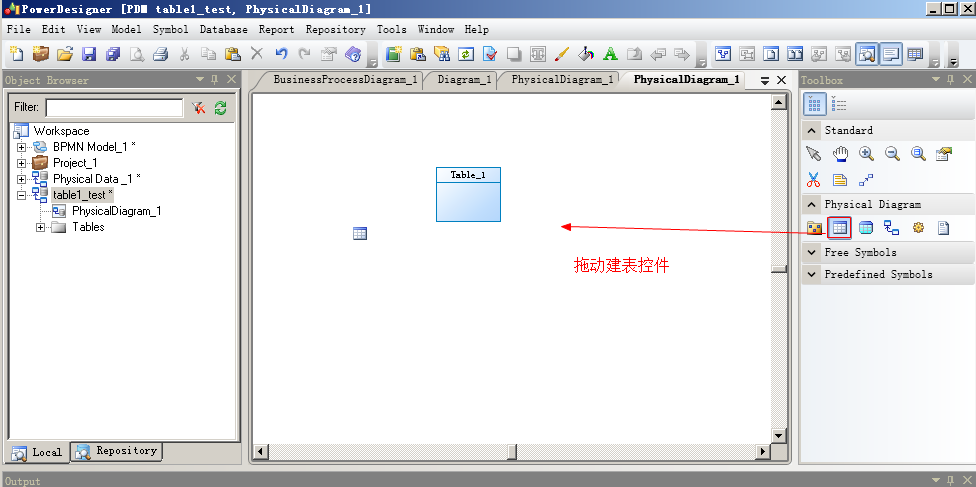
3.创建表
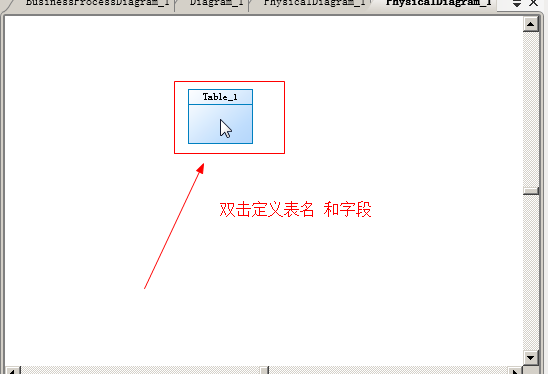
4.定表的名称 与 字段
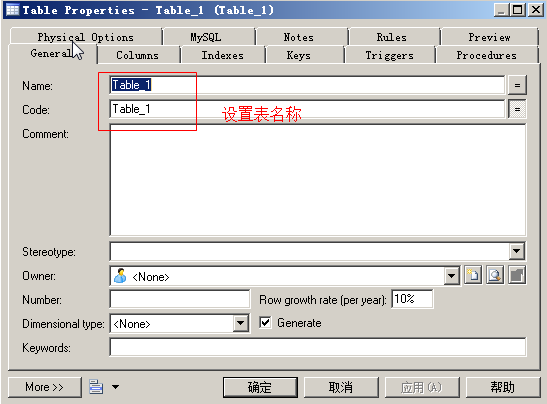
5.设置表名
6.设置字段名称以及字段类型
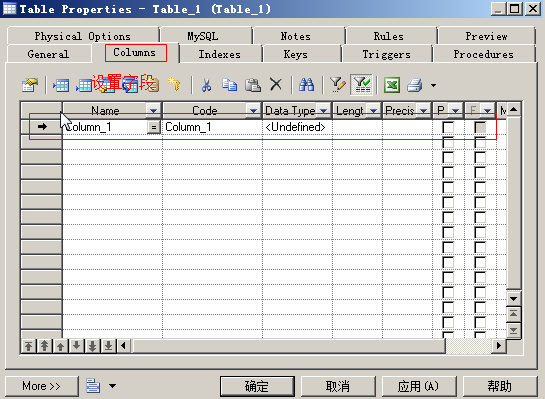
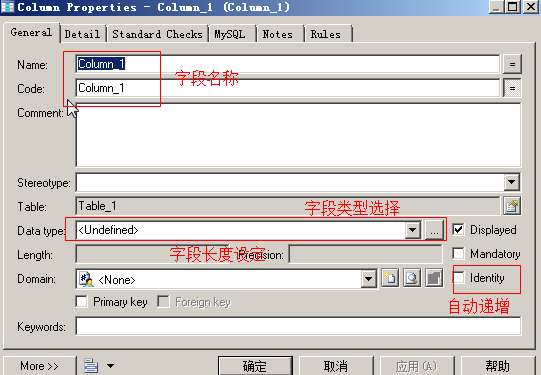
7.设置指定字段的名称类型等明细
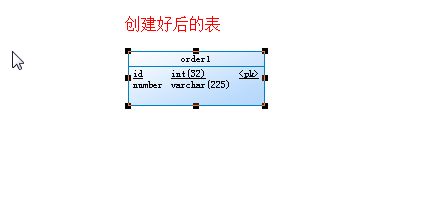
8.建表完成
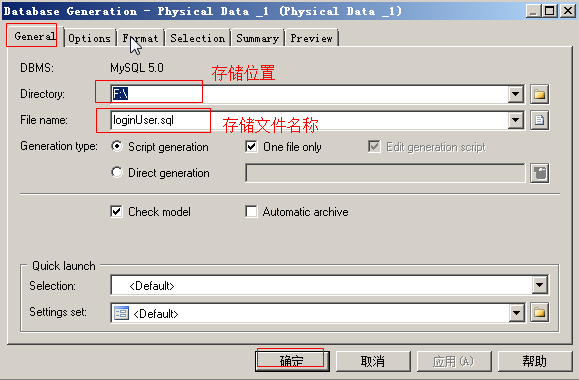
4.导出sql建表文件
1.
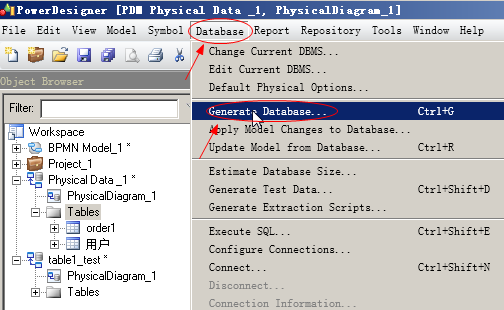
2.
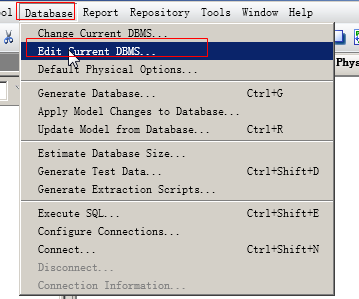
5.修改powerDesigner的默认存储引擎
1.
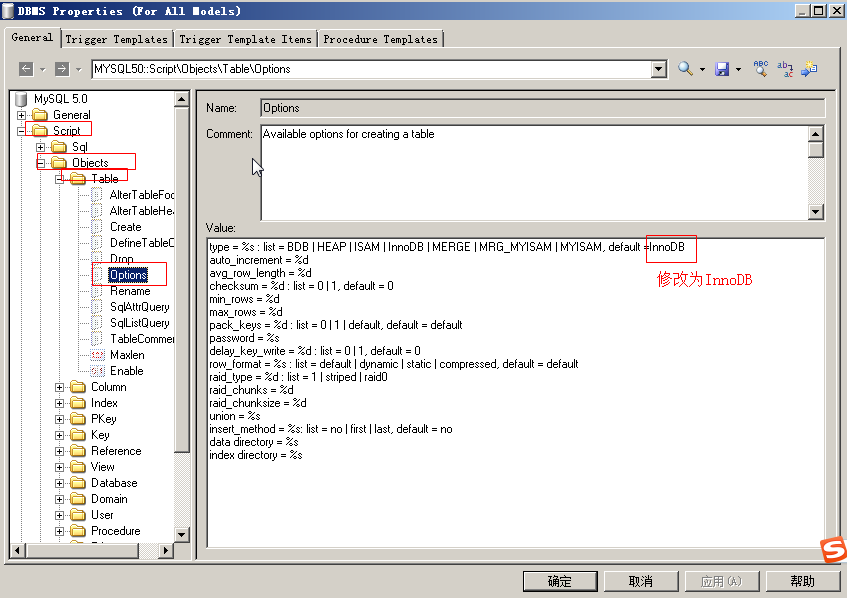
2. 将原来的 default=MYISAM 改为 default=InnoDB
3.点击确定修改完成
6.PowerDesigner为表字段添加Comment注释,让name等于Comment
1.准备执行脚本 nameToCommont.vbs

'******************************************************************************
'* File:     name2comment.vbs
'* Title:    Name to Comment Conversion
'* Model:    Physical Data Model
'* Objects: Table, Column, View
'* Author:   steveguoshao
'* Created: 2013-11-29
'* Mod By:
'* Modified:
'* Version: 1.0
'* Memo:     Modify from name2code.vbs
'******************************************************************************

Option   Explicit
ValidationMode   =   True
InteractiveMode   =   im_Batch

Dim   mdl   '   the   current   model

'   get   the   current   active   model
Set   mdl   =   ActiveModel
If   (mdl   Is   Nothing)   Then
      MsgBox   "There   is   no   current   Model "
ElseIf   Not   mdl.IsKindOf(PdPDM.cls_Model)   Then
      MsgBox   "The   current   model   is   not   an   Physical   Data   model. "
Else
      ProcessFolder   mdl
End   If

'   This   routine   copy   name   into   comment   for   each   table,   each   column   and   each   view
'   of   the   current   folder
Private   sub   ProcessFolder(folder)
      Dim   Tab   'running     table
      for   each   Tab   in   folder.tables
            if   not   tab.isShortcut   then
                  tab.comment   =   tab.name
                  Dim   col   '   running   column
                  for   each   col   in   tab.columns
                        col.comment=   col.name
                  next
            end   if
      next

      Dim   view   'running   view
      for   each   view   in   folder.Views
            if   not   view.isShortcut   then
                  view.comment   =   view.name
            end   if
      next

      '   go   into   the   sub-packages
      Dim   f   '   running   folder
      For   Each   f   In   folder.Packages
            if   not   f.IsShortcut   then
                  ProcessFolder   f
            end   if
      Next
end   sub
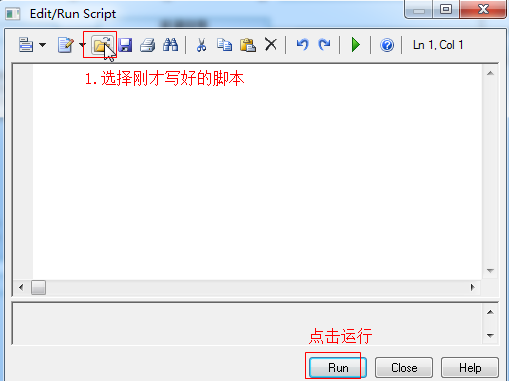
2.运行脚本
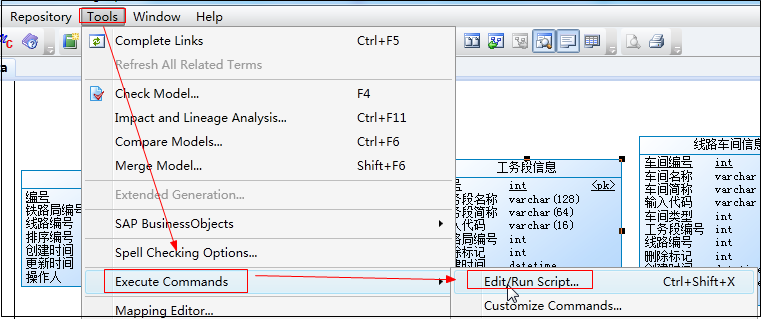
选择刚才的脚本
完美!
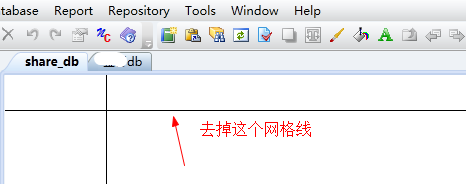
7.去掉网格线
去掉这个网格线

完美!
