在安装python3的情况,我们先创建一下django的虚拟环境,在/opt下创建,
[root@localhost opt]# python3 -m venv django
进入虚拟环境
[root@localhost opt]# source /opt/django/bin/activate
然后我们来安装django1.11版本,安装最新版本会报错
(django) [root@localhost opt]# pip install 'django<1.12'
(django) [root@localhost opt]# pip install pymysql
(django) [root@localhost opt]# pip install ipython
然后我创建一个目录
(django) [root@localhost ~]# mkdir /myproject
进入到里面创建项目,项目的名字为demo,它里面的demo应用,他的名字会和项目名字一样,比如改成www,它里面的应用也会为www
(django) [root@localhost ~]# cd /myproject/
(django) [root@localhost ~]# django-admin startproject demo
进入到项目里创建一个app应用
(django) [root@localhost myproject]# cd demo/
(django) [root@localhost demo]# python3 manage.py startapp blog
(django) [root@localhost demo]# ls
blog demo manage.py
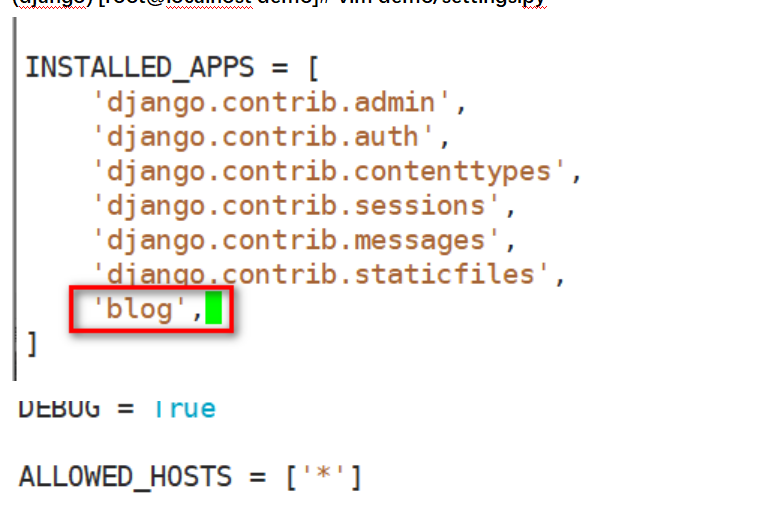
创建完之后django不知道我们创建了blog应用,我们把他加入到应用里
(django) [root@localhost demo]# vim demo/settings.py

首先我们在demo项目下的demo应用下去添加urls.py的文本
(django) [root@localhost demo]# ls
__init__.py __pycache__ settings.py urls.py wsgi.py
(django) [root@localhost demo]# vim urls.py

再去刚才创建的blog应用下创建视图views.py,这样是测试用的输出字符串
(django) [root@localhost demo]vim blog/views.py

修改完之后我们再去demo应用里创建templates渲染目录下创建index.html
(django) [root@localhost demo]# mkdir templates
(django) [root@localhost demo]# cd templates/

进入到渲染的目录里去创建index.html
(django) [root@localhost templates]# vim index.html

代码如下:可以直接复制粘贴
<!DOCTYPE HTML>
<html>
<head>
<meta charset='utf8'/>
<title>demo</title>
</head>
<body>
<h1>Hello World</h1>
</body>
</html>
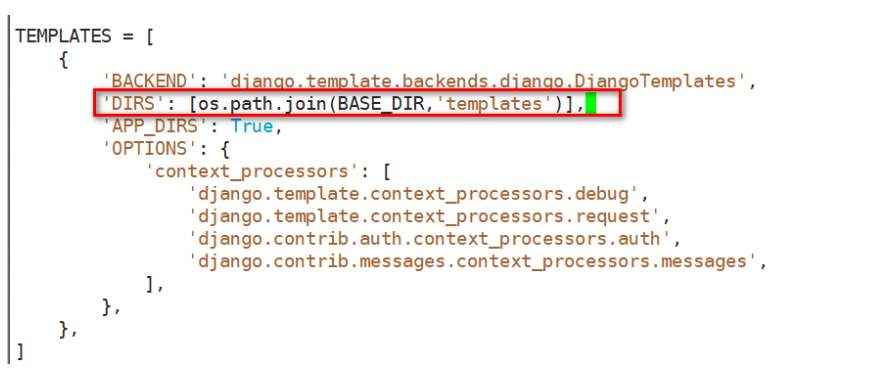
写完我们在去修改setting设置把templates渲染加进去
(django) [root@localhost demo]# vim demo/settings.py
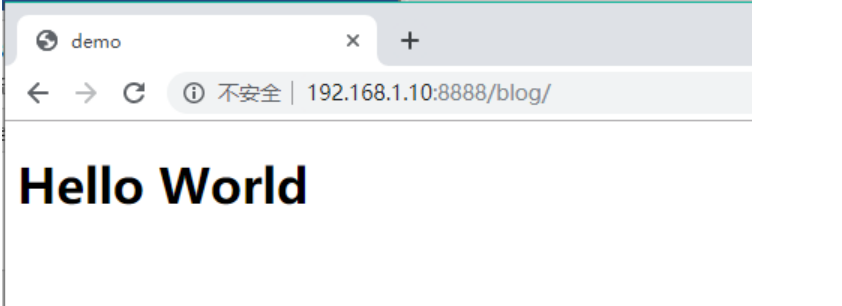
我们再来开启django
(django) [root@localhost demo]# ./manage.py runserver 0.0.0.0:8888(不成功关闭防火墙)
然后我在192.168.1.10这一台安装ansible去控制192.168.1.20安装nginx
[root@localhost ~]# yum -y install ansible
我们还是先来准备实现工作
还是先做ssh免密登录
[root@ansible-server ~]# ssh-keygen -t rsa
[root@ansible-server ~]# ssh-copy-id root@192.168.1.20
免密做完我们在去设置配置文件和添加资产
[root@ansible-server ~]# vim /etc/ansible/ansible.cfg

[root@ansible-server ~]# vim /etc/ansible/hosts 这里资产多了一个192.168.1.30不用管

然后我们把nginx的包php包依赖包拖进去拖进去
先解压
[root@ansible-server ~]# tar zxf nginx-1.14.0.tar.gz
然后把配置文件拷贝出来
[root@ansible-server ~]# cp nginx-1.14.0/conf/nginx.conf /root/
然后我们修改他的配置文件
[root@ansible-server ~]# vim nginx.conf

[root@ansible-server ~]# vim nginx.sh
useradd -M -s /sbin/nologin nginx
cd /root/nginx-1.14.0
./configure --prefix=/usr/local/nginx --user=nginx --group=nginx --with-http_ssl_module --with-http_gzip_static_module --with-pcre
make && make install
cd /root
ln -s /usr/local/nginx/sbin/nginx /usr/local/sbin(软连接)
nginx(启动)
我们在来编写roles(角色)
我们去/etc/ansible/roles/
[root@ansible-server ~]# cd /etc/ansible/roles/
[root@ansible-server roles]# ls
[root@ansible-server roles]# mkdir nginx
[root@ansible-server roles]# ls
nginx
[root@ansible-server roles]# cd nginx/
[root@ansible-server nginx]# mkdir tasks
[root@ansible-server nginx]# ls
tasks
[root@ansible-server nginx]# cd tasks/
我们在编写nginx.yml
[root@ansible-server tasks]# vim nginx.yml
- name: fu zhi bao
copy: src=/root/nginx-1.14.0.tar.gz dest=/root
- name: jie ya bao
command: tar zxf /root/nginx-1.14.0.tar.gz
- name: yum yi laibao
yum: name=pcre-devel,zlib-devel,openssl-devel,gcc state=present
- name: fu zhi nginx jiao ben
copy: src=/root/nginx.sh dest=/root
- name: zhi xing nginx jiao ben
shell: bash /root/nginx.sh
- name: ba nginx file fu zhi gei 1.20
copy: src=/root/nginx.conf dest=/usr/local/nginx/conf/
- name: chong qi nginx
shell: nginx -s stop
- name: kai qi
shell: nginx
- name: firewalld jia kai duankou
shell: firewall-cmd --add-port=80/tcp --permanent
- name: '9000'
shell: firewall-cmd --add-port=9000/tcp --permanent
- name: chong zai
shell: firewall-cmd --reload
在编写main.yml的进行引用
[root@ansible-server tasks]# vim main.yml
- include: nginx.yml
[root@ansible-server roles]# vim lnmp.yml
---
- hosts: 192.168.1.20
roles:
- nginx
最后可以访问了,实验完毕