配置文件的分离
目的就是让开发环境, 生产环境,测试环境的配置分隔开
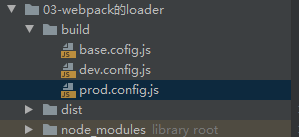
步骤一:
在项目根目录下创建一个 build 文件夹专门用来存放配置文件,再创建三个js文件,
- base.config.js 文件,存放基本配置,开发阶段和生产阶段都需要的配置, 也就是公共配置
- dev.config.js 文件,存放只在开发阶段用到的配置
- prod.config.js 文件,存放只在生产阶段用到的配置
如图所示:
步骤二
现在需要将三个配置文件联系到一起,使用webpack-merge,安装: npm install webpack-merge@4.1.5 --save-dev
接下来在 dev.config.js 文件和 prod.config.js 文件中使用webpack-merge
// prod.config.js
const UglifyJsPlugin = require('uglifyjs-webpack-plugin');
const webpackMerge = require('webpack-merge'); //1.引入webpackMerge
const baseConfig = require('./base.config'); //2.引入base.config.js

module.exports = webpackMerge(baseConfig,{//3.使用webpackMerge进行合并
    plugins: [
        // make sure to include the plugin for the magic
        new UglifyJsPlugin(),
    ],
})
// dev.config.js
const webpackMerge = require('webpack-merge'); //1.引入webpackMerge
const baseConfig = require('./base.config'); //2.引入base.config.js


module.exports = webpackMerge(baseConfig, {
    devServer: { //这个配置只在开发阶段有用,打包生成最终代码的时候,这个配置就没有用了
        contentBase: './dist',
        inline: true
    }
})
公共配置项
// base.config.js
const path = require('path');
const VueLoaderPlugin = require('vue-loader/lib/plugin');
var HtmlWebpackPlugin = require('html-webpack-plugin');


module.exports = {
    //需要导出的文件
    entry: './src/main.js',
    // 导出的路径
    output: {
        path: path.resolve(__dirname, '../dist'),
        filename: 'bundle.js',
        // 存储图片的打包地址
        // publicPath: 'dist/'
    },
    plugins: [
        // make sure to include the plugin for the magic
        new VueLoaderPlugin(),
        new HtmlWebpackPlugin({
            template: 'index.html'
        }),
    ],
    module: {
        rules: [
            {
                test: /.less$/,
                use: [{
                    loader: "style-loader" // creates style nodes from JS strings
                }, {
                    loader: "css-loader" // translates CSS into CommonJS
                }, {
                    loader: "less-loader" // compiles Less to CSS
                },]
            },
            {
                test: /.css$/,
                use: [
                    {loader: "style-loader"},
                    {loader: "css-loader"}
                ]
            },
            // 打包图片
            {
                test: /.(png|jpg|gif)$/,
                use: [
                    {
                        loader: 'url-loader',
                        options: {
                            // 当加载的图片, 小于limit时, 会将图片编译成base64字符串形式.
                            // 当加载的图片, 大于limit时, 需要使用file-loader模块进行加载.
                            //file-loader模块只需要安装,不用进行任何人配置
                            limit: 8192,
                            name:  'img/[name].[hash:8].[ext]'
                        }
                    }
                ]
            },
            // ES6转ES5
            {
                test: /.js$/,
                exclude: /(node_modules|bower_components)/,
                use: {
                    loader: 'babel-loader',
                    options: {
                        presets: ['es2015']
                    }
                }
            },
            // 使用vue
            {
                test: /.vue$/,
                use: ['vue-loader']
            }

        ]
    },
    resolve:{
        // 省略文件后缀
        extensions:['.js', '.css', '.vue'],
        // alias 别名
        alias:{
            'vue$': 'vue/dist/vue.esm.js'
        }
    }
};
步骤三
在 package.json 文件里的scripts中配置命令:
"scripts": {
  "test": "echo "Error: no test specified" && exit 1",
  "build": "webpack --config ./build/prod.config.js",
  "dev": "webpack-dev-server --open --config ./build/dev.config.js"
},
- 在执行
npm run build的时候,会使用prod.config.js配置文件 - 在执行
npm run dev的时候,会使用dev.config.js配置文件
最后,注意一下在 base.config.js 中 output 的配置
module.exports = {
  entry: './src/main.js',
  output: {
   //注意这个地方是 ../dist,如果直接写 dist ,它会在build文件夹下生成dist文件夹
    path: path.join(__dirname, '../dist'),
    filename: 'bundle.js',
  }
}
参考博文:https://blog.csdn.net/weixin_43974265/article/details/112723994