课程目标
多线程之间如何通讯
wait、notify、notifyAll()方法
lock
停止线程
多线程之间如何实现通讯
什么是多线程之间通讯?
多线程之间通讯,其实就是多个线程在操作同一个资源,但是操作的动作不同。
画图演示
多线程之间通讯需求
需求:第一个线程写入(input)用户,另一个线程取读取(out)用户.实现读一个,写一个操作。

代码实现基本实现
共享资源源实体类
package hongmoshui.com.cnblogs.www.study.day003;

/**
 * 共享资源源实体类
 * @author 洪墨水
 */
class Res
{
    public String userSex;

    public String userName;
}
输入线程资源
/**
 * 输入线程资源
 * @author 洪墨水
 */
class IntThrad extends Thread
{
    private Res res;

    public IntThrad(Res res)
    {
        this.res = res;
    }

    @Override
    public void run()
    {
        int count = 0;
        while (true)
        {
            if (count == 0)
            {
                res.userName = "余胜军";
                res.userSex = "男";
            }
            else
            {
                res.userName = "小紅";
                res.userSex = "女";
            }
            count = (count + 1) % 2;
        }
    }
}
输出线程
/**
 * 输出线程
 * @author 洪墨水
 */
class OutThread extends Thread
{
    private Res res;

    public OutThread(Res res)
    {
        this.res = res;
    }

    @Override
    public void run()
    {
        while (true)
        {
            System.out.println(res.userName + "--" + res.userSex);
        }
    }
}
运行代码
/**
 * 运行代码
 * @author 洪墨水
 */
public class Demo1
{
    public static void main(String[] args)
    {
        Res res = new Res();
        IntThrad intThrad = new IntThrad(res);
        OutThread outThread = new OutThread(res);
        intThrad.start();
        outThread.start();
    }
}
运行结果
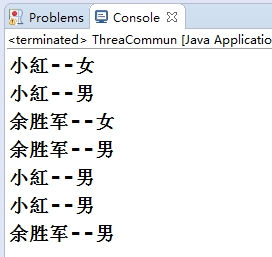
注意:数据发生错乱,造成线程安全问题
解决线程安全问题
IntThrad 加上synchronized
class IntThrad2 extends Thread
{
    private Res res;

    public IntThrad2(Res res)
    {
        this.res = res;
    }

    @Override
    public void run()
    {
        int count = 0;
        while (true)
        {
            synchronized (res)
            {
                if (count == 0)
                {
                    res.userName = "余胜军";
                    res.userSex = "男";
                }
                else
                {
                    res.userName = "小紅";
                    res.userSex = "女";
                }
                count = (count + 1) % 2;
            }

        }
    }
}
输出线程加上synchronized
package hongmoshui.com.cnblogs.www.study.day003;

class Res2
{
    public String userName;

    public String sex;
}

class InputThread extends Thread
{
    private Res2 res2;

    public InputThread(Res2 res2)
    {
        this.res2 = res2;
    }

    @Override
    public void run()
    {
        int count = 0;
        while (true)
        {
            synchronized (res2)
            {
                if (count == 0)
                {
                    res2.userName = "余胜军";
                    res2.sex = "男";
                }
                else
                {
                    res2.userName = "小红";
                    res2.sex = "女";
                }
                count = (count + 1) % 2;
            }

        }
    }
}

class OutThrad extends Thread
{
    private Res2 res2;

    public OutThrad(Res2 res2)
    {
        this.res2 = res2;
    }

    @Override
    public void run()
    {
        while (true)
        {
            synchronized (res2)
            {
                System.out.println(res2.userName + "," + res2.sex);
            }
        }

    }
}

/**
 * 输出线程加上synchronized
 * @author 洪墨水
 */
public class ThreadDemo01
{

    public static void main(String[] args)
    {
        Res2 res2 = new Res2();
        InputThread inputThread = new InputThread(res2);
        OutThrad outThrad = new OutThrad(res2);
        inputThread.start();
        outThrad.start();
    }

}
wait()、notify、notifyAll()方法
wait()、notify()、notifyAll()是三个定义在Object类里的方法,可以用来控制线程的状态。
这三个方法最终调用的都是jvm级的native方法。随着jvm运行平台的不同可能有些许差异。
如果对象调用了wait方法就会使持有该对象的线程把该对象的控制权交出去,然后处于等待状态。
如果对象调用了notify方法就会通知某个正在等待这个对象的控制权的线程可以继续运行。
如果对象调用了notifyAll方法就会通知所有等待这个对象控制权的线程继续运行。
注意:一定要在线程同步中使用,并且是同一个锁的资源
package hongmoshui.com.cnblogs.www.study.day003;

class Res3
{
    public String userSex;

    public String userName;

    // 线程通讯标识
    public boolean flag = false;
}

class IntThrad3 extends Thread
{
    private Res3 res3;

    public IntThrad3(Res3 res3)
    {
        this.res3 = res3;
    }

    @Override
    public void run()
    {
        int count = 0;
        while (true)
        {
            synchronized (res3)
            {
                if (res3.flag)
                {
                    try
                    {
                        // 当前线程变为等待,但是可以释放锁
                        res3.wait();
                    }
                    catch (Exception e)
                    {

                    }
                }
                if (count == 0)
                {
                    res3.userName = "余胜军";
                    res3.userSex = "男";
                }
                else
                {
                    res3.userName = "小紅";
                    res3.userSex = "女";
                }
                count = (count + 1) % 2;
                res3.flag = true;
                // 唤醒当前线程
                res3.notify();
            }

        }
    }
}

class OutThread3 extends Thread
{
    private Res3 res3;

    public OutThread3(Res3 res3)
    {
        this.res3 = res3;
    }

    @Override
    public void run()
    {
        while (true)
        {
            synchronized (res3)
            {
                if (!res3.flag)
                {
                    try
                    {
                        res3.wait();
                    }
                    catch (Exception e)
                    {
                        // TODO: handle exception
                    }
                }
                System.out.println(res3.userName + "--" + res3.userSex);
                res3.flag = false;
                res3.notify();
            }
        }
    }
}

public class ThreaCommun
{
    public static void main(String[] args)
    {
        Res3 res3 = new Res3();
        IntThrad3 intThrad3 = new IntThrad3(res3);
        OutThread3 outThread3 = new OutThread3(res3);
        intThrad3.start();
        outThread3.start();
    }
}
wait与sleep区别?
对于sleep()方法,我们首先要知道该方法是属于Thread类中的。而wait()方法,则是属于Object类中的。
sleep()方法导致了程序暂停执行指定的时间,让出cpu该其他线程,但是他的监控状态依然保持者,当指定的时间到了又会自动恢复运行状态。
在调用sleep()方法的过程中,线程不会释放对象锁。
而当调用wait()方法的时候,线程会放弃对象锁,进入等待此对象的等待锁定池,只有针对此对象调用notify()方法后本线程才进入对象锁定池准备
获取对象锁进入运行状态。
JDK1.5-Lock
在 jdk1.5 之后,并发包中新增了 Lock 接口(以及相关实现类)用来实现锁功能,Lock 接口提供了与 synchronized 关键字类似的同步功能,但需要在使用时手动获取锁和释放锁。
Lock写法
Lock lock = new ReentrantLock();
lock.lock();
try
{
    // 可能会出现线程安全的操作
}
finally
{
    // 一定在finally中释放锁
    // 也不能把获取锁在try中进行,因为有可能在获取锁的时候抛出异常
    lock.unlock();
}
Lock 接口与 synchronized 关键字的区别
Lock 接口可以尝试非阻塞地获取锁 当前线程尝试获取锁。如果这一时刻锁没有被其他线程获取到,则成功获取并持有锁。
Lock 接口能被中断地获取锁 与 synchronized 不同,获取到锁的线程能够响应中断,当获取到的锁的线程被中断时,中断异常将会被抛出,同时锁会被释放。
Lock 接口在指定的截止时间之前获取锁,如果截止时间到了依旧无法获取锁,则返回。
Condition用法
Condition的功能类似于在传统的线程技术中的,Object.wait()和Object.notify()的功能。
代码
Condition condition = lock.newCondition();
res. condition.await();  类似wait
res. Condition. Signal() 类似notify
package hongmoshui.com.cnblogs.www.study.day003;

import java.util.concurrent.locks.Condition;
import java.util.concurrent.locks.Lock;
import java.util.concurrent.locks.ReentrantLock;

class Res4
{
    public String userName;

    public String sex;

    public boolean flag = false;

    Lock lock = new ReentrantLock();
}

class InputThread4 extends Thread
{
    private Res4 res4;

    Condition newCondition;

    public InputThread4(Res4 res4, Condition newCondition)
    {
        this.res4 = res4;
        this.newCondition = newCondition;
    }

    @Override
    public void run()
    {
        int count = 0;
        while (true)
        {
            // synchronized (res4) {

            try
            {
                res4.lock.lock();
                if (res4.flag)
                {
                    try
                    {
                        // res4.wait();
                        newCondition.await();
                    }
                    catch (Exception e)
                    {
                        // TODO: handle exception
                    }
                }
                if (count == 0)
                {
                    res4.userName = "余胜军";
                    res4.sex = "男";
                }
                else
                {
                    res4.userName = "小红";
                    res4.sex = "女";
                }
                count = (count + 1) % 2;
                res4.flag = true;
                // res4.notify();
                newCondition.signal();
            }
            catch (Exception e)
            {
                // TODO: handle exception
            }
            finally
            {
                res4.lock.unlock();
            }
        }

        // }
    }
}

class OutThrad4 extends Thread
{
    private Res4 res4;

    private Condition newCondition;

    public OutThrad4(Res4 res4, Condition newCondition)
    {
        this.res4 = res4;
        this.newCondition = newCondition;
    }

    @Override
    public void run()
    {
        while (true)
        {
            // synchronized (res4) {
            try
            {
                res4.lock.lock();
                if (!res4.flag)
                {
                    try
                    {
                        // res4.wait();
                        newCondition.await();
                    }
                    catch (Exception e)
                    {
                        // TODO: handle exception
                    }
                }
                System.out.println(res4.userName + "," + res4.sex);
                res4.flag = false;
                // res4.notify();
                newCondition.signal();
            }
            catch (Exception e)
            {
                // TODO: handle exception
            }
            finally
            {
                res4.lock.unlock();
            }
            // }
        }

    }
}

public class ThreadDemo02
{

    public static void main(String[] args)
    {
        Res4 res4 = new Res4();
        Condition newCondition = res4.lock.newCondition();
        InputThread4 inputThread4 = new InputThread4(res4, newCondition);
        OutThrad4 outThrad4 = new OutThrad4(res4, newCondition);
        inputThread4.start();
        outThrad4.start();
    }

}
如何停止线程?
停止线程思路
1. 使用退出标志,使线程正常退出,也就是当run方法完成后线程终止。
2. 使用stop方法强行终止线程(这个方法不推荐使用,因为stop和suspend、resume一样,也可能发生不可预料的结果)。
3. 使用interrupt方法中断线程。
代码:
package hongmoshui.com.cnblogs.www.study.day003;

class StopThread implements Runnable
{
    private boolean flag = true;

    @Override
    public synchronized void run()
    {
        while (flag)
        {
            try
            {
                wait();
            }
            catch (Exception e)
            {
                // e.printStackTrace();
                stopThread();
            }
            System.out.println("thread run..");
        }
    }

    /**
     *
     * 停止线程
     * @author: 洪墨水
     */
    public void stopThread()
    {
        flag = false;
    }
}

/**
 *
 * 停止线程
 * @author: 洪墨水
 */
public class StopThreadDemo
{

    public static void main(String[] args)
    {
        StopThread stopThread1 = new StopThread();
        Thread thread1 = new Thread(stopThread1);
        Thread thread2 = new Thread(stopThread1);
        thread1.start();
        thread2.start();
        int i = 0;
        while (true)
        {
            System.out.println("thread main..");
            if (i == 300)
            {
                // stopThread1.stopThread();
                thread1.interrupt();
                thread2.interrupt();
                break;
            }
            i++;
        }

    }

}
ThreadLocal
什么是ThreadLocal
ThreadLocal提供一个线程的局部变量,访问某个线程拥有自己局部变量。
当使用ThreadLocal维护变量时,ThreadLocal为每个使用该变量的线程提供独立的变量副本,所以每一个线程都可以独立地改变自己的副本,而不会影响其它线程所对应的副本。
ThreadLocal的接口方法
ThreadLocal类接口很简单,只有4个方法,我们先来了解一下:
- void set(Object value)设置当前线程的线程局部变量的值。
- public Object get()该方法返回当前线程所对应的线程局部变量。
- public void remove()将当前线程局部变量的值删除,目的是为了减少内存的占用,该方法是JDK 5.0新增的方法。需要指出的是,当线程结束后,对应该线程的局部变量将自动被垃圾回收,所以显式调用该方法清除线程的局部变量并不是必须的操作,但它可以加快内存回收的速度。
- protected Object initialValue()返回该线程局部变量的初始值,该方法是一个protected的方法,显然是为了让子类覆盖而设计的。这个方法是一个延迟调用方法,在线程第1次调用get()或set(Object)时才执行,并且仅执行1次。ThreadLocal中的缺省实现直接返回一个null。
案例:创建三个线程,每个线程生成自己独立序列号。
代码:
package hongmoshui.com.cnblogs.www.study.day003;

class Res5
{
    // 生成序列号共享变量
    public static Integer count = 0;
    public static ThreadLocal<Integer> threadLocal = new ThreadLocal<Integer>() {
        protected Integer initialValue() {

            return 0;
        };

    };

    public Integer getNum() {
        int count = threadLocal.get() + 1;
        threadLocal.set(count);
        return count;
    }
}

/**
 * 创建三个线程,每个线程生成自己独立序列号
 * @author 洪墨水
 */
public class ThreadLocaDemo3 extends Thread {
    private Res5 res5;

    public ThreadLocaDemo3(Res5 res5)
    {
        this.res5 = res5;
    }

    @Override
    public void run() {
        for (int i = 0; i < 3; i++) {
            System.out.println(Thread.currentThread().getName() + "---" + "i---" + i + "--num:" + res5.getNum());
        }

    }

    public static void main(String[] args) {
        Res5 res5 = new Res5();
        ThreadLocaDemo3 threadLocaDemo1 = new ThreadLocaDemo3(res5);
        ThreadLocaDemo3 threadLocaDemo2 = new ThreadLocaDemo3(res5);
        ThreadLocaDemo3 threadLocaDemo3 = new ThreadLocaDemo3(res5);
        threadLocaDemo1.start();
        threadLocaDemo2.start();
        threadLocaDemo3.start();
    }

}
ThreadLocal实现原理
ThreadLocal通过map集合
Map.put(“当前线程”,值);