springmvc+spring+mybatis整合(听起来高大上,实际就是把配置文件弄一块来了)
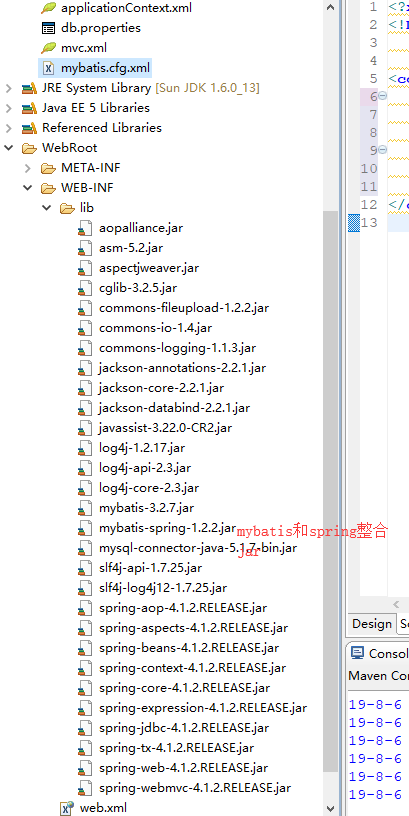
1、导入相关jar包

2、编写配置文件
a总、web.xml----配置spring 配置springmvc
 <!-- spring  配置文件 -->
  <context-param>
      <param-name>contextConfigLocation</param-name>
      <param-value>classpath:applicationContext.xml</param-value>
  </context-param>
  <listener>
      <listener-class>org.springframework.web.context.ContextLoaderListener</listener-class>
  </listener>
  <!-- springmvc 配置文件 -->
  <servlet>
      <servlet-name>springmvc</servlet-name>
      <servlet-class>org.springframework.web.servlet.DispatcherServlet</servlet-class>
      <init-param>
          <param-name>contextConfigLocation</param-name>
          <param-value>classpath:mvc.xml</param-value>
      </init-param>
      <load-on-startup>1</load-on-startup>
  </servlet>
  <servlet-mapping>
      <servlet-name>springmvc</servlet-name>
      <url-pattern>*.do</url-pattern>
  </servlet-mapping>
b、mvc.xml----springmvc的配置文件---最简单的配置使用注解扫描,如果需要json或其他处理填写相关配置
<?xml version="1.0" encoding="UTF-8"?>
<beans xmlns="http://www.springframework.org/schema/beans"
    xmlns:xsi="http://www.w3.org/2001/XMLSchema-instance"
    xmlns:p="http://www.springframework.org/schema/p"
    xmlns:context="http://www.springframework.org/schema/context"
    xsi:schemaLocation="
        http://www.springframework.org/schema/beans
        http://www.springframework.org/schema/beans/spring-beans.xsd
        http://www.springframework.org/schema/context
        http://www.springframework.org/schema/context/spring-context.xsd">

    <!-- 注解扫描,自动扫描这个包下面的注解 -->
    <context:component-scan base-package="cn.sxt.controller"></context:component-scan>

</beans>
c、applicationcontext.xml---spring的配置文件
<?xml version="1.0" encoding="UTF-8"?>
<beans xmlns="http://www.springframework.org/schema/beans"
    xmlns:xsi="http://www.w3.org/2001/XMLSchema-instance"
    xmlns:p="http://www.springframework.org/schema/p"
    xmlns:context="http://www.springframework.org/schema/context"
    xmlns:aop="http://www.springframework.org/schema/aop"
    xmlns:tx="http://www.springframework.org/schema/tx"
    xsi:schemaLocation="
        http://www.springframework.org/schema/beans
        http://www.springframework.org/schema/beans/spring-beans.xsd
        http://www.springframework.org/schema/context
        http://www.springframework.org/schema/context/spring-context.xsd
        http://www.springframework.org/schema/aop
        http://www.springframework.org/schema/aop/spring-aop.xsd
        http://www.springframework.org/schema/tx
        http://www.springframework.org/schema/tx/spring-tx.xsd">
<!--一、 配置datasource连接池    这种配置肯定是为了读取一个properties文件(下面ab两种方式,b有的时候不行))-->
    <bean id="dataSource" class="org.springframework.jdbc.datasource.DriverManagerDataSource">
        <property name="driverClassName" value="${driver}"></property>
        <property name="url" value="${url}"></property>
        <property name="username" value="${username}"></property>
        <property name="password" value="${password}"></property>
    </bean>
    <!-- a 这个就是为了读取这个配置文件的-->
    <bean class="org.springframework.beans.factory.config.PlaceholderConfigurerSupport">
        <property name="localion" value="classpath:db.properties"></property>
    </bean>        <!-- b <context:property-placeholder location="db.properties"/>-->
<!--二、配置工厂 -->
    <bean id="sqlSessionFactory" class="org.mybatis.spring.SqlSessionFactoryBean">
        <property name="dataSorce" ref="dataSource"></property>
     <property name="configLocation" value="classpath:mybatis.cfg.xml"/>//新加的
    </bean>
<!--三、配置声明式事务 --><!--a 配置事务管理器 -->
    <bean id="txManager" class="org.springframework.jdbc.datasource.DataSourceTransactionManager">
        <property name="dataSource" ref="dataSource"></property>
    </bean>
    <tx:advice id="txAdvice" transaction-manager="txManager">
        <tx:attributes>
            <tx:method name="save" propagation="REQUIRED"/>
            <tx:method name="get" read-only="true"/>
            <tx:method name="*" propagation="REQUIRED"/>
        </tx:attributes>
    </tx:advice>
    <aop:config>
        <aop:pointcut expression="execution(*cn.sxt.service.impl.*.*(..))" id="pointcut"/>
        <aop:advisor advice-ref="txAdvice" pointcut-ref="pointcut"/>
    </aop:config>
<!--四、配置注解扫描 一行搞定自结束 -->         <context:component-scan base-package="cn.sxt"/>
</beans>

上面截图后来修改在配置工厂属性里面新增了对mybatis的配置,见代码改变部分
d、mybatis---mybatis的配置文件(可有可无,看你怎么整合)
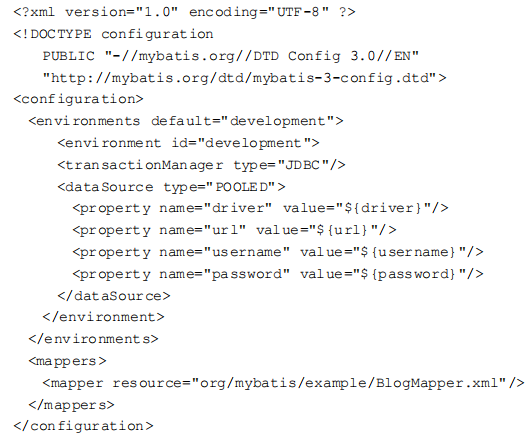
在mybatis3的pdf中拷贝过来的图片,不代表真实配置

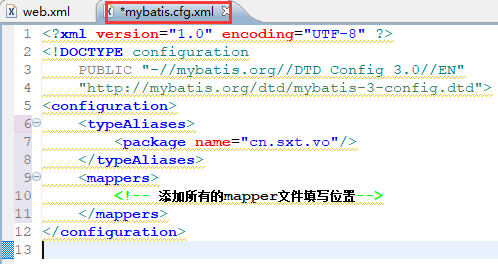
真实配置图片及代码

<?xml version="1.0" encoding="UTF-8" ?>
<!DOCTYPE configuration
    PUBLIC "-//mybatis.org//DTD Config 3.0//EN"
    "http://mybatis.org/dtd/mybatis-3-config.dtd">
<configuration>
    <typeAliases>
        <package name="cn.sxt.vo"/>
    </typeAliases>
    <mappers>
        <!-- 添加所有的mapper文件填写位置-->
    </mappers>
</configuration>
3、编码