Introduction
A lot of Machine Learning (ML) projects, amateur and professional, start with an aplomb. The early excitement with working on the dataset, answering the obvious & not so obvious questions & presenting the results are what everyone of us works for. There are compliments thrown around and talks about going to the next step -- that's when the question arises, How?
The usual suspects are making dashboards and providing insights. But mostly, the real use of your Machine Learning model lies in being at the heart of a product -- that maybe a small component of an automated mailer system or a chatbot. These are the times when the barriers seem unsurmountable. Giving an example, majority of ML folks use R/Python for their experiments. But consumer of those ML models would be software engineers who use a completely different stack. There are two ways via which this problem can be solved:
- Rewriting the whole code in the language that the software engineering folks work
The above seems like a good idea, but the time & energy required to get those intricate models replicated would be utterly waste. Majority of languages like JavaScript, do not have great libraries to perform ML. One would be wise to stay away from it.
- API-first approach
Web APIs have made it easy for cross-language applications to work well. If a frontend developer needs to use your ML Model to create a ML powered web application, he would just need to get the URL Endpoint from where the API is being served.
The articles below would help you to appreciate why APIs are a popular choice amongst developers:
Majority of the Big Cloud providers and smaller Machine Learning focussed companies provide ready-to-use APIs. They cater to the needs of developers/businesses that don't have expertise in ML, who want to implement ML in their processes or product suites.
One such example of Web APIs offered is the Google Vision API

All you need is a simple REST call to the API via SDKs (Software Development Kits) provided by Google. Click here to get an idea of what can be done using Google Vision API.
Sounds marvellous right! In this article, we'll understand how to create our own Machine Learning API using Flask, a web framework with Python.
![]()
NOTE: Flask isn't the only web-framework available. There's Django, Falcon, Hug and many more. For R, we have a package called plumber.
Table of Contents:
- Python Environment Setup & Flask Basics
- Creating a Machine Learning Model
- Saving the Machine Learning Model: Serialization & Deserialization
- Creating an API using Flask
1. Python Environment Setup & Flask Basics
![]()
-
Creating a virtual environment using
Anaconda. If you need to create your workflows in Python and keep the dependencies separated out or share the environment settings,Anacondadistributions are a great option.- You'll find a miniconda installation for Python here
wget https://repo.continuum.io/miniconda/Miniconda3-latest-Linux-x86_64.shbash Miniconda3-latest-Linux-x86_64.sh- Follow the sequence of questions.
source .bashrc- If you run:
conda, you should be able to get the list of commands & help. - To create a new environment, run:
conda create --name <environment-name> python=3.6 - Follow the steps & once done run:
source activate <environment-name> - Install the python packages you need, the two important are:
flask&gunicorn.
-
We'll try out a simple
FlaskHello-World application and serve it usinggunicorn:-
Open up your favourite text editor and create
hello-world.pyfile in a folder -
Write the code below:
"""Filename: hello-world.py """ from flask import Flask app = Flask(__name__) @app.route('/users/<string:username>') def hello_world(username=None): return("Hello {}!".format(username)) -
Save the file and return to the terminal.
-
To serve the API (to start running it), execute:
gunicorn --bind 0.0.0.0:8000 hello-world:appon your terminal. -
If you get the repsonses below, you are on the right track:

- On you browser, try out:
https://localhost:8000/users/any-name

-
Viola! You wrote your first Flask application. As you have now experienced with a few simple steps, we were able to create web-endpoints that can be accessed locally. And it remains simple going forward too.
Using Flask, we can wrap our Machine Learning models and serve them as Web APIs easily. Also, if we want to create more complex web applications (that includes JavaScript *gasps*) we just need a few modifications.
2. Creating a Machine Learning Model
- We'll be taking up the Machine Learning competition: Loan Prediction Competition. The main objective is to set a pre-processing pipeline and creating ML Models with goal towards making the ML Predictions easy while deployments.
import os
import json
import numpy as np
import pandas as pd
from sklearn.externals import joblib
from sklearn.model_selection import train_test_split, GridSearchCV
from sklearn.base import BaseEstimator, TransformerMixin
from sklearn.ensemble import RandomForestClassifier

from sklearn.pipeline import make_pipeline

import warnings
warnings.filterwarnings("ignore")
- Saving the datasets in a folder:
!ls /home/pratos/Side-Project/av_articles/flask_api/data/
'ls' 不是内部或外部命令,也不是可运行的程序
或批处理文件。
data = pd.read_csv('../data/training.csv')
list(data.columns)
['Loan_ID',
 'Gender',
 'Married',
 'Dependents',
 'Education',
 'Self_Employed',
 'ApplicantIncome',
 'CoapplicantIncome',
 'LoanAmount',
 'Loan_Amount_Term',
 'Credit_History',
 'Property_Area',
 'Loan_Status']
data.shape
(614, 13)
- Finding out the
null/Nanvalues in the columns:
for _ in data.columns:
    print("The number of null values in:{} == {}".format(_, data[_].isnull().sum()))
The number of null values in:Loan_ID == 0
The number of null values in:Gender == 13
The number of null values in:Married == 3
The number of null values in:Dependents == 15
The number of null values in:Education == 0
The number of null values in:Self_Employed == 32
The number of null values in:ApplicantIncome == 0
The number of null values in:CoapplicantIncome == 0
The number of null values in:LoanAmount == 22
The number of null values in:Loan_Amount_Term == 14
The number of null values in:Credit_History == 50
The number of null values in:Property_Area == 0
The number of null values in:Loan_Status == 0
- Next step is creating
trainingandtestingdatasets:
pred_var = ['Gender','Married','Dependents','Education','Self_Employed','ApplicantIncome','CoapplicantIncome',
            'LoanAmount','Loan_Amount_Term','Credit_History','Property_Area']

X_train, X_test, y_train, y_test = train_test_split(data[pred_var], data['Loan_Status'],
                                                    test_size=0.25, random_state=42)
- To make sure that the
pre-processing stepsare followed religiously even after we are done with experimenting and we do not miss them while predictions, we'll create a custom pre-processing Scikit-learnestimator.
To follow the process on how we ended up with this estimator, read up on this notebook
from sklearn.base import BaseEstimator, TransformerMixin

class PreProcessing(BaseEstimator, TransformerMixin):
    """Custom Pre-Processing estimator for our use-case
    """

    def __init__(self):
        pass

    def transform(self, df):
        """Regular transform() that is a help for training, validation & testing datasets
           (NOTE: The operations performed here are the ones that we did prior to this cell)
        """
        pred_var = ['Gender','Married','Dependents','Education','Self_Employed','ApplicantIncome',
                    'CoapplicantIncome','LoanAmount','Loan_Amount_Term','Credit_History','Property_Area']

        df = df[pred_var]

        df['Dependents'] = df['Dependents'].fillna(0)
        df['Self_Employed'] = df['Self_Employed'].fillna('No')
        df['Loan_Amount_Term'] = df['Loan_Amount_Term'].fillna(self.term_mean_)
        df['Credit_History'] = df['Credit_History'].fillna(1)
        df['Married'] = df['Married'].fillna('No')
        df['Gender'] = df['Gender'].fillna('Male')
        df['LoanAmount'] = df['LoanAmount'].fillna(self.amt_mean_)

        gender_values = {'Female' : 0, 'Male' : 1}
        married_values = {'No' : 0, 'Yes' : 1}
        education_values = {'Graduate' : 0, 'Not Graduate' : 1}
        employed_values = {'No' : 0, 'Yes' : 1}
        property_values = {'Rural' : 0, 'Urban' : 1, 'Semiurban' : 2}
        dependent_values = {'3+': 3, '0': 0, '2': 2, '1': 1}
        df.replace({'Gender': gender_values, 'Married': married_values, 'Education': education_values,
                    'Self_Employed': employed_values, 'Property_Area': property_values,
                    'Dependents': dependent_values}, inplace=True)

        return df.as_matrix()

    def fit(self, df, y=None, **fit_params):
        """Fitting the Training dataset & calculating the required values from train
           e.g: We will need the mean of X_train['Loan_Amount_Term'] that will be used in
                transformation of X_test
        """

        self.term_mean_ = df['Loan_Amount_Term'].mean()
        self.amt_mean_ = df['LoanAmount'].mean()
        return self
- Convert
y_train&y_testtonp.array:
y_train = y_train.replace({'Y':1, 'N':0}).as_matrix()
y_test = y_test.replace({'Y':1, 'N':0}).as_matrix()
We'll create a pipeline to make sure that all the preprocessing steps that we do are just a single scikit-learn estimator.
pipe = make_pipeline(PreProcessing(),
                    RandomForestClassifier())
pipe
Pipeline(memory=None,
     steps=[('preprocessing', PreProcessing()), ('randomforestclassifier', RandomForestClassifier(bootstrap=True, class_weight=None, criterion='gini',
            max_depth=None, max_features='auto', max_leaf_nodes=None,
            min_impurity_decrease=0.0, min_impurity_split=None,
            min_samples_leaf=1, min_samples_split=2,
            min_weight_fraction_leaf=0.0, n_estimators='warn', n_jobs=None,
            oob_score=False, random_state=None, verbose=0,
            warm_start=False))])
To search for the best hyper-parameters (degree for PolynomialFeatures & alpha for Ridge), we'll do a Grid Search:
- Defining
param_grid:
param_grid = {"randomforestclassifier__n_estimators" : [10, 20, 30],
             "randomforestclassifier__max_depth" : [None, 6, 8, 10],
             "randomforestclassifier__max_leaf_nodes": [None, 5, 10, 20],
             "randomforestclassifier__min_impurity_split": [0.1, 0.2, 0.3]}
- Running the
Grid Search:
grid = GridSearchCV(pipe, param_grid=param_grid, cv=3)
- Fitting the training data on the
pipeline estimator:
grid.fit(X_train, y_train)
GridSearchCV(cv=3, error_score='raise-deprecating',
       estimator=Pipeline(memory=None,
     steps=[('preprocessing', PreProcessing()), ('randomforestclassifier', RandomForestClassifier(bootstrap=True, class_weight=None, criterion='gini',
            max_depth=None, max_features='auto', max_leaf_nodes=None,
            min_impurity_decrease=0.0, min_impu...bs=None,
            oob_score=False, random_state=None, verbose=0,
            warm_start=False))]),
       fit_params=None, iid='warn', n_jobs=None,
       param_grid={'randomforestclassifier__n_estimators': [10, 20, 30], 'randomforestclassifier__max_depth': [None, 6, 8, 10], 'randomforestclassifier__max_leaf_nodes': [None, 5, 10, 20], 'randomforestclassifier__min_impurity_split': [0.1, 0.2, 0.3]},
       pre_dispatch='2*n_jobs', refit=True, return_train_score='warn',
       scoring=None, verbose=0)
- Let's see what parameter did the Grid Search select:
print("Best parameters: {}".format(grid.best_params_))
Best parameters: {'randomforestclassifier__max_depth': 6, 'randomforestclassifier__max_leaf_nodes': None, 'randomforestclassifier__min_impurity_split': 0.1, 'randomforestclassifier__n_estimators': 30}
- Let's score:
print("Validation set score: {:.2f}".format(grid.score(X_test, y_test)))
Validation set score: 0.78
3. Saving Machine Learning Model : Serialization & Deserialization
# 保存模型
from sklearn.externals import joblib
joblib.dump(grid, 'loan_model.pkl')
# 加载模型
grid = joblib.load('loan_model.pkl')
# 读取测试数据
test_df = pd.read_csv('../data/test.csv', encoding="utf-8-sig")
test_df = test_df.head()
test_df
# 使用模型进行预测
grid.predict(test_df)
4. Creating an API using Flask
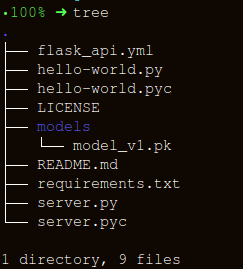
We'll keep the folder structure as simple as possible:
There are three important parts in constructing our wrapper function, apicall():
-
Getting the
requestdata (for which predictions are to be made) -
Loading our
pickled estimator -
jsonifyour predictions and send the response back withstatus code: 200
HTTP messages are made of a header and a body. As a standard, majority of the body content sent across are in json format. We'll be sending (POST url-endpoint/) the incoming data as batch to get predictions.
(NOTE: You can send plain text, XML, csv or image directly but for the sake of interchangeability of the format, it is advisable to use json)
import pandas as pd
from sklearn.externals import joblib
from flask import Flask, jsonify, request

app = Flask(__name__)


@app.route('/predict', methods=['POST'])
def apicall():
    try:
        # 获取test数据,可通过json,也可通过其他方式
        test_json = request.get_json()
        test = pd.read_json(test_json, orient='records')
        test['Dependents'] = [str(x) for x in list(test['Dependents'])]
        loan_ids = test['Loan_ID']

        # 读取数据库形式
        # sql = "select * from data where unif_cust_id=" + unif_cust_id
        # conn = create_engine('mysql+mysqldb://test:test@localhost:3306/score_card?charset=utf8')
        # data = pd.read_sql(sql, conn)

    except Exception as e:
        raise e

    if test.empty:
        return bad_request()
    else:
        # 加载模型
        print("Loading the model...")
        loaded_model = joblib.load('loan_model.pkl')

        # 预测
        print("The model has been loaded...doing predictions now...")
        predictions = loaded_model.predict(test)

        # 将预测结果存入DataFrame中
        prediction_series = list(pd.Series(predictions))
        final_predictions = pd.DataFrame(list(zip(loan_ids, prediction_series)))

        # 返回接口响应
        responses = jsonify(predictions=final_predictions.to_json(orient="records"))
        responses.status_code = 200

        return responses


@app.errorhandler(400)
def bad_request(error=None):
    message = {
        'status': 400,
        'message': 'Bad Request: ' + request.url + '--> Please check your data payload...',
    }
    resp = jsonify(message)
    resp.status_code = 400

    return resp


if __name__ == '__main__':
    app.run()
* Serving Flask app "__main__" (lazy loading)
* Environment: production
WARNING: Do not use the development server in a production environment.
Use a production WSGI server instead.
* Debug mode: off
* Running on http://127.0.0.1:5000/ (Press CTRL+C to quit)
Loading the model...
The model has been loaded...doing predictions now...
127.0.0.1 - - [20/Mar/2019 10:22:35] "[37mPOST /predict HTTP/1.1[0m" 200 -
import json
import requests
import pandas as pd
"""Setting the headers to send and accept json responses
"""
header = {'Content-Type': 'application/json',
                  'Accept': 'application/json'}

"""Reading test batch
"""
df = pd.read_csv('../data/test.csv', encoding="utf-8-sig")
df = df.head()

"""Converting Pandas Dataframe to json
"""
data = df.to_json(orient='records')
data
'[{"Loan_ID":"LP001015","Gender":"Male","Married":"Yes","Dependents":"0","Education":"Graduate","Self_Employed":"No","ApplicantIncome":5720,"CoapplicantIncome":0,"LoanAmount":110.0,"Loan_Amount_Term":360.0,"Credit_History":1.0,"Property_Area":"Urban"},{"Loan_ID":"LP001022","Gender":"Male","Married":"Yes","Dependents":"1","Education":"Graduate","Self_Employed":"No","ApplicantIncome":3076,"CoapplicantIncome":1500,"LoanAmount":126.0,"Loan_Amount_Term":360.0,"Credit_History":1.0,"Property_Area":"Urban"},{"Loan_ID":"LP001031","Gender":"Male","Married":"Yes","Dependents":"2","Education":"Graduate","Self_Employed":"No","ApplicantIncome":5000,"CoapplicantIncome":1800,"LoanAmount":208.0,"Loan_Amount_Term":360.0,"Credit_History":1.0,"Property_Area":"Urban"},{"Loan_ID":"LP001035","Gender":"Male","Married":"Yes","Dependents":"2","Education":"Graduate","Self_Employed":"No","ApplicantIncome":2340,"CoapplicantIncome":2546,"LoanAmount":100.0,"Loan_Amount_Term":360.0,"Credit_History":null,"Property_Area":"Urban"},{"Loan_ID":"LP001051","Gender":"Male","Married":"No","Dependents":"0","Education":"Not Graduate","Self_Employed":"No","ApplicantIncome":3276,"CoapplicantIncome":0,"LoanAmount":78.0,"Loan_Amount_Term":360.0,"Credit_History":1.0,"Property_Area":"Urban"}]'
"""POST <url>/predict
"""
resp = requests.post("http://127.0.0.1:5000/predict",
                    data = json.dumps(data),
                    headers= header)
resp.status_code
200
resp.json()
{'predictions': '[{"0":"LP001015","1":1},{"0":"LP001022","1":1},{"0":"LP001031","1":1},{"0":"LP001035","1":1},{"0":"LP001051","1":1}]'}
End Notes
We have half the battle won here, with a working API that serves predictions in a way where we take one step towards integrating our ML solutions right into our products. This is a very basic API that will help with proto-typing a data product, to make it as fully functional, production ready API a few more additions are required that aren't in the scope of Machine Learning.
There are a few things to keep in mind when adopting API-first approach:
-
Creating APIs out of sphagetti code is next to impossible, so approach your Machine Learning workflow as if you need to create a clean, usable API as a deliverable. Will save you a lot of effort to jump hoops later.
-
Try to use version control for models and the API code,
Flaskdoesn't provide great support for version control. Saving and keeping track of ML Models is difficult, find out the least messy way that suits you. This article talks about ways to do it. -
Specific to
sklearn models(as done in this article), if you are using customestimatorsfor preprocessing or any other related task make sure you keep theestimatorandtraining codetogether so that the model pickled would have theestimatorclass tagged along.
Next logical step would be creating a workflow to deploy such APIs out on a small VM. There are various ways to do it and we'll be looking into those in the next article.
Code & Notebooks for this article: pratos/flask_api
Sources & Links:
[2]. Building Scikit Learn compatible transformers.
[4]. Flask-QuickStart.