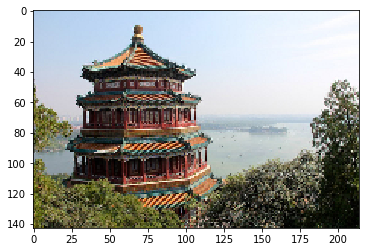
from sklearn.datasets import load_sample_image#先导入数据包
china = load_sample_image("china.jpg")#从包中拿出china那那张图
print(china.shape)
china
array([[[174, 201, 231],
        [174, 201, 231],
        [174, 201, 231],
        ...,
        [250, 251, 255],
        [250, 251, 255],
        [250, 251, 255]],

       [[172, 199, 229],
        [173, 200, 230],
        [173, 200, 230],
        ...,
        [251, 252, 255],
        [251, 252, 255],
        [251, 252, 255]],

       [[174, 201, 231],
        [174, 201, 231],
        [174, 201, 231],
        ...,
        [252, 253, 255],
        [252, 253, 255],
        [252, 253, 255]],

       ...,

       [[ 88,  80,   7],
        [147, 138,  69],
        [122, 116,  38],
        ...,
        [ 39,  42,  33],
        [  8,  14,   2],
        [  6,  12,   0]],

       [[122, 112,  41],
        [129, 120,  53],
        [118, 112,  36],
        ...,
        [  9,  12,   3],
        [  9,  15,   3],
        [ 16,  24,   9]],

       [[116, 103,  35],
        [104,  93,  31],
        [108, 102,  28],
        ...,
        [ 43,  49,  39],
        [ 13,  21,   6],
        [ 15,  24,   7]]], dtype=uint8)
import matplotlib.pyplot as plt#导入画图的包
plt.imshow(china)#imshow函数
plt.show()#显示

plt.imshow(china[:,:,0])#所有行,列,按第一的颜色排列
plt.show()
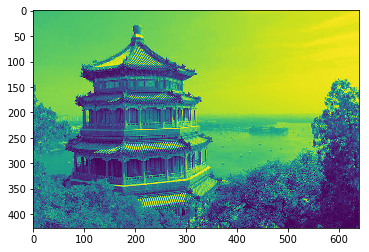
plt.imshow(china[:,:,0],plt.cm.gray)#添加灰色
plt.show()

import sys
sys.getsizeof(china)
819968
image=china[::3,::3]#将间隔扩大为3*3倍
image.shape
plt.imshow(image)
plt.show()
x=image.reshape(-1,3)
from sklearn.cluster import KMeans#导入kmeans包
import numpy as np
model=KMeans(n_clusters=64)#设中心点为64
b=model.fit_predict(x)#预测处理
a=model.cluster_centers_#求均值找中心点
new_image=a[b]#靠近的聚合
new_image=new_image.reshape(image.shape)
plt.imshow(new_image.astype(np.uint8))#改成int
plt.show()

import sys
import matplotlib.image as img
sys.getsizeof(new_image)
128
#图片保存
import matplotlib.image as img
img.imsave('e://01.jpg',china)
sd=img.imread('e://01.jpg')#导入图片数据
sd.shape
plt.imshow(sd)
plt.show()

pb=8/20
pa=1/2
pba=7/10
pab=(7/10*1/2)/(8/20)
print(pab)
cc=1-pab
print(cc)
Python 3.6.6 (v3.6.6:4cf1f54eb7, Jun 27 2018, 02:47:15) [MSC v.1900 32 bit (Intel)] on win32
Type "copyright", "credits" or "license()" for more information.
>>>
================== RESTART: C:/Users/lenovo/Desktop/sff.py ==================
>>>
================== RESTART: C:/Users/lenovo/Desktop/sff.py ==================
0.8749999999999999
>>>
================== RESTART: C:/Users/lenovo/Desktop/sff.py ==================
0.8749999999999999
0.1250000000000001
>>>