实验十二 图形程序设计
实验时间 2018-11-14
1、实验目的与要求
(1) 掌握Java GUI中框架创建及属性设置中常用类的API;
(2) 掌握Java GUI中2D图形绘制常用类的API;
(3) 了解Java GUI中2D图形中字体与颜色的设置方法;
(4) 了解Java GUI中2D图像的载入方法。
2、实验内容和步骤
实验1: 导入第10章示例程序,测试程序并进行代码注释。
测试程序1:
l 运行下列程序,观察程序运行结果。
|
import javax.swing.*; public class SimpleFrameTest { public static void main(String[] args) { JFrame frame = new JFrame(); frame.setBounds(0, 0,300, 200); frame.setDefaultCloseOperation(JFrame.EXIT_ON_CLOSE); frame.setVisible(true); } } |
在elipse IDE中调试运行教材407页程序10-1,结合程序运行结果理解程序;与上面程序对比,思考异同;
掌握空框架创建方法;
了解主线程与事件分派线程概念;
掌握GUI顶层窗口创建技术。
测试程序:
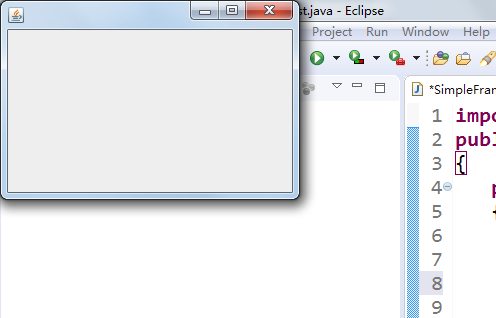
经过测试程序之后,程序会运行出一个窗体,其位置为坐标(0,0),大小是长为300,宽为200的一个窗体
程序源代码机器注释:
import javax.swing.*;
public class SimpleFrameTest
{
   public static void main(String[] args)
   {
     JFrame  frame = new JFrame(); //创建一个对象
     frame.setBounds(0, 0,300, 200);
     //给一个窗体设置其位置大小
     frame.setDefaultCloseOperation(JFrame.EXIT_ON_CLOSE);
     //
     frame.setVisible(true);
   }
}
测试程序2:
l 在elipse IDE中调试运行教材412页程序10-2,结合程序运行结果理解程序;
l 掌握确定框架常用属性的设置方法。
程序测试结果:
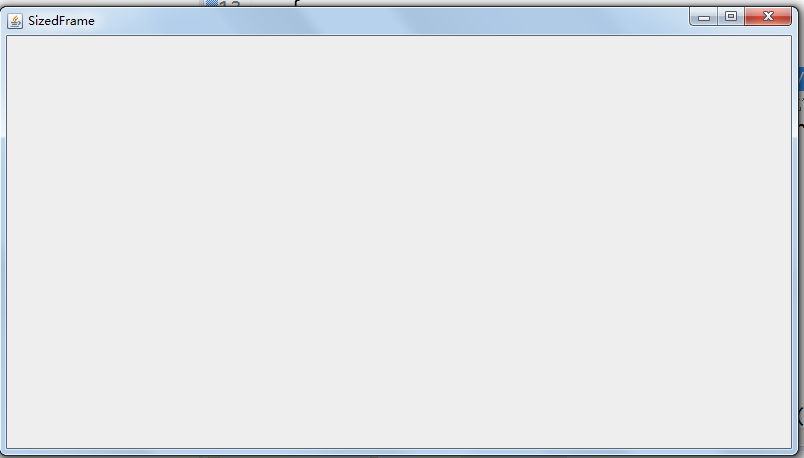
与第一个程序测试的不同之处在于此程序比上一个程序变得简单,而且在窗体的左上角多了一个窗体的名称
程序源代码及其注释:
package sizedFrame;

import java.awt.*;
import javax.swing.*;

/**
 * @version 1.34 2015-06-16
 * @author Cay Horstmann
 */
public class SizedFrameTest
{
   public static void main(String[] args)
   {
      EventQueue.invokeLater(() ->
         {
            JFrame frame = new SizedFrame();
            frame.setTitle("SizedFrame");//将此窗体的标题设置为指定的字符串。
            frame.setDefaultCloseOperation(JFrame.EXIT_ON_CLOSE);
            frame.setVisible(true);
         });
   }
}

class SizedFrame extends JFrame
{
   public SizedFrame()
   {
      //获取屏幕尺寸

      Toolkit kit = Toolkit.getDefaultToolkit();//获取默认工具包。
      Dimension screenSize = kit.getScreenSize();//获取屏幕的大小
      int screenHeight = screenSize.height;
      int screenWidth = screenSize.width;

      // 设置框架宽度、高度,并让平台拾取屏幕位置
      setSize(screenWidth / 2, screenHeight / 2);
      setLocationByPlatform(true);

      // 设置框架图标

      Image img = new ImageIcon("icon.gif").getImage();
      setIconImage(img);
   }
}
测试程序3:
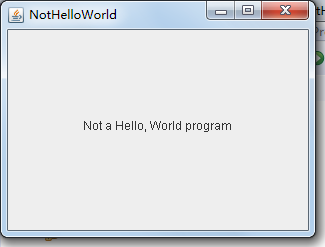
l 在elipse IDE中调试运行教材418页程序10-3,结合运行结果理解程序;
l 掌握在框架中添加组件;
l 掌握自定义组件的用法。
程序测试结果:
程序源代码及其注释:
package notHelloWorld;

import javax.swing.*;
import java.awt.*;

/**
 * @version 1.33 2015-05-12
 * @author Cay Horstmann
 */
public class NotHelloWorld
{
   public static void main(String[] args)
   {
      EventQueue.invokeLater(() ->
         {
            JFrame frame = new NotHelloWorldFrame();
            frame.setTitle("NotHelloWorld");
            frame.setDefaultCloseOperation(JFrame.EXIT_ON_CLOSE);
            frame.setVisible(true);
         });
   }
}

/**
 * A frame that contains a message panel
 */
class NotHelloWorldFrame extends JFrame
{
   public NotHelloWorldFrame()
   {
      add(new NotHelloWorldComponent());
      pack();
   }
}

/**
 * A component that displays a message.
 */
class NotHelloWorldComponent extends JComponent
{
   public static final int MESSAGE_X = 75;
   public static final int MESSAGE_Y = 100;

   private static final int DEFAULT_WIDTH = 300;
   private static final int DEFAULT_HEIGHT = 200;

   public void paintComponent(Graphics g)
   {
      g.drawString("Not a Hello, World program", MESSAGE_X, MESSAGE_Y);
   }
  // 使用此图形上下文的当前字体和颜色绘制由指定 string 给定的文本。最左侧字符的基线位于此图形上下文坐标系的 (x, y) 位置处。
   public Dimension getPreferredSize() { return new Dimension(DEFAULT_WIDTH, DEFAULT_HEIGHT); }
}
测试程序4:
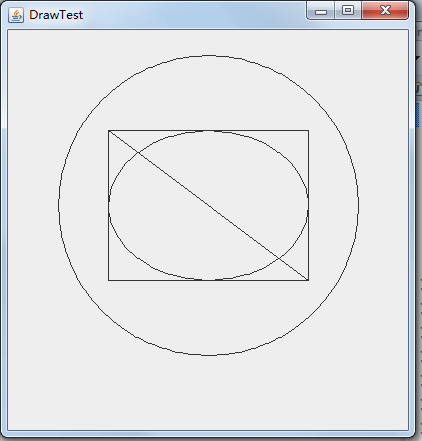
l 在elipse IDE中调试运行教材424 -425页程序10-4,结合程序运行结果理解程序;
l 掌握2D图形的绘制方法。
程序测试结果:
程序测试的源代码及其注释:
package draw;

import java.awt.*;
import java.awt.geom.*;
import javax.swing.*;

/**
 * @version 1.33 2007-05-12
 * @author Cay Horstmann
 */
public class DrawTest
{
   public static void main(String[] args)
   {
      EventQueue.invokeLater(() ->
         {
            JFrame frame = new DrawFrame();
            frame.setTitle("DrawTest");
            frame.setDefaultCloseOperation(JFrame.EXIT_ON_CLOSE);
            frame.setVisible(true);
         });
   }
}

/**
 * A frame that contains a panel with drawings
 */
class DrawFrame extends JFrame
{
   public DrawFrame()
   {
      add(new DrawComponent());
      pack();
   }
}

/**
 * A component that displays rectangles and ellipses.
 */
class DrawComponent extends JComponent
{
   private static final int DEFAULT_WIDTH = 400;
   private static final int DEFAULT_HEIGHT = 400;

   public void paintComponent(Graphics g)
   {
      Graphics2D g2 = (Graphics2D) g;

      // 画一个矩形

      double leftX = 100;
      double topY = 100;
      double width = 200;
      double height = 150;

      Rectangle2D rect = new Rectangle2D.Double(leftX, topY, width, height);
      g2.draw(rect);

      // 画出封闭的椭圆

      Ellipse2D ellipse = new Ellipse2D.Double();
      ellipse.setFrame(rect);
      g2.draw(ellipse);

      //画一条对角线

      g2.draw(new Line2D.Double(leftX, topY, leftX + width, topY + height));

      //画一个圆心相同的圆

      double centerX = rect.getCenterX();
      double centerY = rect.getCenterY();
      double radius = 150;

      Ellipse2D circle = new Ellipse2D.Double();
      circle.setFrameFromCenter(centerX, centerY, centerX + radius, centerY + radius);
      g2.draw(circle);
   }

   public Dimension getPreferredSize() { return new Dimension(DEFAULT_WIDTH, DEFAULT_HEIGHT); }
}
测试程序5:
l 在elipse IDE中调试运行教材432页-433程序10-5,结合程序运行结果理解程序;
l 了解2D图形中字体的设置的方法;
程序测试结果:
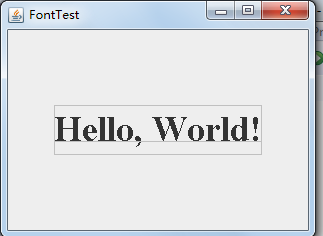
实验源代码的注释:
package font;

import java.awt.*;
import java.awt.font.*;
import java.awt.geom.*;
import javax.swing.*;

/**
 * @version 1.34 2015-05-12
 * @author Cay Horstmann
 */
public class FontTest
{
   public static void main(String[] args)
   {
      EventQueue.invokeLater(() ->
         {
            JFrame frame = new FontFrame();
            frame.setTitle("FontTest");
            frame.setDefaultCloseOperation(JFrame.EXIT_ON_CLOSE);
            frame.setVisible(true);
         });
   }
}

/**
 * A frame with a text message component
 */
//构造器,添加了两个窗口
class FontFrame extends JFrame//创建一个框架
{
   public FontFrame()
   {
      add(new FontComponent());
      pack();
   }
}

/**
 * A component that shows a centered message in a box.
 */
class FontComponent extends JComponent
{
   private static final int DEFAULT_WIDTH = 300;
   private static final int DEFAULT_HEIGHT = 200;

   public void paintComponent(Graphics g)
   {
      Graphics2D g2 = (Graphics2D) g;//创建一个g的对象,并取名g2

      String message = "Hello, World!";
      //在面板上画一个“Hello, World!”的字体
      Font f = new Font("Serif", Font.BOLD, 36);
      g2.setFont(f);

      // 测量消息的大小

      FontRenderContext context = g2.getFontRenderContext();
      Rectangle2D bounds = f.getStringBounds(message, context);

      // 设置(x,y) =文本左上角

      double x = (getWidth() - bounds.getWidth()) / 2;
      double y = (getHeight() - bounds.getHeight()) / 2;

      // 增加上升到y以达到基线

      double ascent = -bounds.getY();
      double baseY = y + ascent;

      //画出消息

      g2.drawString(message, (int) x, (int) baseY);

      g2.setPaint(Color.LIGHT_GRAY);

      // 画出基线

      g2.draw(new Line2D.Double(x, baseY, x + bounds.getWidth(), baseY));

      // 绘制包围的矩形

      Rectangle2D rect = new Rectangle2D.Double(x, y, bounds.getWidth(), bounds.getHeight());
      g2.draw(rect);
   }

   public Dimension getPreferredSize() { return new Dimension(DEFAULT_WIDTH, DEFAULT_HEIGHT); }
}
测试程序6:
在elipse IDE中调试运行教材436页-437程序10-6,结合程序运行结果理解程序;
了解2D图形图像的显示方法。
程序测试结果:
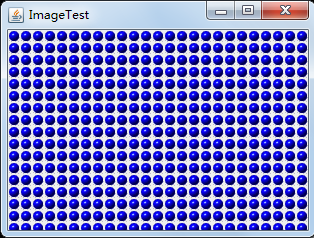
程序源代码及其注释:
package image;

import java.awt.*;
import javax.swing.*;

/**
 * @version 1.34 2015-05-12
 * @author Cay Horstmann
 */
public class ImageTest
{
   public static void main(String[] args)
   {
      EventQueue.invokeLater(() ->
         {
            JFrame frame = new ImageFrame();
            frame.setTitle("ImageTest");
            frame.setDefaultCloseOperation(JFrame.EXIT_ON_CLOSE);
            frame.setVisible(true);
         });
   }
}

/**
 * A frame with an image component
 */
class ImageFrame extends JFrame
{
   public ImageFrame()
   {
      add(new ImageComponent());
      pack();
   }
}

/**
 * A component that displays a tiled image
 */
class ImageComponent extends JComponent
{
   private static final int DEFAULT_WIDTH = 300;
   private static final int DEFAULT_HEIGHT = 200;

   private Image image;

   public ImageComponent()
   {
      image = new ImageIcon("blue-ball.gif").getImage();
   }

   public void paintComponent(Graphics g)
   {
      if (image == null) return;

      int imageWidth = image.getWidth(null);
      int imageHeight = image.getHeight(null);

      // 在左上角绘制图像

      g.drawImage(image, 0, 0, null);
      // 将图像平铺到组件上

      for (int i = 0; i * imageWidth <= getWidth(); i++)
         for (int j = 0; j * imageHeight <= getHeight(); j++)
            if (i + j > 0)
               g.copyArea(0, 0, imageWidth, imageHeight, i * imageWidth, j * imageHeight);
   }

   public Dimension getPreferredSize() { return new Dimension(DEFAULT_WIDTH, DEFAULT_HEIGHT); }
}
实验总结:
理论知识部分总结:
AWT:Java的抽象窗口工具箱(AbstractWindowToolkit,AWT)包含在java.awt包中,它提供了许多用来设计GUI的组件类和容器类。
AWT库处理用户界面元素的方法:把图形元素的创建和行为委托给本地GUI工具箱进行处理。
应用AWT编写依赖于本地用户界面元素GUI会暴露出一些缺陷。例如,菜单、滚动条和文本域这些用户界面元素,在不同的平台上,操作行为上存在一些微妙的差异。
Swing类:
Swing用户界面库是非基于对等体的GUI工具箱;Swing具有更丰富并且更方便的用户界面元素集合;Swing对底层平台的依赖很少,因此与平台相关的bug很少。Swing会带来交叉平台上的统一视觉体验;Swing类库被放在javax.swing包里。
创建框架:
框架是由组件、容器、添加组件、框架、在组件中显示信息构成的。
组件:通常把Component类的子类或者间接子类创建的对象称为一个组件。
容器:容器是Java中能够容纳和排列的组件。
添加组件:Container类提供了一个方法add(),用来在容器类组件对象中添加其他组件。
组件都是矩形形状,组件本身有一个默认的坐标系,组件的左上角的坐标值是(0,0)。如果一个组件的宽是20,高是10,那么,该坐标系中,x坐标的最大值是20;y坐标的最大值是10。
组件默认的边框是一个黑边的矩形,我们可以通过方法
public void setBorder(Border border)
设置组件的边框。该方法的参数是一个接口,必须向该参数传递一个实现接口Border类的实例。如果传递一个null,组件将取消边框。
框架的创建:
Java中,常采用框架(Frame)创建初始界面,即GUI的顶层窗口
AWT库中有一个基于对等体的Frame类。
设置组件是否不透明。isOpaque取false时,组件被设置为透明;isOpaque取true时组件被设置为不透明。方法
public boolean isOpaque()
当组件不透明时该方法返回true,否则返回false。
实验2:课后完成PTA平台题目集:2018秋季西北师范大学面向对象程序设计(Java)练习题集(ch6-ch9)