1.基本思想
简单的说,就是引入了一些相关依赖和一些初始化的配置。主要是基于它的起步依赖和自动配置。
1.1起步依赖
把具备某些功能的坐标打包到一起,简化依赖导入。
比如导入了spring-boot-starter-web这个starter,那么和web相关的jar包都一起自动导入到项目中了,下图可以说明:

1.2自动配置
无需手动配置xml,由starter进行自动配置并管理bean,简化开发过程。
自动配置举例说明:以mybatis-spring-boot-starter为例。
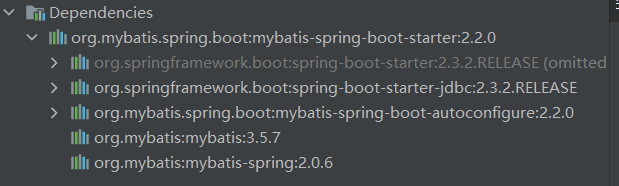
1)当导入了 mybatis-spring-boot-starter后,其导入的相关依赖如下:
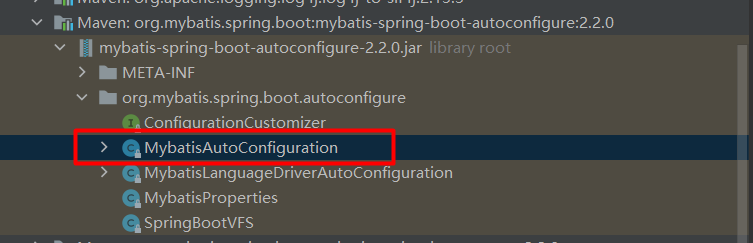
2)可以看到其导入了 mybatis-spring-boot-autoconfigure的jar包,其中有一个自动配置类MybatisAutoConfiguration ,截图:
3)打开此类,部分关键代码如下:
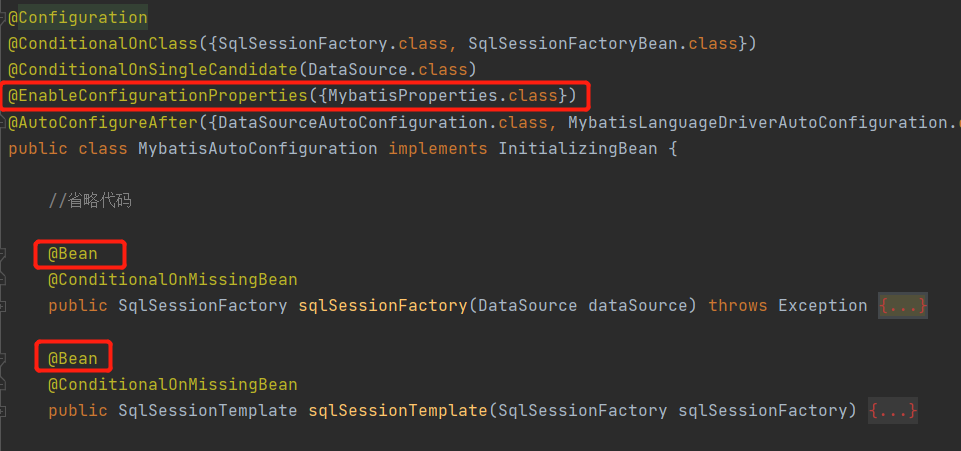
4)对于注解@Configuration和@Bean注解,其结合使用可以替代传统的xml配置文件。@Bean分别把SqlSessionTemplate和SqlSessionFactory注入到Spring容器。
对于注解@EnableConfigurationProperties,其作用是让后面指定的配置属性生效。这里指定的配置属性是MybatisProperties类:
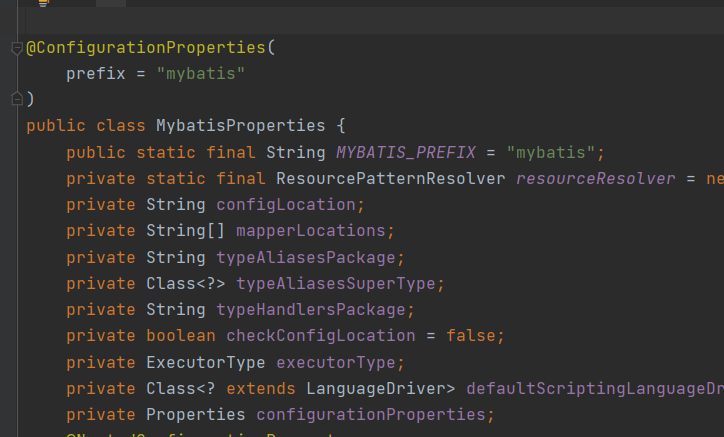
把此类标记是一个配置属性类,prefix指定了前缀,其属性就是配置的可选参数。如配置包的别名:mybatis.type-aliases-package=com.zys.entity
5)在SpringBoot中,其使用了注解@Import,那么它会选择性的读取META-INF/spring.factories配置文件
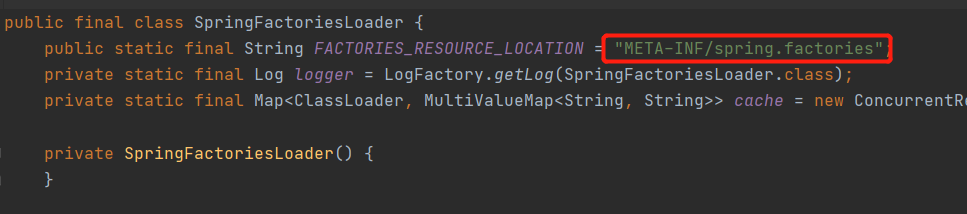
6)如此只要在spring.factories文件配置了,就会根据条件加载尽量,mybatis中自动配置的内容如下:
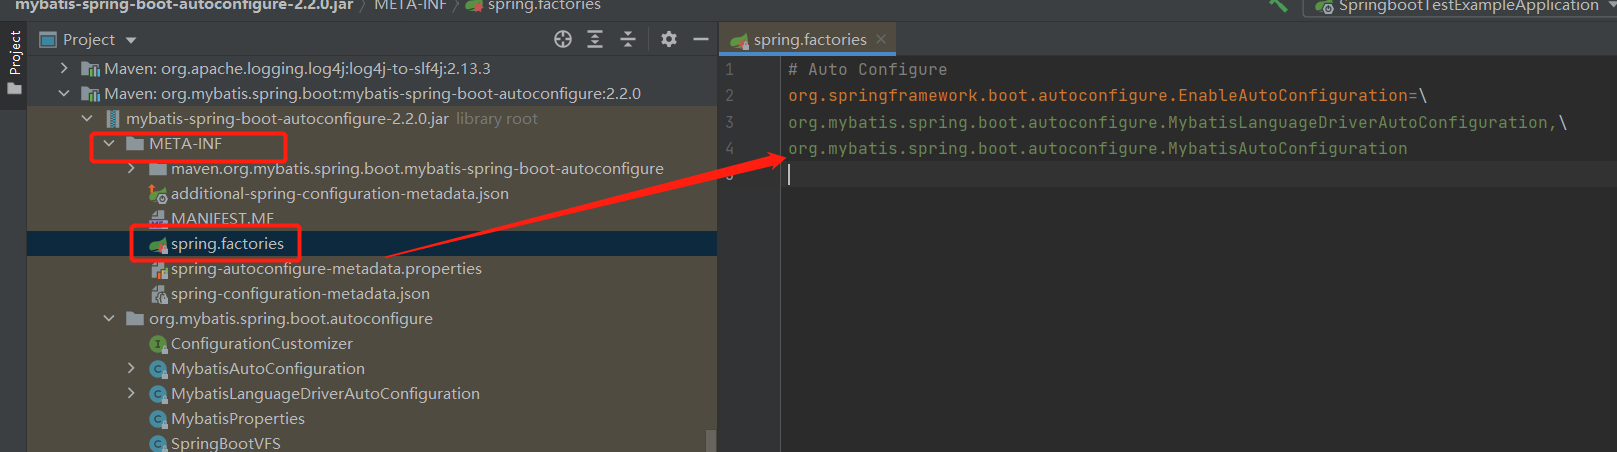
其中key是固定的,value是指定配置类的全路径。
2.命名规范
spring-boot-starter-xxx是SpringBoot官方定义的jar,如spring-bbot-starter-web。
xxx-spring-boot-starter是非官网定义的,如第三方jar包mybatis-spring-boot-starter。
3.自定义starter举例
说明:自定义一个starter,名字是token-redis-spring-boot-starter。
3.1新建项目
创建一个maven的项目,不引入任何的依赖
3.2配置pom
pom.xml添加一下代码
   <parent>
        <groupId>org.springframework.boot</groupId>
        <artifactId>spring-boot-starter-parent</artifactId>
        <version>2.2.2.RELEASE</version>
        <relativePath/> <!-- lookup parent from repository -->
    </parent>

    <dependencies>
        <dependency>
            <groupId>org.springframework.boot</groupId>
            <artifactId>spring-boot-autoconfigure</artifactId>
        </dependency>
        <dependency>
            <groupId>org.springframework.boot</groupId>
            <artifactId>spring-boot-configuration-processor</artifactId>
            <optional>true</optional>
        </dependency>
    </dependencies>
3.3读取并注入配置信息
1)在包util下创建类TokenProperties,此类是一个配置属性类
package com.example.demo.util;

import org.springframework.boot.context.properties.ConfigurationProperties;
//配置前缀,在配置文件中使用时前缀就是hello,如hello.redis-host
@ConfigurationProperties(prefix = "hello")
public class TokenProperties {
    //命名规范必须是驼峰式,解析时会自动将大写转小写,并加-
    private String redisHost="localhost";
    private String redisUsername="root";
    private String redisPassword="123456";

    public String getRedisHost() {
        return redisHost;
    }

    public void setRedisHost(String redisHost) {
        this.redisHost = redisHost;
    }

    public String getRedisUsername() {
        return redisUsername;
    }

    public void setRedisUsername(String redisUsername) {
        this.redisUsername = redisUsername;
    }

    public String getRedisPassword() {
        return redisPassword;
    }

    public void setRedisPassword(String redisPassword) {
        this.redisPassword = redisPassword;
    }
}
2)在包service下创建类TokenService,作为一个服务
package com.example.demo.service;

import com.example.demo.util.TokenProperties;
import org.springframework.beans.factory.annotation.Autowired;

public class TokenService {

    @Autowired
    private TokenProperties tokenProperties;

    public String getToken() {
        //模拟生成token的信息
        return tokenProperties.getRedisHost() + "," + tokenProperties.getRedisUsername() + "," + tokenProperties.getRedisPassword();
    }
}
3)在包config下创建类TokenAutoConfiguration。实现自动配置,把服务注入到Spring中。
package com.example.demo.config;

import com.example.demo.service.TokenService;
import com.example.demo.util.TokenProperties;
import org.springframework.boot.context.properties.EnableConfigurationProperties;
import org.springframework.context.annotation.Bean;
import org.springframework.context.annotation.Configuration;

@Configuration
@EnableConfigurationProperties(TokenProperties.class)
public class TokenAutoConfiguration {

    @Bean
    public TokenService tokenService(){
        return new TokenService();
    }
}
3.4创建spring.factories文件
在资源目录下,创建文件META-INFspring.factories,指定自动配置类的路径
#后面的路径是TokenAutoConfiguration所在的路径
org.springframework.boot.autoconfigure.EnableAutoConfiguration=
  com.example.demo.config.TokenAutoConfiguration
反斜杠表示换行,太长了可以换到下一行。
3.5把项目打成jar发布到maven仓库
1)直接使用idea的maven功能进行打包

2)使用命令打包(二选一)
打开cmd,切换到项目所在的路径,执行mvn clean install,就会将项目打包到本地的maven仓库,就可以使用啦。
如果执行时出现mvn不是内部命令,则需要给maven配置环境变量。配置方式如下:
在环境变量中新建一个变量MAVEN_HOME,值是maven所在的路径,
D:SoftwareDevelopmavenapache-maven-3.3.9
然后在path加添加下面的语句
%MAVEN_HOME%bin
配置完成后重新打开cmd进行打包,成功后就可以正常使用了。
3.6使用自定义的starter
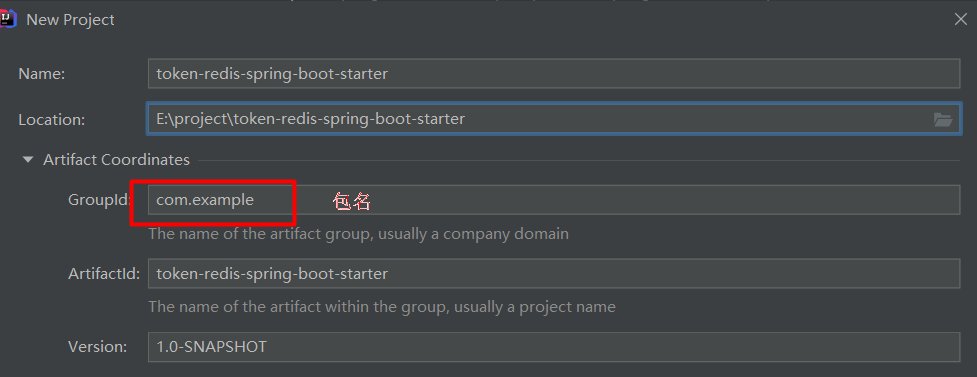
1)新建一个SpringBoot的项目,导入依赖
  <dependency>
       <groupId>com.example</groupId>
       <artifactId>token-redis-spring-boot-starter</artifactId>
       <version>1.0-SNAPSHOT</version>
   </dependency>
由于在创建starter时包名(groupId)是 com.example,故这里也是 com.example,两种要保持一致。
2)在配置文件进行配置来测试, 输入时会自动提示:

配置的内容:
hello.redis-host=127.0.0.1
hello.redis-username=root
hello.redis-password=123456
3)创建TestController类进行测试
package com.example.demo;

import com.example.demo.service.TokenService;
import org.springframework.beans.factory.annotation.Autowired;
import org.springframework.web.bind.annotation.RequestMapping;
import org.springframework.web.bind.annotation.RestController;

@RestController
public class TestController {

    @Autowired
    private TokenService tokenService;

    @RequestMapping("/test")
    public String test(){
       return tokenService.getToken();
    }

}
项目启动后在浏览器输入即可看到相应的信息,如果不配置就使用默认的,如果配置了就使用配置内容。
![]()