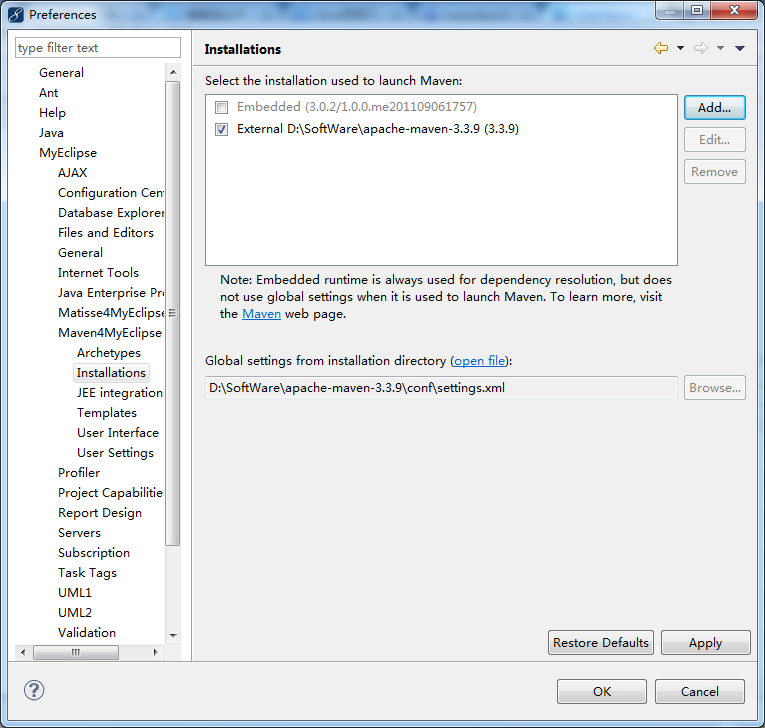
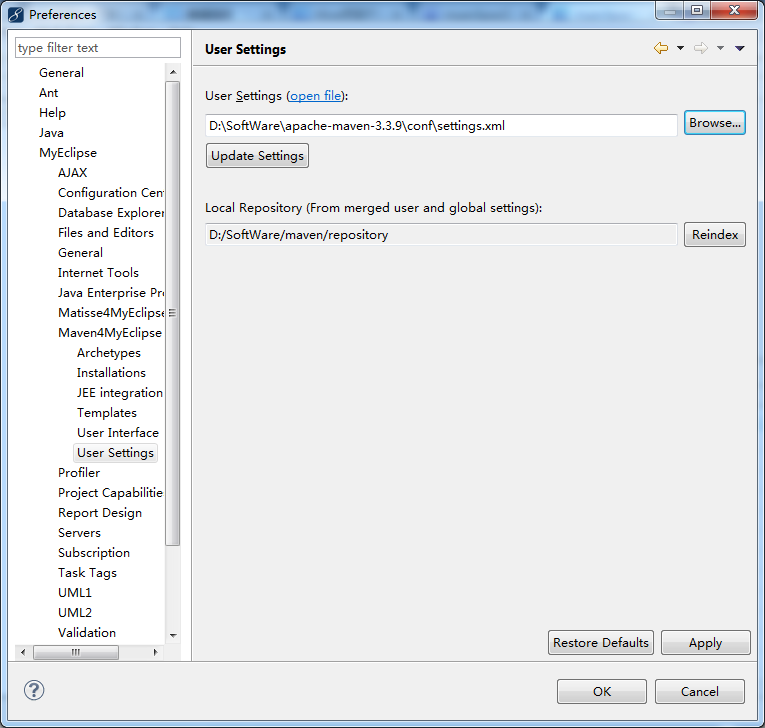
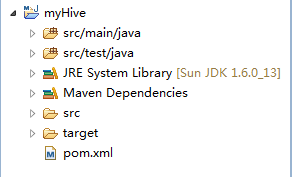
写在前面的话
可详细参考,一定得去看
HBase 开发环境搭建(EclipseMyEclipse + Maven)
Zookeeper项目开发环境搭建(EclipseMyEclipse + Maven)
我这里,相信,能看此博客的朋友,想必是有一定基础的了。我前期写了大量的基础性博文。可以去补下基础。
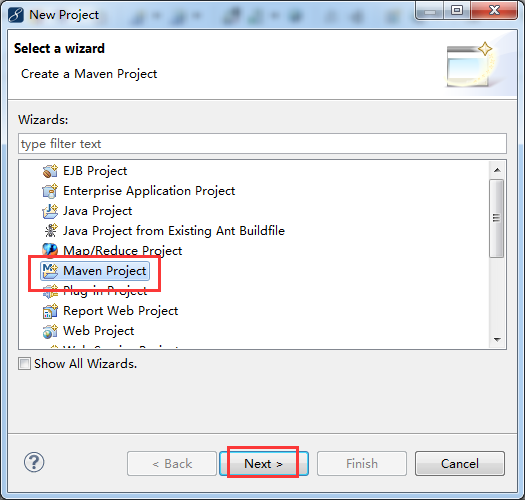
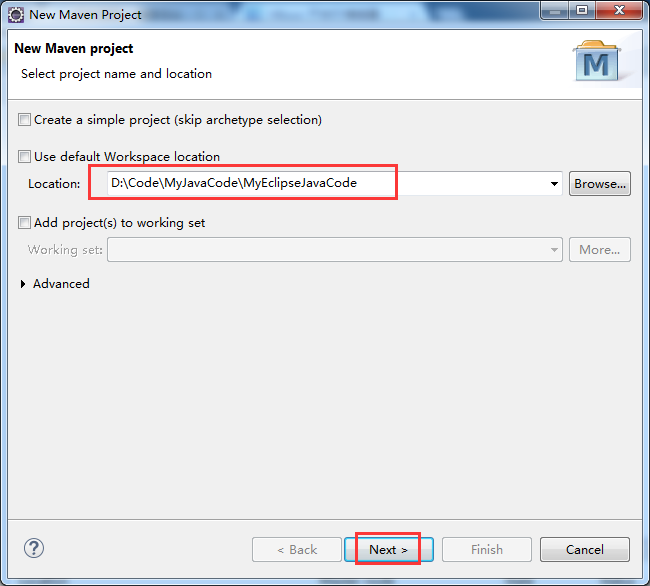
步骤一:File -> New -> Project -> Maven Project
步骤二:自行设置,待会创建的myHBase工程,放在哪个目录下。
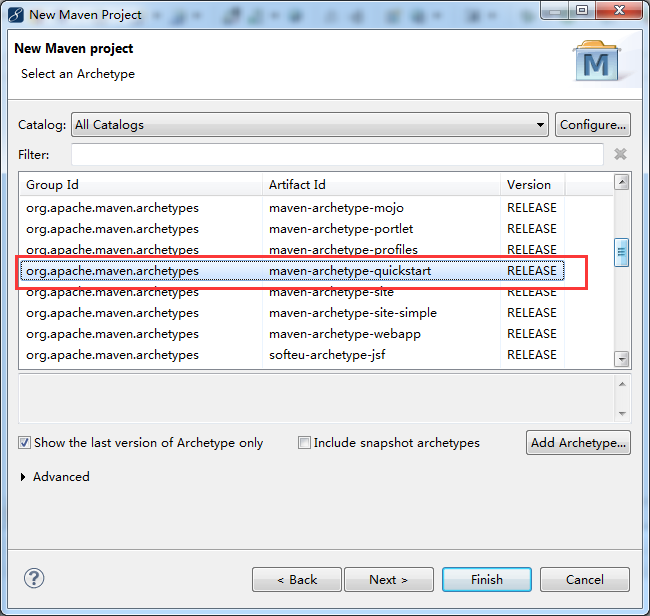
步骤三:
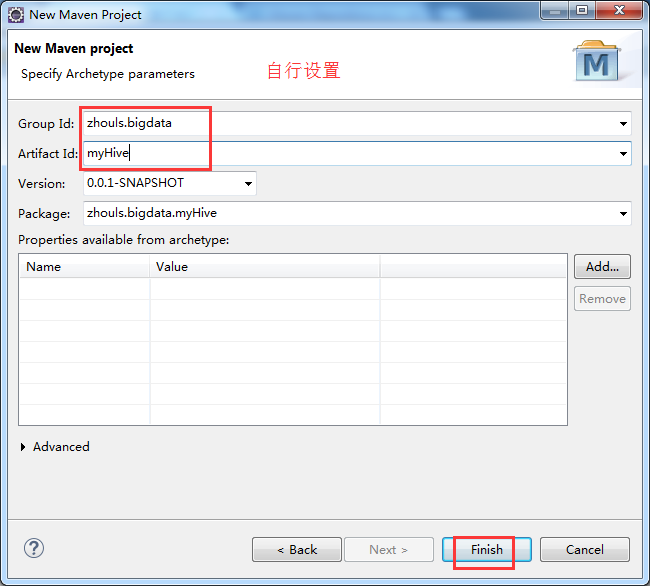
步骤四:自行设置
步骤五:修改jdk
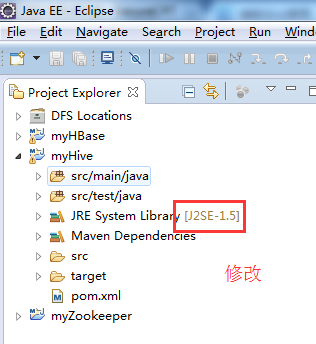
省略,很简单!
步骤六:修改pom.xml配置文件
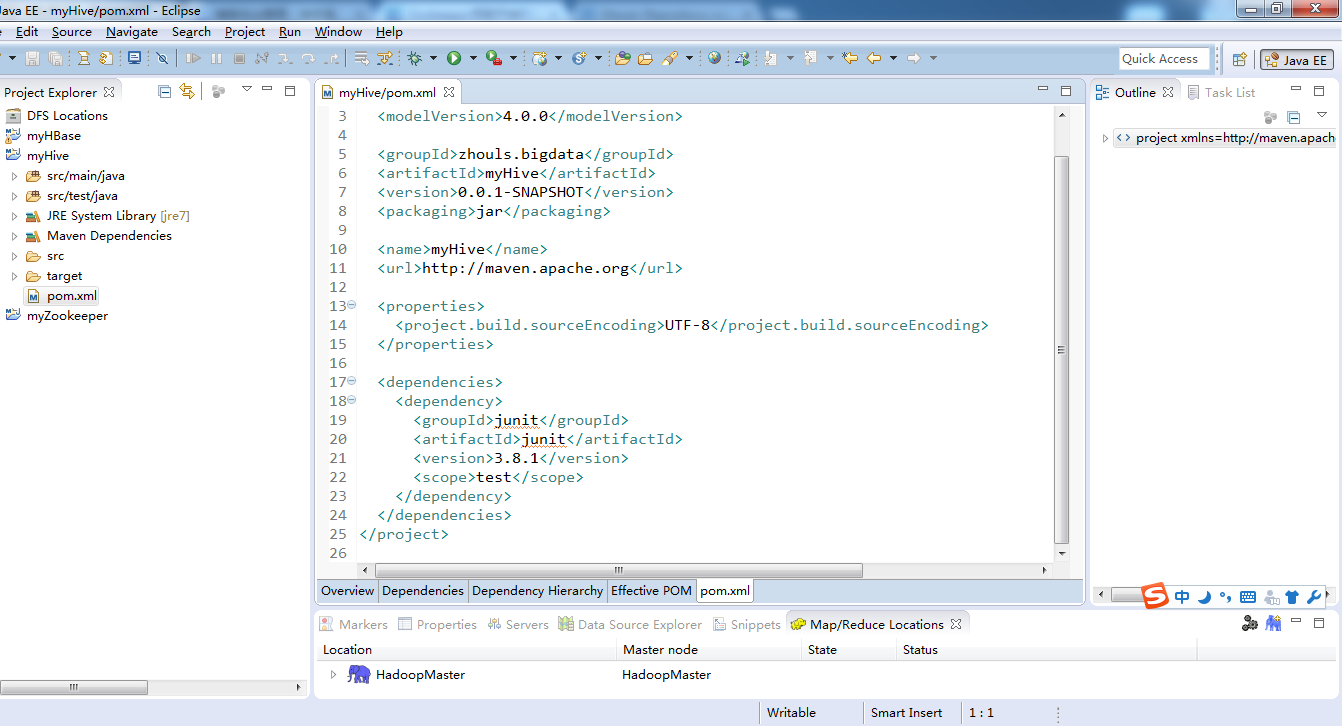
官网Maven的zookeeper配置文件内容:
地址:http://www.mvnrepository.com/search?q=hive
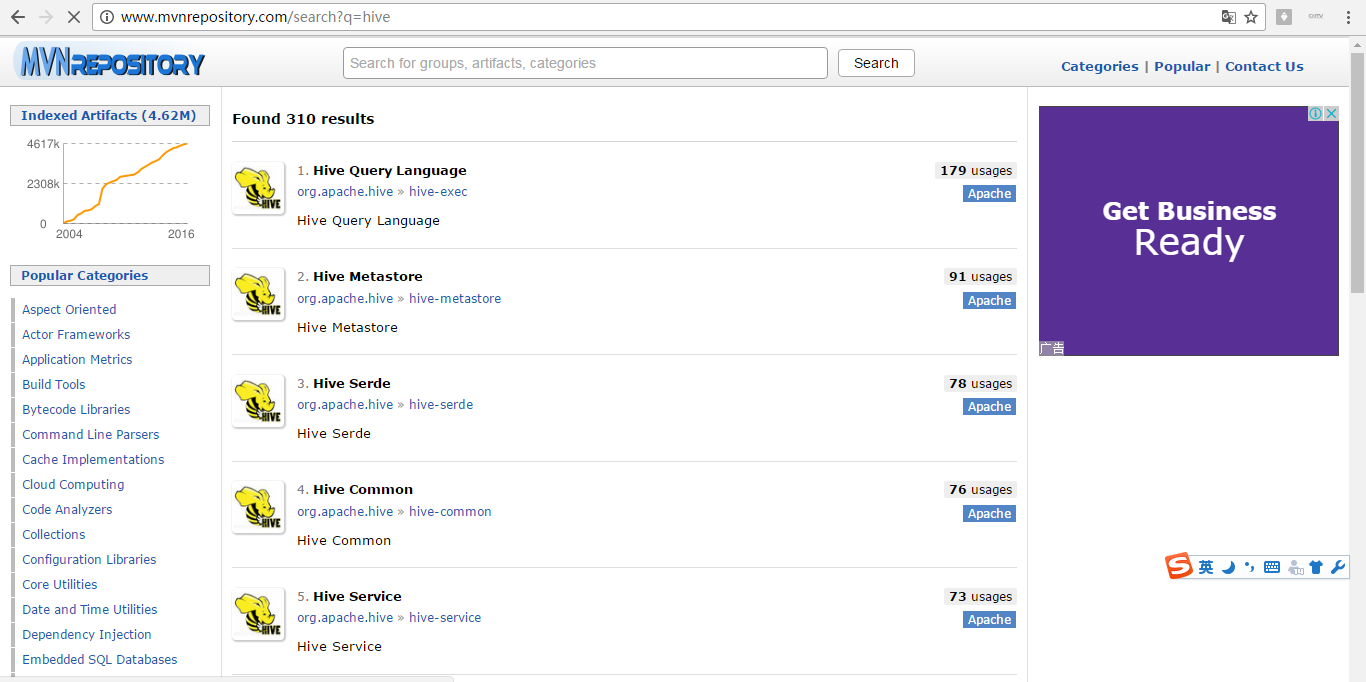

1、
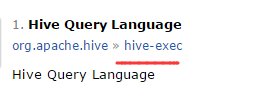
2、

3、

4、

5、

6、

暂时这些吧,以后需要,可以自行再加呢!


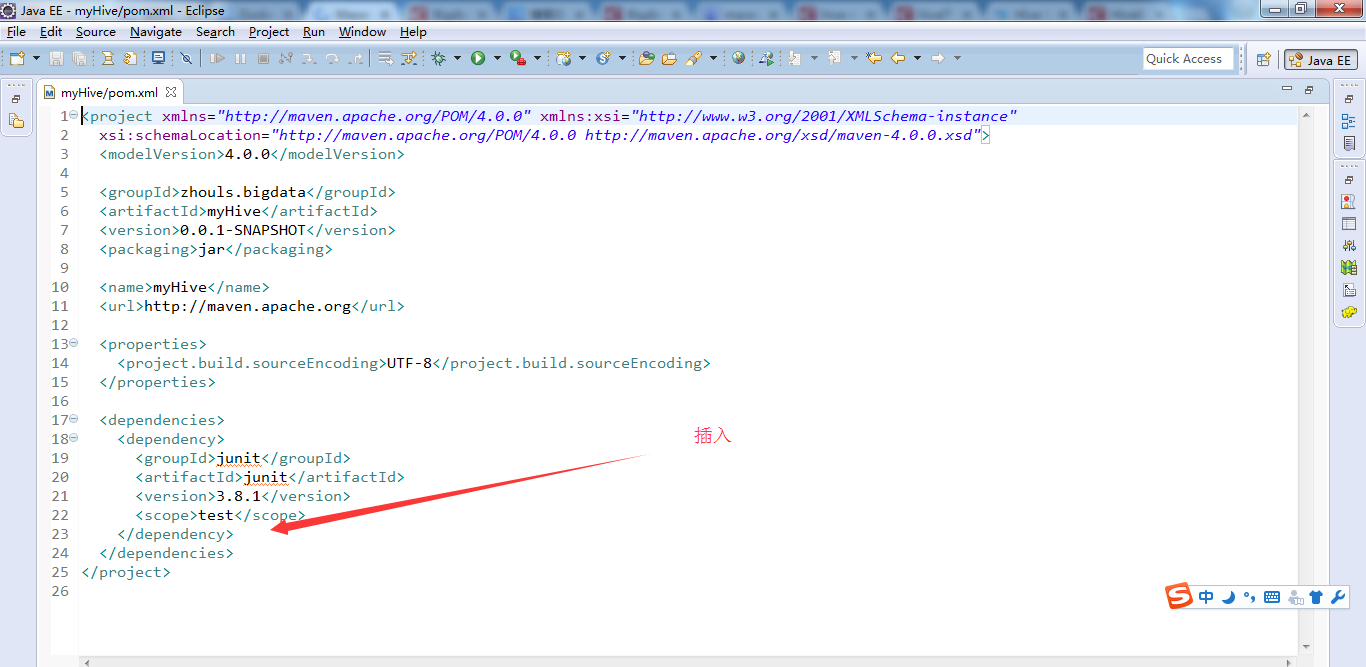
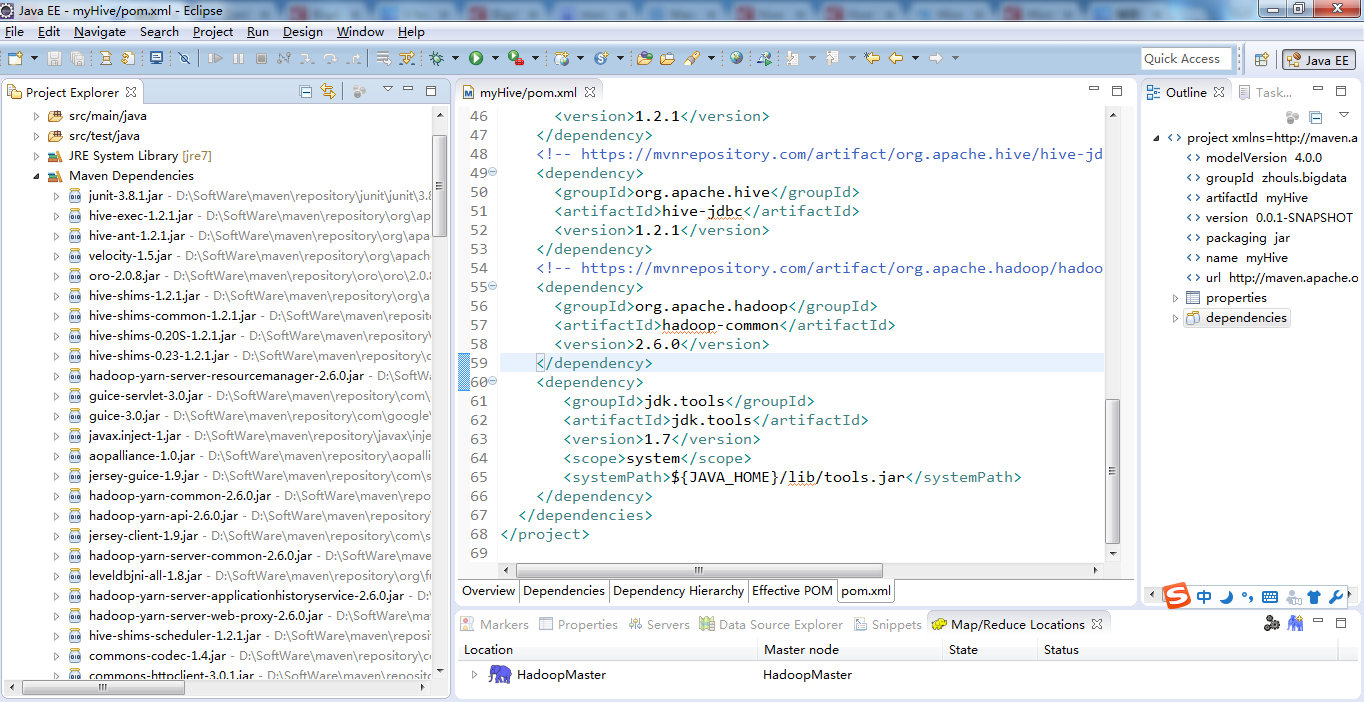
最后的pom.xml配置文件为
<project xmlns="http://maven.apache.org/POM/4.0.0" xmlns:xsi="http://www.w3.org/2001/XMLSchema-instance"
xsi:schemaLocation="http://maven.apache.org/POM/4.0.0 http://maven.apache.org/xsd/maven-4.0.0.xsd">
<modelVersion>4.0.0</modelVersion>
<groupId>zhouls.bigdata</groupId>
<artifactId>myHive</artifactId>
<version>0.0.1-SNAPSHOT</version>
<packaging>jar</packaging>
<name>myHive</name>
<url>http://maven.apache.org</url>
<properties>
<project.build.sourceEncoding>UTF-8</project.build.sourceEncoding>
</properties>
<dependencies>
<dependency>
<groupId>junit</groupId>
<artifactId>junit</artifactId>
<version>3.8.1</version>
<scope>test</scope>
</dependency>
<!-- https://mvnrepository.com/artifact/org.apache.hive/hive-exec -->
<dependency>
<groupId>org.apache.hive</groupId>
<artifactId>hive-exec</artifactId>
<version>1.2.1</version>
</dependency>
<!-- https://mvnrepository.com/artifact/org.apache.hive/hive-metastore -->
<dependency>
<groupId>org.apache.hive</groupId>
<artifactId>hive-metastore</artifactId>
<version>1.2.1</version>
</dependency>
<!-- https://mvnrepository.com/artifact/org.apache.hive/hive-common -->
<dependency>
<groupId>org.apache.hive</groupId>
<artifactId>hive-common</artifactId>
<version>1.2.1</version>
</dependency>
<!-- https://mvnrepository.com/artifact/org.apache.hive/hive-service -->
<dependency>
<groupId>org.apache.hive</groupId>
<artifactId>hive-service</artifactId>
<version>1.2.1</version>
</dependency>
<!-- https://mvnrepository.com/artifact/org.apache.hive/hive-jdbc -->
<dependency>
<groupId>org.apache.hive</groupId>
<artifactId>hive-jdbc</artifactId>
<version>1.2.1</version>
</dependency>
<!-- https://mvnrepository.com/artifact/org.apache.hadoop/hadoop-common -->
<dependency>
<groupId>org.apache.hadoop</groupId>
<artifactId>hadoop-common</artifactId>
<version>2.6.0</version>
</dependency>
<dependency>
<groupId>jdk.tools</groupId>
<artifactId>jdk.tools</artifactId>
<version>1.7</version>
<scope>system</scope>
<systemPath>${JAVA_HOME}/lib/tools.jar</systemPath>
</dependency>
</dependencies>
</project>
当然,这只是初步而已,最简单的,以后可以自行增删。
hive里的JDBC编程入门
在使用JDBC链接Hive之前,首先要开启Hive监听用户的连接。即在运行代码前,得
开启Hive服务的方法如下:
hive --service hiveserver2 >/dev/null 2>/dev/null&
步骤七:这里,给大家,通过一组简单的Hive应用程序实例来向大家展示Hive的某些功能。
类名为HiveTestCase.java
  1 package zhouls.bigdata.myHive;
  2
  3 import java.sql.Connection;
  4 import java.sql.DriverManager;
  5 import java.sql.ResultSet;
  6 import java.sql.SQLException;
  7 import java.sql.Statement;
  8
  9 import org.apache.log4j.Logger;
 10
 11 /**
 12 * Handle data through hive on eclipse
 13 * @author zhouls
 14 * @time 20161112 22:14
 15 */
 16 public class HiveTestCase {
 17     private static String driverName = "org.apache.hadoop.hive.jdbc.HiveDriver";
 18     private static String url = "jdbc:hive2://djt002:10000/default";
 19     private static String user = "";
 20     private static String password = "";
 21     private static String sql = "";
 22     private static ResultSet res;
 23     private static final Logger log = Logger.getLogger(HiveTestCase.class);
 24
 25     public static void main(String[] args) {
 26         try {
 27             Class.forName(driverName); // 注册JDBC驱动
 28 //            Connection conn = DriverManager.getConnection(url, user, password);
 29
 30             //默认使用端口10000, 使用默认数据库,用户名密码默认
 31             Connection conn = DriverManager.getConnection("jdbc:hive2://djt002:10000/default", "", "");
 32 //            Connection conn = DriverManager.getConnection("jdbc:hive://HadoopSlave1:10000/default", "", "");
 33             //当然,若是3节点集群,则HadoopMaster或HadoopSlave1或HadoopSlave2都可以呢。前提是每个都安装了Hive,当然只安装一台就足够了。
 34
 35             //    Statement用来执行SQL语句
 36             Statement stmt = conn.createStatement();
 37
 38             // 创建的表名
 39             String tableName = "testHiveDriverTable";
 40
 41             /** 第一步:存在就先删除 **/
 42             sql = "drop table " + tableName;
 43             stmt.executeQuery(sql);
 44
 45             /** 第二步:不存在就创建 **/
 46             sql = "create table " + tableName +
 47                   "(userid int , " +
 48                   "movieid int," +
 49                   "rating int," +
 50                   "city string," +
 51                   "viewTime string)" +
 52                   "row format delimited " +
 53                   "fields terminated by '	' " +
 54                   "stored as textfile";
 55
 56             // sql = "create table " + tableName + " (key int, value string) row format delimited fields terminated by '	'";
 57             stmt.executeQuery(sql);
 58
 59             // 执行“show tables”操作
 60             sql = "show tables '" + tableName + "'";
 61             System.out.println("Running:" + sql);
 62             res = stmt.executeQuery(sql);
 63             System.out.println("执行“show tables”运行结果:");
 64             if (res.next()) {
 65                 System.out.println(res.getString(1));
 66             }
 67
 68             // 执行“describe table”操作
 69             sql = "describe " + tableName;
 70             System.out.println("Running:" + sql);
 71             res = stmt.executeQuery(sql);
 72             System.out.println("执行“describe table”运行结果:");
 73             while (res.next()) {
 74                 System.out.println(res.getString(1) + "	" + res.getString(2));
 75             }
 76
 77             // 执行“load data into table”操作
 78             String filepath = "/usr/local/data/test2_hive.txt"; //因为是load data local inpath,所以是本地路径
 79             sql = "load data local inpath '" + filepath + "' into table " + tableName;
 80
 81 //            String filepath = "/hive/data/test2_hive.txt"; //因为是load data  inpath,所以是集群路径,即hdfs://djt002/9000/hive/data/下
 82 //            sql = "load data inpath '" + filepath + "' into table " + tableName;
 83
 84             System.out.println("Running:" + sql);
 85             res = stmt.executeQuery(sql);
 86
 87             // 执行“select * query”操作
 88             sql = "select * from " + tableName;
 89             System.out.println("Running:" + sql);
 90             res = stmt.executeQuery(sql);
 91             System.out.println("执行“select * query”运行结果:");
 92             while (res.next()) {
 93                 System.out.println(res.getInt(1) + "	" + res.getString(2));
 94             }
 95
 96             // 执行“regular hive query”操作
 97             sql = "select count(1) from " + tableName;
 98             System.out.println("Running:" + sql);
 99             res = stmt.executeQuery(sql);
100             System.out.println("执行“regular hive query”运行结果:");
101             while (res.next()) {
102                 System.out.println(res.getString(1));
103
104             }
105
106             conn.close();
107             conn = null;
108         } catch (ClassNotFoundException e) {
109             e.printStackTrace();
110             log.error(driverName + " not found!", e);
111             System.exit(1);
112         } catch (SQLException e) {
113             e.printStackTrace();
114             log.error("Connection error!", e);
115             System.exit(1);
116         }
117
118     }
119 }
或者
 1 package com.dajangtai.Hive;
 2
 3
 4
 5
 6 import java.sql.Connection;
 7 import java.sql.DriverManager;
 8 import java.sql.ResultSet;
 9 import java.sql.SQLException;
10 import java.sql.Statement;
11
12
13 public class Demo {
14     private static String driverName = "org.apache.hive.jdbc.HiveDriver";//hive驱动名称
15     private static String url = "jdbc:hive2://djt002:10000/default";//连接hive2服务的连接地址,Hive0.11.0以上版本提供了一个全新的服务:HiveServer2
16     private static String user = "hadoop";//对HDFS有操作权限的用户
17     private static String password = "";//在非安全模式下,指定一个用户运行查询,忽略密码
18     private static String sql = "";
19     private static ResultSet res;
20     public static void main(String[] args) {
21         try {
22             Class.forName(driverName);//加载HiveServer2驱动程序
23             Connection conn = DriverManager.getConnection(url, user, password);//根据URL连接指定的数据库
24             Statement stmt = conn.createStatement();
25
26             //创建的表名
27             String tableName = "testHiveDriverTable";
28
29             /** 第一步:表存在就先删除 **/
30             sql = "drop table " + tableName;
31             stmt.execute(sql);
32
33             /** 第二步:表不存在就创建 **/
34             sql = "create table " + tableName + " (key int, value string)  row format delimited fields terminated by '	' STORED AS TEXTFILE";
35             stmt.execute(sql);
36
37             // 执行“show tables”操作
38             sql = "show tables '" + tableName + "'";
39             res = stmt.executeQuery(sql);
40             if (res.next()) {
41                 System.out.println(res.getString(1));
42             }
43
44             // 执行“describe table”操作
45             sql = "describe " + tableName;
46             res = stmt.executeQuery(sql);
47             while (res.next()) {
48                 System.out.println(res.getString(1) + "	" + res.getString(2));
49             }
50
51             // 执行“load data into table”操作
52             String filepath = "/usr/local/data/djt.txt";//hive服务所在节点的本地文件路径
53             sql = "load data local inpath '" + filepath + "' into table " + tableName;
54             stmt.execute(sql);
55
56             // 执行“select * query”操作
57             sql = "select * from " + tableName;
58             res = stmt.executeQuery(sql);
59             while (res.next()) {
60                 System.out.println(res.getInt(1) + "	" + res.getString(2));
61             }
62
63             // 执行“regular hive query”操作,此查询会转换为MapReduce程序来处理
64             sql = "select count(*) from " + tableName;
65             res = stmt.executeQuery(sql);
66             while (res.next()) {
67                 System.out.println(res.getString(1));
68             }
69             conn.close();
70             conn = null;
71         } catch (ClassNotFoundException e) {
72             e.printStackTrace();
73             System.exit(1);
74         } catch (SQLException e) {
75             e.printStackTrace();
76             System.exit(1);
77         }
78     }
79 }
若是MyEclipse里,需要注意一下
MyEclipse *的安装步骤和破解(32位和64位皆适用)
