上一篇是非注解开发的springmvc登录示例,这一篇使用注解开发
环境:
JDK1.8
Tomcat:8.0
win7
操作步骤和上一篇大同小异:
第一步:创建web工程,并把相应的jar导入到'WEB-INF/lib"目录下
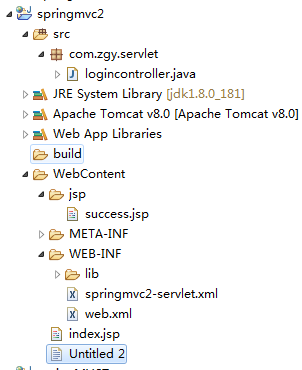
工程目录如下:
index.jsp代码:
 1 <%@ page language="java" contentType="text/html; charset=UTF-8"
 2     pageEncoding="UTF-8"%>
 3 <!DOCTYPE html>
 4 <html>
 5 <head>
 6 <meta charset="UTF-8">
 7 <title>com.zgy.index</title>
 8 </head>
 9 <body>
10     <form action="login.do" >
11         <h1>欢迎来到登录界面</h1>
12         帐号:<input type="text" name="userName"><br><br>
13         密码:<input type="password" name="passWord"><br><br>
14         <input type="submit" name="button" value="登录">
15     </form>
16 </body>
17 </html>
第二步:配置web.xml
<?xml version="1.0" encoding="UTF-8"?>
<web-app xmlns:xsi="http://www.w3.org/2001/XMLSchema-instance" xmlns="http://xmlns.jcp.org/xml/ns/javaee" xsi:schemaLocation="http://xmlns.jcp.org/xml/ns/javaee http://xmlns.jcp.org/xml/ns/javaee/web-app_3_1.xsd" id="WebApp_ID" version="3.1">
  <display-name>springmvc2</display-name>
  <welcome-file-list>

    <welcome-file>index.jsp</welcome-file>
  </welcome-file-list>

  <servlet>
      <servlet-name>springmvc2</servlet-name>
      <servlet-class>org.springframework.web.servlet.DispatcherServlet</servlet-class>
  </servlet>
  <servlet-mapping>
      <servlet-name>springmvc2</servlet-name>
      <url-pattern>*.do</url-pattern>
  </servlet-mapping>
</web-app>
第三步:配置springmvc2-servlet.xml
 1 <?xml version="1.0" encoding="UTF-8"?>
 2 <beans xmlns="http://www.springframework.org/schema/beans"
 3      xmlns:mvc="http://www.springframework.org/schema/mvc"
 4     xmlns:xsi="http://www.w3.org/2001/XMLSchema-instance" xmlns:p="http://www.springframework.org/schema/p"
 5     xmlns:context="http://www.springframework.org/schema/context"
 6     xsi:schemaLocation="http://www.springframework.org/schema/beans http://www.springframework.org/schema/beans/spring-beans-4.2.xsd
 7             http://www.springframework.org/schema/context http://www.springframework.org/schema/context/spring-context-4.2.xsd
 8             http://www.springframework.org/schema/mvc http://www.springframework.org/schema/mvc/spring-mvc-4.2.xsd
 9             http://www.springframework.org/schema/util http://www.springframework.org/schema/util/spring-util-4.2.xsd">
10     <!-- 注解驱动 -->
11     <mvc:annotation-driven/>
12
13     <!-- springmvc2的扫描驱动 -->
14     <context:component-scan base-package="com.zgy.servlet"></context:component-scan>
15
16     <!-- 试图解析器 -->
17     <bean class="org.springframework.web.servlet.view.InternalResourceViewResolver">
18         <property name="prefix" value="/jsp/"></property>
19         <property name="suffix" value=".jsp"></property>
20     </bean>
21
22 </beans>
第四步:编写控制器类
 1 package com.zgy.servlet;
 2
 3 import org.springframework.stereotype.Controller;
 4 import org.springframework.web.bind.annotation.RequestMapping;
 5
 6 @Controller
 7 public class logincontroller {
 8
 9         @RequestMapping(value="login.do")
10         public  String login() {
11
12             System.out.println("-----用户登录------");
13
14             return "success";
15
16         }
17 }