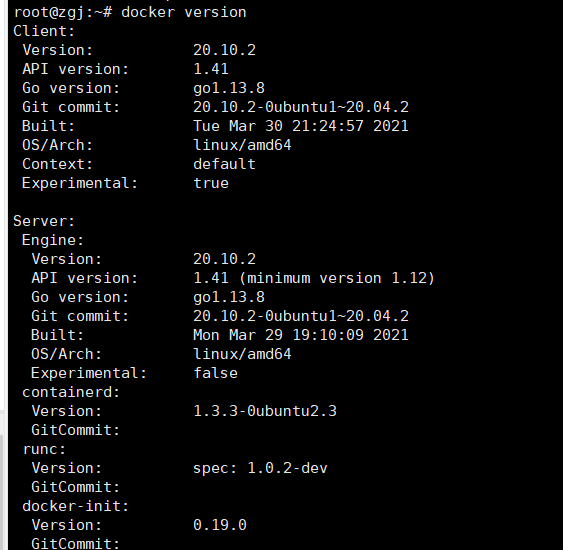
为了测试华为的KubeEdge,需要搭建K8s环境。
环境:
Ubuntu20.04
Docker版本

(一)安装步骤
参考:https://zhuanlan.zhihu.com/p/138554103
1,确保禁止掉swap分区
sudo swapoff -a

#修改/etc/fstab,注释掉swap那行,持久化生效
sudo vi /etc/fstab
2,确保时区和时间正确
sudo timedatectl set-timezone Asia/Shanghai

#修改后,如果想使得系统日志的时间戳也立即生效,则:
sudo systemctl restart rsyslog
3、确保不休眠
sudo systemctl mask sleep.target suspend.target hibernate.target hybrid-sleep.target
4、设置iptables可以看到bridged traffic
先确认Linux内核加载了br_netfilter模块:
lsmod | grep br_netfilter
确保sysctl配置中net.bridge.bridge-nf-call-iptables的值设置为了1。
cat <<EOF | sudo tee /etc/sysctl.d/k8s.conf
net.bridge.bridge-nf-call-ip6tables = 1
net.bridge.bridge-nf-call-iptables = 1
EOF
sudo sysctl --system
5、设置rp_filter的值
#修改/etc/sysctl.d/10-network-security.conf
sudo vi /etc/sysctl.d/10-network-security.conf

#将下面两个参数的值从2修改为1
#net.ipv4.conf.default.rp_filter=1
#net.ipv4.conf.all.rp_filter=1

#然后使之生效
sudo sysctl --system
6、开始安装K8s master
1,安装kubeadm kubeadm kubectl
sudo apt-get update && sudo apt-get install -y ca-certificates curl software-properties-common apt-transport-https curl
 curl -s https://mirrors.aliyun.com/kubernetes/apt/doc/apt-key.gpg | sudo apt-key add -

sudo tee /etc/apt/sources.list.d/kubernetes.list <<EOF
deb https://mirrors.aliyun.com/kubernetes/apt/ kubernetes-xenial main
EOF

sudo apt-get update
sudo apt-get install -y kubelet kubeadm kubectl
sudo apt-mark hold kubelet kubeadm kubectl
2、初始化,这里问题很多,请参考(二)
sudo kubeadm init --pod-network-cidr 172.16.0.0/16
    --image-repository registry.cn-hangzhou.aliyuncs.com/google_containers
3、安装calico插件
下载calico的k8s yaml文件,修改里面的CALICO_IPV4POOL_CIDR的值来避免和宿主机所在的局域网段冲突(gemfield就是把原始的192.168.0.0/16 修改成了172.16.0.0/16):
#下载 https://docs.projectcalico.org/v3.19/manifests/calico.yaml
#修改CALICO_IPV4POOL_CIDR,然后
kubectl apply -f calico.yaml
如果提示安装失败,去https://docs.projectcalico.org/releases 下载最新版,安装,不然不会Ready.
查看状态
kubectl get pods -n kube-system -o widekubectl get pods -n kube-system -o wide
这是从新apply的初始化过程状态

(二)问题处理
1、isn't running or healthy
[wait-control-plane] Waiting for the kubelet to boot up the control plane as static Pods from directory "/etc/kubernetes/manifests". This can take up to 4m0s
[kubelet-check] Initial timeout of 40s passed.
[kubelet-check] It seems like the kubelet isn't running or healthy.
[kubelet-check] The HTTP call equal to 'curl -sSL http://localhost:10248/healthz' failed with error: Get "http://localhost:10248/healthz": dial tcp 127.0.0.1:10248: connect: connection refused.
解决办法:
1.1、关闭Swap
1.2、做如下处理
I faced similar issue recently. The problem was cgroup driver. Kubernetes cgroup driver was set to systems but docker was set to systemd. So I created '/etc/docker/daemon.json' and added below:

{
"exec-opts": ["native.cgroupdriver=systemd"]
}
Then

 systemctl daemon-reload
 systemctl restart docker
 systemctl restart kubelet
Run kubeadm init or kubeadm join again.
2、无法下载coredns处理
docker pull coredns/coredns
kubeadm config images list --config new.yaml
docker images
docker tag coredns/coredns:latest registry.cn-hangzhou.aliyuncs.com/google_containers/coredns/coredns:v1.8.4
docker rmi coredns/coredns:latest
3、The connection to the server localhost:8080 was refused - did you specify the right host or port?
echo "export KUBECONFIG=/etc/kubernetes/admin.conf" >> /etc/profile
source /etc/profile
4、Node节点:Config not found: /etc/kubernetes/admin.conf
mv /etc/kubernetes/kubelet.conf /etc/kubernetes/admin.conf
5、节点虚拟机提示nodename exist
error execution phase kubelet-start: a Node with name "zgj" and status "Ready" already exists in the cluster. You must delete the existing Node or change the name of this new joining Node
hostnamectl set-hostname zgj1
因为直接复制的虚拟机,所以名字重复,这样从新加入即可。
6、reset从新安装后
Get "https://xx.xx.xx.xx:6443/version?timeout=32s": x509: certificate signed by unknown authority
mkdir -p $HOME/.kube
sudo cp -i /etc/kubernetes/admin.conf $HOME/.kube/config
sudo chown $(id -u):$(id -g) $HOME/.kube/config
(三)复制一个虚拟机,然后重命名hostname,先kubeadm reset,然后执行kubeadm最后生成的join语句。
kubeadm join 192.168.3.67:6443 --token xxxx.xxxxxxxxx
	--discovery-token-ca-cert-hash sha256:xxxxxxxxxxxxxxxxxxxxxxxxxxxx


加入Node后的样子

应该基本上成功了。