eolinker 安装部署
基础环境安装
yum -y install gcc automake autoconf libtool make gcc-c++ glibc libxslt-devel libjpeg libjpeg-devel libpng libpng-devel freetype freetype-devel libxml2 libxml2-devel zlib zlib-devel glibc glibc-devel glib2 glib2-devel bzip2 bzip2-devel ncurses ncurses-devel curl curl-devel e2fsprogs e2fsprogs-devel krb5-devel libidn libidn-devel openssl openssl-devel pcre pcre-devel libmcrypt libmcrypt-devel cmake
一、nginx安装
groupadd www
useradd -g www www
cd /data/software/
tar xf nginx-1.8.1.tar.gz
cd nginx-1.8.1
./configure --prefix=/data/opt/nginx --sbin-path=/data/opt/nginx/sbin/nginx --user=www --group=www --with-http_ssl_module --with-http_gzip_static_module --with-http_stub_status_module --without-http_userid_module --without-http_auth_basic_module --without-http_autoindex_module
make && make install
vim /etc/init.d/nginx
#! /bin/bash
# chkconfig: 35 85 15
# description: Nginx is an HTTP(S) server, HTTP(S) reverse
set -e
PATH=/usr/local/sbin:/usr/local/bin:/sbin:/bin:/usr/sbin:/usr/bin
DESC="nginx daemon"
NAME=nginx
DAEMON=/usr/sbin/$NAME  #(这里是nginx安装是 --sbin-path指定的路径)
SCRIPTNAME=/etc/init.d/$NAME
test -x $DAEMON || exit 0
d_start(){
    $DAEMON || echo -n " already running"
}
d_stop() {
    $DAEMON -s quit || echo -n " not running"
}
d_reload() {
    $DAEMON -s reload || echo -n " counld not reload"
}
case "$1" in
start)
    echo -n "Starting $DESC:$NAME"
    d_start
    echo "."
;;
stop)
    echo -n "Stopping $DESC:$NAME"
    d_stop
    echo "."
;;
reload)
    echo -n "Reloading $DESC configuration..."
    d_reload
    echo "reloaded."
;;
restart)
    echo -n "Restarting $DESC: $NAME"
    d_stop
    sleep 2
    d_start
    echo "."
;;
*)
    echo "Usage: $SCRIPTNAME {start|stop|restart|reload}" >&2
    exit 3
;;
esac
exit 0
chmod +x /etc/init.d/nginx
chkconfig --add nginx
service nginx start
更改nginx配置
vim /data/opt/nginx/conf/nginx.conf
# 更改启动用户与组
user  www www;
# 增加index.php
server {
        listen       8008;
        server_name  localhost;
        index  index.php index.html index.htm;

# 取消注释即可
location ~ .php$ {
            root           html;
            fastcgi_pass   127.0.0.1:9000;
            fastcgi_index  index.php;
            fastcgi_param  SCRIPT_FILENAME   $document_root$fastcgi_script_name;
            include        fastcgi_params;
}
service nginx restart
二、配置php
cd /data/software/
# 下载php包
wget http://cn2.php.net/get/php-5.6.13.tar.gz/from/this/mirror
# 解压php包
tar xf mirror
cd php-5.6.13/
./configure --prefix=/data/opt/php5.6.13 --with-curl --with-bz2 --with-zlib --with-mhash --with-pcre-regex --with-mysqli=mysqlnd --with-mysql=mysqlnd --with-gd --with-jpeg-dir --with-png-dir --with-openssl --with-pdo-mysql --with-libxml-dir --with-freetype-dir --with-iconv --enable-opcache --enable-bcmath  --enable-ftp --enable-shmop --enable-fpm --enable-sockets --enable-sysvsem --enable-sysvshm --enable-pcntl --enable-mbregex --enable-calendar --enable-zip --enable-mbstring --enable-pdo
make && make install
cd /data/software/php-5.6.13
# php的配置文件
cp php.ini-development /data/opt/php5.6.13/etc/php.ini
# php-fpm启动文件
cp sapi/fpm/init.d.php-fpm /data/opt/php5.6.13/sbin/
# 加载执行权限
chmod a+x /data/opt/php5.6.13/sbin/
chmod a+x /data/opt/php5.6.13/sbin/init.d.php-fpm
cd /data/opt/php5.6.13/etc
# php-fpm的配置文件
cp php-fpm.conf.default php-fpm.conf
cd /data/opt/php5.6.13/sbin/
#  启动php-fpm
./init.d.php-fpm start
# 查看是否启动成功
lsof  -i:9000
[root@test etc]# lsof -i:9000
COMMAND   PID   USER   FD   TYPE     DEVICE SIZE/OFF NODE NAME
php-fpm 22309   root    7u  IPv4 1623825525      0t0  TCP localhost:cslistener (LISTEN)
php-fpm 22310 nobody    0u  IPv4 1623825525      0t0  TCP localhost:cslistener (LISTEN)
php-fpm 22311 nobody    0u  IPv4 1623825525      0t0  TCP localhost:cslistener (LISTEN)
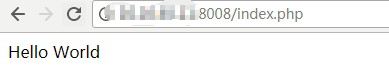
检验nignx对php的支持,是否正常
echo "<?php echo '<p>Hello World</p>'; ?>"
 > /data/opt/nginx/html/index.php
三、mysql配置
cd /data/software/
# 解压数据包
tar xf mysql-5.6.30.tar.gz
cd mysql-5.6.30
cmake -DCMAKE_INSTALL_PREFIX=/data/opt/mysql -DMYSQL_UNIX_ADDR=/data/opt/mysql/mysql.sock
-DDEFAULT_CHARSET=utf8 -DDEFAULT_COLLATION=utf8_general_ci -DWITH_INNOBASE_STORAGE_ENGINE=1 -DWITH_MYISAM_STORAGE_ENGINE=1 -DWITH_MEMORY_STORAGE_ENGINE=1 -DWITH_PARTITION_STORAGE_ENGINE=1 -DMYSQL_DATADIR=/data/opt/mysqldb -DMYSQL_TCP_PORT=3306 -DENABLE_DOWNLOADS=1 -DEXTRA_CHARSETS=all -DENABLED_LOCAL_INFILE=1 -DWITH_READLINE=1
make && make install
# 创建mysql数据目录
mkdir -p /data/opt/mysql
chown -R mysql:mysql /data/opt/mysql
# 备份数据目录
cd /data/opt/mysqldb
chown -R mysql:mysql .
# 初始化mysql
./scripts/mysql_install_db -user=mysql -datadir=/data/opt/mysqldb/
# mysql 配置文件
cp support-files/my-default.cnf /etc/my.cnf
# mysql启动文件
cp support-files/mysql.server /etc/init.d/mysqld
service mysqld restart
# 添加到开机启动
chkconfig 35 mysqld on
chkconfig --level 35 mysqld on
vim /etc/profile

MYSQL_HOME=/data/opt/mysql
PATH=$MYSQL_HOME/bin:$PATH
export PATH MYSQL_HOME

source /etc/profile
创建mysql数据库,及相关用户权限
create database eolinker_os;
create user eolinker_user by identified 'eolinker_pwd';
grant all privileges on eolinker_os."*" to eolinker_user@"%" by identified "eolinker_pwd";
flush privileges;
select User,Password,Host from mysql.user;
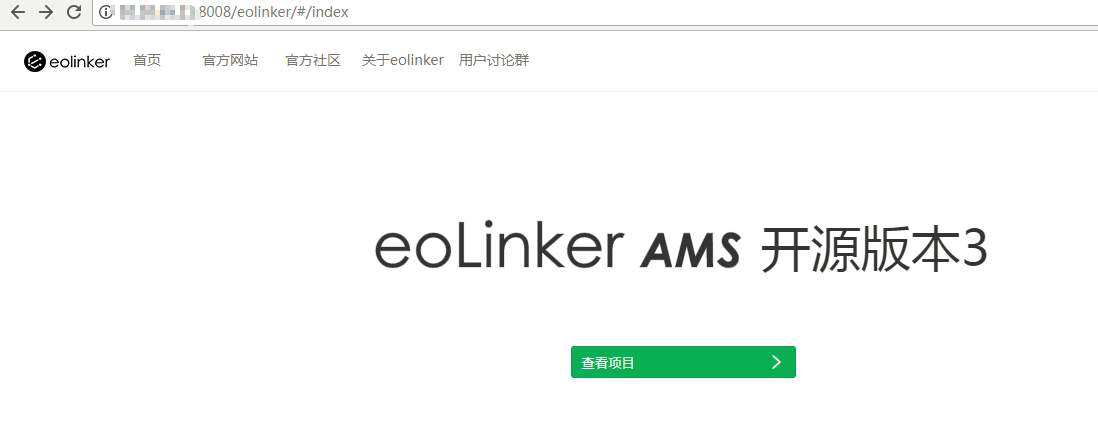
四、eolinker配置
# 解压eolinker包
unzip -d eolinker eolinker_os_3.2.4.zip
# copy到nginx目录
mv eolinker /data/opt/nginx/html/
# 设置权限
chmod -R 777 html/
五、测试
http://IP地址:8008/eolinker