上传图片
(1)action:图片上传到后台的API地址,不能写相对路径,应该填写完整的绝对路径【地址为后台地址】
<el-upload action="http://127.0.0.1:8888/api/private/v1/upload"></el-upload>
(2)headers:设置上传的请求头部【因为内部是没有使用axios,所以要另外配置请求头】
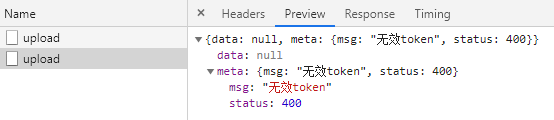
- 不使用headers携带token请求头会提示无效的,前台界面虽然有显示图片,但不是真正的上传图片到后台
- headers中携带token请求头
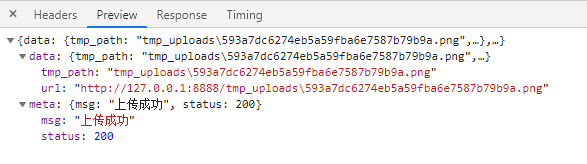
 headerObj: {
      Authorization: window.sessionStorage.getItem('token')
 },
(3)on-success:文件上传成功时的钩子; response:服务器返回的数据; file:当前的文件信息; fileList:已经上传组件的文件列表
<el-upload :on-success="handleSuccess"></el-upload>

data() {
   return {// 添加商品的表单数据对象
   pics:[]
   }
},

handleSuccess(response, file, fileList){
  if(response.meta.status === 200){
    this.pics.push(response.data.tmp_path)
  }
}
(4)on-remove:文件列表移除文件时的钩子; file:当前的文件信息;
<el-upload :on-remove="handleRemove">

data() {
   return {// 添加商品的表单数据对象
   pics:[]
   }
},

// 处理移除图片的操作
handleRemove(file) {
  // 1. 获取将要删除的图片的临时路径
  const filePath = file.response.data.tmp_path
  // 2. 从 pics 数组中,找到这个图片对应的索引值
  const index = this.pics.findIndex(item => item.pic === filePath)
  // 3. 调用数组的 splice 方法,把图片信息对象,从 pics 数组中移除
  this.pics.splice(index, 1)
},
(5)on-preview:图片预览事件; file:当前的文件信息;
<el-upload :on-preview="handlePreview">
<el-dialog :visible.sync="dialogVisible">
  <img width="100%" :src="previewPath" alt="" />
</el-dialog>

data() {
    return {// 添加商品的表单数据对象
    // 图片的预览路径
      previewPath: '',
    // 图片预览的弹框
      previewVisible: false
    }
},

// 处理图片预览效果
handlePreview(file) {
  this.previewPath = file.response.data.url
  this.previewVisible = true
},
(6)list-type:文件列表的类型
html代码:
<el-form :model="addForm" ref="addFormRef">
<el-upload :action="uploadURL" :on-preview="handlePreview" :on-remove="handleRemove" list-type="picture" :headers="headerObj" :on-success="handleSuccess">
<el-button size="small" type="primary">点击上传</el-button>
</el-upload>
</el-form>

<!-- 图片预览 -->
<el-dialog title="图片预览" :visible.sync="previewVisible" width="50%">
<img :src="previewPath" alt="" class="previewImg">
</el-dialog>
js:
export default {
  data() {
    return {// 添加商品的表单数据对象
      addForm: {
    // 图片的数组
        pics: [],
      },
    // 上传图片的URL地址
      uploadURL: 'http://127.0.0.1:8888/api/private/v1/upload',
      // 图片上传组件的headers请求头对象
      headerObj: {
        Authorization: window.sessionStorage.getItem('token')
      },
    // 图片的预览路径
      previewPath: '',
    // 图片预览的弹框
      previewVisible: false
    }
  },
  created() {
    this.getCateList()
  },
  methods: {
  // 处理图片预览效果
    handlePreview(file) {
      this.previewPath = file.response.data.url
      this.previewVisible = true
    },
    // 处理移除图片的操作
    handleRemove(file) {
      // 1. 获取将要删除的图片的临时路径
      const filePath = file.response.data.tmp_path
      // 2. 从 pics 数组中,找到这个图片对应的索引值
      const i = this.addForm.pics.findIndex(x => x.pic === filePath)
      // 3. 调用数组的 splice 方法,把图片信息对象,从 pics 数组中移除
      this.addForm.pics.splice(i, 1)
    },
    // 监听图片上传成功的事件
    handleSuccess(response) {
      // 1. 拼接得到一个图片信息对象(后台需要返回一个图片信息对象)
      const picInfo = { pic: response.data.tmp_path }
      // 2. 将图片信息对象,push 到pics数组中
      this.addForm.pics.push(picInfo)
    },
  }
}