背景:虽然有GitHub、GitLab这样强大的Git仓库,但是涉及私有Git库要收费,所以自己动手搭建免费的用用
环境:windows 7 旗舰版、JDK 1.8、IDEA 2017
-------------------------------------------------------------------------------------------------------------------------------------------
1、Gitblit服务器搭建
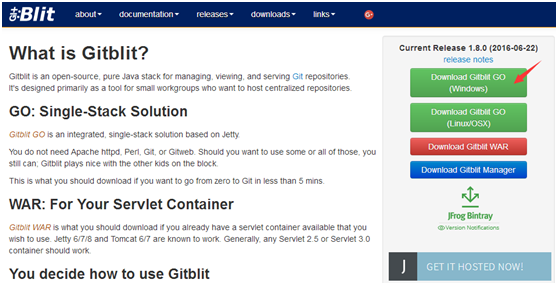
1.1、下载最新版本的Gitblit,Gitblit官方网站:http://www.gitblit.com/,本文使用的是1.8.0版本
1.2、下载完毕后解压至D:Java下,改名为gitblit(只是个人习惯,Java开发相关的东西都放在这儿),观察一下gitblit的目录结构,红色箭头标记的是将要修改和操作的部分

1.3、在data目录中将defaults.properties文件复制一份,改名为my.properties
1.4、打开gitblit.properties文件,注释掉include = defaults.properties这句,添加include = my.properties这句,说明使用的是my.properties配置文件


1.5、找到server.httpPort,设定http协议的端口号: server.httpPort = 10101
1.6、找到server.httpBindInterface,设定服务器的IP地址(本机IP地址):server.httpBindInterface = 192.168.20.7
1.7、找到server.httpsBindInterface,设定为localhost:server.httpsBindInterface = localhost

1.8、在D:Javagitblit目录同时按下shift+鼠标右键,找到"在此处打开命令窗口",输入gitblit.cmd
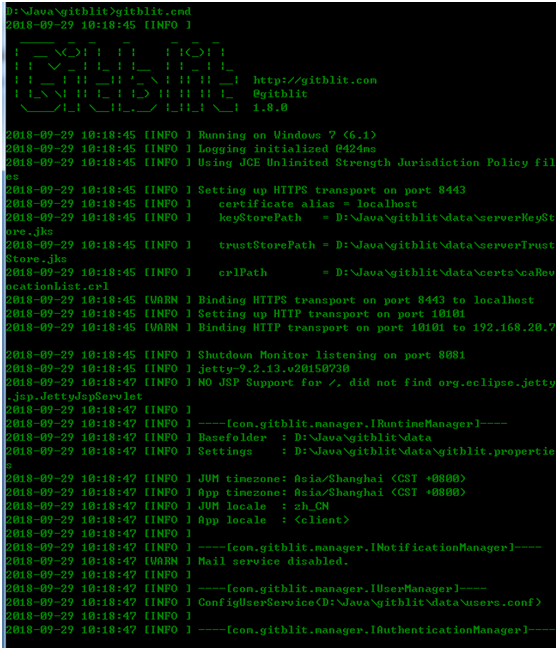
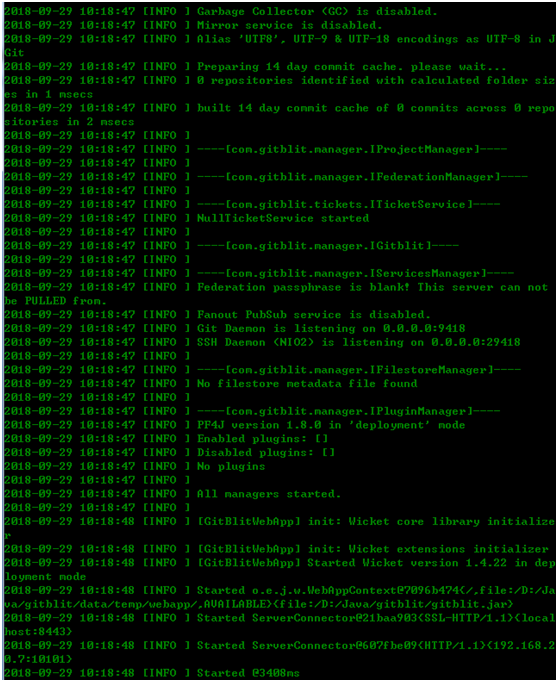
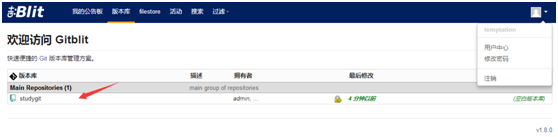
1.9、打开浏览器,在地址栏输入:https://localhost:8443/ 或 http://192.168.20.7:10101/,如果出现下图,说明服务器已经搭建完毕。默认账号和密码均为 admin

-------------------------------------------------------------------------------------------------------------------------------------------
2、gitblit创建用户、版本库,并分配访问权限
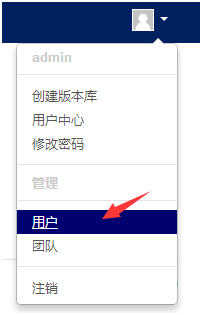
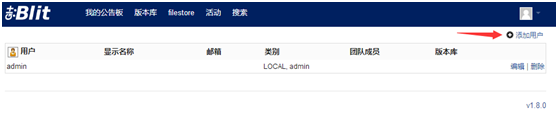
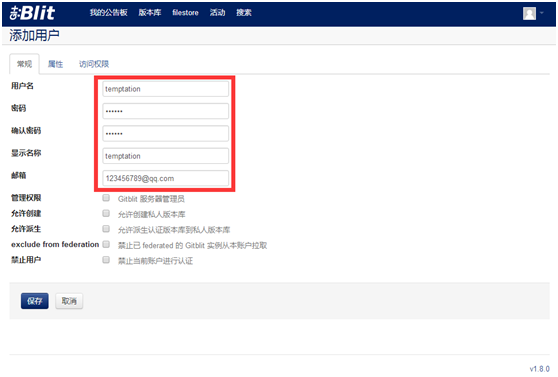
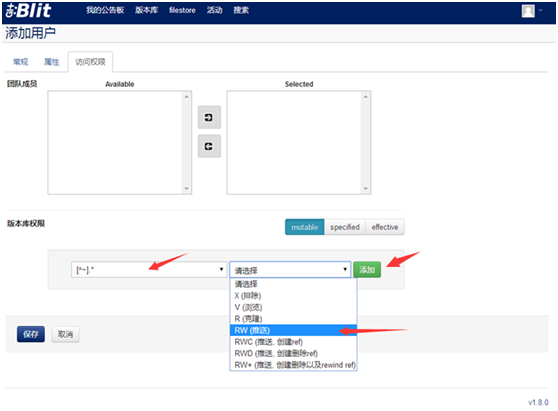
2.1、使用admin账号登录服务器,创建用户,并分配访问权限
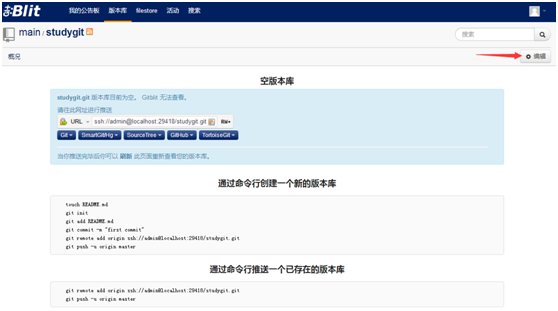
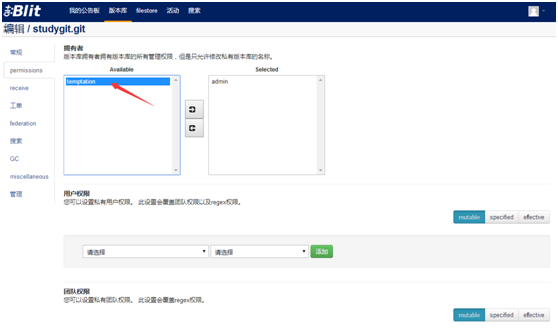
2.2、创建版本库,并设置版本库访问权限

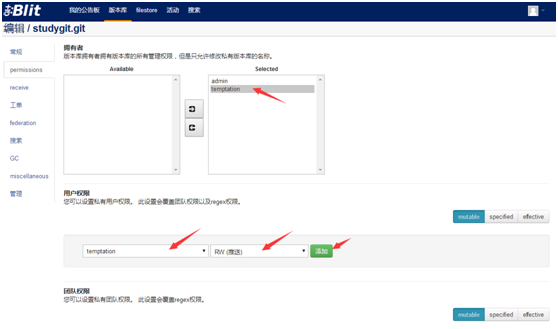
点击"保存"按钮后,再用创建的temptation账号登录Git服务器观察一下,发现可以看到admin账号创建并分配给temptation账号访问的版本库
-------------------------------------------------------------------------------------------------------------------------------------------
3、Git客户端搭建
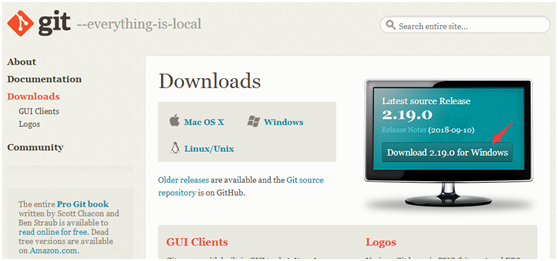
3.1、下载Git客户端最新版本,Git客户端官网:https://git-scm.com/downloads,下载完毕后打开,一路回车默认安装即可
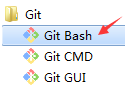
3.2、Git本机配置,找到安装好的Git客户端,点击Git Bash
命令语句解释:
cd ~/.ssh:查看是否存在.ssh目录
mkdir ~/.ssh:如果不存在,则创建一个.ssh目录
git config --global user.name "账号":设置git全局账号
git config --global user.email "邮箱":设置git全局邮箱
ssh-keygen -t rsa -C "邮箱":生成SSH Key

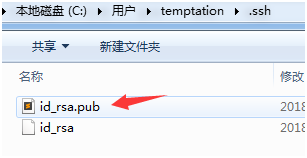
3.3、在操作系统的用户目录下C:Users emptation.ssh下,找到id_rsa.pub,将其中的内容复制出来
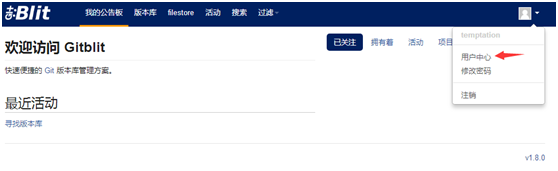
3.4、用创建的Git账号temptation登录Git服务器
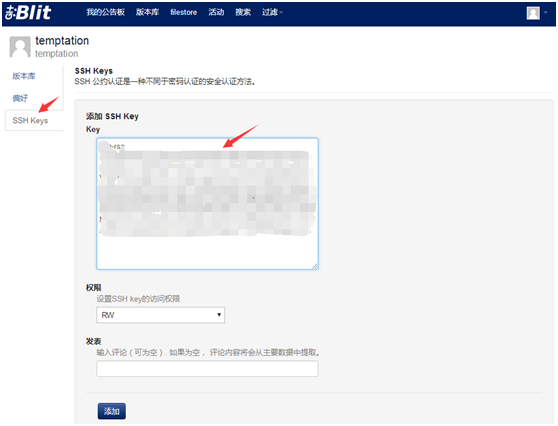
3.5、将id_rsa.pub的内容贴到SSH Keys中,点击"添加"即可
-------------------------------------------------------------------------------------------------------------------------------------------
4、Git客户端使用
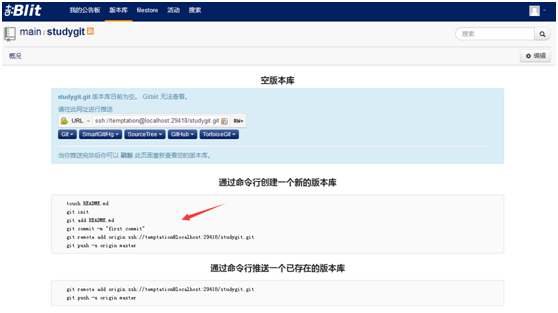
4.1、在想要创建项目的路径创建项目目录,比如:在D:workspace下新建目录studygit
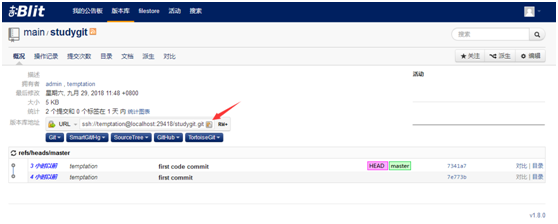
4.2、在目录studygit下,右键找到"Git Bash Here",将下图红色箭头标记部分复制贴入
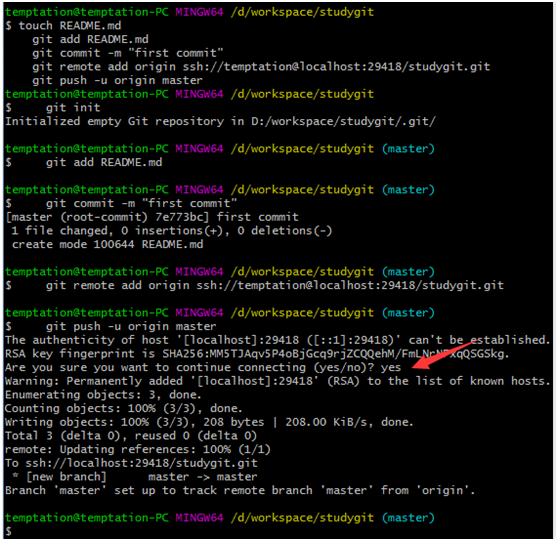
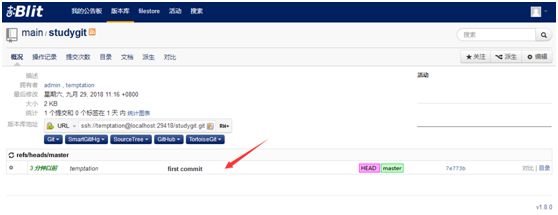
4.3、再次刷新服务端,可以看到版本的提交
-------------------------------------------------------------------------------------------------------------------------------------------
5、IDEA整合Git使用(整合使用Maven管理的Springboot项目为例)
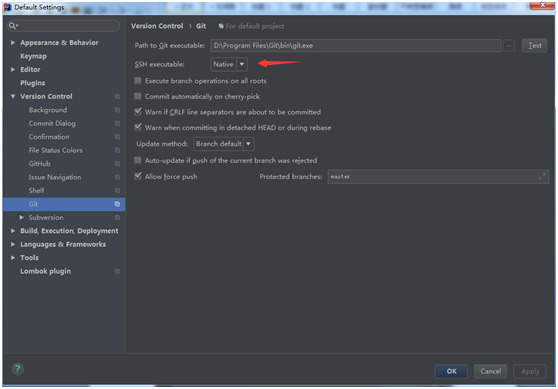
5.1、IDEA的Settings中设置Git的SSH executable为Native
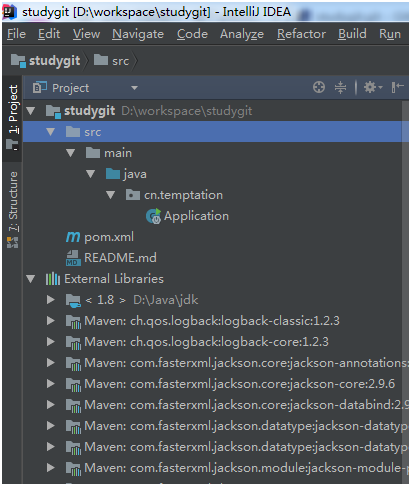
5.2、打开上面创建的Git项目

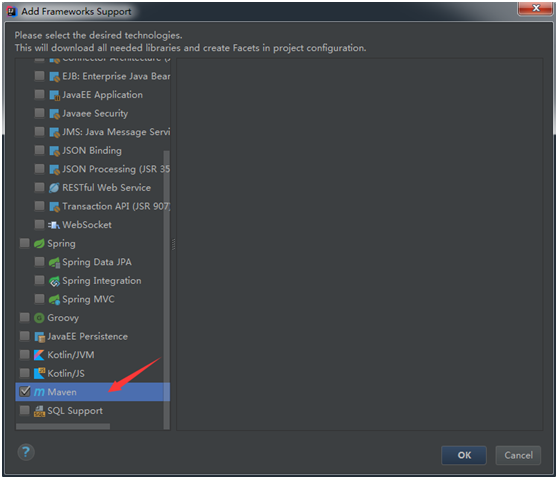
5.3、在项目上右键,点击"Add Framework Support...",选中Maven

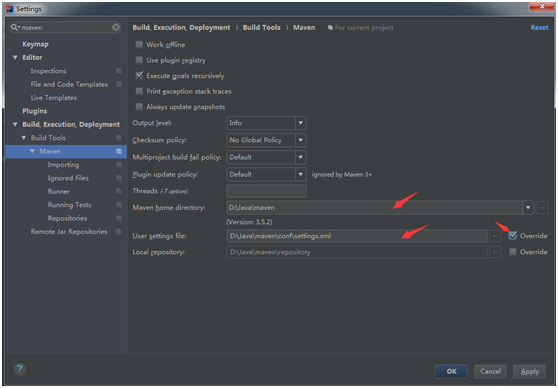
5.4、IDEA的Settings中设置Maven为自己配置的Maven(Maven设置可以参看:https://www.cnblogs.com/iflytek/p/8526182.html)
5.5、在pom.xml文件中编写如下内容

 1 <?xml version="1.0" encoding="UTF-8"?>
 2 <project xmlns="http://maven.apache.org/POM/4.0.0"
 3          xmlns:xsi="http://www.w3.org/2001/XMLSchema-instance"
 4          xsi:schemaLocation="http://maven.apache.org/POM/4.0.0 http://maven.apache.org/xsd/maven-4.0.0.xsd">
 5     <modelVersion>4.0.0</modelVersion>
 6
 7     <groupId>cn.temptation</groupId>
 8     <artifactId>studygit</artifactId>
 9     <version>1.0-SNAPSHOT</version>
10
11     <!-- 使用spring boot的默认设置 -->
12     <parent>
13         <groupId>org.springframework.boot</groupId>
14         <artifactId>spring-boot-starter-parent</artifactId>
15         <version>2.0.4.RELEASE</version>
16     </parent>
17
18     <dependencies>
19         <!-- web -->
20         <dependency>
21             <groupId>org.springframework.boot</groupId>
22             <artifactId>spring-boot-starter-web</artifactId>
23         </dependency>
24         <!-- thymeleaf -->
25         <dependency>
26             <groupId>org.springframework.boot</groupId>
27             <artifactId>spring-boot-starter-thymeleaf</artifactId>
28         </dependency>
29     </dependencies>
30 </project>
5.6、在项目上使用快捷键F4,查看Problem并解决

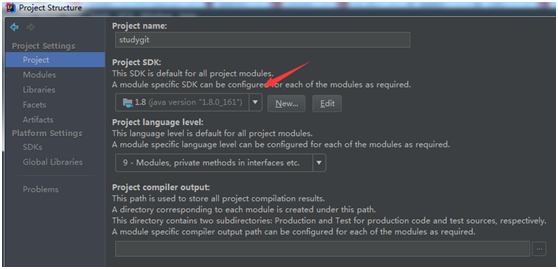
5.7、编写Springboot项目内容(可以参看:https://www.cnblogs.com/iflytek/p/8526182.html)
 1 package cn.temptation;
 2
 3 import org.springframework.boot.SpringApplication;
 4 import org.springframework.boot.autoconfigure.SpringBootApplication;
 5
 6 @SpringBootApplication
 7 public class Application {
 8     public static void main(String[] args) {
 9         // SpringBoot项目启动
10         SpringApplication.run(Application.class, args);
11     }
12 }
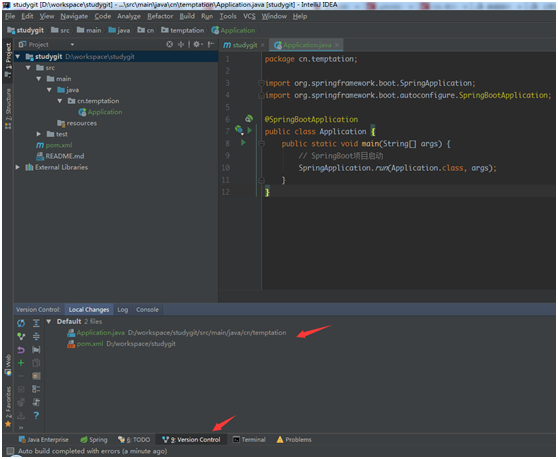
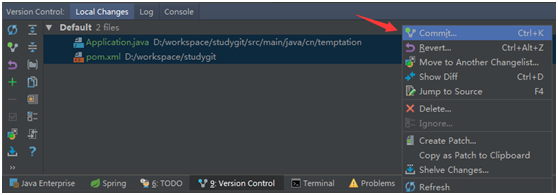
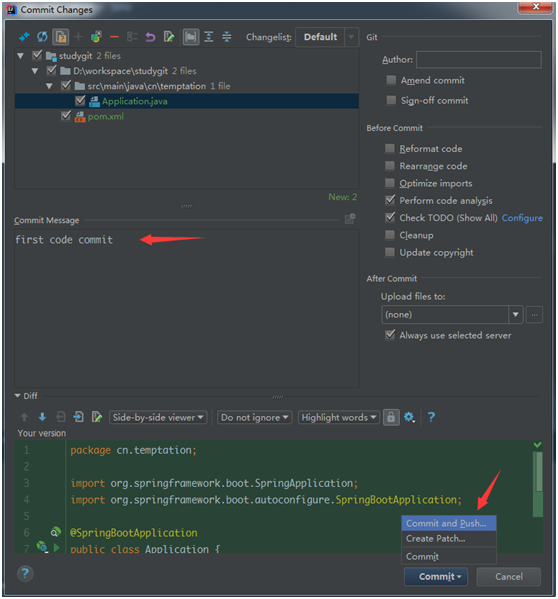
5.8、提交代码至Git服务器


-------------------------------------------------------------------------------------------------------------------------------------------
6、IDEA中直接使用已经创建好的Git项目