在云笔记项目学习中,提到了如何下载和上传文件,使用web的方式完成上传和下载都需要参考规范协议,代码的书写,以及web的配置,都是参考规范协议来编写的。本文将重新建立一个新Maven项目,进行简单演示,在服务端生成图片和Excel文件,发送到网页显示或实现下载,从本地上传图片或者文件到服务器,然后写出到目标文件夹。
文件上传与下载相关参考协议
(1)文件上传参考协议:Form-based File Upload in HTML RFC1867
(2)文件下载参考协议:Hypertext Transfer Protocol HTTP/1.1 RFC2616
(3)Spring-framework参考文档:https://docs.spring.io/spring/docs/4.3.23.RELEASE/spring-framework-reference/htmlsingle/
其他协议:
(1)UDP协议:User Datagram Protocol(UDP) RFC768 ,以前学习的UDP编程基于此
(2)TCP协议:Transmission Control Protocol(TCP) RFC793,以前学习的socket就是基于此文章
(3)HTTP/1.0版本协议:Hypertext Transfer Protocol HTTP/1.0 RFC1945,是HTTP/1.1以前的版本
(4)HTTP状态管理协议:HTTP State Management Mechanism RFC6265,其中Cookie就在里面说明
本项目参考的协议只有上传和下载协议,以及Spring-framework参考文档。
项目搭建
Step1 导包,项目需要导入Spring-MVC包、poi包、Commons-fileupload包、jackson核心包、pom.xml中进行配置
 1 <project xmlns="http://maven.apache.org/POM/4.0.0" xmlns:xsi="http://www.w3.org/2001/XMLSchema-instance" xsi:schemaLocation="http://maven.apache.org/POM/4.0.0 http://maven.apache.org/xsd/maven-4.0.0.xsd">
 2   <modelVersion>4.0.0</modelVersion>
 3   <groupId>com.boe</groupId>
 4   <artifactId>FileUploadAndDownLoad</artifactId>
 5   <version>0.0.1-SNAPSHOT</version>
 6   <packaging>war</packaging>
 7
 8   <dependencies>
 9    <!-- 导入spring-MVC -->
10     <dependency>
11      <groupId>org.springframework</groupId>
12      <artifactId>spring-webmvc</artifactId>
13      <version>4.2.3.RELEASE</version>
14     </dependency>
15
16     <dependency>
17      <groupId>org.springframework</groupId>
18      <artifactId>spring-webmvc</artifactId>
19      <version>4.2.3.RELEASE</version>
20      <classifier>sources</classifier>
21     </dependency>
22
23     <dependency>
24      <groupId>org.springframework</groupId>
25      <artifactId>spring-webmvc</artifactId>
26      <version>4.2.3.RELEASE</version>
27      <classifier>javadoc</classifier>
28     </dependency>
29
30     <!-- 导入poi包,创建excel用 -->
31     <dependency>
32      <groupId>org.apache.poi</groupId>
33      <artifactId>poi</artifactId>
34      <version>3.17</version>
35     </dependency>
36
37     <dependency>
38      <groupId>org.apache.poi</groupId>
39      <artifactId>poi-ooxml</artifactId>
40      <version>3.17</version>
41     </dependency>
42
43     <!-- 导入commons-fileupload包,用于文件上载 -->
44     <dependency>
45      <groupId>commons-fileupload</groupId>
46      <artifactId>commons-fileupload</artifactId>
47      <version>1.3</version>
48     </dependency>
49
50     <!-- 导入json和java对象转换的jackson包 -->
51     <!-- 导入jackson-core -->
52     <dependency>
53      <groupId>com.fasterxml.jackson.core</groupId>
54      <artifactId>jackson-core</artifactId>
55      <version>2.2.3</version>
56     </dependency>
57
58    <!-- 导入jackson-databind -->
59     <dependency>
60      <groupId>com.fasterxml.jackson.core</groupId>
61      <artifactId>jackson-databind</artifactId>
62      <version>2.2.3</version>
63     </dependency>
64
65     <!-- 导入jackson-annotations -->
66      <dependency>
67       <groupId>com.fasterxml.jackson.core</groupId>
68       <artifactId>jackson-annotations</artifactId>
69       <version>2.2.3</version>
70     </dependency>
71
72 </dependencies>
73
74 </project>
step2 配置Spring-mvc.xml,除了配置组件扫描和注解驱动,由于项目上传文件需要用到Spring的解析器MultipartResolver,因此还需要进行上传解析器配置,里面设置上传的最大文件大小,以及文件名编码方式和最大文件内存保存大小等属性,后面将有用。
 1         <!-- 配置组件扫描 -->
 2         <context:component-scan base-package="Web"></context:component-scan>
 3         <!-- 添加注解驱动 -->
 4         <mvc:annotation-driven></mvc:annotation-driven>
 5
 6         <!-- 配置文件上载解析器MultipartResolver -->
 7         <bean id="multipartResolver" class="org.springframework.web.multipart.commons.CommonsMultipartResolver">
 8         <!-- one of the properties available; the maximum file size in bytes -->
 9         <!-- 通过set方法设置以下两个父类属性,父类为CommonsFileUploadSupport.class -->
10         <property name="maxUploadSize" value="10000000"/>  <!--10M大小 -->
11         <property name="defaultEncoding" value="UTF-8" /> <!-- 文件名编码,可以适用于中文名 -->
12
13         <property name="maxInMemorySize" value="10000000" />
14         <!-- 上传文件大小默认小于10kib时,会将文件写入硬盘前保存在内存中,否则就不会保存在内存中 -->
15         </bean>
step3 配置Servlet,其中使用部署描述文件来自动配置,DispatcherServelet会自动启动Spring-MVC,因此不需要新建一个类,直接使用存在的Spring下的DispatcherServelet即可,并设置参数,和路径请求条件。
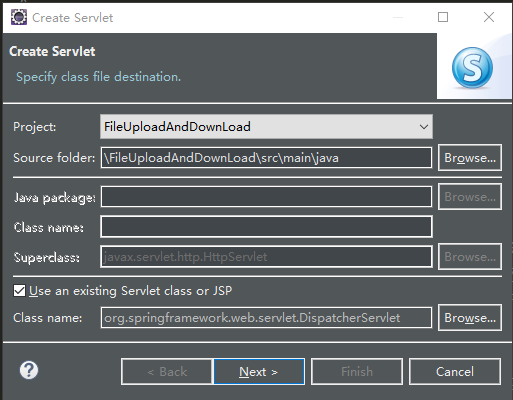
配置完成后的web.xml文件内容,就包含部署描述文件自动生成的部分。
 1 <?xml version="1.0" encoding="UTF-8"?>
 2 <web-app xmlns:xsi="http://www.w3.org/2001/XMLSchema-instance" xmlns="http://java.sun.com/xml/ns/javaee" xsi:schemaLocation="http://java.sun.com/xml/ns/javaee http://java.sun.com/xml/ns/javaee/web-app_2_5.xsd" version="2.5">
 3   <display-name>FileUploadAndDownLoad</display-name>
 4   <welcome-file-list>
 5     <welcome-file>index.html</welcome-file>
 6     <welcome-file>index.htm</welcome-file>
 7     <welcome-file>index.jsp</welcome-file>
 8     <welcome-file>default.html</welcome-file>
 9     <welcome-file>default.htm</welcome-file>
10     <welcome-file>default.jsp</welcome-file>
11   </welcome-file-list>
12   <!-- 手动配置的servlet -->
13   <servlet>
14     <description></description>
15     <display-name>ImageServlet</display-name>
16     <servlet-name>ImageServlet</servlet-name>
17     <servlet-class>Web.ImageServlet</servlet-class>
18   </servlet>
19   <servlet-mapping>
20     <servlet-name>ImageServlet</servlet-name>
21     <url-pattern>/demoImg</url-pattern>
22   </servlet-mapping>
23   <!-- 使用部署描述文件生成,不用新建一个专门的servlet,而是勾选"选择已经存在的servlet或JSP来配置" -->
24   <!-- 使用DispatcherServlet来帮忙加载配置文件,启动Spring容器 -->
25   <servlet>
26     <description></description>
27     <display-name>DispatcherServlet</display-name>
28     <servlet-name>DispatcherServlet</servlet-name>
29     <servlet-class>org.springframework.web.servlet.DispatcherServlet</servlet-class>
30     <init-param>
31       <description></description>
32       <param-name>contextConfigLocation</param-name>
33       <param-value>classpath:config/spring-*.xml</param-value>
34     </init-param>
35     <load-on-startup>1</load-on-startup>
36   </servlet>
37   <servlet-mapping>
38     <servlet-name>DispatcherServlet</servlet-name>
39     <url-pattern>*.do</url-pattern>
40   </servlet-mapping>
41 </web-app>
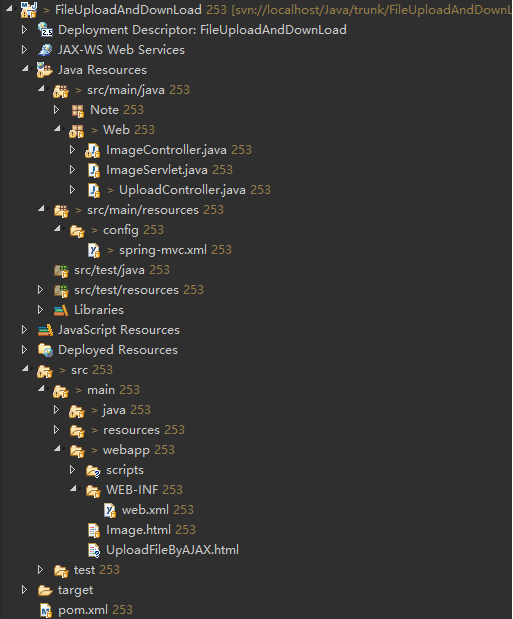
完成以上配置后,就可以写控制器,以及网页来进行测试,最后测试完成后项目结构如下图:
RFC2616协议参考
服务器给浏览器发送数据时,先发送状态行,再发送响应头和消息body,可以参考RFC2616超文本传输协议内容。
例子:如果发送一个网页给Client,简单的将包含如下几部分
HTTP/1.1 200 OK
ContentType:text/html charset=utf-8
ContentLength:203
空一行
<html>内容</html>
状态行(Status-Line)
Status-Line = HTTP-Version SP Status-Code SP Reason-Phrase CRLF
状态行包括HTTP版本号,状态码,和状态码的建议描述等信息,其中状态码是三位的数字,第一位数字用于分类,其他没有分类功能。此外Client端只检查状态码,不会检查状态码的描述,描述主要是给人看的。关于状态码,有如下几类:
1XX: Informational,请求接受继续执行
2XX: Success,请求被成功接受,解释,以及被接收
3XX: Redirection,为了完成当前请求,需要进行进一步的请求
4XX: Client Error,请求包含错误语法或者不能被实现
5XX: Server Error,服务端不能处理包含正确语法的请求
响应头(Entity Header Fields)
响应头里的ContentType定义了消息Body里的数据类型,根据RFC2616介绍,Content-Encoding也可以定义消息Body数据类型,消息头里的ContentLength定义了消息Body在编码前的长度
消息body(Entity Header Fields)
任何HTTP/1.1版本的消息body,都必须在前面有ContentType对媒体信息的定义。
使用Servlet发送图片到网页
在进行文件下载前,先演示如何动态生成图片,并通过Servlet发送图片到网页显示,其中图片生成有一套固定的写法,最后返回一个byte数组,然后通过Servlet将这个字节数组发送到网页,完成图片显示。在服务器发送图片数据给浏览器时,需要发送包含状态行,响应头和消息Body的一条消息给浏览器,并且要发送正确的消息,网页才能正常显示图片。其中需要设置ContentType为image/png,告诉浏览器这是一张图片,并设置ContentLength,告诉浏览器图片的字节长度是多少。Servlet代码如下:
 1 package Web;
 2
 3 import java.awt.image.BufferedImage;
 4 import java.io.ByteArrayOutputStream;
 5 import java.io.IOException;
 6
 7 import javax.imageio.ImageIO;
 8 import javax.servlet.ServletException;
 9 import javax.servlet.http.HttpServlet;
10 import javax.servlet.http.HttpServletRequest;
11 import javax.servlet.http.HttpServletResponse;
12
13 public class ImageServlet extends HttpServlet {
14     private static final long serialVersionUID = 1L;
15
16     public ImageServlet() {
17         // TODO Auto-generated constructor stub
18     }
19
20     protected void doGet(HttpServletRequest request, HttpServletResponse response) throws ServletException, IOException {
21         //response.getWriter().append("Served at: ").append(request.getContextPath());
22
23         //在doGet方法里将资源发送
24         byte[] image=createImage();
25         //设置消息发送的消息头
26         response.setContentType("image/png");
27         response.setContentLength(image.length);
28         //发送数据
29         response.getOutputStream().write(image);
30
31     }
32     /**
33      * 绘制一张图片,返回图片编码后的byte数组
34      * @return
35      * @throws IOException
36      */
37     public byte[] createImage() throws IOException {
38         //使用BufferedImage绘图
39         //第一个参数图片宽度
40         //第二个参数图片高度
41         //第三个参数图片像素颜色表示方式,为3位的byte,一个byte调节一种颜色,分别为BGR,一个byte为8位,可以代表0-255的亮度
42         BufferedImage buffImage=new BufferedImage(100,100,BufferedImage.TYPE_3BYTE_BGR);
43         //设置图片某个像素点的颜色
44         buffImage.setRGB(50, 50, 0x00ff00);//使用16进制表示
45         ByteArrayOutputStream os=new ByteArrayOutputStream();
46         //图片编码为png
47         ImageIO.write(buffImage, "png", os);
48         //关闭流
49         os.close();
50         byte[] image=os.toByteArray();
51         return image;
52     }
53
54 }
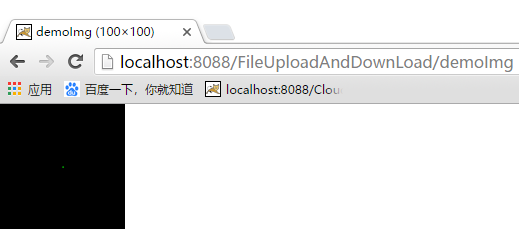
直接使用doGet请求来发送响应,服务端在获取请求后,刚开始会先调用service方法,随后会分发给doGet来执行,具体里面原理这里不深究,后续单独学习。浏览器端访问后图片显示结果如下图:
使用Spring-MVC发送图片内容到网页,并实现文件下载
使用Spring-MVC来实现Servlet能实现的功能,代码将更加简单,如发送图片到网页显示,只需要配置控制器即可,并且使用@ResponseBody注解,可实现向浏览器发送数据,这次发送的数据不一定是JSON,可能是图片字节数组,也可能是Excel的字节数组。如下代码实现了图片发送和文件下载。主要参考协议RFC2616来完成。
  1 package Web;
  2
  3 import java.awt.image.BufferedImage;
  4 import java.io.ByteArrayOutputStream;
  5 import java.io.IOException;
  6
  7 import javax.imageio.ImageIO;
  8 import javax.servlet.http.HttpServletResponse;
  9
 10 import org.apache.poi.hssf.usermodel.HSSFCell;
 11 import org.apache.poi.hssf.usermodel.HSSFRow;
 12 import org.apache.poi.hssf.usermodel.HSSFSheet;
 13 import org.apache.poi.hssf.usermodel.HSSFWorkbook;
 14 import org.springframework.stereotype.Controller;
 15 import org.springframework.web.bind.annotation.RequestMapping;
 16 import org.springframework.web.bind.annotation.ResponseBody;
 17
 18 /**
 19  * 发送图片的控制器
 20  * @author yangchaolin
 21  *
 22  */
 23 @Controller
 24 @RequestMapping("/demo")
 25 public class ImageController {
 26     /**
 27      * @ResponseBody 注解会自动处理控制返回值
 28      * 1 当返回的类型为JavaBean(数组,集合),返回的数据为JSON
 29      * 2 当返回的类型为byte数组,直接将byte数组装入响应消息的body
 30      * 3 produces的配置相当如设置消息头Content-Type为image/png
 31      */
 32     @RequestMapping(value="/imgController.do",produces="image/png")
 33     @ResponseBody
 34     public byte[] sendImageToWeb() throws IOException {
 35         byte[] image=createImage();
 36         return image;
 37     }
 38
 39     /**
 40      * 下载图片需参考RFC2616 19.5.1 Content-Disposition
 41      * 如果想下载图片,需要将Content-Type设置为application/octet-stream
 42      * 另外还需要在响应消息头设置Content-Disposition
 43      */
 44     @RequestMapping(value="/downloadImage.do",produces="application/octet-stream")
 45     @ResponseBody
 46     public byte[] downloadImageForWeb(HttpServletResponse response) throws IOException {
 47         //example写法: Content-Disposition: attachment; filename="fname.ext"
 48         response.setHeader("Content-Disposition", "attachment; filename="text.png"");// " 转义 "
 49         return createImage();
 50     }
 51
 52     /**
 53      * 生成excel,浏览器可以下载,类似图片下载
 54      */
 55     @RequestMapping(value="/downloadExcel.do",produces="application/octet-stream")
 56     @ResponseBody
 57     public byte[] downloadExcelForWeb(HttpServletResponse response) throws IOException {
 58         //example写法: Content-Disposition: attachment; filename="fname.ext"
 59         response.setHeader("Content-Disposition", "attachment; filename="text.xls"");// " 转义 "
 60         return createExcel();
 61     }
 62
 63     /**
 64      * 生成一个简单excel,并返回byte数组
 65      */
 66     private byte[] createExcel() throws IOException {
 67         //生成工作簿
 68         HSSFWorkbook workbook=new HSSFWorkbook();
 69         //生成工作表
 70         HSSFSheet sheet=workbook.createSheet("information");
 71         //创建一行
 72         HSSFRow row=sheet.createRow(0);//第一行
 73         //行中创建一个Cell
 74         HSSFCell cell=row.createCell(0);//第一列
 75         //Cell中写入数据
 76         cell.setCellValue("hello excel with poi");
 77         //将Excel数据写入到输出流
 78         ByteArrayOutputStream os=new ByteArrayOutputStream();
 79         workbook.write(os);
 80         os.close();
 81         //使用输出流API,转换成byte数组并返回
 82         byte[] excel=os.toByteArray();
 83         return excel;
 84     }
 85
 86     /**
 87      * 绘制一张图片,返回图片编码后的byte数组
 88      */
 89     public byte[] createImage() throws IOException {
 90         //使用BufferedImage绘图
 91         //第一个参数图片宽度
 92         //第二个参数图片高度
 93         //第三个参数图片像素颜色表示方式,为3位的byte,一个byte调节一种颜色,分别为BGR,一个byte为8位,可以代表0-255的亮度
 94         BufferedImage buffImage=new BufferedImage(100,100,BufferedImage.TYPE_3BYTE_BGR);
 95         //设置图片某个像素点的颜色
 96         buffImage.setRGB(50, 50, 0x00ff00);//使用16进制表示
 97         ByteArrayOutputStream os=new ByteArrayOutputStream();
 98         //图片编码为png
 99         ImageIO.write(buffImage, "png", os);
100         //关闭流
101         os.close();
102         byte[] image=os.toByteArray();
103         return image;
104     }
105
106 }
网页部分:
 1 <!DOCTYPE html>
 2 <html>
 3 <head>
 4 <meta charset="UTF-8">
 5 <title>web发送请求到服务端得到图片</title>
 6 </head>
 7 <body style="font-family:'微软雅黑'">
 8
 9   <h1>以下为使用servlet从服务端得到的图片</h1>
10   <p>
11     <img alt="" src="demoImg"> <!-- demoImg为web.xml中配置好的访问路径 -->
12   </p>
13
14   <h1>以下为使用Spring MVC从服务端得到的图片</h1>
15   <p>
16     <img alt="" src="demo/imgController.do"> <!-- src里就是get请求地址 -->
17   </p>
18
19   <h1>以下为使用Spring MVC从服务器下载图片</h1> <!-- 下载图片,需参考RFC2616 19.5.1里的要求 -->
20   <a href="demo/downloadImage.do">下载图片</a>
21
22   <h1>以下为使用Spring MVC从服务器下载Excel</h1> <!-- 下载Excel,需参考RFC2616 19.5.1里的要求,类似图片下载,最后都是返回byte数组 -->
23   <a href="demo/downloadExcel.do">下载Excel</a>
24
33 </body>
34 </html>
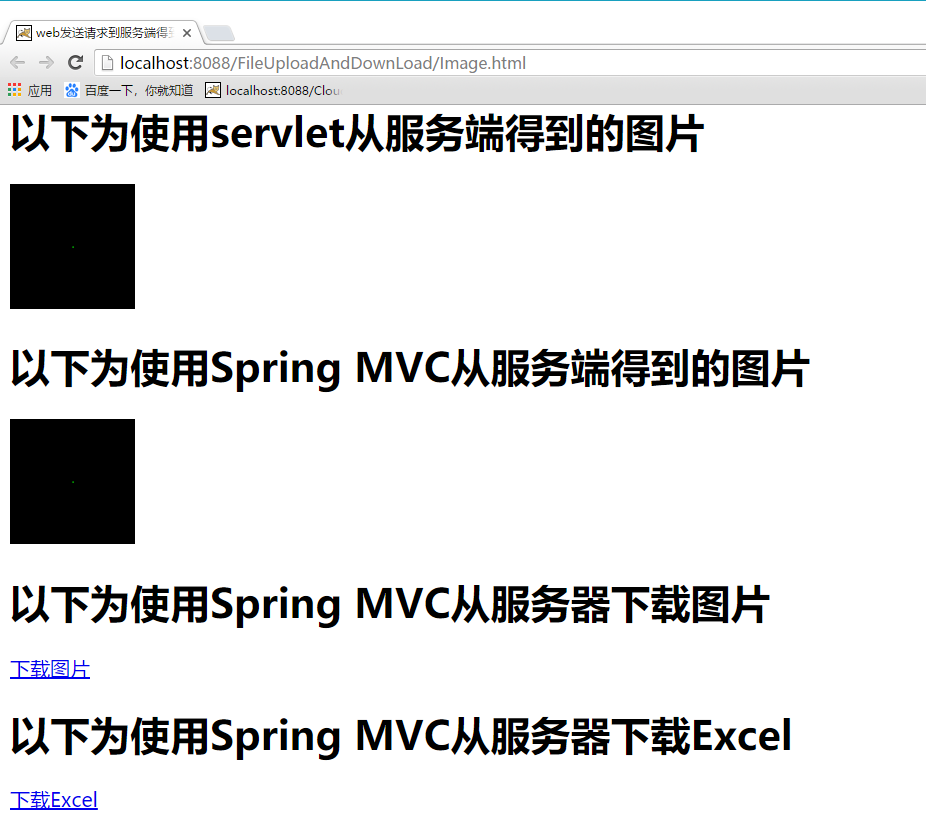
网页显示:
下载的图片和Excel在文件夹中:

RFC1867协议参考
文件的上传,参考文档 Form-based File Upload in HTML RFC1867,字面意思为基于Form表单的文件上传,其中在文档目录 2.HTML forms with file submission 里有一个example,示例用户如何通过表单上传文件。
<FORM ENCTYPE="multipart/form-data" ACTION="_URL_" METHOD=POST>
File to process: <INPUT NAME="userfile1" TYPE="file">
<INPUT TYPE="submit" VALUE="Send File">
</FORM>
发送的请求,必须为POST请求,此外还需要完成以下两步才能正常上载文件:
1 导入一个commons-fileupload包
2 在web.xml中进行解析器MultipartResolver的配置
解析器的配置方法参考spring-framework的文档目录 22.10.2 Using a MultipartResolver with Commons FileUpload,本文档使用版本4
使用Spring-MVC实现文件上传
使用Spring-MVC实现文件的上传,网页端除了使用传统Form表单提交方式,还可以使用AJAX的FormData来提交,前者是上传后会刷新页面,后者是不刷新页面。本项目中上传文件成功后,服务器将给浏览器发送一个Map,里面包含上传成功的信息,不再采用云笔记的JasonResult来返回数据,代码如下。
  1 package Web;
  2
  3 import java.io.File;
  4 import java.io.FileOutputStream;
  5 import java.io.IOException;
  6 import java.io.InputStream;
  7 import java.util.HashMap;
  8 import java.util.Map;
  9
 10 import org.springframework.stereotype.Controller;
 11 import org.springframework.web.bind.annotation.RequestMapping;
 12 import org.springframework.web.bind.annotation.ResponseBody;
 13 import org.springframework.web.multipart.MultipartFile;
 14
 15 /**
 16  * 上传文件的控制器
 17  * @author yangchaolin
 18  *
 19  */
 20 @Controller
 21 @RequestMapping("/file")
 22 public class UploadController {
 23
 24     @RequestMapping("/uploadFile.do")
 25     @ResponseBody
 26     public Object uploadFile(MultipartFile userfile1,MultipartFile userfile2) throws IllegalStateException, IOException{
 27         /**
 28          * Spring MVC中可以使用MultipartFile接受上载的文件,文件中的一切数据都可以从此对象中获取
 29          * 比如可以获取文件原始名,文件类型等
 30          */
 31
 32         //比如获取上载文件的原始文件名,就是文件系统中的文件名
 33         String filename1=userfile1.getOriginalFilename();
 34         String filename2=userfile2.getOriginalFilename();
 35         System.out.println("文件1原始文件名为:"+filename1);
 36         System.out.println("文件2原始文件名为:"+filename2);
 37
 38         Map<String,String> map=new HashMap<String,String>();
 39
 40         /**
 41          * 保存上传的文件有三种方法:
 42          * 1 MultipartFile接口的transferTo(File dest)方法
 43          * 将文件直接保存到目标文件,适用于大文件
 44          * 2 MultipartFile接口的getBytes()方法
 45          * 将文件全部读取,返回byte数组,保存在内存,适用于小文件,大文件有爆内存风险
 46          * 3 MultipartFile接口的getInputStream()方法,将文件读取后返回一个InputStream
 47          * 获取上载文件的流,适用于大文件
 48          */
 49
 50         //mac中保存文件地址 /Users/yangchaolin
 51         //window中保存地址 D:/yangchaolin
 52         //linux中保存地址 /home/soft01/yangchaolin
 53
 54         //1 使用transferTo(File dest)
 55         // 创建目标文件夹
 56         File dir=new File("F:/FileUploadAndDownload");
 57         boolean makeDirectoryResult=dir.mkdirs();
 58         System.out.println("文件夹路径是否建立:"+makeDirectoryResult);
 59         //往文件夹放第一个文件
 60         File file=new File(dir,filename1);
 61         userfile1.transferTo(file);
 62
 63         /**
 64          * transferTo方法如果不注释掉,后面执行第二种方法写入文件到硬盘会报错
 65          * 报错内容:java.lang.IllegalStateException: File has been moved - cannot be read again
 66          * 原因为transferTo方法底层在执行时,会检查需要写入到OutputStream的文件字节数是否超过MultipartResolver配置的大小,
 67          * 默认设置为10kib,如果超过了,执行完这个方法后会从内存中删除上传的文件,后面再想读取就会报错
 68          */
 69
 70         //2 使用getInputStream()方法
 71         File file1=new File(dir,filename1);
 72         InputStream isWithoutBuff=userfile1.getInputStream();
 73         //使用FileoutputStream写出到文件
 74         FileOutputStream fosWithoutbuff=new FileOutputStream(file1);
 75         //InputStream一个字节一个字节的读取,将读取到的结果写入到FileOutputStream
 76         int b;//读取一个byte后,以int类型显示数值,范围0~255
 77         while((b=isWithoutBuff.read())!=-1) {
 78             //read()方法每次只读取文件的一个byte
 79             fosWithoutbuff.write(b);
 80         }
 81         isWithoutBuff.close();
 82         fosWithoutbuff.close();
 83
 84         //同样使用InputStream读取,将读取到的结果写入到FileOutputStream,但使用了缓冲字节数组
 85         File file2=new File(dir,filename2);
 86         InputStream isWithBuff=userfile2.getInputStream();
 87         FileOutputStream fosWithBuff=new FileOutputStream(file2);
 88         int n;//保存返回读取到的字节数, 一次8192个字节,当不够时就是实际读取到的字节数
 89         byte[] buff=new byte[8*1024];//8kib的缓冲字节数组
 90         while((n=isWithBuff.read(buff))!=-1) {
 91             System.out.println("读取后的字节数:"+n);
 92             fosWithBuff.write(buff, 0, n);
 93         }
 94         isWithBuff.close();
 95         fosWithBuff.close();
 96
 97         //3 使用getBytes()方法
 98         byte[] data=userfile2.getBytes();
 99         //写出byte数组到文件
100         File file3=new File(dir,filename2);
101         FileOutputStream fosWithByte=new FileOutputStream(file3);
102         fosWithByte.write(data,0,data.length);
103         fosWithByte.close();
104
105         map.put("Result", "upload Success");
106
107         return map;//需要导入jackson的三个核心包,否则无法正常转换成JSON
108
109     }
110
111 }
传统Form表单提交:
1   <h1>以下为使用Spring MVC上载图片</h1>
2   <form method="post" action="file/uploadFile.do" enctype="multipart/form-data">
3     file to process:<br>
4     <input type="file" name="userfile1"/> <!-- name用于提交到服务器的表单数据进行标识 -->
5     <input type="file" name="userfile2"/>
6     <input type="submit" value="upload文件"/>
7   </form>
网页显示:

文件上传结果:

AJAX提交的方式,服务端无需修改,只需要修改浏览器端代码即可:
AJAX文件上载,参考项目FileUploadAndDownLoad ,AJAX上传适用于最新的浏览器版本,老版本的可能不兼容,使用FormData()来上传文件,FormData类似于Form,对于前面Spring MVC上传文件的方式:
1 不使用AJAX,客户端需使用form来实现文件上传,form表单里有input元素,通过input元素的name属性来标识上传文件的资源,利用commons-fileupload包,客户端上传的文件会保存在MultipartFile对象中,然后可再通过三种方式,将上传的文件写入到硬盘。
2 使用AJAX,客户端不需要写form表单,文件资源将直接保存到FormData里面,然后传入服务器,服务端的处理跟前面第一种没有区别,只是保存到FormData里的标识符,需要跟服务端方法里的参数名字一样。
 1 <!DOCTYPE html>
 2 <html>
 3 <head>
 4 <meta charset="UTF-8">
 5 <title>使用AJAX上传文件</title>
 6 <script type="text/javascript" src="scripts/jquery.min.js"></script>
 7 <script type="text/javascript">
 8  <!--使用AJAX来上传数据-->
 9  $(function(){
10      $("#uploadFile").bind("click",uploadFileWithAJAX);
11  });
12  function uploadFileWithAJAX(){
13      //获取文件,将文件保存到FormData里
14      var file1=$("#file1")[0].files[0];//jQuery对象转换成DOM对象,然后使用DOM对象的files属性,获取文件
15      var file2=$("#file2")[0].files[0];
16      //创建内存中的表单对象
17      var formdata=new FormData();
18      //第一个参数,必须和服务端MultipartFile的参数名一样
19      formdata.append("userfile1",file1);
20      formdata.append("userfile2",file2);
21
22      //发送ajax请求
23      $.ajax({
24          url:"file/uploadFile.do",
25          type:"POST",
26          data:formdata,
27          dataType:"JSON",
28          cache:false,
29          processData:false,
30          contentType:false,
31          success:function(resultData){
32              console.log(resultData);
33              if(resultData.Result=="upload Success"){
34                  $("#result").text("upload Success");
35              }
36          },
37          error:function(e){
38              console.log("网络错误");
39          }
40      });
41
42  }
43 </script>
44 </head>
45 <body>
46
47   <h1>以下为使用AJAX上传文件,服务端代码不用变</h1>
48   <input type="file" id="file1"><br>
49   <input type="file" id="file2"><br>
50   <input type="submit" value="上传图片" id="uploadFile"><br>
51   <div id="result"></div>
52
53 </body>
54 </html>
网页显示:
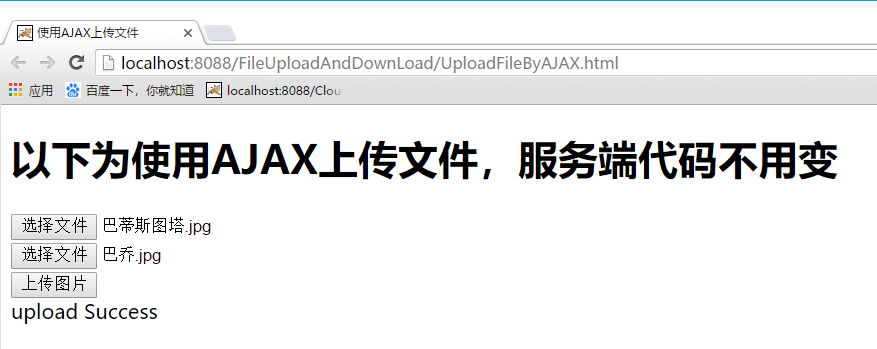
文件上传结果:

总结
(1)无论是文件的上传,下载还是显示,都需要参考协议,其中上传参考RFC1867,下载参考RFC2616,此外还需要参考Spring-Framework的文档
(2)使用Spring注解@ResponseBody不仅仅可以返回JSON,还可以返回byte数组
(3)文件的上传可以使用AJAX,并使用FormData完成文件上传