一、allure简介、使用
allure是一个生成测试报告的插件,支持常见语言,如python、Java等,生成美观的测试报告。
1.1 生成json
安装
pip install allure-pytest
使用
在pytest的配置文件的命令行参数中加上如下代码(指定报告生成的文件夹):
--alluredir ./report
例:
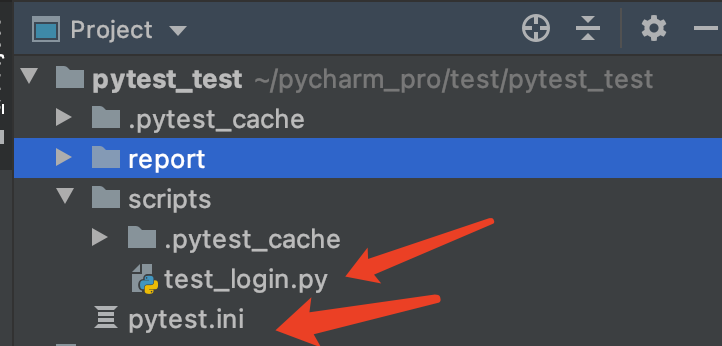
项目目录:

# test_login.py
import pytest


class TestLogin(object):
    def test_f1(self):
        print("--- f1 ---")
        assert 1
pytest配置文件:
[pytest]

# 添加命令行参数
addopts = -s --alluredir ./report/jsonfile

# 文件搜索路径
testpaths = ./scripts
在terminal运行 pytest 命令即可在report目录下生成一个json文件,里面包含了执行测试脚本的相关信息

1.2 将json转成html
安装
官网下载allure的zip包,解压,将解压包里面的 bin 目录配置到系统环境变量 path 中,以Mac电脑为例:

如果在terminal中输入 allure --version ,正确打印版本信息即可:

使用
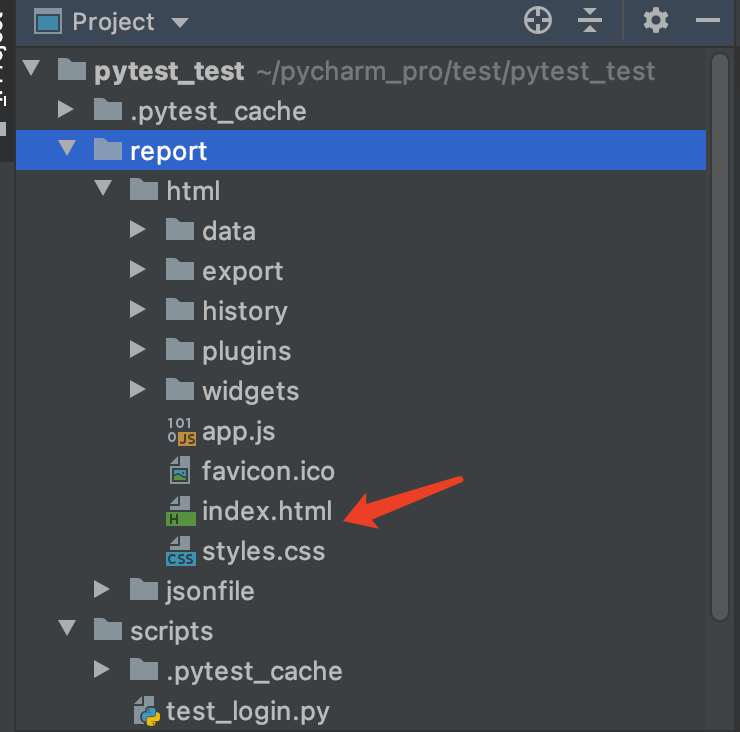
在上面生成json文件的基础上,在terminal 中输入如下命令(注意在项目的根目录下执行),即可在report目录下生成html报告:
allure generate report/jsonfile -o report/html --clean


在浏览器打开报告:

1.3 参数与命令详解
pytest配置文件中 addopts = -s --alluredir ./report/jsonfile 的 --alluredir ./report/jsonfile是什么意思?
--alluredir 后面的 ./report/jsonfile 是执行脚本后相关的测试数据输出的目录名称。目录名称不固定的,可以自定义,如 ./result/aaa
allure generate report/jsonfile -o report/html --clean 是什么意思?
report/jsonfile 表示执行测试后json数据的输出目录;
-o 表示output 输出;
report/html 表示html文件输出的目录;
--clean 清除缓存,加上这个参数 相当于删除原有的html文件,再创建新的
二、allure与pytest结合使用
给报告添加详细的说明信息,增加可读性。
2.1 添加测试步骤和测试描述
使用
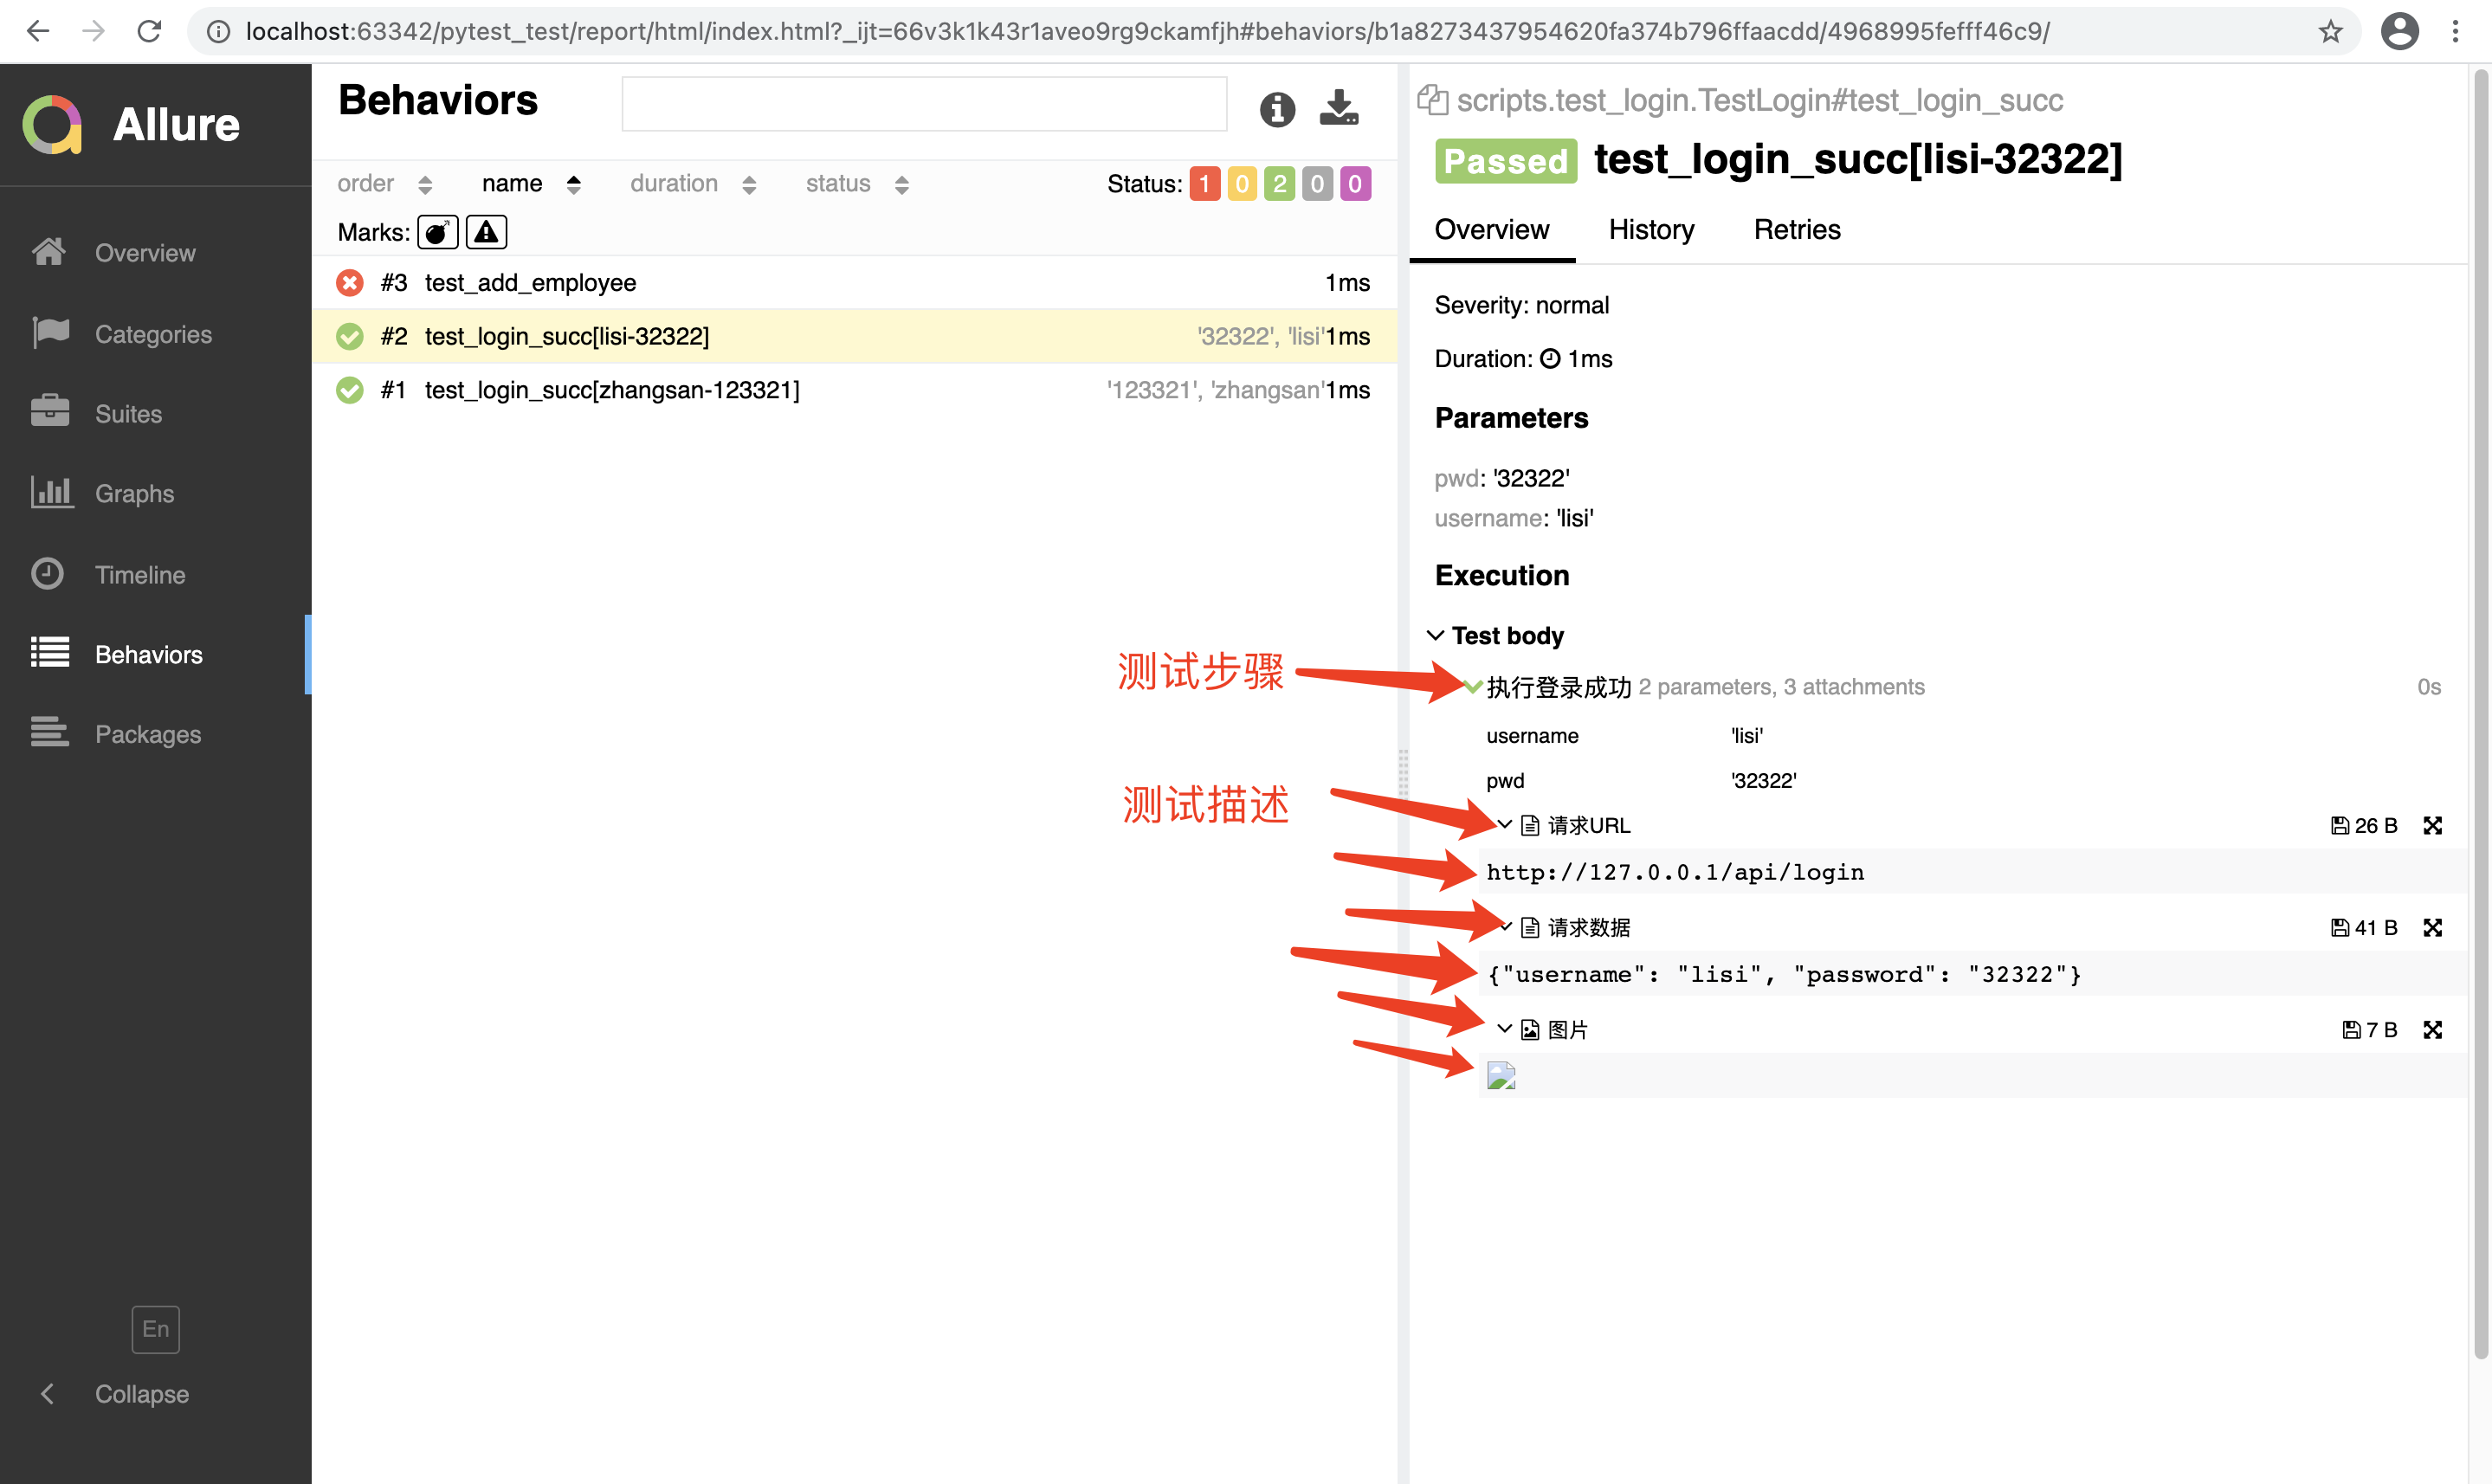
添加测试步骤: 给测试方法添加@allure.step("测试步骤1") 或者 使用with allure.step("测试步骤1")
添加测试描述: 支持文本、图片等。在需要添加描述的方法之前添加 allure.attach("描述详细内容", name="描述标题")
例:
# test_login.py
import pytest
import allure
import json

# 模拟数据
url = "http://127.0.0.1"
method = "post"


class TestLogin(object):
    @allure.step("执行登录成功")
    @pytest.mark.parametrize(("username", "pwd"), [("zhangsan", "123321"), ("lisi", "32322")])
    def test_login_succ(self, username, pwd):
        route = "/api/login"
        data = {"username": username, "password": pwd}

        # 添加文本描述
        allure.attach(str(url + route), name="请求URL")  # 方式1
        allure.attach(json.dumps(data), "请求数据", allure.attachment_type.TEXT)  # 方式2

        # 添加图片描述
        allure.attach("./1.png", "图片", allure.attachment_type.PNG)

        assert 1

    def test_add_employee(self):
        data = {"name": "wangwu"}
        route = "/api/login"

        # 使用 with 添加测试步骤
        with allure.step("执行新增员工"):
            # 添加文本描述
            allure.attach(str(url + route), name="请求URL")
            allure.attach(json.dumps(data), name="请求数据")
        assert 0
[pytest]

# 添加命令行参数
addopts = -s --alluredir ./report/jsonfile

# 文件搜索路径
testpaths = ./scripts
在terminal 一次执行 pytest 和 allure generate report/jsonfile -o report/html --clean ,在浏览器打开测试报告:

2.2 添加测试级别
应用场景
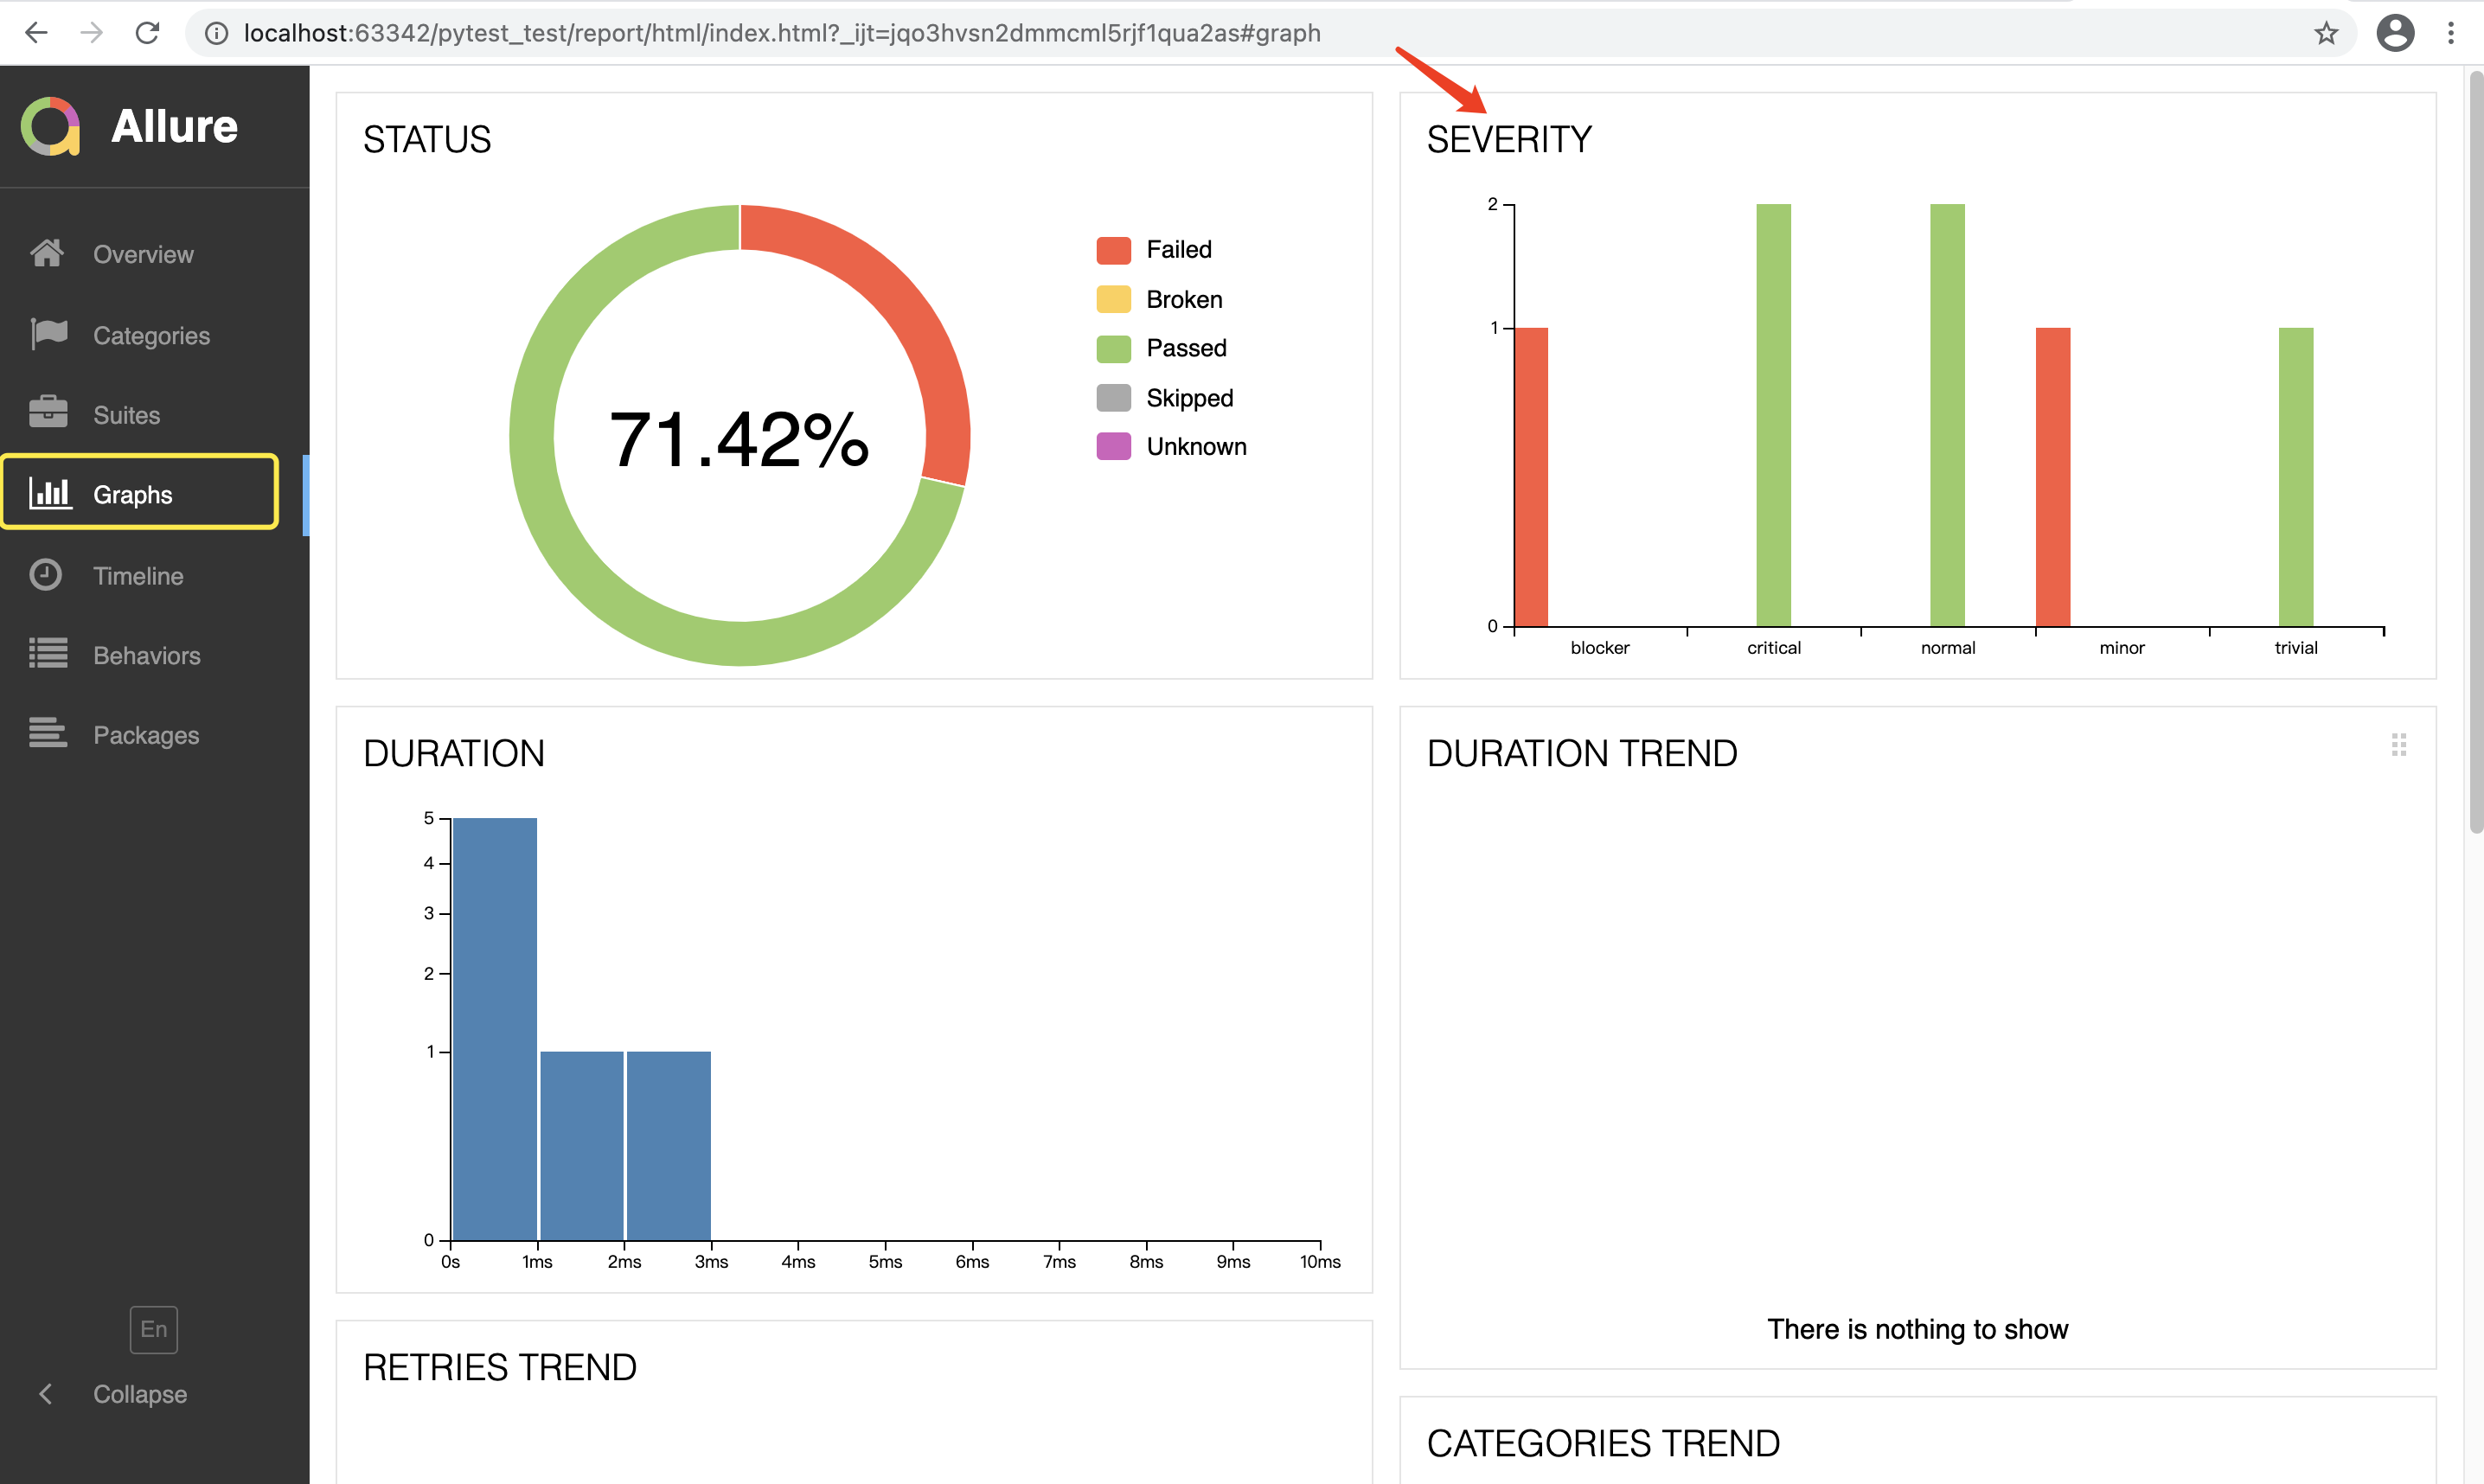
给测试用例添加严重级别,出了bug后方便辨认哪些需要优先解决。
使用
给测试方法添加装饰器 @allure.severity(allure.severity_level.BLOCKER)
总共5个级别:
BLOCKER 最严重
CRITICAL 严重
NORMAL 普通
MINOR 不严重
TRIVIAL 最不严重
例:
# test_login.py
import pytest
import allure
import json

# 模拟数据
url = "http://127.0.0.1"
method = "post"


class TestLogin(object):
    @allure.step("执行登录成功")
    @allure.severity(allure.severity_level.CRITICAL)
    @pytest.mark.parametrize(("username", "pwd"), [("zhangsan", "123321"), ("lisi", "32322")])
    def test_login_succ(self, username, pwd):
        route = "/api/login"
        data = {"username": username, "password": pwd}

        # 添加文本描述
        allure.attach(str(url + route), name="请求URL")  # 方式1
        allure.attach(json.dumps(data), "请求数据", allure.attachment_type.TEXT)  # 方式2

        # 添加图片描述
        allure.attach("./1.png", "图片", allure.attachment_type.PNG)

        assert 1

    @allure.severity(allure.severity_level.BLOCKER)
    def test_add_employee(self):
        data = {"name": "wangwu"}
        route = "/api/login"

        # 使用 with 添加测试步骤
        with allure.step("执行新增员工"):
            # 添加文本描述
            allure.attach(str(url + route), name="请求URL")
            allure.attach(json.dumps(data), name="请求数据")
        assert 0

    @allure.severity(allure.severity_level.NORMAL)
    def test_f1(self):
        assert 1

    @allure.severity(allure.severity_level.MINOR)
    def test_f2(self):
        assert 0

    @allure.severity(allure.severity_level.TRIVIAL)
    def test_f3(self):
        assert 1

    def test_f4(self):
        assert 1
[pytest]

# 添加命令行参数
addopts = -s --alluredir ./report/jsonfile

# 文件搜索路径
testpaths = ./scripts
在terminal 一次执行 pytest 和 allure generate report/jsonfile -o report/html --clean ,在浏览器打开测试报告:
