参考:https://blog.csdn.net/CAU_Ayao/article/details/83536320#1__18
可以按照参考链接的步骤安装,以下为本人安装时实际遇到的问题
1. 配置anaconda3环境
下载地址: https://mirrors.tuna.tsinghua.edu.cn/anaconda/archive/
我下载的版本是 anaconda3-5.2.0
选择此版本因为该版本python是3.6
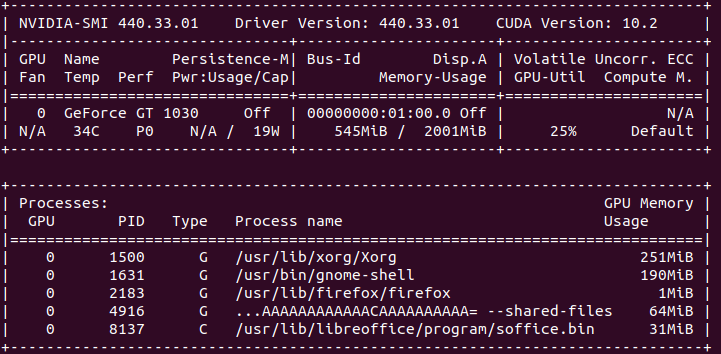
2. 安装nvidia
终端输入命令:nvidia-smi
挑选适合自己电脑的版本,成功显示如下:
3. 降级gcc
在终端输入,可以看当前gcc版本
gcc --version

查看cuda10.2和gcc的对应关系

我当前的版本是7.3.0,所以就没有选择降级
4. 安装cuda
我选择的版本是10.2,如下图进行选择

然后根据提示进行安装。
提示一直失败 然后参考https://www.jianshu.com/p/b6c472231fc8
在命令行输入
apt-get --purge -y remove 'cuda*'

apt-get --purge -y remove 'nvidia*'

apt autoremove -y

apt-get clean

reboot
重启电脑,发现安装成功
3. 安装cudnn
1) 下载地址:https://developer.nvidia.com/rdp/cudnn-download

2)选择 cudnn Library for Linux ,点击下载
然后在下载位置打开终端 ,输入命令
sudo tar -zxvf /home/XXX/cudnn-10.2-linux-x64-v5.1.tgz
然后在终端继续输入
sudo cp cuda/include/cudnn.h /usr/local/cuda/include

注意,解压后的文件夹名称为cuda ,将对应文件复制到 /usr/local中的cuda内.

sudo cp cuda/lib64/libcudnn* /usr/local/cuda/lib64
sudo chmod a+r /usr/local/cuda/include/cudnn.h /usr/local/cuda/lib64/libcudnn*
3)安装测试
在终端输入
nvcc –V

解决方法:
在终端输入
sudo gedit ~/.bashrc
然后在文件最后添加
export PATH="/usr/local/cuda-10.2/bin:$PATH"
export CUDA_HOME=/usr/local/cuda-10.2
export LD_LIBRARY_PATH=/usr/local/cuda-10.2/lib64:/usr/local/cuda-10.2/extras/CUPTI/lib64:$LD_LIBRARY_PATHs
export LD_LIBRARY_PATH="/usr/local/cuda-10.2/lib64:/usr/local/cuda-10.2/extras/CUPTI/lib64:/usr/local/cuda-10.2/lib64:/usr/local/cuda-10.2/lib64"
终端输入
source ~/.bashrc
再次输入 nvcc --version,发现成功

4. 安装opencv
问题1:https://blog.csdn.net/weixin_41053564/article/details/81254410
问题2:https://mlog.club/article/2282932
下载cmake-gui,取消 cuda、cuff
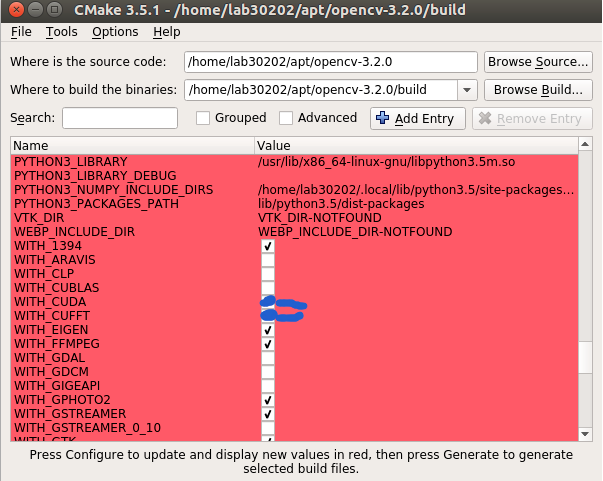
取消 ENABLE_PRECOMPILED_HEADERS=OFF
终端输入:pkg-config --modversion opencv

成功!麻蛋,整了一天才发现问题
其中缺少的文件 ippicv_linux_20151201.tgz 百度云链接如下:
链接: https://pan.baidu.com/s/1SPf4hR40oWs9vwWzu-GpYQ 密码: 2bti
5. 安装caffe
参考链接:
https://blog.csdn.net/CAU_Ayao/article/details/83536320#1__18
跟着文章的步骤做就可以
安装过程中出现
/usr/local/cuda/include/math_functions.h:54:2: warning: #warning “math_functions.h is an internal header file and must not be used directly. This file will be removed in a future CUDA release. Please use cuda_runtime_api.h or cuda_runtime.h instead.” [-Wcpp]
#warning "math_functions.h is an internal header file and must not be used directly. This file will be removed in a future CUDA release. Please use cuda_runtime_api.h or cuda_runtime.h instead."
原因:cuda版本函数文件更新
解决方案:打开出问题的文件math_functions.cu文件,进行修改
//#include <math_functions.h>  // CUDA's, not caffe's, for fabs, signbit(删除该行)
#include <cuda_runtime.h>     // CUDA's, not caffe's, for fabs, signbit(增加该行)
#include <thrust/device_vector.h>
#include <thrust/functional.h>  // thrust::plus
#include <thrust/reduce.h>
6. 测试caffe

没报错就是成功了
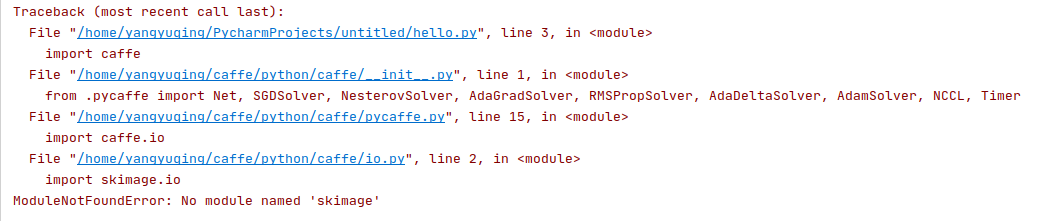
5. 在pycharm引用caffe
直接引用的话,会发现:会提示没有caffe这个模块

在首行添加你自己文件夹下caffe的目录
import sys
sys.path.append('/home/yangyuqing/caffe/python')
import caffe
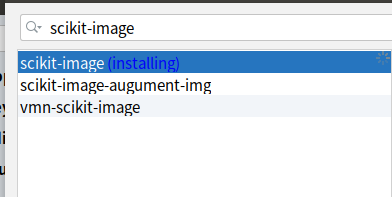
再运行会发现
点击下载scikit-image包