Linux搭建nexus仓库
1.安装jdk
1.1 获取安装包,解压到指定目录:
1 tar xf jdk.tar.gz -C /opt/export
1.2 配置环境变量:
1 # vim /etc/profile
2 export JAVA_HOME=/opt/export/jdk
3 export PATH=$JAVA_HOME/bin:$PATH
4 export CLASSPATH=.:$JAVA_HOME/lib:$JAVA_HOME/jre/lib:$JAVA_HOME/lib/tools.jar
5 export RUN_AS_USER=root  # 后边启动nexus需要
6
7 # source /etc/profile
1.3 出现下面结果,说明部署成功
1 # java -version
2 java version "1.7.0_80"
3 Java(TM) SE Runtime Environment (build 1.7.0_80-b15)
4 Java HotSpot(TM) 64-Bit Server VM (build 24.80-b11, mixed mode)
2.安装nexus
2.1下载安装
下载地址:
https://www.sonatype.com/download-oss-sonatype
https://help.sonatype.com/repomanager2/download/download-archives---repository-manager-oss
1 cd /opt
2 tar xf nexus-2.4.0-09-bundle.tar.gz
解压后有两个目录:
1 $ ls /opt/
2 nexus-2.4.0-09  sonatype-work
更改目录名称:
1 mv nexus-2.4.0-09 nexus
2.2 更改nexus配置文件
默认端口为8081,可根据需要修改:
 1 $ vim /opt/nexus/conf/nexus.properties
 2 # Jetty section
 3 application-port=8081  # 修改为10890
 4 application-host=0.0.0.0
 5 nexus-webapp=${bundleBasedir}/nexus
 6 nexus-webapp-context-path=/nexus
 7
 8 # Nexus section
 9 nexus-work=${bundleBasedir}/../sonatype-work/nexus
10 runtime=${bundleBasedir}/nexus/WEB-INF
2.3 关闭防火墙或打开10890端口
1 /etc/init.d/iptables stop
2 chkconfig iptables off
2.4 启动nexus
1 $ /opt/nexus/bin/jsw/linux-x86-64/nexus start
2 ****************************************
3 WARNING - NOT RECOMMENDED TO RUN AS ROOT
4 ****************************************
5 Starting Nexus OSS...
6 Started Nexus OSS.
如果没有配置环境变量RUN_AS_USER=root,会报错:
1 # /opt/nexus/bin/jsw/linux-x86-64/nexus start
2 ****************************************
3 WARNING - NOT RECOMMENDED TO RUN AS ROOT
4 ****************************************
5 If you insist running as root, then set the environment variable RUN_AS_USER=root before running this script.
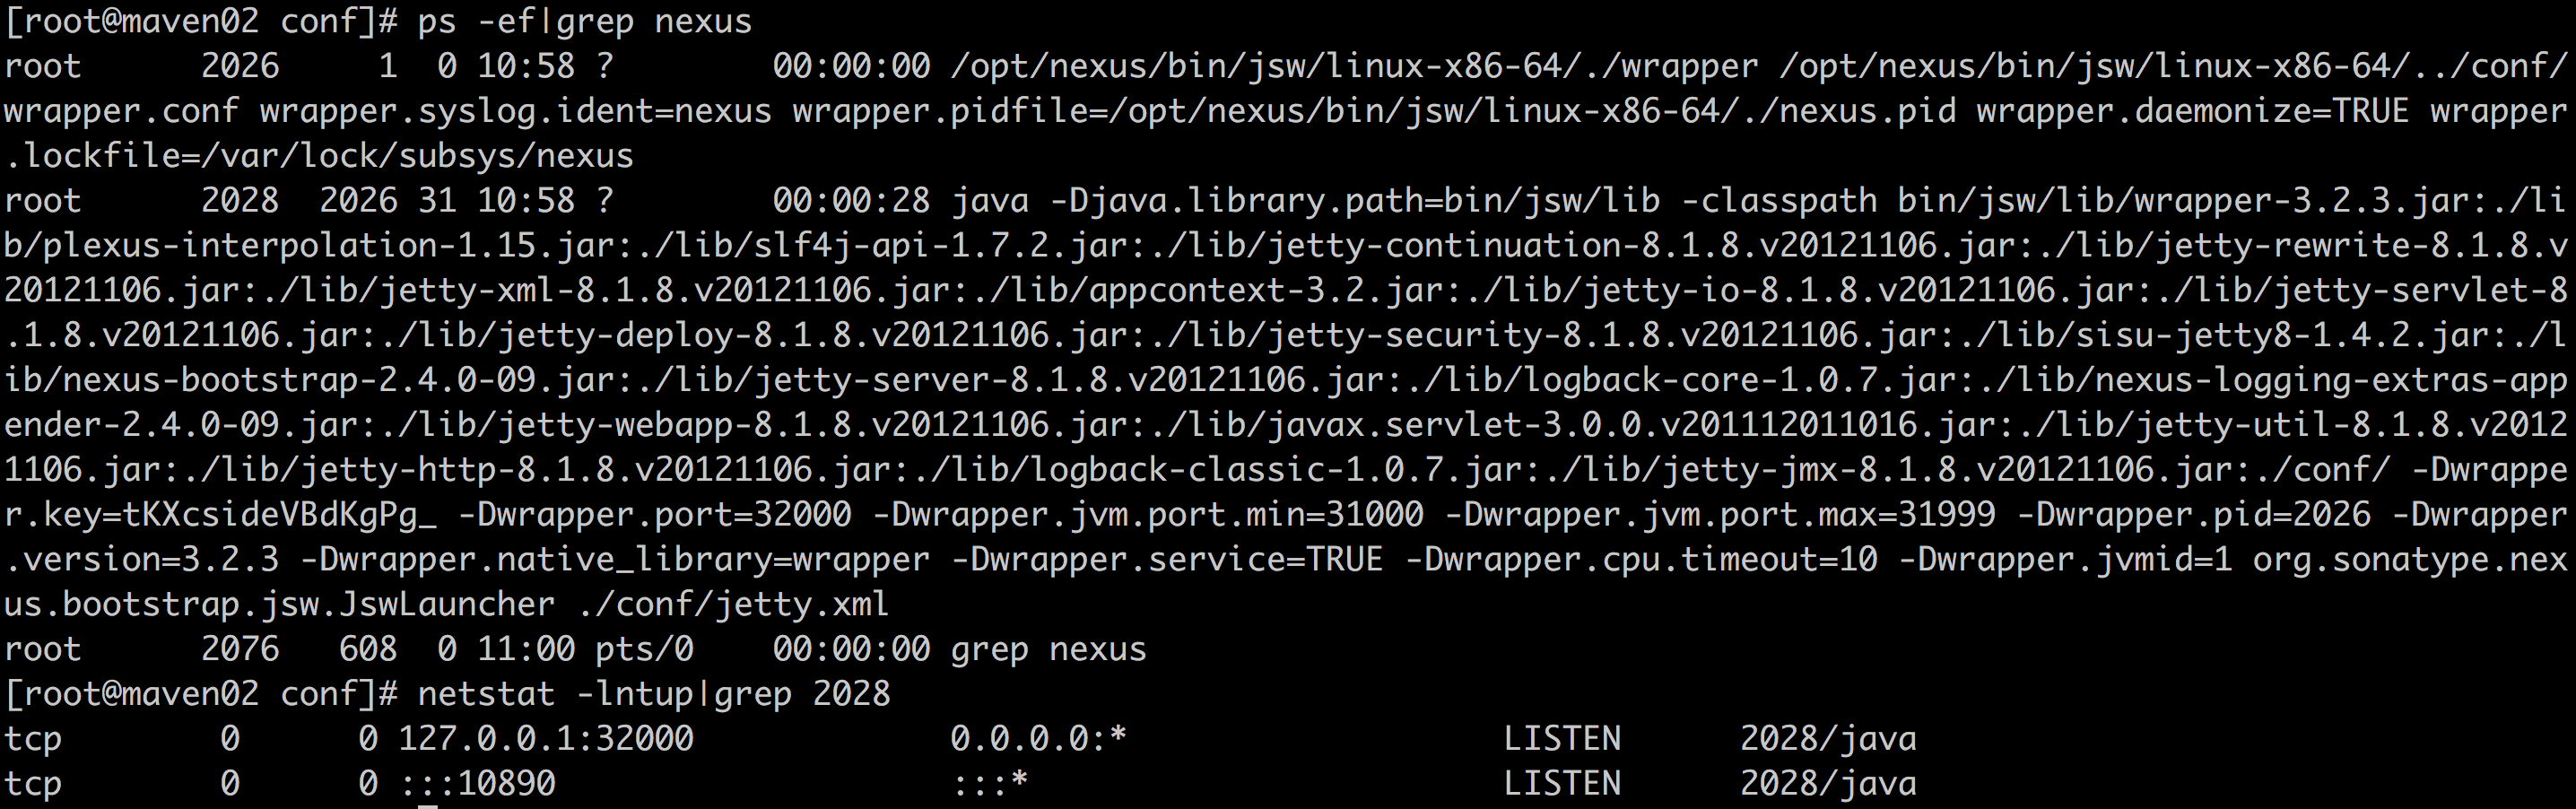
2.5 检查进程和端口
3.浏览器访问nexus
1 http://ip地址:8081/nexus
2 登录,默认用户名 admin 默认密码 admin123
访问登录:

4.迁移nexus
如果想要将nexus仓库迁移,只需要打包此目录,迁移到新nexus主机:
1 $ du -sh /opt/sonatype-work/nexus/storage
2 47G    /opt/sonatype-work/nexus/storage/
由于文件过大,可采用rsync的方式。
本文参考:https://blog.csdn.net/sunyanxiong123/article/details/68926610
Nexus高可用方案
描述:由于nexus进程会因为某些原因挂掉,为了不影响使用,决定做nexus高可用。
准备:根据上一章,准备两台服务器搭建nexus,主:192.168.51.204 maven01,备:192.168.51.207 maven02:
1.搭建keepalived
主:
 1 # cat /etc/keepalived/keepalived.conf
 2 ! Configuration File for keepalived
 3
 4 global_defs {
 5    router_id maven01
 6 }
 7 vrrp_script chk_http_port {              #检测nexus端口是否存在,不存在进行vip漂移
 8     script "</dev/tcp/127.0.0.1/10890"
 9     interval 1
10     weight -30
11     fall 1
12     rise 1
13 }
14 vrrp_instance VI_1 {
15     state MASTER
16     interface eth0
17     virtual_router_id 88
18     priority 150
19     advert_int 1
20     authentication {
21         auth_type PASS
22         auth_pass 1111
23     }
24     virtual_ipaddress {
25         192.168.51.210
26     }
27     track_script {
28         chk_http_port
29     }
30 }
备:
 1 # cat /etc/keepalived/keepalived.conf
 2 ! Configuration File for keepalived
 3
 4 global_defs {
 5    router_id maven01
 6 }
 7 vrrp_script chk_http_port {
 8     script "</dev/tcp/127.0.0.1/10890"
 9     interval 1
10     weight -30
11     fall 1
12     rise 1
13 }
14 vrrp_instance VI_1 {
15     state MASTER
16     interface eth0
17     virtual_router_id 88
18     priority 100
19     advert_int 1
20     authentication {
21         auth_type PASS
22         auth_pass 1111
23     }
24     virtual_ipaddress {
25         192.168.51.210
26     }
27     track_script {
28         chk_http_port
29     }
30 }
2.同步数据
描述:对比同步数据方式,1⃣️定时任务rsync同步:不及时,容易遗漏数据。2⃣️nfs共享:能够解决数据一致问题,但是主一旦宕机,备库起不到任何作用。3⃣️sersync或者inotify+rsync:可以实现实时同步,最后选用inotify方式。
2.1 部署rsync
2.1.1 备:部署rsync服务端
安装rsync软件
1 yum install -y rsync
编写配置文件
 1 $ cat /etc/rsyncd.conf
 2 #created by yjn at 2018
 3
 4 uid = rsync
 5 gid = rsync
 6 use chroot = no
 7 max connections = 10
 8 strict modes = yes
 9 pid file = /var/run/rsyncd.pid
10 lock file = /var/run/rsync.lock
11 log file = /var/log/rsyncd.log
12
13 [nexus]
14 path = /opt/sonatype-work/nexus/storage
15 comment = "nexus backup dir"
16 ignore errors
17 read only = no
18 write only = no
19 hosts allow = 192.168.0.0/16
20 auth users = rsync_backup
21 secrets file = /etc/rsync.password
创建备份目录的管理用户
1 useradd -s /sbin/nologin -M rsync
创建安全认证文件
1 echo "rsync_backup:123" >/etc/rsync.password
2 chmod 600 /etc/rsync.password
修改备份目录属主
1 chown -R rsync.rsync /opt/sonatype-work/nexus/storage
启动rsync服务
1 rsync --daemon
2 说明:rsync服务的端口号为873端口(tcp)
2.1.2 主:部署rsync客户端
安装rsync软件
1 yum install -y rsync
创建安全认证文件
1 echo "123" >/etc/rsync.password
2 chmod 600 /etc/rsync.password
2.2 部署inotify-tools软件
inotify软件的参考资料链接:https://github.com/rvoicilas/inotify-tools/wiki
1 # yum install -y inotify-tools
2 Loaded plugins: fastestmirror, security
3 Setting up Install Process
4 Loading mirror speeds from cached hostfile
5  * base: mirrors.zju.edu.cn
6  * extras: mirror.bit.edu.cn
7  * updates: mirrors.tuna.tsinghua.edu.cn
8 No package inotify-tools available.
9 Error: Nothing to do
没有这个包,更新epel源:
1 yum install -y epel-release && yum update
2.3 inotify+rsync结合脚本同步nexus
2.3.1 写同步脚本
#!/bin/bash
###########

inotifywait -mrq /opt/sonatype-work/nexus/storage  --format '%w%f'  -e create,delete,close_write,moved_to|
while read line
do
  rsync -az --delete  /opt/sonatype-work/nexus/storage/*  rsync_backup@192.168.51.207::nexus --password-file=/etc/rsync.password &>/dev/null
done
2.3.2 后台执行:
1 sh /yjn/scripts/backup.sh &
2.3.3 发现报错:
1 Failed to watch /opt/sonatype-work/nexus/storage; upper limit on inotify watches reached!
2 Please increase the amount of inotify watches allowed per user via `/proc/sys/fs/inotify/max_user_watches'.
注意:inotify默认监控同步文件的个数是有限制的,8192,通过配置文件/proc/sys/fs/inotify/max_user_watches可以调整监控的个数。此问题明显就是文件太多,导致无法监控。
2.3.4 解决:
1 echo 8192000 > /proc/sys/fs/inotify/max_user_watches
此时再执行脚本,没有报错信息,验证可以同步。