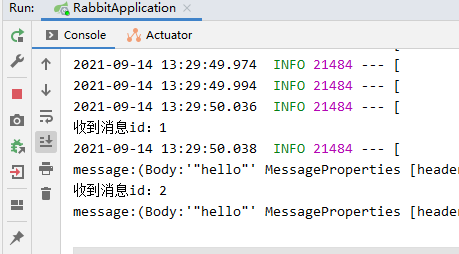
一、创建新用户
在Admin菜单Users子菜单下,填入用户名,密码,确认密码和选择对应权限Tags标记,点击Add user按钮进行添加。
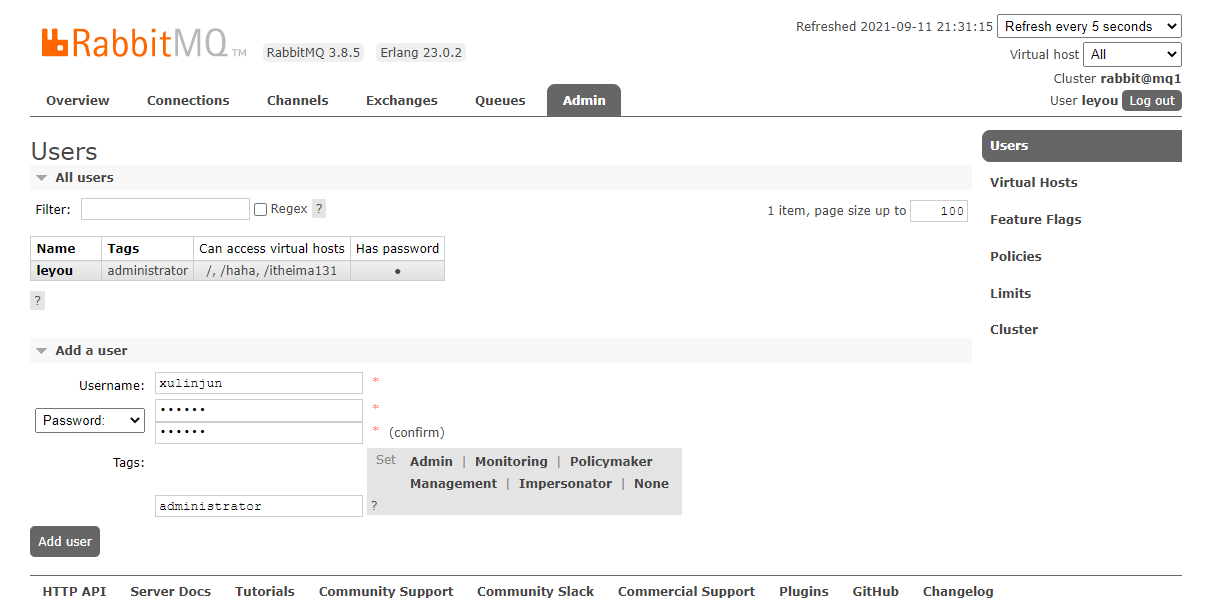
二、创建新虚拟机
在Admin菜单下Virtual Hosts子菜单下,在图中表单位置,填入虚拟机名(注意,虚拟机名一定要以/开头),接着填入描述,和Tags标记,完毕,点击Add Virtual Hosts按钮,就可以添加一个新的虚拟机了。
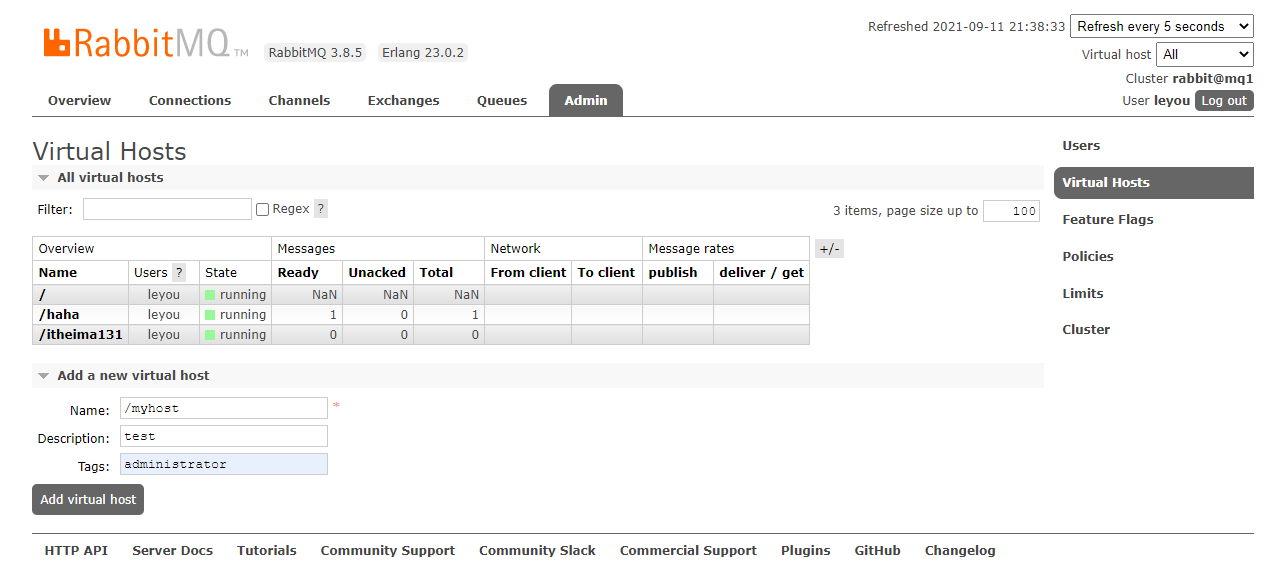
三、给新建的虚拟机添加可访问权限用户
这里用于测试,就添加我们刚刚创建的用户xulinjun好了,从虚拟机列表点击我们刚刚创建的虚拟机(/myhost),进入虚拟机详情,在下图位置选择我们创建的新用户,点击Set permission,完毕。
四、Spring Boot AMQP
Spring有很多不同的项目,其中就有对AMQP的支持
新建一个Spring Boot项目,在此基础上进行如下操作
4.1、导包
分别导入了web环境启动器、rabbitMQ启动器、JSON转换器
<dependencies>
    <dependency>
        <groupId>org.springframework.boot</groupId>
        <artifactId>spring-boot-starter-web</artifactId>
    </dependency>
    <dependency>
        <groupId>org.springframework.boot</groupId>
        <artifactId>spring-boot-starter-amqp</artifactId>
    </dependency>
    <dependency>
        <groupId>com.fasterxml.jackson.dataformat</groupId>
        <artifactId>jackson-dataformat-xml</artifactId>
        <version>2.9.10</version>
    </dependency>
</dependencies>
4.2、添加rabbitMQ配置信息
server:
  port: 8081
spring:
  application:
    name: producer-application
  rabbitmq:
    virtual-host: /myhost   # 虚拟机名称
    username: xulinjun   # 用户名
    password: 123456   # 密码
    addresses: 192.168.206.99:5672   # 地址及端口
4.3、添加启动类
package com.learn;

import org.springframework.amqp.support.converter.Jackson2JsonMessageConverter;
import org.springframework.boot.SpringApplication;
import org.springframework.boot.autoconfigure.SpringBootApplication;
import org.springframework.context.annotation.Bean;

@SpringBootApplication
public class RabbitApplication {
    public static void main(String[] args) {
        SpringApplication.run(RabbitApplication.class);
    }

    @Bean
    public Jackson2JsonMessageConverter jsonMessageConverter(){
        // 创建JSON的消息转换器
        return new Jackson2JsonMessageConverter();
    }
}
4.4、在web层添加控制器方法
这里添加了2个方法,sendMsg往mq中发送字符串类型的数据,sendMap往mq中发送map类型的数据,但是刚刚配置JSON转换器,也是会自动转换String,向mq中发送。
注意的是,队列必须提前存在,不会自动创建
package com.learn.web;

import org.springframework.amqp.rabbit.core.RabbitTemplate;
import org.springframework.beans.factory.annotation.Autowired;
import org.springframework.web.bind.annotation.PathVariable;
import org.springframework.web.bind.annotation.RequestMapping;
import org.springframework.web.bind.annotation.RestController;

import java.util.HashMap;
import java.util.Map;

@RestController
public class ProducerController {

    // rabbit客户端对象
    @Autowired
    private RabbitTemplate rabbitTemplate;

    @RequestMapping("/send/{msg}")
    public String sendMsg(@PathVariable("msg") String msg){

        // 参数1:队列名称,操作的队列必须存在
        // 参数2:存放的消息信息
            rabbitTemplate.convertAndSend("boot_queue", msg);
        return "ok";
    }

    @RequestMapping("/sendmap")
    public String sendMap(){
        Map<String, String> map = new HashMap<String, String>();
        map.put("name", "jack");
        map.put("age", "27");
        rabbitTemplate.convertAndSend("boot_queue", map);
        return "ok";
    }
}
4.5、访问浏览器,向mq中发送消息
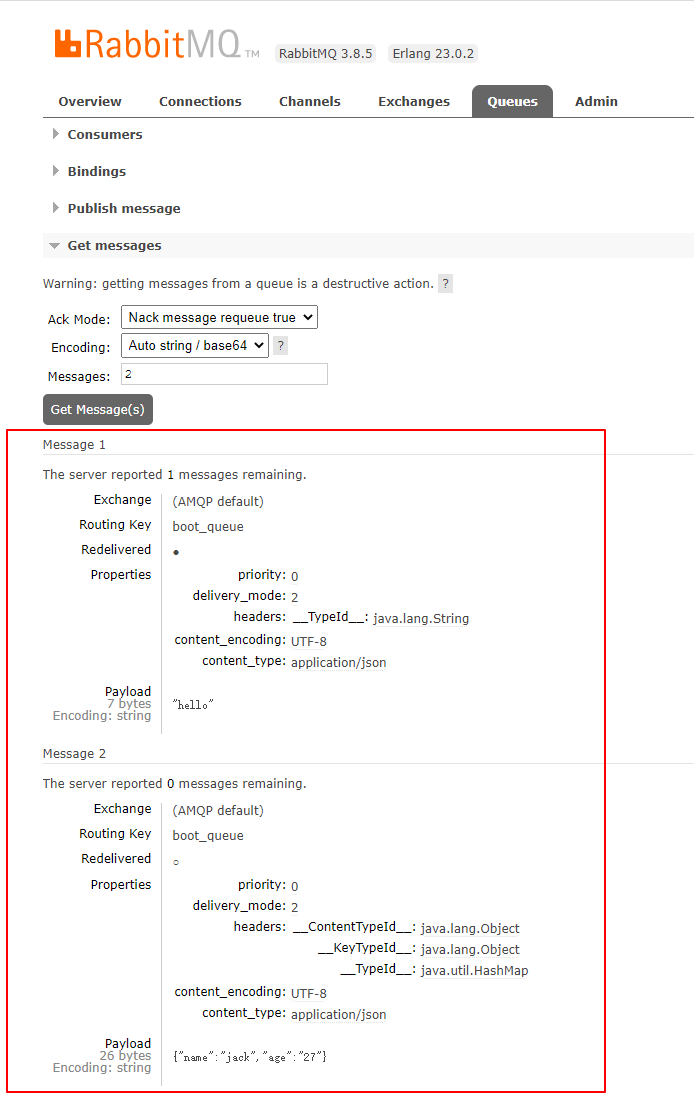
分别在浏览器中访问 http://localhost:8081/send/hello、http://localhost:8081/sendmap,往mq中发送消息


在mq管理界面里面就可以看到存储的消息了
4.6、在consumer包中添加消费消息代码
package com.learn.consumer;

import com.rabbitmq.client.Channel;
import org.springframework.amqp.core.Message;
import org.springframework.amqp.rabbit.annotation.RabbitListener;
import org.springframework.stereotype.Component;

import java.util.Map;

@Component
public class TestConsumer {
    @RabbitListener(queues = "boot_queue")   // 注意,只需要队列名称一致即可
    public void receive(String msg, Channel chanel, Message message) throws InterruptedException {
        // 会话唯一ID
        long deliveryTag = message.getMessageProperties().getDeliveryTag();
        System.out.println("收到消息id:" + deliveryTag);
        Thread.sleep(500);
        System.out.println("message:" + msg);
    }
}
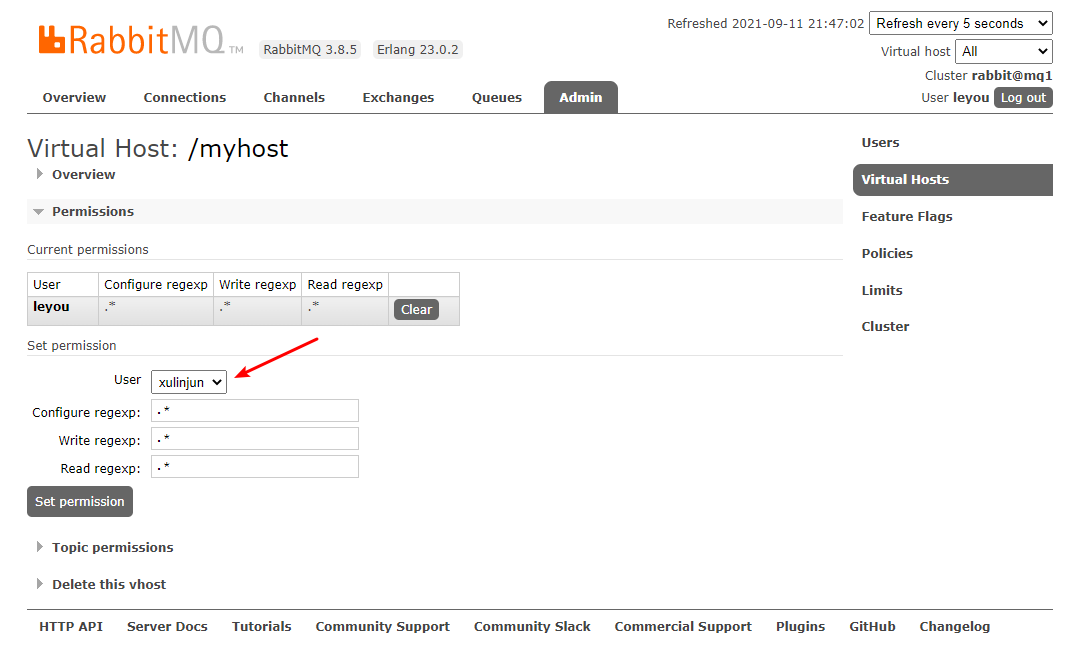
4.7、重启项目启动器,消费消息
