1、Eclipse集成TestNG插件
a.下载TestNG离线插件并解压得到features和plugins两个文件夹;
b.将features文件下的org.testng.eclipse_6.9.8.201510130443复制到D:eclipsefeatures目录下;
c.将plugins文件下的org.testng.eclipse_6.9.8.201510130443复制到D:eclipseplugins目录下;
注:重启Eclipse,windows=》preferences=》TestNG
2、导入testNG依赖包
a.进入maven中央仓库地址:https://mvnrepository.com/
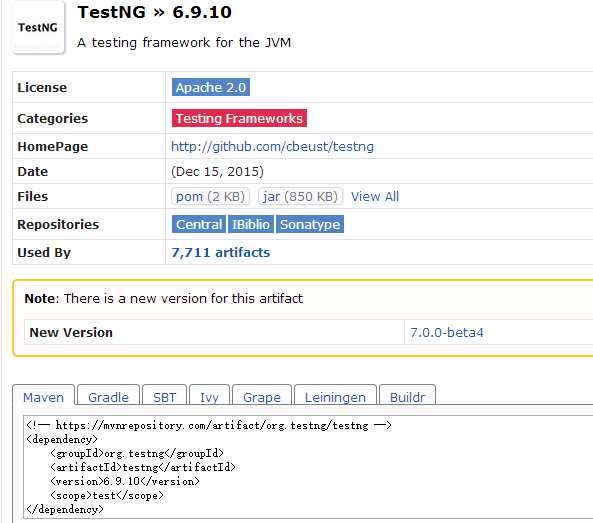
b.Maven项目下的pom.xml配置
  <dependencies>
    <!-- https://mvnrepository.com/artifact/org.testng/testng -->
    <dependency>
       <groupId>org.testng</groupId>
       <artifactId>testng</artifactId>
       <version>6.9.10</version>
       <scope>test</scope>
    </dependency>
  </dependencies>
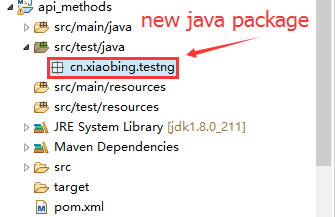
3.配置完成,新建TestNGDemo01类

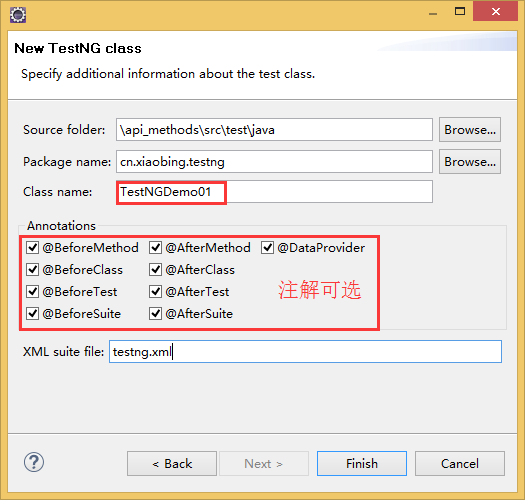
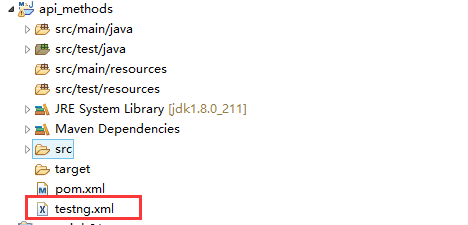
4.为了方便访问,也可以将testng.xml 拖动至项目根目录下:
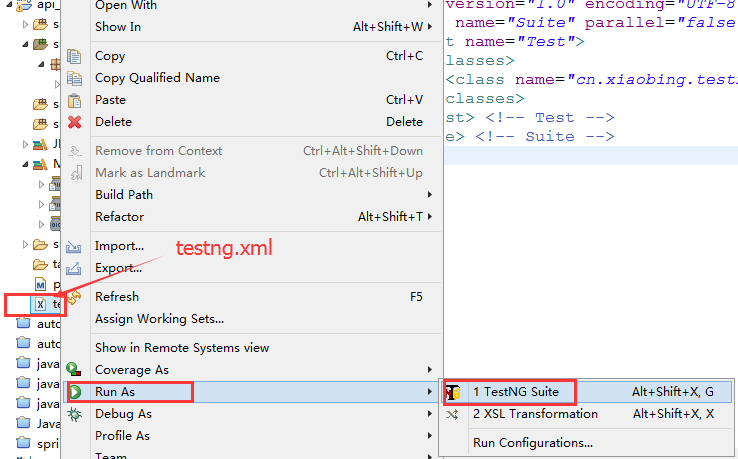
5.运行套件执行类可以在这么配置

6.TestNGDemo01示例代码
package cn.xiaobing.testng;

import org.testng.annotations.Test;
import org.testng.annotations.BeforeMethod;
import org.testng.annotations.AfterMethod;
import org.testng.annotations.DataProvider;
import org.testng.annotations.BeforeClass;
import org.testng.annotations.AfterClass;
import org.testng.annotations.BeforeTest;
import org.testng.annotations.AfterTest;
import org.testng.annotations.BeforeSuite;
import org.testng.annotations.AfterSuite;

public class TestNGDemo01 {
  @Test(dataProvider = "dp")
  public void f(Integer n, String s) {
	  System.out.println("TestNGDemo01.f()");
  }
  @BeforeMethod
  public void beforeMethod() {
	  System.out.println("TestNGDemo01.beforeMethod()");
  }

  @AfterMethod
  public void afterMethod() {
	  System.out.println("TestNGDemo01.afterMethod()");
  }


  @DataProvider
  public Object[][] dp() {
	  System.out.println("数据提供者:@DataProvider");
    return new Object[][] {
      new Object[] { 1, "a" },
      new Object[] { 2, "b" },
    };
  }
  @BeforeClass
  public void beforeClass() {
	  System.out.println("TestNGDemo01.beforeClass()");
  }

  @AfterClass
  public void afterClass() {
	  System.out.println("TestNGDemo01.afterClass()");
  }

  @BeforeTest
  public void beforeTest() {
	  System.out.println("TestNGDemo01.beforeTest()");
  }

  @AfterTest
  public void afterTest() {
	  System.out.println("TestNGDemo01.afterTest()");
  }

  @BeforeSuite
  public void beforeSuite() {
	  System.out.println("TestNGDemo01.beforeSuite()");
  }

  @AfterSuite
  public void afterSuite() {
	  System.out.println("TestNGDemo01.afterSuite()");
  }

}
7.执行套件:
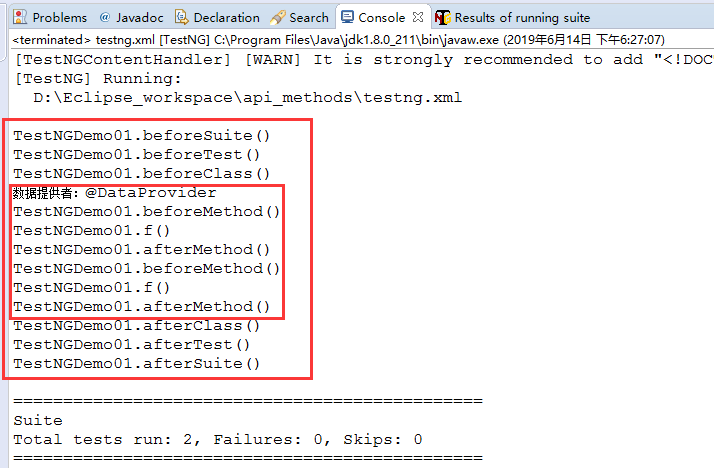
8.输出结果:

总结:亲测后总结,分享给需要的人,不足之处后续修正补充!