前言
一个vue+element-ui框架的图片上传demo
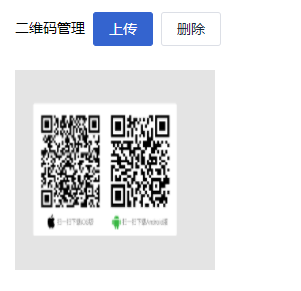
支持图片上传、回显预览、删除、格式校验及限制大小
源码
<template>
  <div class="el-flex el-flex-column" style="height:100%;overflow: auto">
    <div class="content-box__gap el-flex-grow el-overflow-hidden">
      <div class="fill-height el-flex el-flex-column el-padding16 el-whiteBg">
        <div class="el-mb-3 el-flex">
          <div class="el-mt-2">
            二维码管理
          </div>
          <el-upload
            action
            :show-file-list="false"
            :http-request="selectPicUpload"
            :before-upload="beforeAvatarUpload"
            :on-remove="handleRemove"
          >
            <!-- <i class="el-icon-plus avatar-uploader-icon"></i> -->
            <el-button type="primary" class="el-ml-2">上传</el-button>
          </el-upload>
          <el-button class="el-ml-2" :disabled="!this.curId" @click="deleteFun">删除</el-button>
        </div>
        <img v-if="imageUrl && curId" :src="imageUrl" class="avatar" />
      </div>
    </div>
  </div>
</template>

<script lang="ts">
import { Vue, Component, Inject } from 'vue-property-decorator'
import { uploadEwm, deleteEwm, getEwm } from '@/modules/xingzheng/office/api/user'

@Component({
  name: 'CodeManage'
})
export default class CodeManage extends Vue {
  imageUrl = ''
  curId = ''

  created() {
    this.getEwmFun()
  }
  getEwmFun() {
    getEwm().then(res => {
      this.imageUrl = `data:image/jpg;base64,${res.data.content}`
      this.curId = res.data.id
    })
  }
  selectPicUpload(obj: any) {
    let fd = new FormData() //参数的格式是formData格式的
    fd.append('avatarFile', obj.file) //参数
    uploadEwm(fd).then(() => {
      this.getEwmFun()
    })
  }
  //对上传图片的大小、格式进行限制
  beforeAvatarUpload(file: any) {
    const isJPG = file.type === 'image/jpeg'
    const isJPG2 = file.type === 'image/jpg'
    const isPNG = file.type === 'image/png'
    const isLt5M = file.size / 1024 / 1024 < 5
    if (!isJPG && !isJPG2 && !isPNG) {
      this.$message.warning('只支持jpg或png格式图片')
    }
    if (!isLt5M) {
      this.$message.warning('请上传5MB以内的图片!')
    }
    return (isJPG || isJPG2 || isPNG) && isLt5M
  }
  deleteFun() {
    this.$confirm('确定要当前删除二维码?', '提示', {
      confirmButtonText: '确定',
      cancelButtonText: '取消',
      type: 'warning'
    }).then(() => {
      deleteEwm(this.curId).then(() => {
        this.imageUrl = ''
        this.$message({
          type: 'success',
          message: '删除成功'
        })
      })
    })
  }
}
</script>
<style scoped lang="scss">
.avatar {
  display: block;
   200px;
  height: 200px;
  margin-top: 12px;
}
</style>
api例子
//获取二维码
export function getEwm() {
  return request({
    url: `/qrcode`,
    method: 'get',
    baseURL: globalBaseUrl
  })
}
//上传二维码
export function uploadEwm(data: any) {
  return request({
    url: `/admin/qrcode/upload`,
    method: 'post',
    data: data,
    baseURL: globalBaseUrl
  })
}
//删除二维码
export function deleteEwm(id: any) {
  return request({
    url: `/admin/qrcode/${id}`,
    method: 'delete',
    baseURL: globalBaseUrl
  })
}
效果