一、搭建目的;
通过搭建过程,了解目前流行的监控系统。
二、搭建环境;
虚机
三、搭建配置调试过程;
1、prometheus相关安装包下载地址;https://prometheus.io/download/
2、grafana下载地址;https://grafana.com/grafana/download
3、安装
(1)、下载并解压安装prometheus(网上搜索教程,本笔记省略);配置prometheus并启动prometheus;
prometheus.yml
# my global config
global:
  scrape_interval:     15s # Set the scrape interval to every 15 seconds. Default is every 1 minute.
  evaluation_interval: 15s # Evaluate rules every 15 seconds. The default is every 1 minute.
# Alertmanager configuration
#  - job_name: 'Alertmanager'
#    static_configs:

        #- alertmanager:9093

# Load rules once and periodically evaluate them according to the global 'evaluation_interval'.
  # - "first_rules.yml"
  # - "second_rules.yml"

# A scrape configuration containing exactly one endpoint to scrape:
# Here it's Prometheus itself.
scrape_configs:
  # The job name is added as a label `job=<job_name>` to any timeseries scraped from this config.
  - job_name: 'prometheus'

    # metrics_path defaults to '/metrics'
    # scheme defaults to 'http'.

    static_configs:
    - targets: ['localhost:9090']
*注意targets为什么不用服务器ip而是用localhost因为如果用服务器ip的话,一旦服务器ip变了就无法使用*
启动prometheus命令进入安装目录 ./prometheus --config.file=prometheus.yml &
netstat –tpln可以看到已经 监听9090端口,可以通过ip:9090访问prometheus;
(2)、安装启动node_exporter(网上搜索教程,本笔记省略);并接入到prometheus;
启动node_exporter;进入安装目录 ./node_exporter &
netstat –tpln可以看到已经 监听9100端口
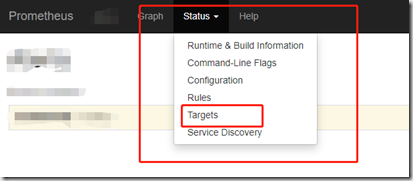
修改prometheus;并重启prometheus查看ip:9090上node_exporter服务是否接入并up成功;
prometheus.yml;
# my global config
global:
  scrape_interval:     15s # Set the scrape interval to every 15 seconds. Default is every 1 minute.
  evaluation_interval: 15s # Evaluate rules every 15 seconds. The default is every 1 minute.
  # scrape_timeout is set to the global default (10s).

# Alertmanager configuration
#  - job_name: 'Alertmanager'
#    static_configs:

        #- alertmanager:9093

# Load rules once and periodically evaluate them according to the global 'evaluation_interval'.
  # - "first_rules.yml"
  # - "second_rules.yml"

# A scrape configuration containing exactly one endpoint to scrape:
# Here it's Prometheus itself.
scrape_configs:
  # The job name is added as a label `job=<job_name>` to any timeseries scraped from this config.
  - job_name: 'prometheus'

    # metrics_path defaults to '/metrics'
    # scheme defaults to 'http'.

    static_configs:
    - targets: ['localhost:9090']
  - job_name: 'node_self'
    scheme: http
    #tls_config:
      #ca_file: node_exporter.crt
    static_configs:
    - targets: ['localhost:9100']
重启prometheus在ip:9090看到如下图表示正常
(3)、安装配置alertmanager+prometheus_webhook_dingtalk完成报警收集与报警消息推送到钉钉;修改prometheus配置接入alertmanager并添加报警规则rules.yml
安装,启动prometheus_webhook_dingtalk
启动prometheus_webhook_dingtalk;进入安装目录;nohup ./prometheus-webhook-dingtalk --ding.profile="ops_dingding=https://oapi.dingtalk.com/robot/send?access_token=xxxxxxx" --ding.profile="dev_dingding=https://oapi.dingtalk.com/robot/send?access_token=xxxxxxxxx2" 2>&1 1>dingding.log &
说明:1、https://oapi.dingtalk.com/robot/send?access_token=xxxxxxxxx2和https://oapi.dingtalk.com/robot/send?access_token=xxxxxxx为钉钉自己创建机器人接口。webhook可惟在启动时指定多个机器人(注意在webhook中的—ding.profile命名不能相同;一个为ops_dingding;一个为dev_dingding);
启动后默认监听8060端口;
(4)、配置alertmanager.yml并启动alertmanager服务;
alertmanager.yml
route:
  group_by: ['alertname']
  group_wait: 30s
  group_interval: 5m
  repeat_interval: 1h
  receiver: 'web.hook'
  routes:
  - receiver: 'test.yaya'
    match:
      priority: P0
    continue: true
  - receiver: 'web.hook'
    match:
      priority: P0
    continue: true
receivers:
- name: 'web.hook'
  webhook_configs:
  - url: 'http://127.0.0.1:8060/dingtalk/ops_dingding/send'
#inhibit_rules:
  #- source_match:
    #  severity: 'critical'
    #target_match:
    #  severity: 'warning'
    #equal: ['alertname', 'dev', 'instance']
- name: 'test.yaya'
  webhook_configs:
  - url: 'http://127.0.0.1:8060/dingtalk/dev_dingding/send'
#inhibit_rules:
#  - source_match:
#      severity: 'critical'
#    target_match:
#      severity: 'warning'
#    equal: ['alertname','dev', 'instance']
*注意routes中的报警方式test.yaya和web.hook如果没有continue:true那么在第一个报警匹配之后不会再运行后台其它匹配的报警;url为报警的prometheus_webhook_dingtalk的接口;两个不同的机器人ops_dingding和dev_dingding*
进入安装目录 ;运行./alertmanager --config.file=alertmanager.yml &;监控9093端口配置服务正常启动。
配置prometheus.yml接入alertmanager
global:
  scrape_interval:     15s # Set the scrape interval to every 15 seconds. Default is every 1 minute.
  evaluation_interval: 15s # Evaluate rules every 15 seconds. The default is every 1 minute.
  # scrape_timeout is set to the global default (10s).

# Alertmanager configuration
alerting:
  alertmanagers:
    - static_configs:
      - targets: ['localhost:9093']
#  - job_name: 'Alertmanager'
#    static_configs:

      - targets:
        #- alertmanager:9093

# Load rules once and periodically evaluate them according to the global 'evaluation_interval'.
rule_files:
  - "rules.yml"
  # - "first_rules.yml"
  # - "second_rules.yml"

# A scrape configuration containing exactly one endpoint to scrape:
# Here it's Prometheus itself.
scrape_configs:
  # The job name is added as a label `job=<job_name>` to any timeseries scraped from this config.
  - job_name: 'prometheus'

    # metrics_path defaults to '/metrics'
    # scheme defaults to 'http'.

    static_configs:
    - targets: ['localhost:9090']
  - job_name: 'node_self'
    scheme: http
    #tls_config:
      #ca_file: node_exporter.crt
    static_configs:
    - targets: ['localhost:9100']
*注意rule_files指定了报警规则文件;目录默认为prometheus安装目录 *
rules.yml
groups:
- name: "服务报警测试"
  rules:
  - alert: "内存服务报警"
    expr: 100 - ((node_memory_MemAvailable_bytes * 100) / node_memory_MemTotal_bytes) > 40
    for: 1m
    labels:
      #token: {{ .Values.prometheus.prometheusSpec.externalLabels.env }}-bigdata
      priority: P0
      status: 告警
    annotations:
      description: "大数据告警:IPadress:{{$labels.instance}} 内存使用大于48%(目前使用:{{$value}}%)"
      summary: "大数据告警:CPU使用大于40%(目前使用:{{$value}}%)"
*注意runle.yml中的node_memory_MemAvailable_bytes等参数为node_exporter收集参数,更多内容请问度娘*
重启prometheus;
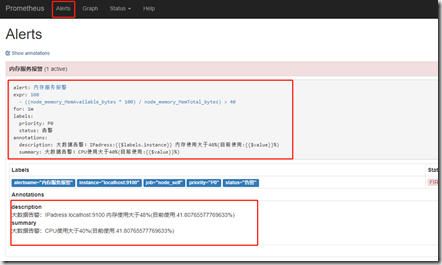
web打开ip:9090
报警从pending到firing话的钉钉上收到报警信息表示正常。
(5)安装grafana并图型node_export和push_gateway参数指定参数;
安装grafana(自行百度);启动 systemctl start grafana;
登录初始用户名/密码为admin/admin;
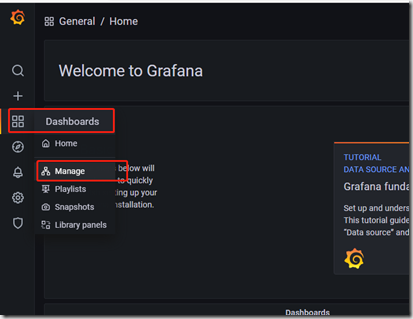
安装后配置数据源为prometheus;下载node_exporter基本监控json文件导入granfa;可以完成node_exporter数据获取生成监控图。
接入push_gateway数据自定义监控图;
1、安装push_gateway;开启服务;监听9091
自定义监控数据获取写入push_gateway;
#!/bin/bash
avl=`free -m|grep Mem|awk '{print $NF}'`
total=`free -m|grep Mem|awk '{print $2}'`
sum=$(printf "%.3f" `echo "scale=5;${avl}/${total}"|bc`)
res=`echo "$sum * 100"|bc`
#echo ${res}%
echo "Mem_use_persent ${res}" | curl --data-binary @- http://127.0.0.1:9091/metrics/job/wx_job
jk_disk.sh  test.sh
[root@test04 pushgateway-0.7.0.linux-amd64]# cat /wuxiao/jb/jk_disk.sh
res=`df -h|grep -E "/$"|awk '{print $5}'|awk -F"%" '{print $1}'`
#echo ${res}
echo "disk_jk_use_persent ${res}" | curl --data-binary @- http://127.0.0.1:9091/metrics/job/jk_disk_use
配置prometheus.yml接入prometheus,并生启prometheus
global:
  scrape_interval:     15s # Set the scrape interval to every 15 seconds. Default is every 1 minute.
  evaluation_interval: 15s # Evaluate rules every 15 seconds. The default is every 1 minute.
  # scrape_timeout is set to the global default (10s).

# Alertmanager configuration
alerting:
  alertmanagers:
    - static_configs:
      - targets: ['localhost:9093']
#  - job_name: 'Alertmanager'
#    static_configs:

      - targets:
        #- alertmanager:9093

# Load rules once and periodically evaluate them according to the global 'evaluation_interval'.
rule_files:
  - "rules.yml"
  # - "first_rules.yml"
  # - "second_rules.yml"

# A scrape configuration containing exactly one endpoint to scrape:
# Here it's Prometheus itself.
scrape_configs:
  # The job name is added as a label `job=<job_name>` to any timeseries scraped from this config.
  - job_name: 'prometheus'

    # metrics_path defaults to '/metrics'
    # scheme defaults to 'http'.

    static_configs:
    - targets: ['localhost:9090']
  - job_name: 'node_self'
    scheme: http
    #tls_config:
      #ca_file: node_exporter.crt
    static_configs:
    - targets: ['localhost:9100']
  - job_name: 'pushgateway'
    static_configs:
      - targets: ['localhost:9091']
        labels:
          instance: pushgateway
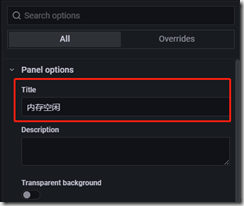
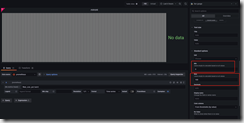
登录grafana配置
*注意数据源和监控的数据要填对*
配置倮保存即可
