在很多的场景下我们需要用到二维码,这里就通过google的zxing来对二维码进行实现。
二维码生成:
1.导入依赖:
<dependency>
  <groupId>com.google.zxing</groupId>
  <artifactId>core</artifactId>
  <version>2.2</version>
</dependency>
<dependency>
  <groupId>com.google.zxing</groupId>
  <artifactId>javase</artifactId>
  <version>2.2</version>
</dependency>
2.编写二维码工具类,用于讲生成的二维码图片通过流的形式写到浏览器,同时支持在二维码中间添加定制图片:
import com.google.zxing.*;
import com.google.zxing.client.j2se.BufferedImageLuminanceSource;
import com.google.zxing.common.BitMatrix;
import com.google.zxing.common.HybridBinarizer;
import com.google.zxing.qrcode.decoder.ErrorCorrectionLevel;

import javax.imageio.ImageIO;
import javax.servlet.http.HttpServletResponse;
import java.awt.*;
import java.awt.geom.RoundRectangle2D;
import java.awt.image.BufferedImage;
import java.io.File;
import java.io.IOException;
import java.util.Hashtable;

import static org.apache.catalina.manager.Constants.CHARSET;

public class RecodeUtil {

    private static final int WIDTH = 30;
    private static final int HEIGHT = 30;


    public static void creatRrCode(String contents, int width, int height, HttpServletResponse response) throws Exception {
        Hashtable hints = new Hashtable();

        hints.put(EncodeHintType.ERROR_CORRECTION, ErrorCorrectionLevel.H); //容错级别最高
        hints.put(EncodeHintType.CHARACTER_SET, "utf-8"); //设置字符编码
        hints.put(EncodeHintType.MARGIN, 1); //二维码空白区域,最小为0也有白边,只是很小,最小是6像素左右
        try {
            BitMatrix bitMatrix = new MultiFormatWriter().encode(contents, BarcodeFormat.QR_CODE, width, height, hints); // 1、读取文件转换为字节数组
            BufferedImage image = toBufferedImage(bitMatrix);
            //转换成png格式的IO流
            ImageIO.write(image, "png", response.getOutputStream());
        } catch (WriterException e) {
            e.printStackTrace();
        } catch (IOException e) {
            e.printStackTrace();
        }
    }

    /**
     * image流数据处理
     */
    public static BufferedImage toBufferedImage(BitMatrix matrix) throws Exception {
        int width = matrix.getWidth();
        int height = matrix.getHeight();
        BufferedImage image = new BufferedImage(width, height, BufferedImage.TYPE_INT_RGB);
        for (int x = 0; x < width; x++) {
            for (int y = 0; y < height; y++) {//0xFF000000  0xFFFFFFFF
                //https://blog.csdn.net/cgwcgw_/article/details/21155229 颜色查询
                image.setRGB(x, y, matrix.get(x, y) ? 0xFF000000 : 0xFFFFFFFF);
            }
        }
        insertImage(image,"D:/head.jpg",true,width,height);//调用insertImage函数插入图片
        return image;
    }
    /**
     * 插入内嵌图片
     * @param source
     * @param imgPath 要插入图片路径
     * @param needCompress 要插入图片的像素是否大于60
     * @throws Exception
     */
    private static void insertImage(BufferedImage source, String imgPath,
                                    boolean needCompress,int qrWidth,int qrHeight) throws Exception {
        File file = new File(imgPath);
        if(!file.exists()){
            System.err.print(""+imgPath+"路径不存在!");
            return;
        }
        Image src = ImageIO.read(new File(imgPath));
        int width = src.getWidth(null);//获得原宽度
        int height = src.getHeight(null);//获得源高度
        if(needCompress){//比较要插入的图片的宽度是否大于设定的WIDTH=30像素宽
            if(width>WIDTH){
                width = WIDTH;
            }
            if(height>HEIGHT){//比较要插入的图片的高度是否大于设定的HEIGTH=30像素宽
                height = HEIGHT;
            }
            Image image = src.getScaledInstance(width, height, //把image对象的getScaledInstance方法把图片缩小heightXwidth像素大小
                    Image.SCALE_SMOOTH);
            BufferedImage tag = new BufferedImage(width,height,///创建一个透明色的BufferedImage对象
                    BufferedImage.TYPE_INT_RGB);
            Graphics g = tag.getGraphics();//获得画笔
            g.drawImage(image, 0, 0, null);//绘制指定图像中当前可用的image图像,图像的左上角位于该图形上下文坐标(0,0)的 (x, y)
        }
        //开始画内嵌图片
        Graphics2D graph = source.createGraphics();
        //计算绘画坐标
        int x = (qrWidth-width)/2;
        int y = (qrHeight-height)/2;
        graph.drawImage(src, x, y, width, height, null);//内嵌坐标为(x,y)的地方
        Shape shape = new RoundRectangle2D.Float(x,y,width,width,6,6);
        graph.setStroke(new BasicStroke(3f));
        graph.draw(shape);
        graph.dispose();
    }

    public static String decode(File file) throws Exception {
        BufferedImage image;
        image = ImageIO.read(file);
        if (image == null) {
            return null;
        }
        BufferedImageLuminanceSource source = new BufferedImageLuminanceSource(image);
        BinaryBitmap bitmap = new BinaryBitmap(new HybridBinarizer(source));
        Result result;
        Hashtable hints = new Hashtable();
        hints.put(DecodeHintType.CHARACTER_SET, CHARSET);
        result = new MultiFormatReader().decode(bitmap, hints);
        String resultStr = result.getText();
        return resultStr;
    }

}
3.提供请求控制器:
@RestController
public class QRCodeController {

    @GetMapping("/qrcode")
    public void qrcode(HttpServletRequest request, HttpServletResponse response) throws Exception {
        String content = "你是猪";
        long l = LocalDateTime.now().toInstant(ZoneOffset.of("+8")).toEpochMilli();
        content += String.valueOf(l);
        if (StringUtils.isBlank(content)) {
            System.out.println("404");
            return;
        }
        //调用工具类,生成二维码
        RecodeUtil.creatRrCode(content, 180, 180, response);   //180为图片高度和宽度
    }

    @PostMapping("/qrcode/parse")
    public void read(MultipartFile file) throws Exception {
        File toFile = null;
        InputStream ins = null;
        ins = file.getInputStream();
        toFile = new File(file.getOriginalFilename());
        inputStreamToFile(ins, toFile);
        ins.close();

        RecodeUtil.decode(toFile);
    }

    //获取流文件
    private static void inputStreamToFile(InputStream ins, File file) {
        try {
            OutputStream os = new FileOutputStream(file);
            int bytesRead = 0;
            byte[] buffer = new byte[8192];
            while ((bytesRead = ins.read(buffer, 0, 8192)) != -1) {
                os.write(buffer, 0, bytesRead);
            }
            os.close();
            ins.close();
        } catch (Exception e) {
            e.printStackTrace();
        }
    }
}
4.通过以上的代码就完成了后端代码的编写,接下去看一下前端代码。我前端代码基于 Vue 。:
// ......省略代码
<button v-on:click="qrcode">二维码</button><br/>
<img :src = "qrcodeImage" >
<img src = "http://localhost:8889/qrcode" >

export default {
  name: 'HelloWorld',
  data () {
    return {
      qrcodeImage: ''
    }
  },
  methods: {
    qrcode: function () {
      this.qrcodeImage = null
      this.$axios({
        method: 'get',
        url: '/api/qrcode',
        responseType: 'arraybuffer'
      }).then(function (res) {
        return 'data:image/png;base64,' + btoa(
          new Uint8Array(res.data)
            .reduce((data, byte) => data + String.fromCharCode(byte), '')
        )
      }).then(data => {
        this.qrcodeImage = data
      }).catch(function (err) {
        alert(err)
      })
    }
}
5.启动项目,不点击二维码按钮的时候只有一个固定不变的二维码。当点击二维码按钮可以看到一下效果:
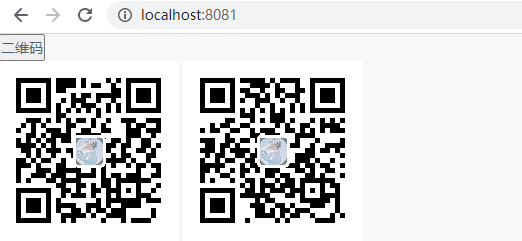
这样子就可以实现我们的二维码。
二维码解析:
二维码解析可以通过调用上述 /qrcode/parse 接口,这里采用 postman作为演示,我们先将上面得到的二维码截图保存:

然后就可以得到二维码的内容了。解析的代码上面也已经给出。