http://www.instructables.com/id/Bitcoin-Mining-using-Raspberry-Pi/
Step 5: Installing Required Libraries
The miner to be installed comes as source files, which means that the program must be compiled into a binary before it can be run. To make a program, in this case BFGMiner, many dependencies are required.
Dependencies are additional software, or libraries the program needs in order to compile properly, as it has been developed using them to make the software more efficient. Hopefully you will be seeing the Raspbian desktop, so double click on LXTerminaland type in the following:
1) sudo apt-get update
2) sudo apt-get install autoconf autogen libtool uthash-dev libjansson-dev libcurl4-openssl-dev libusb-dev libncurses-dev git-core –y
This process will take a few minutes to complete.
Step 6: Installing BFGMiner
Now you’re ready to start mining. To do this, providing you're using Slush’s pool, you’ll use the following command:
./bfgminer -o stratum.bitcoin.cz:3333 -O username.worker:password -S all
The username section is composed of two parts, the username that you use to login to the pool, and worker which is the worker name you gave when you registered the worker. Finally, the password that was set when you created the worker.
That’s a lot of numbers, so I’ll make some of them a bit clearer.
Current mining speed,
typically calculated in megahashes or gigahashes. The number of hashes a
second that can be calculated the better. A hash is an algorithm of
converting numbers and letters into an undecryptable set of characters.
So a miner is used to process millions of numbers in an effort to match
the hash to guess the original number. The more hashes that can be
processed the faster it is able to solve the problem.
Number of accepted shares. A share on a pool is to show the miner has successfully worked out a given problem, so the more shares you can process the better your reward from the pool.
Detailed information on accepted shares and pool updates. This is a running log of what is currently happening with the miners and basic pool information, such as messages of updates and when new blocks are found.
More information can be found at the BFGminer github site.
Step 8: Conclusion
Following these steps will leave you with a very energy efficient bitcoin miner, as a Raspberry Pi only uses four watts of power, and a miner is typically 2.5W. Mining used to be done with computers consuming over 700W for the same process so to make a jump in savings helps repay the cost of the hardware we are using.
All there is to do now is to sit back and watch the money slowly build up. Though it is important that you understand that Bitcoin value fluctuates wildly, it is extremely volatile, so invest at your own risk.
You can also put up LCDs. Connect more Pis for getting better speed :D
For more information there are a number of websites and forums available, such ashttps://bitcointalk.org/,to help get you started.
https://computers.tutsplus.com/tutorials/how-to-create-a-raspberry-pi-bitcoin-miner--cms-20353
Requirements
In order to mine Bitcoin, you will need:
- A pool account
- Bitcoin Wallet
- Raspberry Pi
- Raspbian image SD card
- USB Bitcoin miner
Creating an Account
There are four things you need to do:
- Download a bitcoin wallet
- Create a pool account
- Set up payment
- Set up workers
Download a Bitcoin Wallet
A wallet is a program that sits on your computer and gives you a wallet address, this is a unique string of numbers and letters that you will use to receive bitcoins. Download the client for your computer from https://bitcoin.org/en/download
After installation, you will have to save a file called wallet.dat, keep this file safe, as this contains your unique wallet address within it, including all bitcoins that you will gain. If you lose this file, you cannot recover any bitcoins it contained.
Create a Pool Account
Once you have a wallet address, create a pool account. A pool is a huge collection of other people working towards gaining bitcoins. Due to the complexity of mining a bitcoin, it has become unrealistic to solo mine–the act of processing millions of numbers to solve the block problem. Working as a group, or pool, lets everyone have a chance of earning some Bitcoin. There are many pools around, in this tutorial I’ll be using one called Slush’s pool: http://mining.bitcoin.cz/
Set Up Payment
Once you have created a pool account, you'll need to enter your unique wallet address into the Bitcoin payout address.
Create Worker Account
Next step is to create a worker login account. Within your pool account you have the ability to create something called a worker for each of your bitcoin miners, so you're able to monitor them all separately just in case one should fail.
Each worker has its own login name and password. Whilst you are on My Account click Register New Worker and give it a name, for example; worker, and a password.
Now you're ready to set your Raspberry Pi mining for Bitcoin.
Setting Up the Raspberry Pi
Start with a fresh Raspbian install, if you don’t know who to do this, read the tutorial How to Install NOOBS on a Raspberry Pi With a Mac.
If you plan on running more than one Bitcoin miner at the same time, it is best to use a powered USB hub. Take into account the power rating as mining will need a lot of power, as much as one mp per miner.
With your USB miner attached to your Raspberry Pi, let’s get everything installed.
Installing Required libraries
The miner to be installed comes as source files, which means that the program must be compiled into a binary before it can be run. To make a program, in this case BFGMiner, many dependencies are required.
Dependencies are additional software, or libraries the program needs in order to compile properly, as it has been developed using them to make the software more efficient.
Hopefully you will be seeing the Raspbian desktop, so double click on LXTerminal and type in the following:
|
1
2
|
sudo apt-get updatesudo apt-get install autoconf autogen libtool uthash-dev libjansson-dev libcurl4-openssl-dev libusb-dev libncurses-dev git-core –y |
This process will take a few minutes to complete.
Installing BFGMiner
Once all the dependencies have been installed, now it is time to download and install BFGMiner, so type the following into LXTerminal. It’s normal for these to take a few minutes to complete so some patience is needed.
|
1
2
3
4
5
|
git clone https://github.com/luke-jr/bfgminer.gitcd bfgminer./autogen.sh./configuremake |
Start Mining Bitcoin
Now you’re ready to start mining. To do this, providing you're using Slush’s pool, you’ll use the following command:
|
1
|
./bfgminer -o stratum.bitcoin.cz:3333 -O username.worker:password -S all |
The username section is composed of two parts, the username that you use to login to the pool, and worker which is the worker name you gave when you registered the worker. Finally, the password that was set when you created the worker.
If everything works, you will see the main screen that will look similar to this:
That’s a lot of numbers, so I’ll make some of them a bit clearer.
- Current mining speed, typically calculated in megahashes or gigahashes. The number of hashes a second that can be calculated the better. A hash is an algorithm of converting numbers and letters into an undecryptable set of characters. So a miner is used to process millions of numbers in an effort to match the hash to guess the original number. The more hashes that can be processed the faster it is able to solve the problem.
- Number of accepted shares. A share on a pool is to show the miner has successfully worked out a given problem, so the more shares you can process the better your reward from the pool.
- Detailed information on accepted shares and pool updates. This is a running log of what is currently happening with the miners and basic pool information, such as messages of updates and when new blocks are found.
https://learn.adafruit.com/piminer-raspberry-pi-bitcoin-miner/initial-setup-and-assembly
What you'll need:
-
Raspberry Pi + SD Card running Raspbian configured for network access
- Adafruit 16x2 LCD + Keypad Kit (any color style will work) assembled & installed
- I2C, & Adafruit Pi Code libraries installed on Pi
- USB Bitcoin Mining Device
-
Powered USB Hub (needed for USB powered miners)
- most hubs can power up to 4 of these miners (others may use more or
less current). You can always get more hubs, one for every 4 miners!
- Mining Pool Account (Login/Password)
- Your Computer (for configuration and setup)
For help with initial setup, check out the following tutorials:
When you've got all that working, come back here!
A note about USB mining devices
At the time of this writing, dedicated bitcoin mining hardware can be somewhat hard to find, but they are becoming more common as next generation ASIC-based devices are released. A number of open source projects and related info can be found in the BitcoinTalk forums.For this tutorial I'll be using ASICMiner Block Erupter USB devices. Though this tutorial uses details specific to the Block Erupter USB, a few small modifications should make it work with any hardware compatible with cgminer v3.1.1
Beginners Guide To Turn Your Raspberry Pi into an Affordable Bitcoin Mining Rig
Posted by dconroy on Aug 13, 2013 in How To's, Raspberry Pi | 53 comments | 256,977 views

First off, I know this post is a little late in the game as it is becoming less profitable for amateurs to mine Bitcoins, and that there are more efficient ways to go about this. But I am writing this anyways for posterity’s sake as I know for a fact there
are people out there who have idle Raspberry Pis and are looking for a
project. I’m sure there are also others like myself who are just looking
to learn more about cryptocurrencies. To get started, here is our shopping list (if you are reading this, you probably already own some of these items):
Shopping List
| QTY | Required Items | Price(USD)* |
| 1 | Raspberry PI | $35.00 |
| 1 | Micro USB cable | $5.49 |
| 1 | ASICMiner Erupter USB 336MH/s Sapphire Bitcoin Miner | $10.99 |
| 1 | Powered USB Hub** | $25.00 |
| 1 | SD Card (class 4 and 2gb minimum) | $7.49 |
| Total: $83.97 | ||
| Optional Items | ||
| 1 | Power Supply | $9.95 |
| 1 | HDMI Cable | $2.28 |
| 1 | Case | $12.75 |
| 1 | USB Fan (The mining devices run hot) | $8.43 |
*Prices are subject to change
**The Pi alone can not power one of these miners, a Powered USB HUB is mandatory to mine bitcoin.
Bitcoin Wallets
Before we setup the Mining software on the Pi we need to setup a bitcoin wallet where we will store the credit from the mining. There are countless options(Software, Web, Mobile) when it comes to setting up a bitcoin wallet. I’ve listed a few below but there are many more and each method has its own risks, luckily bitcoin.org has a great writeup on how to choose a wallet.
Windows/MAC/Linux
Multi-Bit – Quick and Lightweight Bitcoin Wallet
Bitcoin-QT – Takes a day or two to download ~6gigs of Bitcoin Transactional Data
Armory – Desktop Add-on Application
Web/Hosted
Coinbase
Blockchain.info
Android
Bitcoin Wallet
iOS
Currently the app store does not allow any bitcoin wallet applications.
Mining Pools
Bitcoin Pooled Mining is the best way to get started mining. Pooled Mining allows multiple users to work together to “crack” a single bitcoin and then share the benefits fairly. Due to the competitive nature of mining, if you tried to mine on your own it could be a long time before you successfully mined anything. Pooled Mining is a nice way to receive smaller and more regular payouts instead. For people with slower rigs, pooled mining might be the only way you ever earn bitcoins.
Two Mining pools I recommend and have verified are:
Slush’s Pool
BTC Guild
The setup for both pools is straight forward. You create a username, password, and then worker credentials(for each mining device). You also add the bitcoin wallet address you created above to your pool so you receive bitcoin payments when you hit the pool’s payout thresholds (usually around .01 BTC). It’s also recommended you sign up for multiple pools in case one experiences technical difficulties, the software we are about to install will switch if one goes down.
Installing Mine Peon the rPi
Now that we have a bitcoin wallet and have joined a mining pool, Neil Fincham and his project Mine Peon
makes getting the software running on the rPi quite easy. Mine Peon is
an ARM Mining Platform that is built specifically for Raspberry Pi. It
is built on Arch Linux and uses the popular cgminer and bfgminer for the heavy lifting. To get started, you simply download the latest image here and burn it to your SD card.
If you are using Windows to flash your SD Card, I recommend using Win32DiskImager.
This tool can also be used after our initial setup to create an image
of our finalized implementation(very useful as a backup).

For other operating systems, you can find a handy guide on flashing SD cards from eLinux.org here.
After the image is flashed, you can boot your device. The first boot takes about a minute as it needs to generate the SSH keys, but future boots take only about 10 seconds. Use your router or keyboard/video/mouse to find out the IP address of the rPi. The default username and password for SSH and for the WebUI are:
Username: minepeon
Password: peon
After the rPi has booted, you can navigate to Mine Peon’s handy WebUI
by opening your browser and entering the Raspberry Pi’s IP address.
There you can insert the mining pool and worker information.

The best part about Mine Peon is that it automatically supports the USB mining devices,
so you can be up and running in a few minutes without having to worry
about drivers/compatability issues. There are even handy graphs to check
your stats!

For Further information on Mine Peon check out their installation guide here.
Closing Remarks
Are you going to get rich quick using the Raspberry Pi for bitcoin mining? Of course not. This tutorial was never meant to give that impression. But, could you potential recoup your investment costs and perhaps end up a couple bucks ahead after 6-12 months? Definitely possible!
PS – If you have any questions about earning potential, profitability, or just basic setup, just add a comment below and I’d be happy to help! And if you get your rPi working and mining Bitcoin – Feel free to send a tip to my blog’s BTC address:
1Q9ASkZFAHXLvpPAzAVipcKUH5Vy2xmsA6
https://bitcointalk.org/index.php?topic=1736096.0
Requirements
In order to mine Bitcoin, you will need:
- A pool account
- Bitcoin Wallet
- Raspberry Pi
- Raspbian image SD card
- USB Bitcoin miner
Creating an Account
There are four things you need to do:
- Download a bitcoin wallet
- Create a pool account
- Set up payment
- Set up workers
Download a Bitcoin Wallet
A wallet is a program that sits on your computer and gives you a wallet address, this is a unique string of numbers and letters that you will use to receive bitcoins. Download the client for your computer from https://bitcoin.org/en/download
After installation, you will have to save a file called wallet.dat, keep this file safe, as this contains your unique wallet address within it, including all bitcoins that you will gain. If you lose this file, you cannot recover any bitcoins it contained.
Create a Pool Account
Once you have a wallet address, create a pool account. A pool is a huge collection of other people working towards gaining bitcoins. Due to the complexity of mining a bitcoin, it has become unrealistic to solo mine–the act of processing millions of numbers to solve the block problem. Working as a group, or pool, lets everyone have a chance of earning some Bitcoin. There are many pools around, in this tutorial I’ll be using one called Slush’s pool: http://mining.bitcoin.cz/
Set Up Payment
Once you have created a pool account, you'll need to enter your unique wallet address into the Bitcoin payout address.
Create Worker Account
Next step is to create a worker login account. Within your pool account you have the ability to create something called a worker for each of your bitcoin miners, so you're able to monitor them all separately just in case one should fail.
Each worker has its own login name and password. Whilst you are on My Account click Register New Worker and give it a name, for example; worker, and a password.
Now you're ready to set your Raspberry Pi mining for Bitcoin.
Setting Up the Raspberry Pi
Start with a fresh Raspbian install, if you don’t know who to do this, read the tutorial How to Install NOOBS on a Raspberry Pi With a Mac.
If you plan on running more than one Bitcoin miner at the same time, it is best to use a powered USB hub. Take into account the power rating as mining will need a lot of power, as much as one mp per miner.
With your USB miner attached to your Raspberry Pi, let’s get everything installed.
Installing Required libraries
The miner to be installed comes as source files, which means that the program must be compiled into a binary before it can be run. To make a program, in this case BFGMiner, many dependencies are required.
Dependencies are additional software, or libraries the program needs in order to compile properly, as it has been developed using them to make the software more efficient.
Hopefully you will be seeing the Raspbian desktop, so double click on LXTerminal and type in the following:
|
1
2
|
sudo apt-get updatesudo apt-get install autoconf autogen libtool uthash-dev libjansson-dev libcurl4-openssl-dev libusb-dev libncurses-dev git-core –y |
This process will take a few minutes to complete.
Installing BFGMiner
Once all the dependencies have been installed, now it is time to download and install BFGMiner, so type the following into LXTerminal. It’s normal for these to take a few minutes to complete so some patience is needed.
|
1
2
3
4
5
|
git clone https://github.com/luke-jr/bfgminer.gitcd bfgminer./autogen.sh./configuremake |
You will be greeted with a screen that looks similar to the following:
今天收到了小派,UK产的绿板子,还配了个透明盒子,装在里面闪亮亮的很好看,而且只有卡片大小,寻思着用它做什么好呢?想来想去,看到人家拿小派作家庭媒体中心,还有人拿它当下载机,于是就萌生了一个家庭媒体中心+下载机二合一的东东,白天看电影,晚上添加任务让它自己下载到SD卡里,第二天就能看了,接上无线网卡,通过手机控制它,遥控器都省了。下面我们就开始吧。
你需要的东西:
- Model B型树莓派(带壳)
- 一张Class10的高速度SD卡
- 5v2A的电源适配器(如果你的智能手机充电器,能达到5v1A及以上,就拿那个当电源好了)
- 一根HDMI线
- 一杯程序员饮料
也可能需要的东西:
- 纯铜散热器套装
- 一个小巧玲珑即插即忘的无线网卡(当然前提是你家要有无线网络)
- HDMI转DVI线(连接没有HDMI的显示器用)
- 容量超级大的移动硬盘
- 4口USB集线器
高大上的奢侈品
需要安装的软件如下:
PC端:
- putty(一个SSH工具,用于远程连到你的树莓派上,这样你就不用把你的小派挪来挪去了)
- FileZilla(一个开源的ftp客户端,这样你可以把你电脑上的文件直接拖到你的小派里了)
- win32DiskImager-binary(把网上下载的镜像刷到SD卡里)
前两款软件的安装都非常简单,直接一路下一步,第三款直接解压缩,这里就不介绍了
树莓派端:
- Raspbmc(Xbmc的树莓派版,Xbmc是一个流行的媒体中心系统,基于linux,可以方便的播放你各种设备上的音频视频图片拽过来在你的Xbmc上播放,也能播放广播和在线视频,这里要赞一下Raspbmc的作者,Sam Nazarko,他还是一个19岁的学生,相当厉害)
- aria2c(Linux下的命令行下载利器,nani?命令行???你是在逗我么,莫怕,接着往下看)
- yaaw(基于web的aria2c的UI,可以添加任务,查看任务进度)
- nginx(http服务器,用于承载yaaw)
我们需要从Raspbmc网站下载镜像,这里你有两个选择,
- 安装的时候比较痛苦:参照这篇教程,点击页面上的link链接或这里下载windows installer,按照页面上的指导向SD中刷入boot镜像(这个镜像只包含最基本的boot,在启动后会联网下载最新的镜像),完成后插入SD到你的树莓派中,开机,并为你的树莓派插上网线(此时无线网卡不可用),用前面提到的线缆连接上显示器(或电视机),看着蓝色的屏幕开始品尝你的程序员饮料吧,痛苦开始了,视你的网速,我是在等了2个小时之后突然发现它只走了20%然后果断放弃了
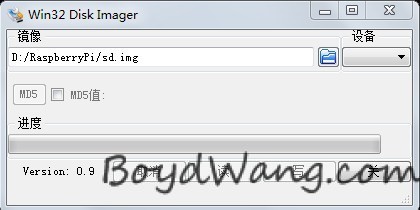
- 更新的时候比较痛苦:访问Raspbmc下载页面,点击页面上的Standalone Image下载完整镜像,解压缩得到一个sd.img,然后使用win32DiskImager-binary.exe工具刷入SD卡中(选择解压出的sd.img,然后“设备”里选择你的SD卡,注意一定要是你的SD卡,别选错了,然后点“写”),等刷成功之后,把SD插入树莓派中,启动,你就可以使用了,这个时候你也可以使用你的无线网卡了,需要配置一下,一会说。
到此,媒体中心安装完成,恭喜你获得了“事倍功半”成就(Why?看了这么久蓝屏,就完成了一半,不是事倍功半么),好的,继续往下看!
我们开始配置下载机。
在PC上打开putty,进你的路由器看你的树莓派地址是多少,填进puttyHost Name(or IP address)栏里,点Open,

在弹出的窗口中输入用户名pi,回车,然后是密码raspberry(屏幕上不会有任何显示),回车,你就打开了一个树莓派的shell,可以远程操作啦!(nani?又是命令行,这回帮不了你了,只能用命令行了,不过顺带学习一下linux的精髓也是不错的嘛,对吧)。我们开始安装软件。
第一次连接ssh可能还要进行一些配置,根据提示点ok就行了。
进入后先update一下软件源,使用命令
首先安装aria2c
在shell窗口使用下面的命令进行安装
接下来我们做一些配置
在aria2.conf里面输入如下内容,可以直接复制后在窗口里按鼠标右键粘贴
按ctrl+o 保存,回车一下,然后按ctrl+x退出编辑,完了后运行:
测试有没有错误,如果没有错误的话按一下Ctrl + C终止当前程序,继续往下。
接下来我们让aria2c成为系统服务并且开机自启动
粘贴如下内容到窗口,注意格式一定要保持一致
之后按ctrl+o保存,回车一下,再按ctrl+x退出编辑
使用命令进行权限更改
测试服务是否可以启动:
如果只显示Starting aria2c,没有其他错误提示的话就成功了
添加aria2c服务自动运行:
到此aria2c就可以开机自启动了。
下来是安装nginx web服务器
在shell窗口使用命令进行安装
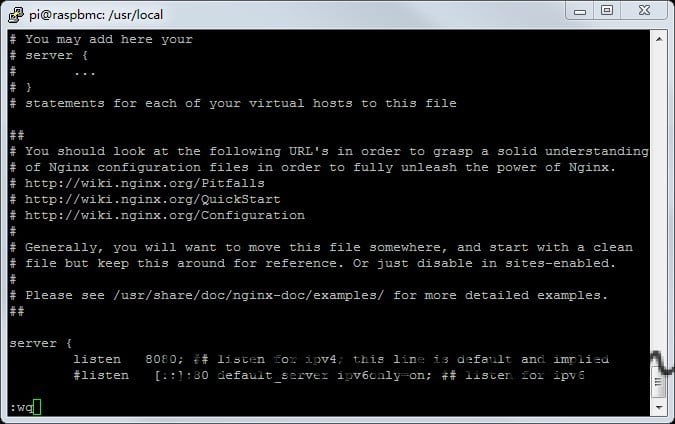
由于Raspbmc以及自带的远程管理占用了80端口,因此我们需要更改nginx的端口号使他们不相互冲突,通过修改nginx.conf文件实现
使用下面的命令进入修改
进入vi后,输入
按回车 查找listen,找到
按方向键移动光标(nani?不能用鼠标?对不起,不能)到第一个listen的”#”,按del删除,再移动光标到80,按一下字母i,进入编辑模式,此时就可以自由编辑了,把80改为8080,改完后应该是这个样子:
按一下esc键,回到浏览模式,然后按一下冒号键(shift + ;键),输入wq,保存退出
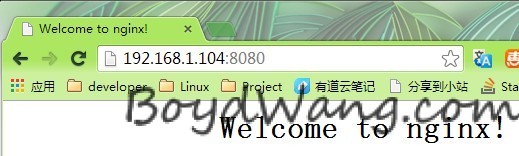
使用如下命令启动nginx
进入http://树莓派的ip:8080/你能看到Welcome to nginx!说明安装成功(OY!)
再来是yaaw,
从这里下载yaaw,可以使用git直接下载到树莓派上或者在PC端点击页面的右下角那个“Download Zip”下载最新版本,解压缩,再通过FileZilla上传到你的树莓派上的,我推荐第二种方式,这样你就不用命令行了:)
在PC端解压缩yaaw的压缩包,解压出的文件夹叫yaaw-master,我们把它重命名名为yaaw
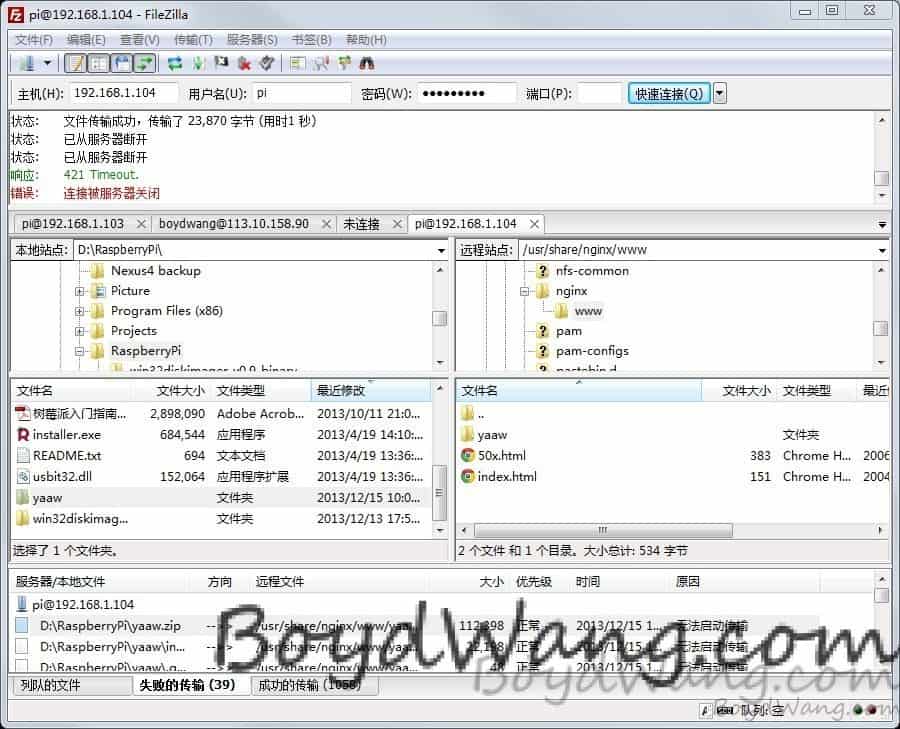
我们还需要更改一下nginx的www目录访问权限,才能使用ftp把yaaw扔进去
之后打开FileZilla,在”主机”处输入你的树莓派的ip,用户名输入pi,密码输入raspberry,点击“快速连接”,然后在下面“本地站点里”选择yaaw所在的本地路径,在“远程站点”里定位到/usr/share/nginx/www,把刚才的yaaw拖进去就行了。
然后在你的shell上使用命令
让yaaw文件夹可以被浏览器访问。
然后在pc的地址栏里输入http://树莓派IP:8080/yaaw,就能看到任务管理界面了,它看起来像这个样子

到此大功告成,OY!!
别着急,我们还需要一些额外的工作使你以后的使用更方便。有点耐心,就要完了。
一些额外的工作:
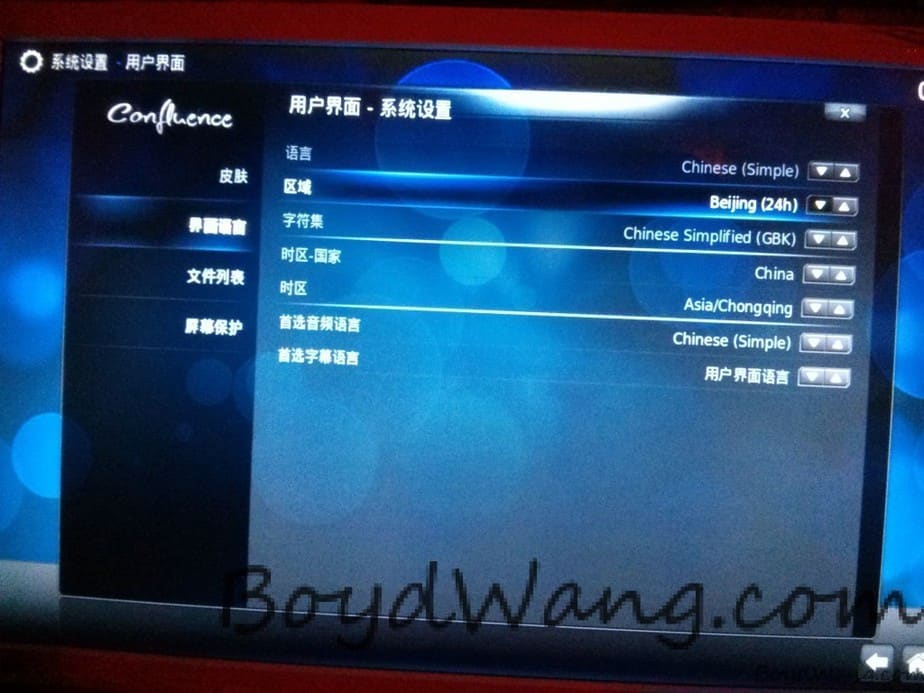
- 首先要把系统语言改成中文,在System-Settings-Appearance-International里把Language改成Chinese(Simple),光标移开就自动换了,然后把字符集改成Chinese Simplified (GBK)
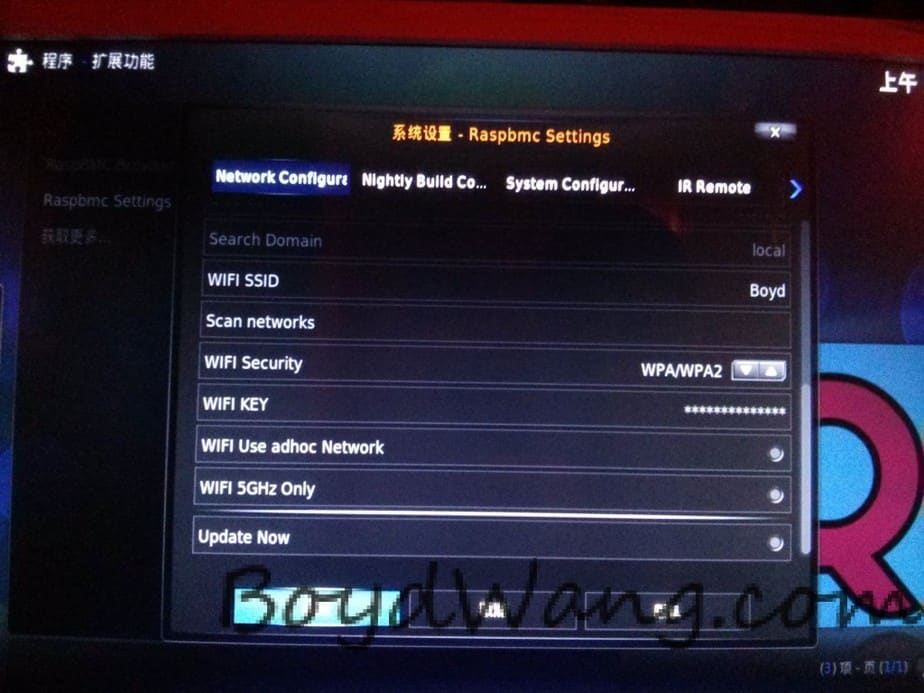
- 无线网的配置,这个需要在树莓派的UI界面进行,进入程序-Raspbmc Settings-Network Configuratioin
- 请为你的小派在路由器里分配一个固定的IP地址,这样可以省去很多麻烦。


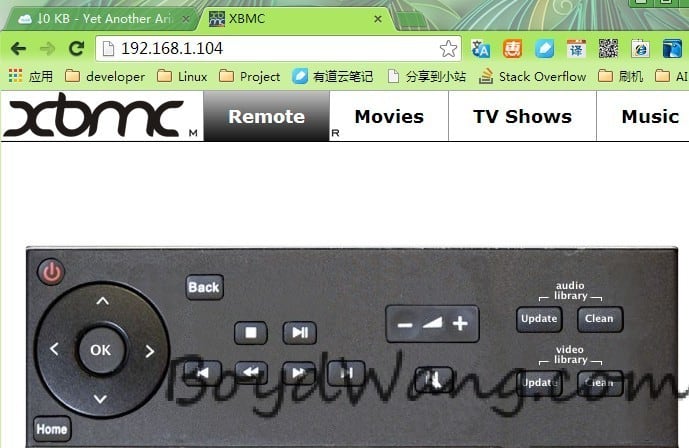
远程控制:
你现在有两种方式来远程控制你的树莓派了,
知识加油站:
什么是树莓派?
树莓派是一款基于ARM的微型电脑主板,以SD卡为内存硬盘,卡片主板周围有两个USB接口和一个网口,可连接键盘、鼠标和网线,同时拥有视频模拟信号的电视输出接口和HDMI高清视频输出接口,以上部件全部整合在一张仅比信用卡稍大的主板上,具备所有PC的基本功能只需接通电视机和键盘,就能执行如电子表格、文字处理、玩游戏、播放高清视频等诸多功能。
Raspberry Pi B款只提供电脑板,无内存、电源、键盘、机箱或连线。
挖矿的起点其实很低,用CPU、GPU挖是成本最低的选择,不过CPU效率实在太低,用显卡的话必须要较高端A卡,假如你是使用笔记本的话,大概挖一辈子都买不了馒头。如果您还是想凑热闹不妨买个Bitcoin ASICMiner Block Erupter USB,成本大概是300元左右,成本低,功耗低,但挖矿效率比普通电脑强得多,甚至还可以买N个并行挖矿,而在这时候,你就需要多个个USB口扩展。ORICO P10-U2、ORICO P10-U3、ORICO A3H10等10口USB HUB就是一极佳的扩展助手。