scrapy 爬虫流程示例
爬取腾讯hr招聘信息
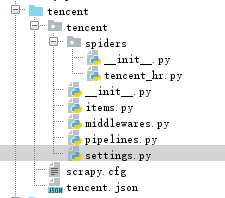
工程目录:
1,创建爬虫: scrapy startproject tencent tencent.com
2.进入tencent目录,创建爬虫文件:scrapy genspider tencent_hr
tencent encentspiders encent_hr.py #引擎
# -*- coding: utf-8 -*-
import scrapy
from tencent.items import TencentItem#导入Item
class TencentHrSpider(scrapy.Spider):
    name = 'tencent_hr'             #爬虫的别名,
    allowed_domains = ['tencent.com']#爬取的范围
    url='https://hr.tencent.com/position.php?&start='  #构造爬取的url
    offset=0                        #由于要爬多页,每一页url后缀加10,用offset的变化来爬不同的页
    start_urls = [url+str(offset)]  #开始爬的起点的url

    def parse(self, response):    #必选的方法,爬到的页面响应放在这里来处理
        #下面的for循环处理爬取一页的数据
        for each in response.xpath('//tr[@class="even"] | //tr[@class="odd"]'):# | 代表或的关系
            item=TencentItem()      #产生一个存放数据的item
            item['positiontname'] = each.xpath('.//a/text()').extract()[0]  #职位名称
            item['positiontlink'] = each.xpath('.//a/@href').extract()[0]   #职位url
            item['positiontype'] = each.xpath('./td[2]/text()').extract()[0]#职位所属类型
            item['peopleNum'] = each.xpath('./td[3]/text()').extract()[0]   #招的人数
            item['workLocation'] = each.xpath('./td[4]/text()').extract()[0]#工作地点
            item['publishtime'] = each.xpath('./td[5]/text()').extract()[0]# 发布时间
            item['pagenum']=self.offset/10                                 #用来看爬到第几页了
            yield item  #yield是python内置的语法:生成器,就是这个函数返回一堆item的生成器,
        #处理好了爬完一页的数据
        if self.offset < 1680:
            self.offset += 10
        #产生新的请求
        yield scrapy.Request(self.url+str(self.offset),callback=self.parse)
tencent/tencent/items.py #要爬取的数据字段
# -*- coding: utf-8 -*-

import scrapy
class TencentItem(scrapy.Item):
    positiontname=scrapy.Field()
    positiontlink=scrapy.Field()
    positiontype=scrapy.Field()
    peopleNum=scrapy.Field()
    workLocation=scrapy.Field()
    publishtime=scrapy.Field()
    pagenum=scrapy.Field()
tencent/tencent/settings.py 配置文件
# Configure item pipelines
# See https://doc.scrapy.org/en/latest/topics/item-pipeline.html
ITEM_PIPELINES = {
   'tencent.pipelines.TencentPipeline': 300,
}
tencent/tencent/pipelines.py 要使用pipline,记得在上面的settings.py里把管道名字写对
# -*- coding: utf-8 -*-

import json
class TencentPipeline(object):
    #可选方法:存储数据之前做的事
    def __init__(self):
        self.file = open('tencent.json', 'w')
    #必选方法:存储数据
    def process_item(self, item, spider):
        text=json.dumps(dict(item),ensure_ascii=False)+'
'
        self.file.write(text.encode("utf-8"))
        return item #return是必须的

    # 可选方法:存储数据之后做的事
    def close_spider(self):
        self.file.close()