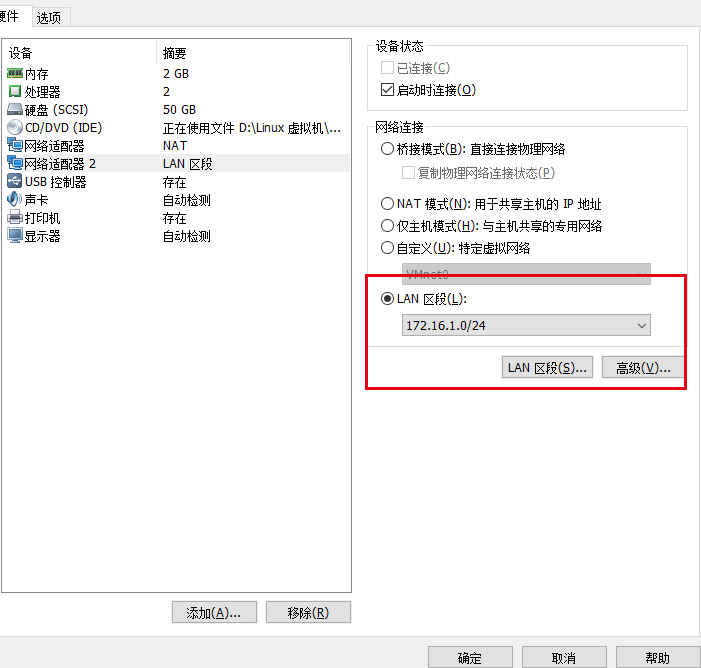
一、 准备台机器 配置两块网卡
net.ifnames=0 biosdevname=0 修改网卡名 eth0
两块网卡
	NAT 模拟公网
	LAN 区段 模拟局域网(内网)172.16.1.0/24

网卡配置
eth0
    TYPE=Ethernet
    BOOTPROTO=none
    NAME=eth0
    DEVICE=eth0
    ONBOOT=yes
    IPADDR=10.0.0.10
    PREFIX=24
    GATEWAY=10.0.0.254
    DNS1=10.0.0.254
eth1
    TYPE=Ethernet
    BOOTPROTO=static
    NAME=eth1
    DEVICE=eth1
    ONBOOT=yes
    IPADDR=172.16.1.10
    PREFIX=24
    GATEWAY=172.16.1.254
    DNS1=172.16.1.254

重启网卡:systemctl restart network
二、关闭一些服务
1.关闭防火墙
	systemctl stop firewalld
	systemctl disable firewalld
2.关闭selinux
	vim /etc/selinux/config     SELINUX=disabled
	或者执行setenforce 0 ,getenforce查看
3.关闭NetWorkManager
	systemctl stop NetWorkManager
	systemctl disable NetWorkManager
三、修改系统所需要的的源(yum 源 epel 源)
修改yum源与epel源 https://opsx.alibaba.com/mirror 阿里云开源镜像网址
yum源:
	1.先备份
	mv /etc/yum.repos.d/CentOS-Base.repo /etc/yum.repos.d/CentOS-Base.repo.backup
	2.下载新的CentOS-Base.repo到/etc/yum.repos.d/
    wget -O /etc/yum.repos.d/CentOS-Base.repo http://mirrors.aliyun.com/repo/Centos-7.repo
    或者
   	curl -o /etc/yum.repos.d/CentOS-Base.repo http://mirrors.aliyun.com/repo/Centos-7.repo

    yum.repos.d  系统yum源的存放位置(格式:xxx.repo)
epel源:
	1.备份
	mv /etc/yum.repos.d/epel.repo
	/etc/yum.repos.d/epel.repo.backup
	2.下载新的repo到/etc/yum.repos.d/
	wget -O /etc/yum.repos.d/epel.repo http://mirrors.aliyun.com/repo/epel-7.repo
    3.查看源: yum repolist
    Loaded plugins: fastestmirror
    Loading mirror speeds from cached hostfile
     * base: mirrors.aliyun.com
     * extras: mirrors.aliyun.com
     * updates: mirrors.aliyun.com
    repo id                                                                                               repo name                                                                                                                            status
    base/7/x86_64                                                                                         CentOS-7 - Base - mirrors.aliyun.com                                                                                                 10,070
    epel/x86_64                                                                                           Extra Packages for Enterprise Linux 7 - x86_64                                                                                       13,465
    extras/7/x86_64                                                                                       CentOS-7 - Extras - mirrors.aliyun.com                                                                                                  413
    updates/7/x86_64                                                                                      CentOS-7 - Updates - mirrors.aliyun.com                                                                                               1,134
    repolist: 25,082
四、安装常用的软件工具
yum install -y tree vim wget bash-completion bash-completion-extras lrzsz net-tools sysstat iotop iftop htop unzip nc nmap telnet bc psmisc
五、修改、etc/ssh/sshd.confing 79、115行 重启sshd服务
1、修改sshd.config文件
	vim /etc/ssh/sshd_config  进入后输入":"+行号可直接到指定位置 将yes改为no 并去掉"#"
:79 GSSAPIAuthentication yes
:115 UseDNS no
#  egrep -n '^(GSSAPIA|UseDNS)' /etc/ssh/sshd_config
79:GSSAPIAuthentication no
115:UseDNS no
# systemctl restart sshd
六、配置环境变量 /etc/profile
颜色代码
	1. export PS1="[e[37;40m][[e[32;40m]A u[e[36;40m]@h [e[31;40m]\w[e[0m]]\$ "
rm 增加确认
	2. alias rm='rm -i'
七、设置时间同步阿里云
# crontab -e
#/bin/bash-date
*/5 * * * *  sh ntpdate ntp.aliyun.com >/dev/null 2>&1
