1、导入安装包,解压

[root@ocp Desktop]# unzip p10404530_112030_Linux-x86-64_1of7.zip
[root@ocp Desktop]# unzip p10404530_112030_Linux-x86-64_2of7.zip
2、查看帮助文档
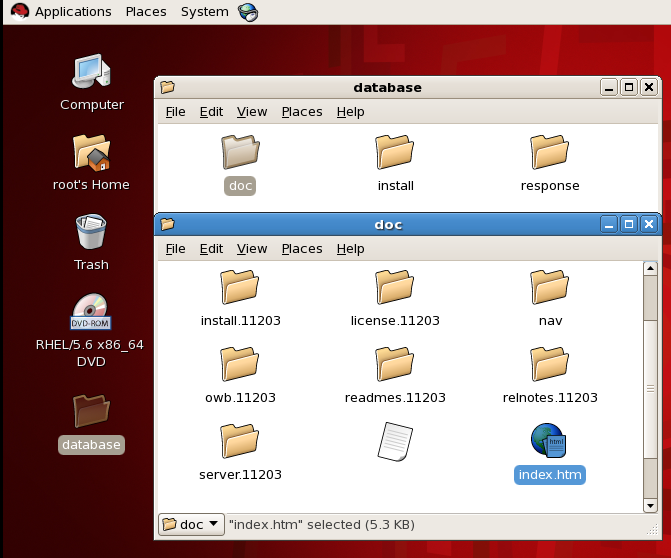


3、内存,硬盘


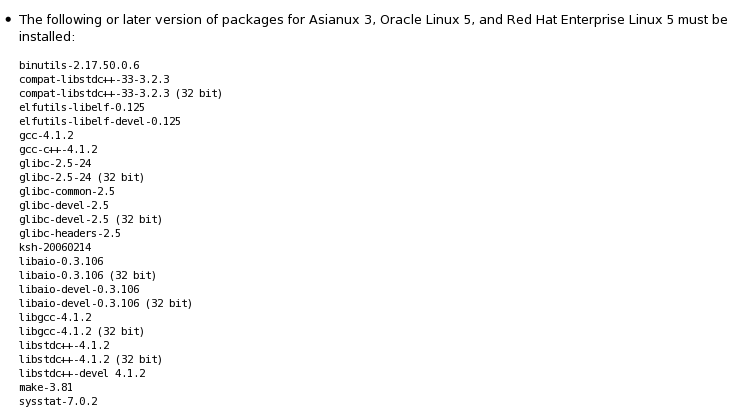
4、软件包
- 配置yum源
[root@ocp Desktop]# cd /etc/yum.repos.d/
[root@ocp yum.repos.d]# ls
rhel-debuginfo.repo  rhel-source.repo
[root@ocp yum.repos.d]# rm -rf rhel-debuginfo.repo    # 删除debug
[root@ocp yum.repos.d]#
[root@ocp yum.repos.d]# vim  rhel-source.repo        # 配置
[rhel-source]
name=Red Hat Enterprise Linux $releasever - Source
baseurl=file:///mnt/Server
enabled=1
gpgcheck=0
[root@ocp yum.repos.d]# mount /dev/cdrom /mnt/
mount: block device /dev/cdrom is write-protected, mounting read-only

- 安装包
The following or later version of packages for Asianux 3, Oracle Linux 5, and Red Hat Enterprise Linux 5 must be installed:

binutils-2.17.50.0.6
compat-libstdc++-33-3.2.3
compat-libstdc++-33-3.2.3 (32 bit)
elfutils-libelf-0.125
elfutils-libelf-devel-0.125
gcc-4.1.2
gcc-c++-4.1.2
glibc-2.5-24
glibc-2.5-24 (32 bit)
glibc-common-2.5
glibc-devel-2.5
glibc-devel-2.5 (32 bit)
glibc-headers-2.5
ksh-20060214
libaio-0.3.106
libaio-0.3.106 (32 bit)
libaio-devel-0.3.106
libaio-devel-0.3.106 (32 bit)
libgcc-4.1.2
libgcc-4.1.2 (32 bit)
libstdc++-4.1.2
libstdc++-4.1.2 (32 bit)
libstdc++-devel 4.1.2
make-3.81
sysstat-7.0.2
[root@ocp oracle]# yum -y install binutils compat-libstdc++-33 elfutils-libelf elfutils-libelf-devel
gcc gcc-c++ glibc glibc-common glibc-devel glibc-headers ksh
libaio libaio-devel libgcc  libstdc++ libstdc++-devel make sysstat
[root@ocp oracle]# rpm -q gcc
gcc-4.1.2-50.el5
- ODBC包

[root@ocp ~]# yum -y install unixODBC unixODBC-devel
5、组和用户

[root@ocp ~]# groupadd oinstall
[root@ocp ~]# groupadd dba
[root@ocp ~]#
[root@ocp ~]# useradd -g oinstall -G dba oracle
[root@ocp ~]# passwd oracle
Changing password for user oracle.
New UNIX password:
BAD PASSWORD: it is based on a dictionary word
Retype new UNIX password:
passwd: all authentication tokens updated successfully.
[root@ocp ~]#
[root@ocp ~]# id oracle
uid=500(oracle) gid=500(oinstall) groups=500(oinstall),501(dba)
6、配置kernel参数、资源限制
- 内核参数
[root@ocp ~]# vim /etc/sysctl.conf
# 添加
fs.aio-max-nr = 1048576
fs.file-max = 6815744
# kernel.shmall = 2097152      # 注释 默认有这2个参数
# kernel.shmmax = 536870912   # 注释
kernel.shmmni = 4096
kernel.sem = 250 32000 100 128
net.ipv4.ip_local_port_range = 9000 65500
net.core.rmem_default = 262144
net.core.rmem_max = 4194304
net.core.wmem_default = 262144
net.core.wmem_max = 1048586
# 立刻生效
[root@ocp ~]# sysctl -p
- 资源限制
[root@ocp ~]# vim /etc/security/limits.conf
oracle              soft    nproc   2047
oracle              hard    nproc   16384
oracle              soft    nofile  1024
oracle              hard    nofile  65536
oracle              soft    stack   10240
# 立即生效
[root@ocp ~]# sysctl -p
7、创建必须的目录

[root@ocp ~]# mkdir -p /u01/app/oracle/product/11.2.0/dbhome_1
[root@ocp ~]# chown -R oracle:oinstall /u01
[root@ocp ~]# chmod -R 775 /u01

[root@ocp ~]# cd Desktop/
[root@ocp Desktop]# ls
database
[root@ocp Desktop]# mv database/ /home/oracle/
[root@ocp Desktop]# cd /home/oracle/
[root@ocp oracle]# ls
database
[root@ocp oracle]# chown -R oracle:oinstall database/
[root@ocp oracle]# chmod 775 database/
8、配置oracle用户环境、安装
[root@ocp oracle]# su - oracle   # 切换oracle用户
[oracle@ocp ~]$ cd database/
[oracle@ocp database]$ ls
doc      readme.html  rpm           sshsetup  welcome.html
install  response     runInstaller  stage
[oracle@ocp database]$
[oracle@ocp database]$ ./runInstaller   # 安装
Starting Oracle Universal Installer...

Checking Temp space: must be greater than 120 MB.   Actual 42024 MB    Passed
Checking swap space: must be greater than 150 MB.   Actual 5855 MB    Passed
Checking monitor: must be configured to display at least 256 colors.    Actual 16777216    Passed
Preparing to launch Oracle Universal Installer from /tmp/OraInstall2018-03-03_12-45-15AM. Please wait ...[oracle@ocp database]$
9、图形界面安装
(1)我们不需要接收有关安全问题的通知,所以不用填写邮件地址;

(2)我们目前不需要软件更新,软件更新需要购买服务,
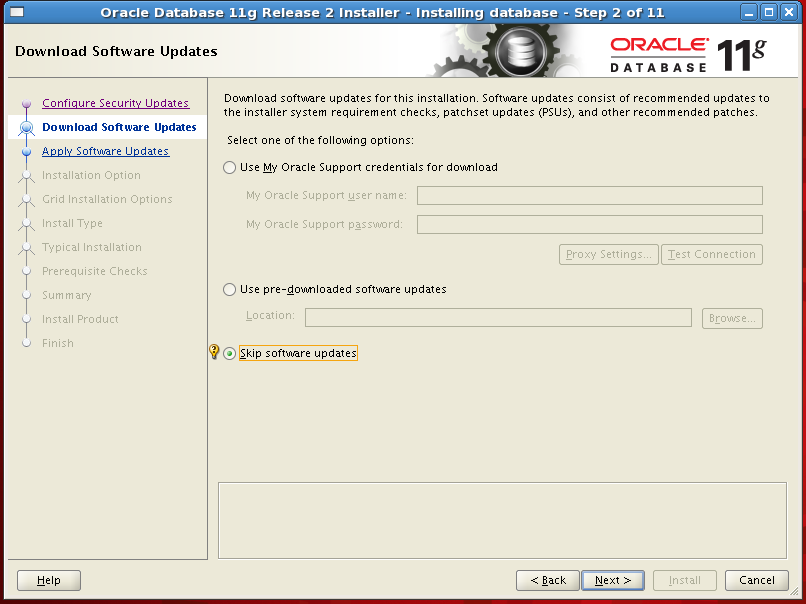
(3)安装选项界面,我们选择第一项【创建和配置数据库】,然后点击【下一步】

(4)跳转到数据库需要安装的类别,我们在服务器上安装,所以选择第二项
【服务器类】,然后选择【下一步】
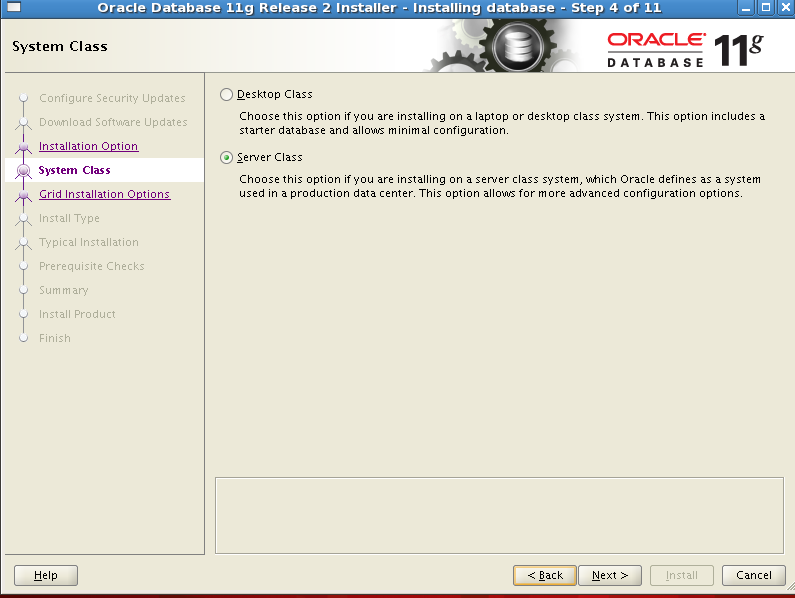
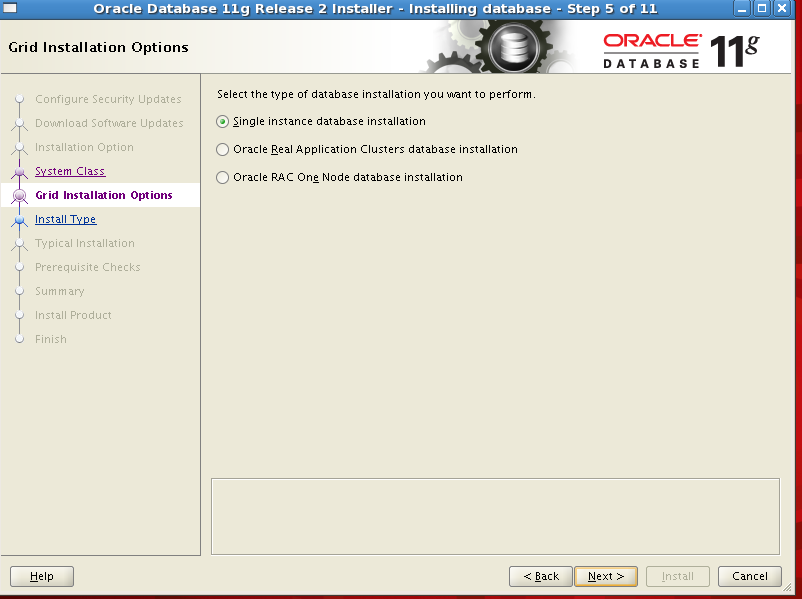
(5)系统收集完相关信息后,会跳转到网格安装选项,让我们选择【单实例】、还是
【RAC】或者【RAC 节点】,我们选择【单实例】,然后单击【下一步】;
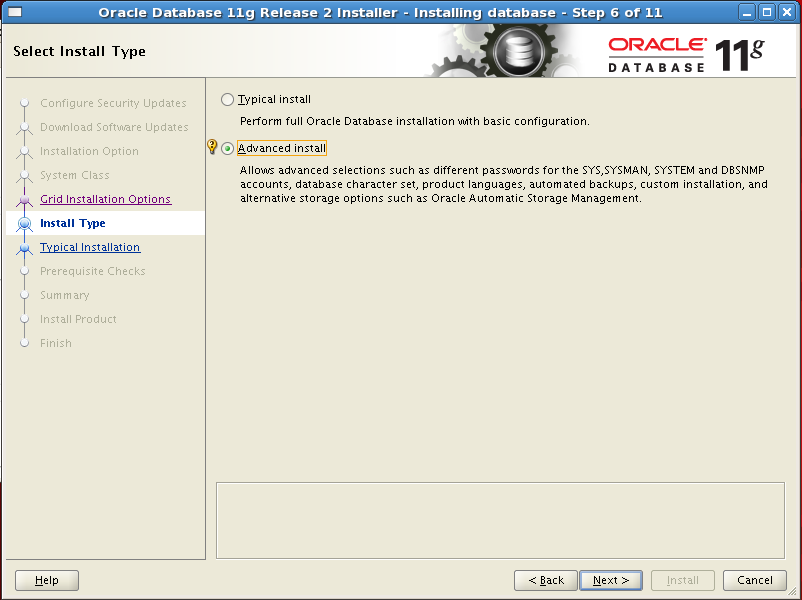
(6)系统会跳转到 安装类型页面,为了定义更多选项,我们选择【高级安装】,然后选择【下一步】
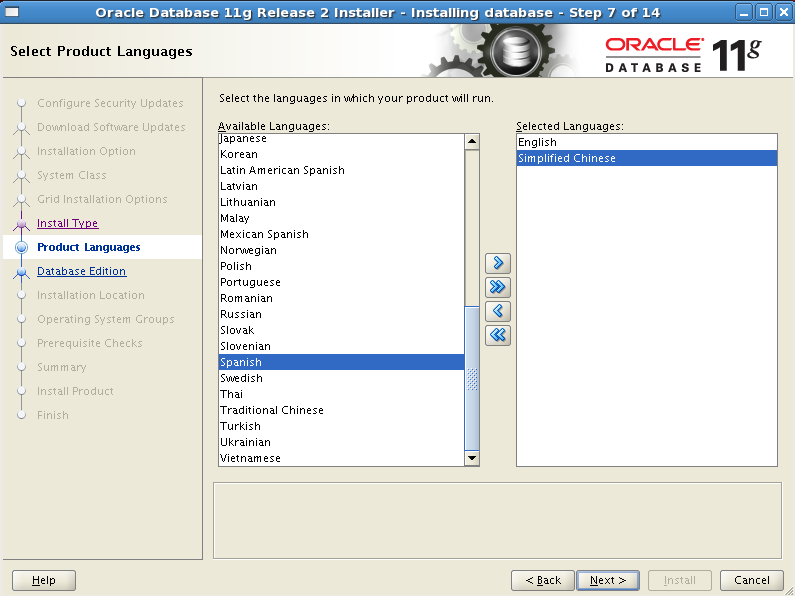
(7)根据你的情况选择语言,已经选英文,我们添加中文,然后选
择【下一步】,如图
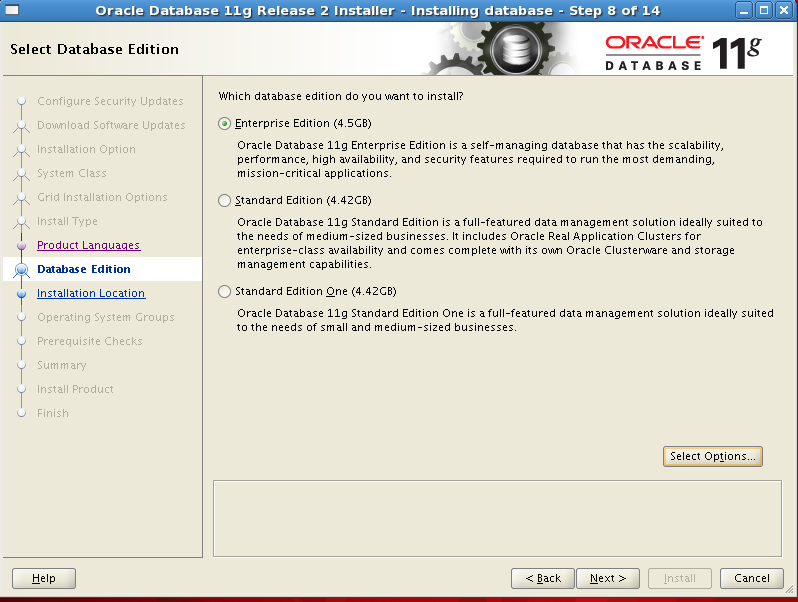
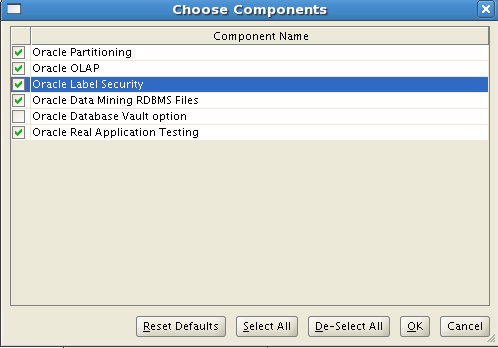
(8)点击【下一步】后,会跳转到数据库版本的选择页面,我们选择【企业版】,然后点击【options】
单击【下一步】,如图:
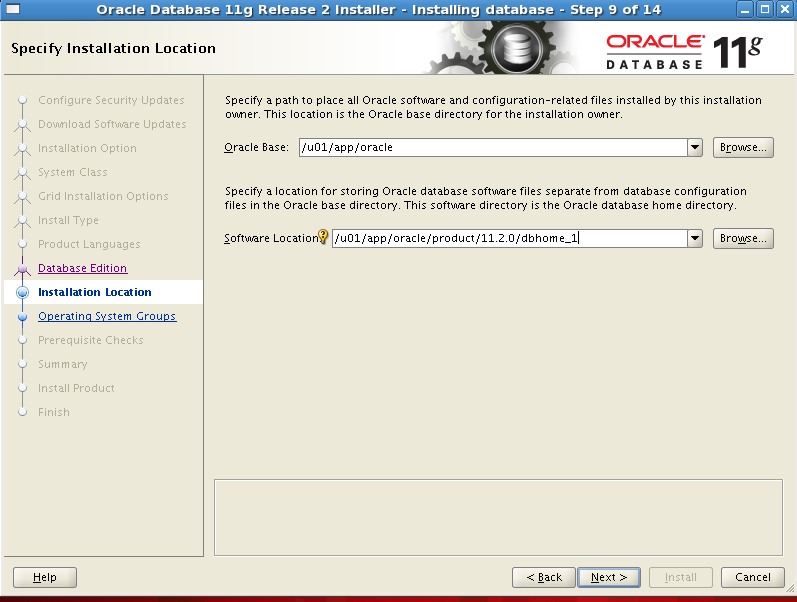
(9)跳转到安装目标路径的选择页面,如图:我们选择刚才创建的路径,然后选择【下一步】,
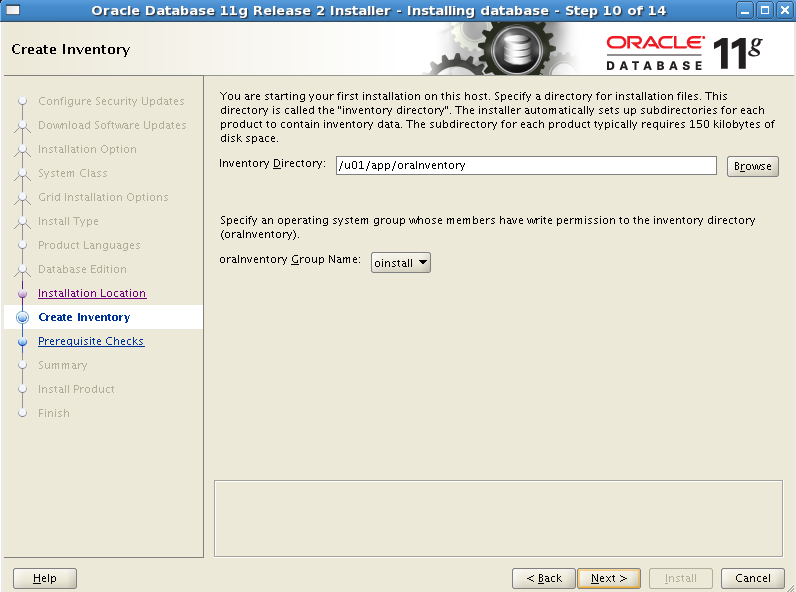
(10)跳转到创建产品清单页面,选择【下一步】,如图
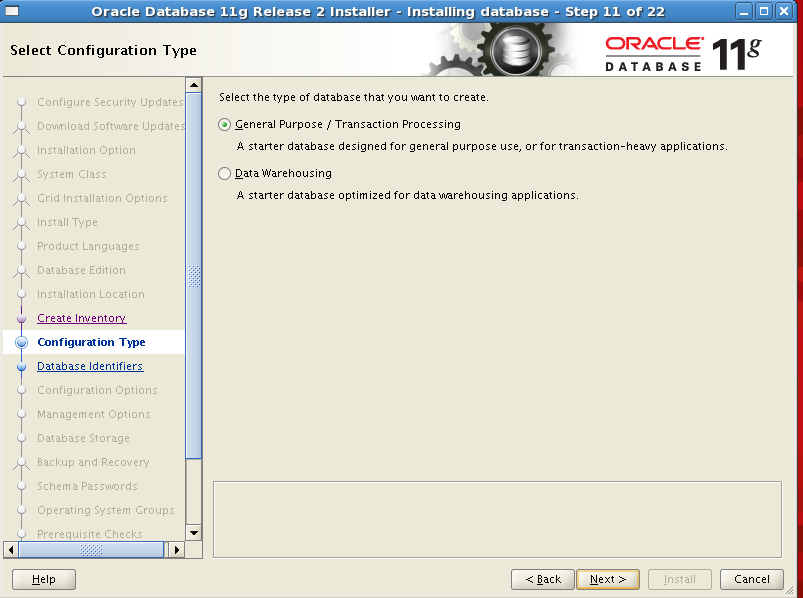
(11)跳转到配置类型页面,我们选择【一般用途/事务处理】,也是默认选项,然后选
择【下一步】;
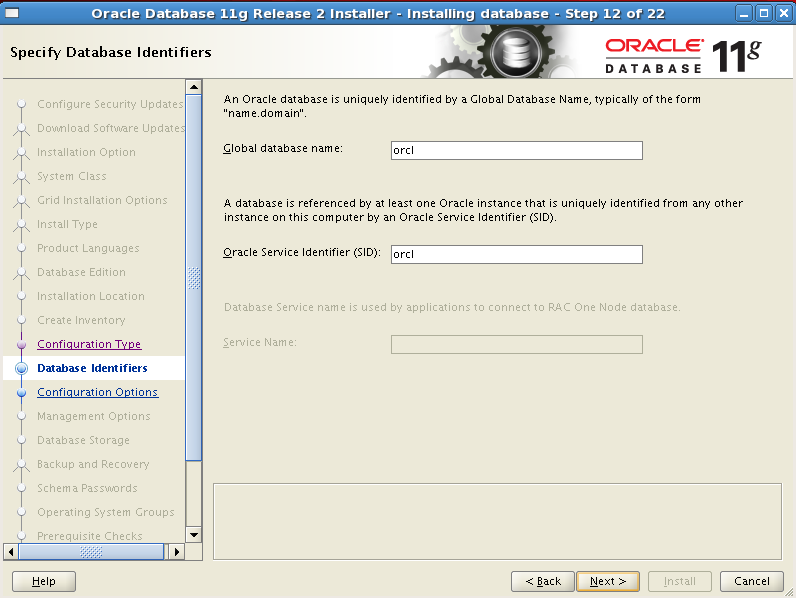
(12)跳转到数据库标识符配置页面,【全局数据库名】指在 一个网络内的数据库名称
标识,而【服务标识符】指在一台服务器上的数据库服务标识。我们可以保持默认,
也可以让两个标识符都为“orcl”,方便记忆,然后选择【下一步】,
(13)会跳转到配置选项页面,如图所示:

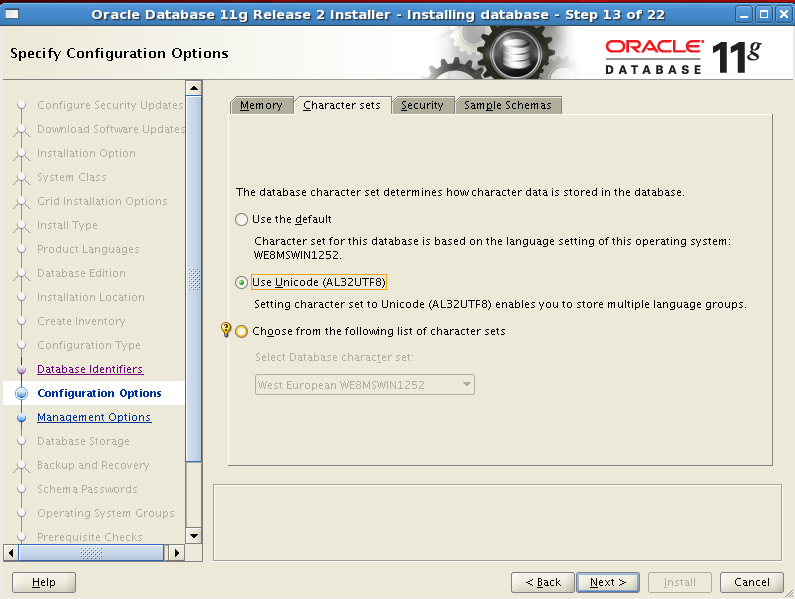
【内存】我们保持默认使用自动内存管理,也可以自定义500MB;
【字符集】我们保持默认或者选择第二项【使用 unicode】;
【安全性】保持默认;
【示例方案】默认 或者 我们学习数据库时,需要使用示例数据库,所以选中复选框。
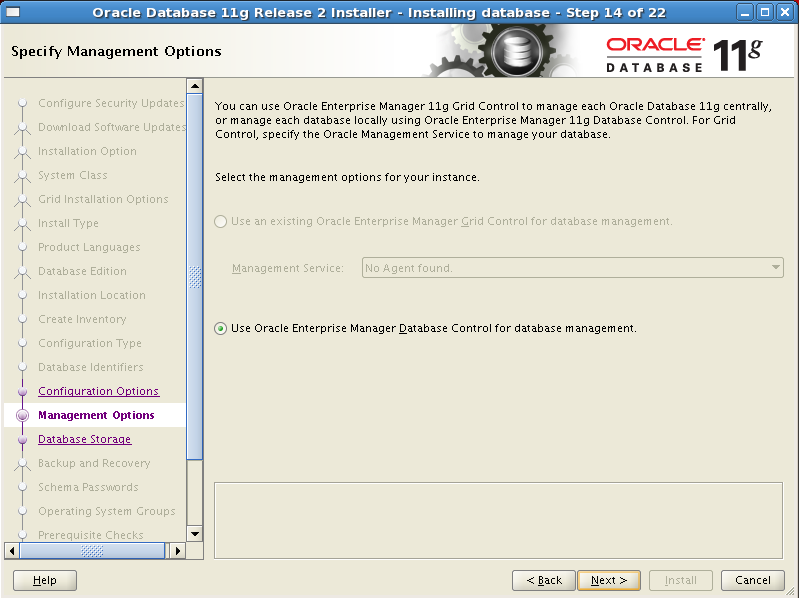
(14)然后单击【下一步】,跳转到下一个配置页面,如图所示:

(15)我们直接单机【下一步】,跳转到数据库存储的配置页面,
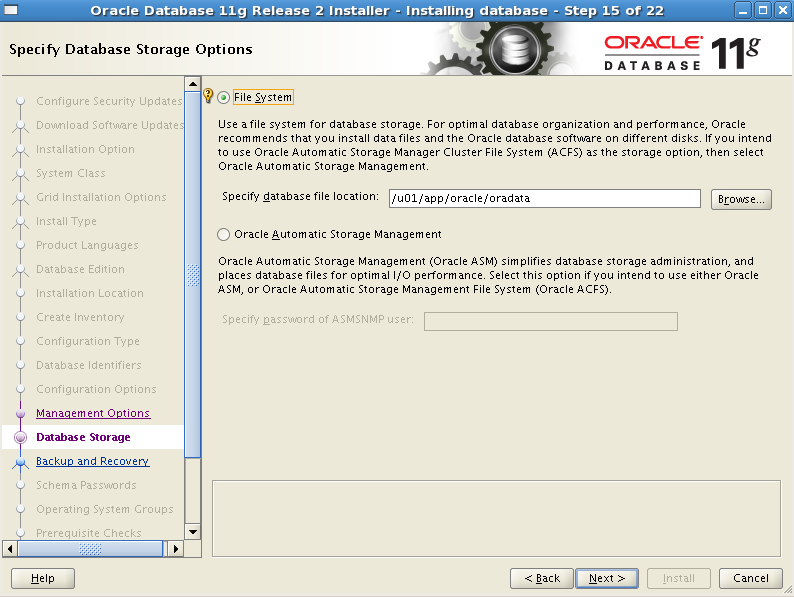
(16)本案例,我们使用【文件系统】,数据库文件默认位置保持默认,然后选择【下一步】,如图:
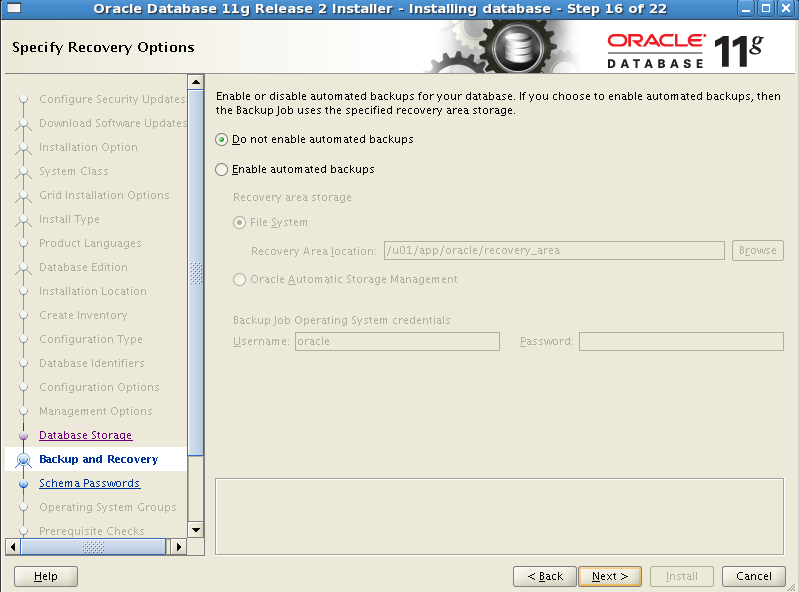
(17)跳转到备份和恢复配置页面,我们本次选择【不启用自动备份】,后期我们手动开
启该功能。然后选择【下一步】,如图:
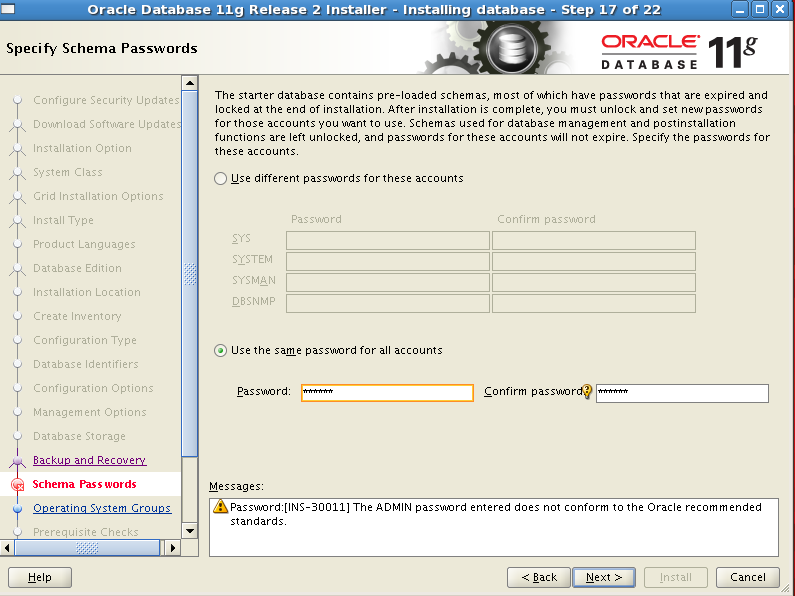
(18)跳转到数据库账号的配置页面,我们本次选择【对所有用户使用相同的密码】,方
便记忆和学习,但是在生产环境中,根据安全要求规范来进行操作。
单击【下一步】,因为本次我们使用“oracle”这个简单的密码作为账号的密码,所
以 Oracle 软件会提示我们说密码不符合要求,我们忽略,选择【是】进行下一步;
(19)跳转到操作系统组配置页面,我们选择 OSOPER 组为 oinstall 组,然后单击【下
一步】前进;

(20)系统会跳转到先决条件检查页面,该页面会列出在安装 Oracle 软件时,需要预先
准备的软硬件环境等是否满足 Oracle 软件的要求,根据该检查结果,我们可以查看我
们之前的相关配置是否正确,如果不正确,请修改。当然,如果只有内存不满足条
件,根据你电脑的相关情况进行处理。如图所示:

【back】返回查看检查的内容

(21)【保存响应文件】该响应文件可以在操作系统没有图形环境的情况下进行 Oracle
数据库安装,但是在生产环境中,一般都有图形界面,一些有要求的环境可能禁止提
供图形界面,因为更多的软件包意味着更多的漏洞风险,在这样的情况下,使用响应
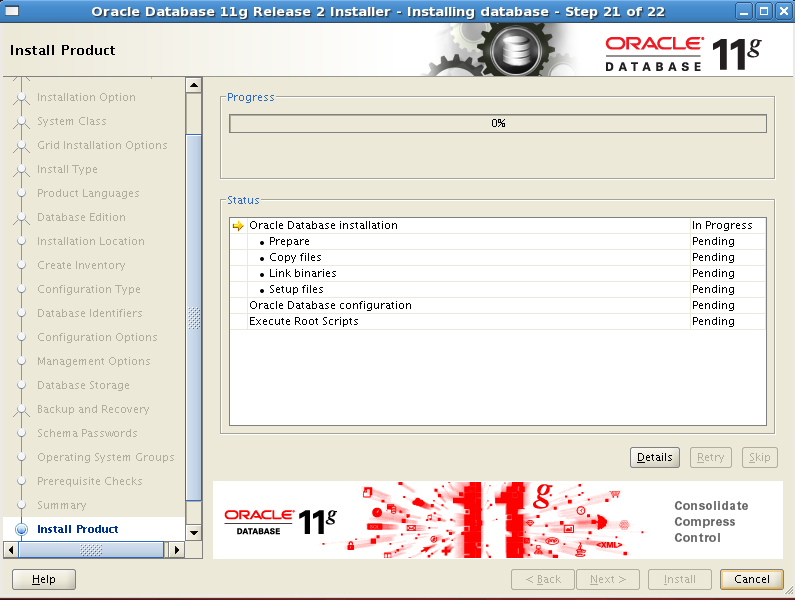
文件来进行命令行安装 Oracle 数据库就显得更有用(逼)处(格)了。经检查灭有问题,我
们选择【安装】开始进行数据库的安装,该过程根据计算机性能的不同时间长短不一
样。如图所示
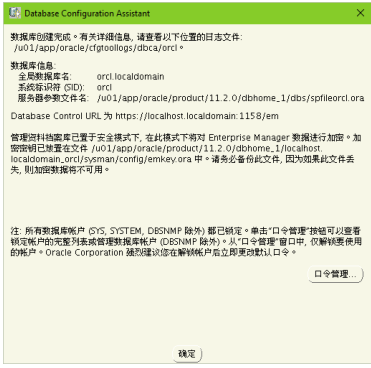
(22) 、 使用数据库配置助手配置账号和口令
在数据库安装完成后,会提示一个数据库配置助手的页面,在本页面提示有数据库
相关的信息,特别是路径和密钥等,也有一个按钮【口令管理】,我们可以在这里直接
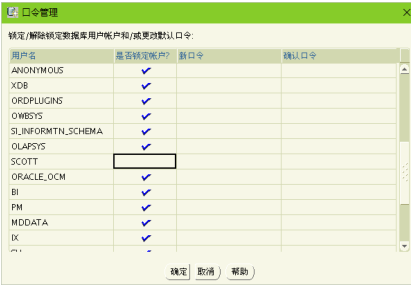
使用【口令管理】功能来解锁数据库中锁定的账户,如图:
(23)单击【口令管理】进入到口令管理页面,我们可以直接点击解锁账号或者修改账号
密码。本次,我们使用该功能来解锁 SCOTT 用户,如图所示
修改完成后,我们单击【确定】按钮生效。然后再数据库配置助手页面单击【确
定】完成该配置。
(24)执行安装完 成前脚本
点击【确认】完数据库自动配置页面后,会自动跳转到安装完成前脚本提示页
面,该页面显示了两个脚本需要在我们完成数据库安装前执行
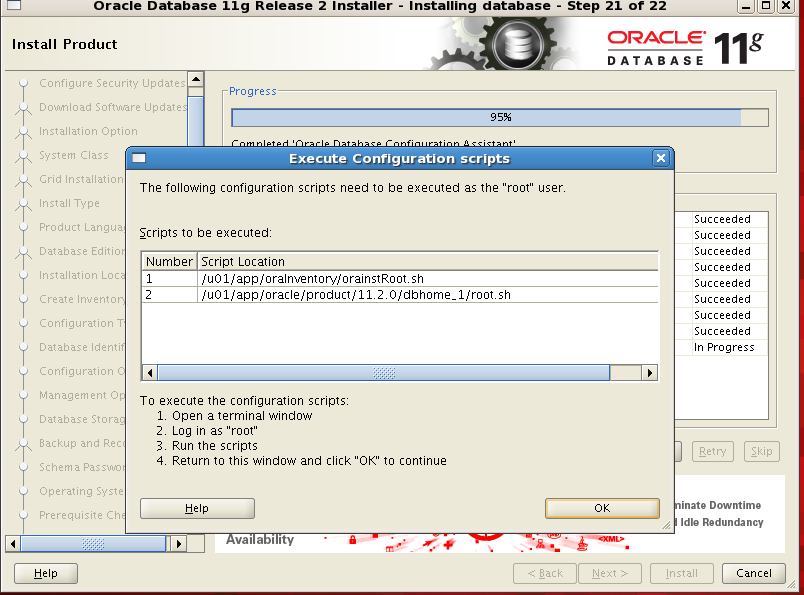
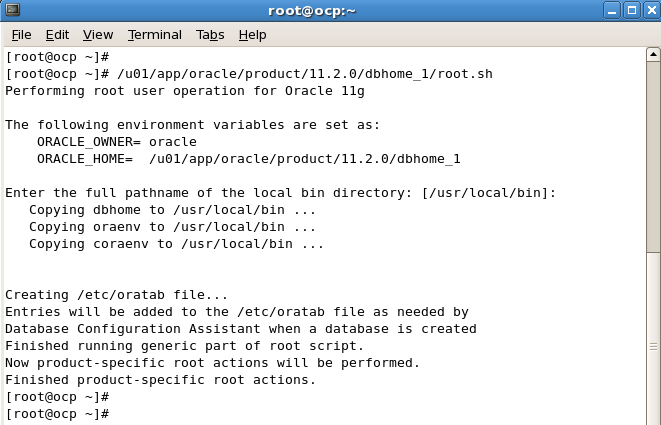
我们重新打开一个终端,使用 root 用户登录,直接输入脚本位置进行执行,如下
所示:

上面的输出结果说明我们第一个脚本执行成功,下来我们来执行第二个脚本,如
下所示:
(25)安装成功

10、启动数据库
[oracle@ocp ~]$ . oraenv
ORACLE_SID = [orcl1] ? orcl
The Oracle base has been set to /u01/app/oracle

[oracle@ocp ~]$ sqlplus / as sysdba

SQL*Plus: Release 11.2.0.3.0 Production on Wed Mar 7 14:00:19 2018

Copyright (c) 1982, 2011, Oracle.  All rights reserved.


Connected to:
Oracle Database 11g Enterprise Edition Release 11.2.0.3.0 - 64bit Production
With the Partitioning, Oracle Label Security, OLAP, Data Mining
and Real Application Testing options

SQL>
SQL> startup
ORA-01081: cannot start already-running ORACLE - shut it down first

SQL> show user
USER is "SYS"


