启动Jmeter后, 在Test plan下创建线程组:
1. 创建线程组(Thread Group)

在Thread Group界面,有一些线程的设置需要了解,如图:
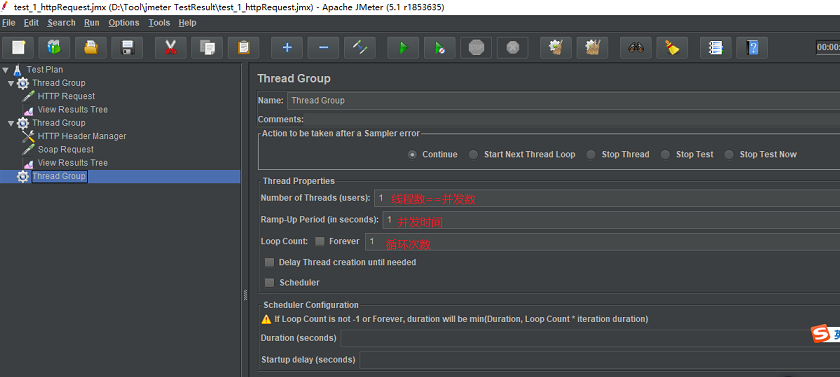
下面就可进行Http/Soap请求测试
测试的数据:
一. 测试Http请求
以下面的测试数据为例,进行http请求测试
1,创建Http请求(Http request) -add ->sampler(采样器)


3. 设置完成http 请求页面后,需要添加一个监听器查看运行结果(Listener ->view results Tree)
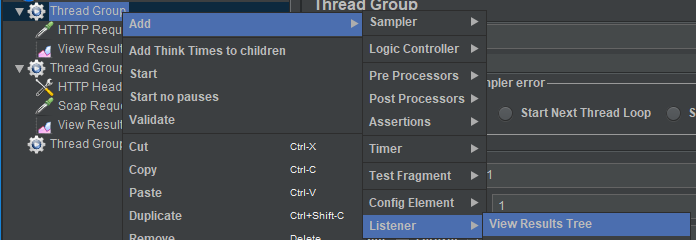
4. 在View Results Tree界面可设置log 保存路径,设置log保存的级别等(自己理解,还未实践)
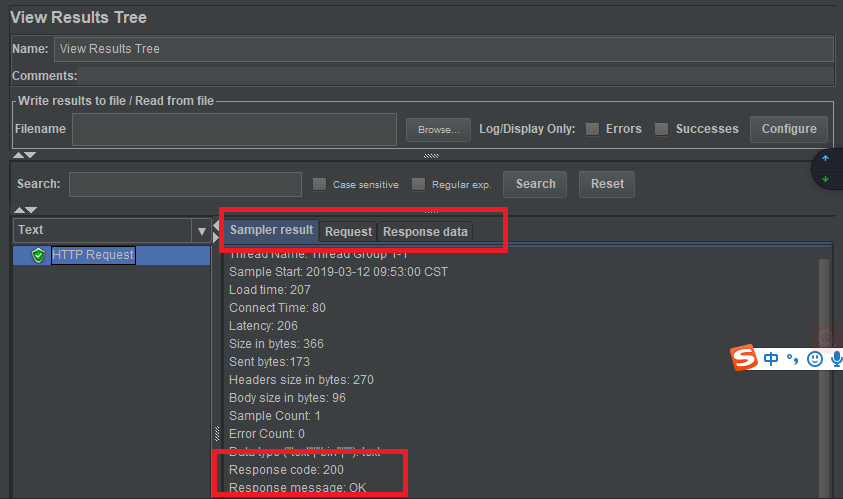
5. 在View Results Tree 界面点击工具栏的绿色运行按钮,查看执行结果:
二.用http request 测试soap请求
测试数据:
接口地址: http://www.webxml.com.cn/webservices/qqOnlineWebService.asmx
获得腾讯QQ在线状态
输入参数:QQ号码 String,默认QQ号码:8698053。返回数据:String,Y = 在线;N = 离线;E = QQ号码错误;A = 商业用户验证失败;V = 免费用户超过数量
SOAP 1.1
以下是 SOAP 1.2 请求和响应示例。所显示的占位符需替换为实际值。
POST /webservices/qqOnlineWebService.asmx HTTP/1.1
Host: www.webxml.com.cn
Content-Type: text/xml; charset=utf-8
Content-Length: length
SOAPAction: "http://WebXml.com.cn/qqCheckOnline"

<?xml version="1.0" encoding="utf-8"?>
<soap:Envelope xmlns:xsi="http://www.w3.org/2001/XMLSchema-instance" xmlns:xsd="http://www.w3.org/2001/XMLSchema" xmlns:soap="http://schemas.xmlsoap.org/soap/envelope/">
  <soap:Body>
    <qqCheckOnline xmlns="http://WebXml.com.cn/">
      <qqCode>string</qqCode>
    </qqCheckOnline>
  </soap:Body>
</soap:Envelope>
1. 创建Http请求(Http request) -add ->sampler(采样器), 可修改采样器名称为soap requst
2. 在soap request页面设置如下:
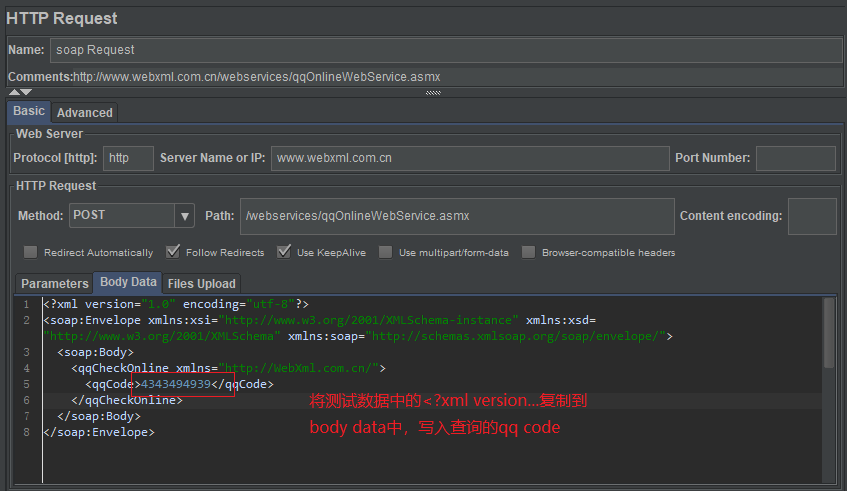
3. soap请求,还需要添加HTTP Header Manager:
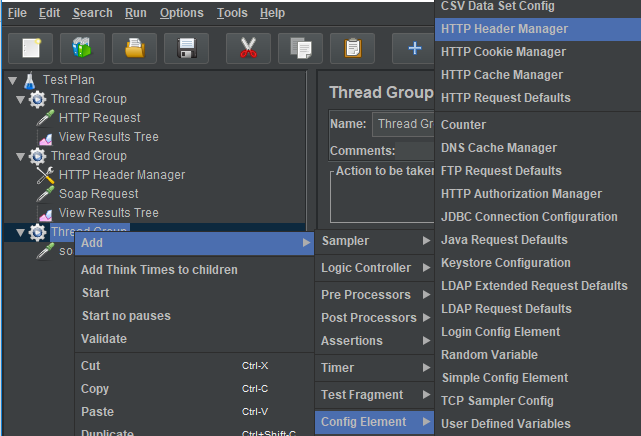
4. 在HTTP Header Manager页面设置参数:

5. 添加监听器 view results tree, 运行,查看测试结果