这个主要是来开发book的这个大模块的,看看如何优雅的开发出booked模块!
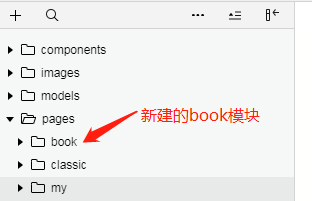
一、book模块的创建
这个就很简单了,创建一个大的框架是很简单的
二、组件的编写
(1)wxml组件页面的编码
首先是将一本书的展示看做是一个组件,然后就是循环展示所有请求的书籍的信息,所以需要把一本书当做一个组件来制作,这样就能比较合理的解决这个问题!
 1 // book组件的页面的代码
 2 <view class="container">
 3   <image src="{{book.image}}"></image>
 4   <view class="description">
 5     <text class="title">{{book.title}}</text>
 6     <text class="author">{{book.author}}</text>
 7     <view class="foot">
 8       <text class="footer">{{book.fav_nums}} 喜欢</text>
 9     </view>
10   </view>
11 </view>
将这个book组件引用到page中去,给用户展示书籍的信息,需要在book.json 中引入,并且将组件的写到book.wxml页面代码中,这里暂时只是展示一个book组件
 1 // page中的book.json 中引入book组件
 2 {
 3   "usingComponents": {
 4     "v-book":"/components/book/index"
 5   }
 6 }
 7
 8 // page中的book.wxml中引入v-book标签
 9 <v-book book="{{books[0]}}" />
10
11 // page中的book.js中操作数据,将数据传递到页面属性中,只写主要的生命周期函数
12 import {
13   BookModel
14 } from '../../models/book.js';
15
16 // 实例化BookModel对象
17 const bookModel = new BookModel();
18
19 Page({
20
21   /**
22    * 页面的初始数据
23    */
24   data: {
25     // 服务器请求的数据 book的集合
26     books:[]
27   },
28
29   /**
30    * 生命周期函数--监听页面加载
31    */
32   onLoad: function(options) {
33     // 这种写法才能规避回调地狱的
34     bookModel.getHotList()
35     .then(res => {
36       // 这种写法不完善 只是做了赋值 页面无法获取到
37       // this.data.books = res
38       this.setData({
39         books:res
40       })
41     })
42
43   },
(2)book组件样式的编码
这个啊,让人头疼的,我是写不出来,哈哈
 1 .container{
 2   margin-top: 30rpx;
 3   display: flex;
 4   position: relative;
 5   box-shadow: 2px 2px 3px #e3e3e3;
 6   flex-direction: column;
 7   width: 240rpx;
 8   height: 360rpx;
 9 }
10
11 /* 书籍封面的样式 */
12 .container image {
13   width: 100%;
14   height: 100%;
15   border-radius: 2px;
16 }
17
18 .description{
19   width: 216rpx;
20   position: absolute;
21   bottom: 0;
22   background-color: #fff;
23   padding: 5rpx 10rpx 8rpx 15rpx;
24   font-size: 24rpx;
25   display: flex;
26   flex-direction: column;
27   border-bottom-left-radius: 2px;
28   border-bottom-right-radius: 2px;
29 }
30
31 .title{
32   margin-top: 10rpx;
33   text-overflow: ellipsis;
34   white-space: nowrap;
35   overflow: hidden;
36 }
37
38 .author{
39   font-size: 20rpx;
40   color: #999999;
41   margin-bottom: 10rpx;
42   text-overflow: ellipsis;
43   white-space: nowrap;
44   overflow: hidden;
45 }
46
47 .foot{
48   font-size: 20rpx;
49   display: flex;
50   flex-direction: row;
51   justify-content: flex-end;
52 }
53
54 .footer{
55   color:
56 }
三、组件的应用
因为书籍是使用的一组的书籍组件,如何来把服务器上传回来的所有的书籍信息全部显示出来,这个就是我们需要考虑的,需要完成的
小程序中肯定是存在类似for循环的,那就是wx:for 但是在小程序中并不是叫做for循环,而是叫做列表渲染
(1)列表渲染
1 <block wx:for="{{books}}">
2   <v-book book="{{item}}" />
3 </block>
(2)整体页面布局
这个就是pages中的book页面的代码了,主题包含一个搜索栏,以及下面的图书列表
 1 <view class="container">
 2   <view class="header">
 3     <view class="box">
 4       <image src="/images/icon/search.png"></image>
 5       <text>搜索书籍</text>
 6     </view>
 7   </view>
 8   <view class="sub-container">
 9     <image src="/images/book/quality.png" class="head-img"></image>
10     <view class="books-container">
11       <block wx:for="{{books}}">
12         <v-book book="{{item}}" />
13       </block>
14     </view>
15   </view>
16 </view>
(3)整体的样式代码
看一下如何设计样式来让这个页面看起来那么舒服,这是最难的吧,充分灵活的使用flex布局来实现这样的样式
 1 .container{
 2   display: flex;
 3   flex-direction: column;
 4   align-items: center;
 5   width:100%;
 6 }
 7
 8  .sub-container{
 9   display: flex;
10   flex-direction: column;
11   align-items: center;
12   background-color: #f5f5f5;
13   margin-top:100rpx;
14   /* z-index:0;  */
15 }
16
17 .books-container{
18   margin-top:10rpx;
19   display: flex;
20   flex-direction: row;
21   flex-wrap: wrap;
22   padding: 0 90rpx 0 90rpx;
23   justify-content: space-between;
24 }
25
26 .books-container v-book{
27   margin-bottom: 30rpx;
28 }
29
30 .box{
31   display:flex;
32   flex-direction: row;
33   justify-content: center;
34   align-items: center;
35   border-radius: 50px;
36   background-color: #f5f5f5;
37   height: 34px;
38   width:700rpx;
39   color:#999999;
40 }
41
42 .header{
43   /* fixed 是使得容器固定 */
44   position: fixed;
45   background-color: #ffffff;
46   height:100rpx;
47   width:100%;
48   border-top:1px solid #f5f5f5;
49   border-bottom:1px solid #f5f5f5;
50   display: flex;
51   flex-direction: row;
52   align-items: center;
53   justify-content: center;
54   box-shadow:0 0 3px 0 #e3e3e3;
55   z-index: 99;
56 }
57
58 .head-img{
59   width:106rpx;
60   height:34rpx;
61   margin-top:40rpx;
62 }
63
64 .box image{
65   margin-right:10px;
66   width:14px;
67   height:14px;
68   margin-bottom:-2px;
69 }
四、book组件中业务逻辑的实现
这个主要是实现功能就是从book列表页面用户直接点击之后,跳转到书籍的详细信息的页面,这个该如何实现,是在组件中实现跳转逻辑,还是在页面上实现,如何取舍,如何选择,是选择组件的通用性呢?还是选择组件的设计实现简单呢?如何来写这个逻辑代码?
1、不考虑组件的通用性
不考虑组件通用性的话,就直接在组件中实现页面的跳转就OK了,具体的实现代码如下:
 1 // 组件中的wxml文件
 2 <view bind:tap="onTap" class="container">
 3 </view>
 4
 5 // 组件中的js文件 小程序中的navigateTo实现跳转
 6   methods: {
 7     onTap(event){
 8       const bid = this.properties.book.id;
 9       wx.navigateTo({
10         url: `/pages/book-detail/book-detail?bid=${bid}`,
11       })
12     }
13   }
2、考虑组件通用性的
五、book详细信息的开发
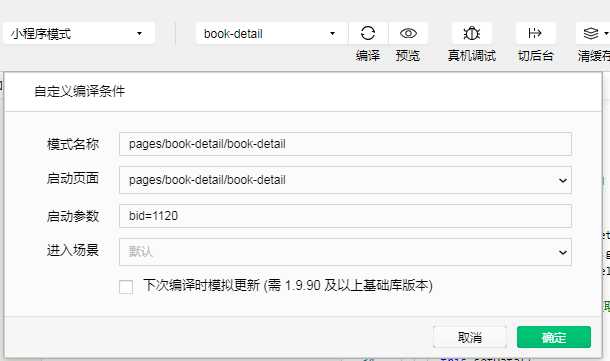
1、小程序中的编译模式
为了方便开发,让小程序每次编译之后都会是书籍详细信息的页面,我们可以添加编译模式,来控制编译之后的启动页面,这样有利于提高开发效率:
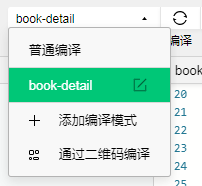
选择自己定义的编译模式:
2、具体book详情页面的开发
首先把详情页面的样式也页面的代码进行编写,这里就是没有按照顺序来整理出来代码,直接把完整的代码都拿出来吧
首先是详情页面的wxml文件中静态页面代码:(这里不是完整的,下面的点评功能没有实现)
 1 <wxs src="../../util/filter.wxs" module="util"/>
 2 <view class="container">
 3   <!-- 头部信息 -->
 4   <view class="head">
 5     <image src="{{book.image}}"></image>
 6     <text class="title">{{book.title}}</text>
 7     <text class="author">{{book.author}}</text>
 8   </view>
 9   <!-- 短评 -->
10   <view class="sub-container">
11     <text class="headline">短评</text>
12     <view class="comment-container">
13       <block wx:for="{{util.limit(comments,10)}}" wx:key="">
14         <v-tag tag-class="{{index==0?'ex-tag1':'' || index==1?'ex-tag2':''}}" text="{{item.content}}">
15           <text class="num" slot="after">{{"+" + item.nums}}</text>
16         </v-tag>
17       </block>
18     </view>
19     <!-- 内容简介 -->
20     <view class="sub-container">
21       <text class="heading">内容简介</text>
22       <text class="content" decode="{{true}}">{{util.format(book.summary)}}</text>
23     </view>
24   </view>
25   <!-- 书籍出版信息 -->
26   <view class="sub-container">
27     <text class="heading">书籍信息</text>
28     <view class="detail-container">
29       <view class="vertical description">
30         <text>出版社</text>
31         <text>出版年</text>
32         <text>页数</text>
33         <text>定价</text>
34         <text>装帧</text>
35       </view>
36       <view class="vertical">
37         <text>{{book.publisher}}</text>
38         <text>{{book.pubdate}}</text>
39         <text>{{book.pages}}</text>
40         <text>{{book.price}}</text>
41         <text>{{book.binding}}</text>
42       </view>
43     </view>
44   </view>
45 </view>·
接下来是wxss样式的代码:
  1 .container {
  2   background-color: #f5f5f5;
  3   width: 100%;
  4 }
  5
  6 .head {
  7   background-color: #fff;
  8   padding-top: 40rpx;
  9   padding-bottom: 40rpx;
 10   display: flex;
 11   flex-direction: column;
 12   align-items: center;
 13 }
 14
 15 .title {
 16   color: #2f2f2f;
 17   margin-top: 20rpx;
 18   font-size: 38rpx;
 19   font-weight: 600;
 20 }
 21
 22 .author {
 23   font-size: 28rpx;
 24   color: #999;
 25 }
 26
 27 .head image {
 28   width: 200rpx;
 29   height: 300rpx;
 30   box-shadow: 2px 2px 3px #e3e3e3;
 31 }
 32
 33 .sub-container {
 34   width: 690rpx;
 35   display: flex;
 36   flex-direction: column;
 37   align-items: center;
 38   margin-top: 30rpx;
 39   background-color: #fff;
 40   padding: 30rpx;
 41 }
 42
 43 .headline {
 44   font-size: 30rpx;
 45   font-weight: 600;
 46   color: #2f2f2f;
 47   margin-bottom: 20rpx;
 48 }
 49
 50 .comment-container {
 51   display: flex;
 52   flex-direction: row;
 53   flex-wrap: wrap;
 54 }
 55
 56 .comment-container v-tag {
 57   margin-right: 15rpx;
 58   margin-bottom: 10rpx;
 59 }
 60
 61 .num {
 62   margin-left: 10rpx;
 63   font-size: 22rpx;
 64   color: #aaa;
 65 }
 66
 67 .content{
 68   text-indent: 58rpx;
 69   font-weight: 500
 70 }
 71
 72 /* 给标签前两个设置背景色 这种设置违背了组件的封装原则的*/
 73
 74 /* 这里引入了小程序中的externalClasses来进行自定义组件的样式的设置 */
 75
 76 /* .comment-container > v-tag:nth-child(1) > view{
 77   background-color: #fffbdd;
 78 }
 79
 80 .comment-container > v-tag:nth-child(2) > view{
 81   background-color: #eefbff;
 82 } */
 83
 84 /* !important 强制提高外部样式的权限 */
 85
 86 .ex-tag1 {
 87   background-color: #fffbdd !important;
 88 }
 89
 90 .ex-tag2 {
 91   background-color: #eefbff !important;
 92 }
 93
 94 /* 书籍出版信息样式 */
 95 .detail-container{
 96   width: 100%;
 97   display: flex;
 98   flex-direction: row;
 99   justify-content: flex-start;
100   margin-bottom: 100rpx;
101   font-size: 28rpx;
102   color: #666;
103 }
104
105 .vertical{
106   display: flex;
107   flex-direction: column;
108 }
109
110 .description{
111   color: #999;
112   margin-right: 30rpx;
113 }
最后是book详情页面的js代码:
 1 import {
 2   BookModel
 3 } from '../../models/book.js';
 4
 5 // 实例化BookModel对象
 6 const bookModel = new BookModel();
 7
 8 Page({
 9
10   /**
11    * 页面的初始数据
12    */
13   data: {
14     comments:[],
15     book:null,
16     likeStatus:false,
17     likeCount:0
18   },
19
20   /**
21    * 生命周期函数--监听页面加载
22    */
23   onLoad: function (options) {
24     // 从外部页面传递过来的参数id
25     const bid = options.bid;
26     console.log(bid);
27     const detail = bookModel.getDetail(bid);
28     const comments = bookModel.getComments(bid);
29     const likeStatus = bookModel.getLikeStatus(bid);
30
31     // 利用promise的then的回调获取数据
32     detail.then(res => {
33       // console.log(res);
34       this.setData({
35         book:res
36       })
37     })
38
39     comments.then(res => {
40       // console.log(res);
41       this.setData({
42         comments:res.comments
43       })
44     })
45
46     likeStatus.then(res =>{
47       // console.log(res);
48       this.setData({
49         likeStatus:res.like_status,
50         likeCount:res.fav_nums
51       })
52     })
53
54   },
3、小程序插槽slot
这里的插槽很适合来做自定义组件的,这种用法非诚灵活,感觉真的有一种美妙的感觉-slot的官方介绍:
其实文档中已经写的很清楚了,但是还是看一下老师的讲解,毕竟在实战中引用才是最重要的,如何将理论的东西应用到实战中,是很值得思考的东西
1 <view class="container">
2   <slot name="before"></slot>
3   <text>{{text}}</text>
4   <!-- 微信小程序中的 插槽 slot -->
5   <slot name="after"></slot>
6 </view>
这个其实就相当于占位符,我事先在这里占有一个位置,随时等待有人来占有这个地方,但是如果没人来占,对总体的布局也不会产生影响,有人的话,我就要把这个人给你们展示出来了,这个人就和组件中的其他的标签融为一体了,注意这里需要指定slot的name值,因为在page中是需要根据name值来找具体哪个slot的
看page中如何插入到插槽中slot的:
1   <view class="sub-container">
2     <text class="headline">短评</text>
3     <view class="comment-container">
4       <block wx:for="{{comments}}" wx:key="">
5         <v-tag text="{{item.content}}">
6           <text class="num" slot="after">{{"+" + item.nums}}</text>
7         </v-tag>
8       </block>
9     </view>
这里是将text标签插入到插槽中,那么插槽中就会被一个text标签完全的占有了,你看到就是text标签中的内容了
但是,这样的话,slot并不会生效,需要在配置一个参数,就是:
1   options: {
2     multipleSlots:true
3   },
这样的话,才能实现slot的功能
4、小程序中的externalClasses
这个是说的是小程序中的自定义组件如何来引入外部样式类,就是如何将page中的样式放入到自定义组件中,使其生效,小程序提供了externalClasses这个配置,可以应用这个设置来解决这个问题
小程序中国的官方的介绍文档:https://developers.weixin.qq.com/miniprogram/dev/framework/custom-component/wxml-wxss.html#外部样式类
还是来看一下这个东西是如何在实战中应用的:
首先,看自定义组件中需要设置哪些地方:
 1 // 首先是需要设置 js中配置
 2   externalClasses:[
 3     'tag-class'
 4   ],
 5
 6 // 其次是需要在页面中使用这个自定义class
 7 <!-- tag标签组件 短评以及搜索中的标签组件 -->
 8 <view class="container tag-class">
 9   <slot name="before"></slot>
10   <text>{{text}}</text>
11   <!-- 微信小程序中的 插槽 slot -->
12   <slot name="after"></slot>
13 </view>
这样的话,我们就可以在使用自定义标签的时候来传递样式进去了
 1 // 这里面有一个样式的切换 第一个和第二个分别展示不同的背景色
 2 <view class="sub-container">
 3     <text class="headline">短评</text>
 4     <view class="comment-container">
 5       <block wx:for="{{comments}}" wx:key="">
 6         <v-tag tag-class="{{index==0?'ex-tag1':'' || index==1?'ex-tag2':''}}" text="{{item.content}}">
 7           <text class="num" slot="after">{{"+" + item.nums}}</text>
 8         </v-tag>
 9       </block>
10     </view>
再来看一下ex-tag1与ex-tag2的样式设置
1 .ex-tag1 {
2   background-color: #fffbdd !important;
3 }
4
5 .ex-tag2 {
6   background-color: #eefbff !important;
7 }
注意:!important 这里是提高该样式的重要性的,如果没有的话,虽然外部样式已经设置进去了,但是可能会被默认的样式覆盖的,这里为了强制覆盖默认样式而进行的设置
5、小程序中的wxs
这个文件的主要功能就是在wxml文件中可以调用外部的js代码,当然js代码是放在wxs文件中的,看看这个新的知识点是如何来实现的,官方文档:
https://developers.weixin.qq.com/miniprogram/dev/reference/wxs/01wxs-module.html
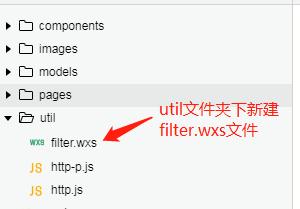
开始编写逻辑代码:
 1 // filter.wxs文件中代码 注意model.exports导出 var关键字 正则替换写法
 2 var format = function(text){
 3   if(!text){
 4     return
 5   }
 6   var reg = getRegExp('\\n','g');
 7   return text.replace(reg,'
     ');
 8
 9 }
10
11 module.exports = {
12   format:format
13 }
14
15 // 页面中的引入代码
16 <wxs src="../../util/filter.wxs" module="util"/>
17 // 标签中使用
18 <text class="content" decode="{{true}}">{{util.format(book.summary)}}</text>