群聊无昵称
原生js代码
<!DOCTYPE html>
<html lang="en">
<head>
  <meta charset="UTF-8">
  <title>群聊</title>
</head>
<body>
<p>
    <input type="text" id="content">
    <button onclick="send_msg()">发送</button> <!--给按钮绑定点击事件-->
</p>

<div id="chat_list">

</div>
</body>
<script type="application/javascript">
  var ws = new WebSocket("ws://192.168.16.42:9527/my_socket");
  // 监听后端发来的消息,ws.onmessage起到监听的作用,只要有消息过来函数会自动执行
  ws.onmessage = function (eventMessage) {
      console.log(eventMessage.data); // 获取后端发来的消息
      var p = document.createElement("p");
      p.innerText = eventMessage.data;
      document.getElementById("chat_list").appendChild(p); // 将消息内容添加到div内
  };
  // 将我们输入的内容发送给后端
  function send_msg() {
      var content = document.getElementById("content").value;
      ws.send(content);
  };

</script>
</html>
后端逻辑代码
# -*- coding: utf-8 -*-
# @Time    : 2019/7/15 16:42

from flask import render_template,request,Flask
from geventwebsocket.handler import WebSocketHandler  # 提供WS协议处理
from geventwebsocket.server import WSGIServer # 承载服务
from geventwebsocket.websocket import WebSocket  # 语法提示

app = Flask(__name__)

user_socket_list = []
@app.route("/my_socket")
def my_socket():
    # 获取当前客户端与服务器的Socket连接
    user_socket = request.environ.get("wsgi.websocket")  # type:WebSocket
    if user_socket:
            user_socket_list.append(user_socket)
            print(len(user_socket_list),user_socket_list)
        # 1 [<geventwebsocket.websocket.WebSocket object at 0x000001D0D70E1458>]
        # print(user_socket,"OK 连接已经建立好了,接下来发消息吧")
    while 1:
        # 等待前端将消息发送过来
        msg = user_socket.receive()
        print(msg)

        for usocket in user_socket_list:
            try:
                usocket.send(msg)
            except:
                continue

@app.route("/qunliao")
def gc():
    return render_template("qunliao.html")

if __name__ == '__main__':
    http_serv = WSGIServer(("0.0.0.0",9527),app,handler_class=WebSocketHandler) # 这种启动方式和app.run()不冲突,该启动方式发什么请求都可以接受到
    http_serv.serve_forever()
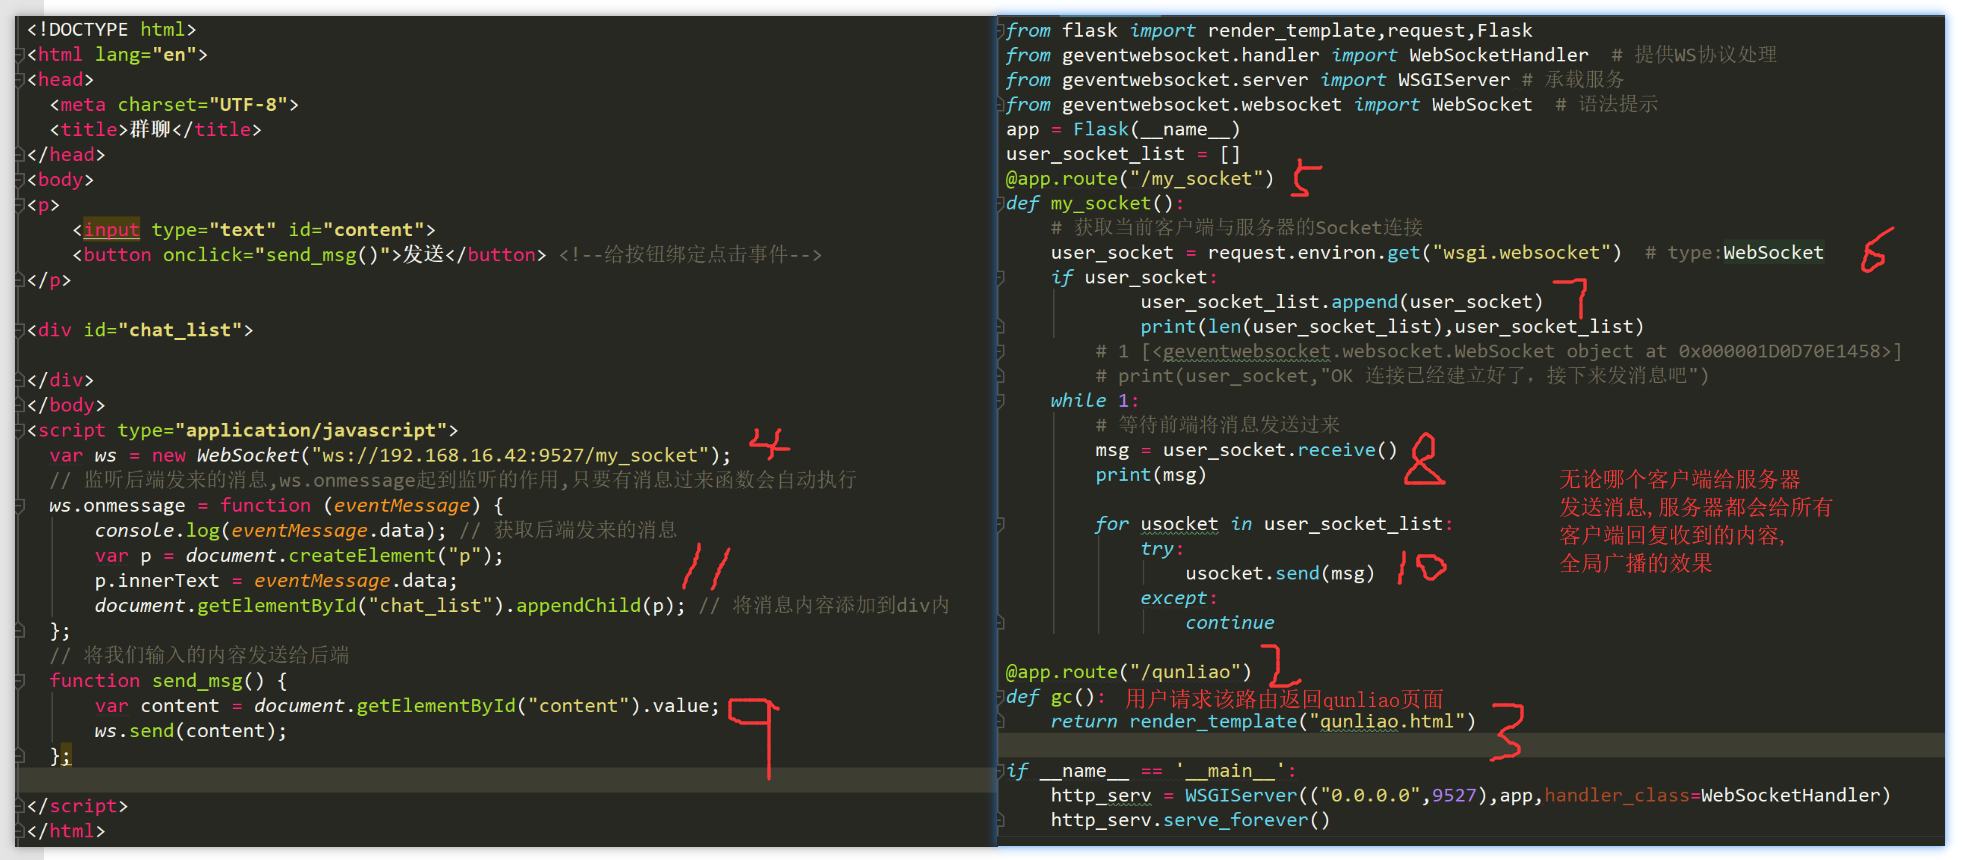
流程
1、用户在网页请求http://192.168.16.42:9527/qunliao
2、请求/qunliao这个路由走后端对应的视图函数gc返回qunliao.html这个页面,
3、页面在加载的过程中走到script代码时建立WebSocket连接请求ws://192.168.16.42:9527/my_socket,
4、ws://192.168.16.42:9527/my_socket请求走后端对应的视图函数,获取当前客户端与服务器的socket连接对象,调用该对象的receive方法,等待前端发来消息,
5、前端我们通过给input框绑定点击事件,获取用户输入的内容发送给服务器;
6、后端将前端发来的消息在发送给前端;
7、前端通过ws.onmessage这个事件监听着后端过来的消息,只要有消息就会自动触发函数执行并获取数据;
第一步是浏览器向/quliao这个路径发起请求:

jQuery

<!DOCTYPE html>
<html lang="en">
<head>
  <meta charset="UTF-8">
  <title>群聊</title>
</head>
<body>
<p>
    <input type="text" id="content">
    <button id="send_msg" >发送</button> <!--给按钮绑定点击事件-->
</p>

<div id="chat_list">

</div>
</body>
<script src="/static/jquery-3.4.1.js"></script>
<script type="application/javascript">
    var ws = new WebSocket("ws://192.168.16.42:9527/my_socket");
    // 监听后端发来的消息,ws.onmessage起到监听的作用,只要有消息过来函数会自动执行
    ws.onmessage = function (eventMessage) {
      console.log(eventMessage.data);       // 获取后端发来的消息
      var p = document.createElement("p"); // 创建一个p标签
      p.innerText = eventMessage.data;     // 将后端发来的数据添加到p标签内
      $("#chat_list").append(p)            // 将p标签添加到div内
    };
  // 将我们输入的内容发送给后端
    $("#send_msg").click(function () {
        var content = $("#content").val();
        ws.send(content);
    })
</script>
</html>

from flask import render_template,request,Flask
from geventwebsocket.handler import WebSocketHandler  # 提供WS协议处理
from geventwebsocket.server import WSGIServer # 承载服务
from geventwebsocket.websocket import WebSocket  # 语法提示
app = Flask(__name__,static_folder="statics",static_url_path="/static")  # 获取静态文件
user_socket_list = []
@app.route("/my_socket")
def my_socket():
    # 获取当前客户端与服务器的Socket连接
    user_socket = request.environ.get("wsgi.websocket")  # type:WebSocket
    if user_socket:
            user_socket_list.append(user_socket)
            print(len(user_socket_list),user_socket_list)
        # 1 [<geventwebsocket.websocket.WebSocket object at 0x000001D0D70E1458>]
        # print(user_socket,"OK 连接已经建立好了,接下来发消息吧")
    while 1:
        # 等待前端将消息发送过来
        msg = user_socket.receive()
        print(msg)
        for usocket in user_socket_list:
            try:
                usocket.send(msg)
            except:
                continue

@app.route("/qunliao")
def gc():
    return render_template("qunliao.html")

if __name__ == '__main__':
    http_serv = WSGIServer(("0.0.0.0",9527),app,handler_class=WebSocketHandler)
    http_serv.serve_forever()
带群昵称的群聊
通过动态路由参数获取前端传过来的用户名

<!DOCTYPE html>
<html lang="en">
<head>
  <meta charset="UTF-8">
  <title>群聊</title>
</head>
<body>
<input type="text" id="username">
<button id="login">登录</button>
<p>
    <input type="text" id="content">
    <button id="send_msg" >发送</button> <!--给按钮绑定点击事件-->
</p>

<div id="chat_list">

</div>
</body>
<script src="/static/jquery-3.4.1.js"></script>
<script type="application/javascript">
    var ws = null; // 创建全局变量,ws多处使用

    $("#login").click(function () {
         var username = $("#username").val();
         console.log(username);
         // 创建一个websocket对象,建立websocket连接,更改了全局的ws,将用户名拼接上
         ws = new WebSocket("ws://192.168.16.42:9527/my_socket/" + username);

        // 监听后端发来的消息,ws.onmessage起到监听的作用,只要有消息过来函数会自动执行
        ws.onmessage = function (eventMessage) {
            console.log(eventMessage.data);       // 获取后端发来的消息
            var str_obj = JSON.parse(eventMessage.data);  // 反序列化,因为我们在发送给后端的时候是json
            var p = document.createElement("p"); // 创建一个p标签
            $(p).text(str_obj.from_user +":"+str_obj.chat);     // 将dom对象转换成jQuery对象,将后端发来的数据添加到p标签内
            $("#chat_list").append(p)            // 将p标签添加到div内
        };
    });

    // 将我们输入的内容发送给后端
    $("#send_msg").click(function () {
        var content = $("#content").val();
        var username = $("#username").val();
        // 将要发送的内容封装成自定义对象
        var sendStr = {
            from_user:username,
            chat:content
        };
        console.log(sendStr);
        // 序列化后发送给后端
        ws.send(JSON.stringify(sendStr));
    });
</script>
</html>

from flask import render_template,request,Flask
from geventwebsocket.handler import WebSocketHandler  # 提供WS协议处理
from geventwebsocket.server import WSGIServer # 承载服务
from geventwebsocket.websocket import WebSocket  # 语法提示
app = Flask(__name__,static_folder="statics",static_url_path="/static")
user_socket_dict = {}

# 建立websocket连接时,前端将名字发送过来了
@app.route("/my_socket/<username>")
def my_socket(username):
    # 获取当前客户端与服务器的Socket连接
    user_socket = request.environ.get("wsgi.websocket")  # type:WebSocket

    if user_socket:
        # 以名字为key,连接对象为value添加到字典中
        user_socket_dict[username] = user_socket
    while 1:
        # 等待前端将消息发送过来,此时是json数据
        msg = user_socket.receive()
        for usocket in user_socket_dict.values():
            try:
                # 将收到的信息在发送给所有与服务器建立连接的前端
                usocket.send(msg)
            except:
                continue

@app.route("/qunliao")
def gc():
    return render_template("qunliaonicheng.html")

if __name__ == '__main__':
    http_serv = WSGIServer(("0.0.0.0",9527),app,handler_class=WebSocketHandler)
    http_serv.serve_forever()
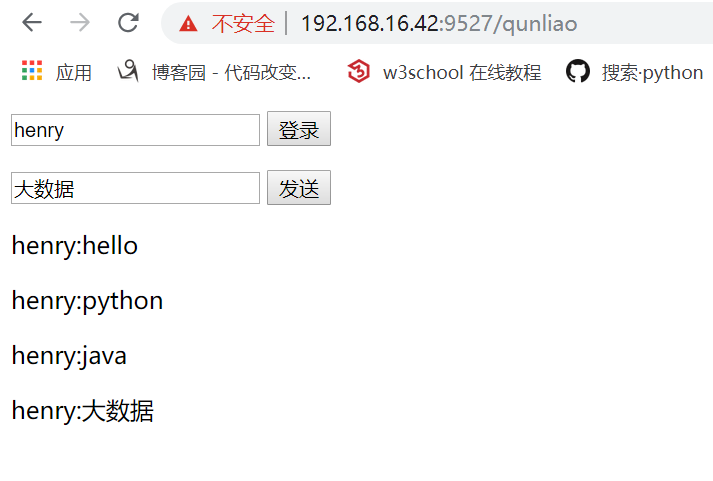
效果:

websocket实现私聊

<!DOCTYPE html>
<html lang="en">
<head>
  <meta charset="UTF-8">
  <title>群聊</title>
</head>
<body>
我的昵称:<input type="text" id="username">
<button id="login">登录</button>
<p>
    给<input type="text" id="to_user">发送
    <input type="text" id="content">
    <button id="send_msg" >发送</button> <!--给按钮绑定点击事件-->
</p>

<div id="chat_list">

</div>
</body>
<script src="/static/jquery-3.4.1.js"></script>
<script type="application/javascript">
    var ws = null; // 创建全局变量,ws多处使用

    $("#login").click(function () {
         var username = $("#username").val();
         console.log(username);
         // 创建一个websocket对象,建立websocket连接,更改了全局的ws,将用户名拼接上
         ws = new WebSocket("ws://192.168.16.42:9527/my_socket/" + username);

        // 监听后端发来的消息,ws.onmessage起到监听的作用,只要有消息过来函数会自动执行
        ws.onmessage = function (eventMessage) {
            console.log(eventMessage.data);       // 获取后端发来的消息
            var str_obj = JSON.parse(eventMessage.data);  // 反序列化,因为我们在发送给后端的时候是json
            var p = document.createElement("p"); // 创建一个p标签
            $(p).text(str_obj.from_user +":"+str_obj.chat);     // 将dom对象转换成jQuery对象,将后端发来的数据添加到p标签内
            $("#chat_list").append(p)            // 将p标签添加到div内
        };
    });

    // 将我们输入的内容发送给后端
    $("#send_msg").click(function () {
        var content = $("#content").val();
        var username = $("#username").val();
        var to_user = $("#to_user").val();
        // 将要发送的内容封装成自定义对象
        var sendStr = {
            from_user:username,
            chat:content,
            to_user:to_user,
        };
        console.log(sendStr);
        // 序列化后发送给后端
        ws.send(JSON.stringify(sendStr));
    });
</script>
</html>

import json
from flask import render_template,request,Flask
from geventwebsocket.handler import WebSocketHandler  # 提供WS协议处理
from geventwebsocket.server import WSGIServer # 承载服务
from geventwebsocket.websocket import WebSocket  # 语法提示
app = Flask(__name__,static_folder="statics",static_url_path="/static")
user_socket_dict = {}

# 建立websocket连接时,前端将名字发送过来了
@app.route("/my_socket/<username>")
def my_socket(username):
    # 获取当前客户端与服务器的Socket连接
    user_socket = request.environ.get("wsgi.websocket")  # type:WebSocket

    if user_socket:
        # 以名字为key,连接对象为value添加到字典中
        user_socket_dict[username] = user_socket
    while 1:
        # 等待前端将消息发送过来,此时是json数据
        msg = user_socket.receive()
        print(msg)    # {"from_user":"wuchao","chat":"123","to_user":"xiaohei"}
        # 反序列化
        msg_dict = json.loads(msg)
        # 查找字典中前端要发送信息给那个人的名字
        to_username = msg_dict.get("to_user")
        # 获取目标人物的连接地址
        to_user_socket = user_socket_dict.get(to_username)
        # 将信息发送给目标人物
        to_user_socket.send(msg)

@app.route("/siliao")
def gc():
    return render_template("siliao.html")

if __name__ == '__main__':
    http_serv = WSGIServer(("0.0.0.0",9527),app,handler_class=WebSocketHandler)
    http_serv.serve_forever()
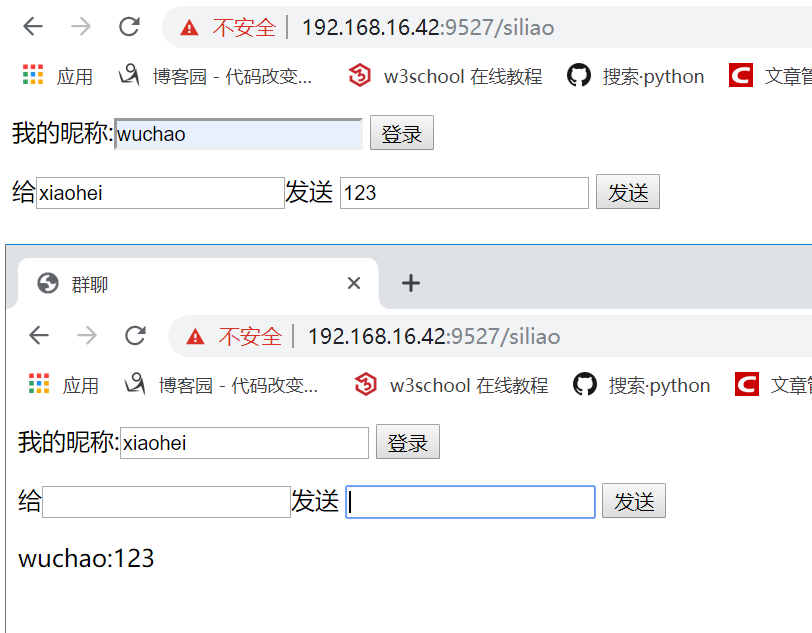
效果

