上两篇文章说过要写一个简单的单页应用例子的, 迟迟没有兑诺, 实在有愧 哈哈。这篇写给小白用户哈。
正好趁今天风和日丽,事情不多, 把从项目里的代码扣取了一下, 整理了一个简单的例子。
因为我们生产项目用到es6 还有构建工具,为了让例子足够简单和原生,除了一个zepto,连require都是我之前写的文章里的实现的,很简单70行代码。
事例地址
github:https://github.com/skyweaver213/simple-spa
demo: https://skyweaver213.github.io/simple-spa/example/demo/index.html
单页应用
单页应用是指在浏览器中运行的应用,它们在使用期间不会重新加载页面。像所有的应用一样,它旨在帮助用户完成任务,比如“编写文档”或者“管理Web服务器”。可以认为单页应用是一种从Web服务器加载的富客户端。(摘自:http://blog.csdn.net/zuoninger/article/details/38842823)
如何实现
单页应用 说白了就是不用刷新页面,例如首页点击 查询到 列表页,一般给一个过场动画,从而优化用户的体验。但是往往单页应用首次加载时间比较长,因为很多人往往把代码都打进首屏里了。
然后能不能做到既要极速打开首屏体验,也要保留单页的流程用户体验呢?
这时候 极致的按需, 能把这个问题 迎刃而解。

截图为例, 例如绿色的其实就是用户打开这个页面首先最关心的部分,我们把这部分归入到首屏里,然后待首屏渲染成功后,再异步 require 其他首屏之额的模块,例如我蓝色框住的信息和操作。
例如这样。
        //航班卡片渲染
        flightInfo.render(orderDetail, orderDetailInfo);
        //价格render
        pricetotal.render(orderDetail, orderDetailInfo);

        //异步模块加载
        this.loadAsynModules();
        this.loadAsynXprdModules();
1、单页的核心实现
利用了浏览器 支持历史记录操作,pushState 和popstate (如果不支持这个属性的浏览器可以用hashchange这个事件代替,移动端基本都支持了)
没了解过这个属性的 可以看看 张鑫旭的 :http://www.zhangxinxu.com/wordpress/2013/06/html5-history-api-pushstate-replacestate-ajax/
流程大概是这样

拉取html:
 1                 var me = this;
 2                 //获取html
 3                 $.ajax({
 4                     url: htmlPath,
 5                     type: 'get',
 6                     success: function (data) {
 7                         //console.log('ss data ', data);
 8                         getScript(data, me);
 9                     },
10                     error: function (e) {
11                         console.log('error ', e);
12                     }
13
14                 });
html 内容:
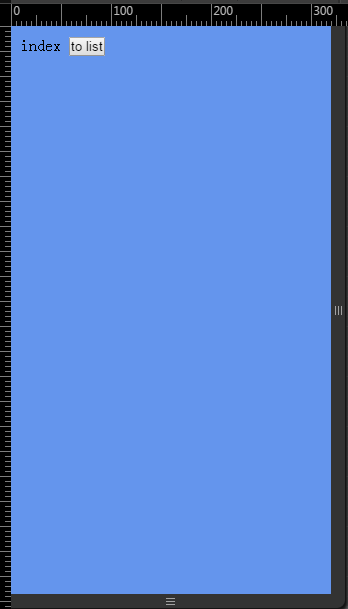
 1 <div class="main-viewport">
 2     <div class="viewport index-viewport" data-no-init="true">
 3         <style>
 4             .index-viewport {
 5                 background: cornflowerblue;
 6             }
 7         </style>
 8
 9         <div class="viewport-content">
10             index
11
12             <button class="js_tolist"> to list </button>
13         </div>
14
15
16         <script type="text/fscript" data-src="./js/index.js" ></script>
17     </div>
18 </div>
注意 script是 data-src ,因为是单页代码动态引入,然后拉取html成功后 会自动关联viewport下的script,再读取data-src的内容,然后动态引入script资源。
动态引入js:
 1                 //取scripts的绝对路径 如果不是绝对路径 ,需要动态计算
 2                 var script_path = scripts[0].getAttribute('data-src') || '';
 3
 4                 require([script_path], function (exports) {
 5
 6                     var view = cloneObj(exports.view);
 7
 8                     view.htmlPath = htmlPath;
 9                     view.viewPort = $("[page-path='" + htmlPath + "']");
10                     view.$ = function (selector) {
11                         return view.viewPort.find(selector);
12                     };
13                     //每创建一个view 把引用存起来
14                     DF.VIEWREF[htmlPath] = view;
15
16                     //如果上一个view存在
17                     scope.preView && scope.preView.onHide.apply(scope.preView);
18
19                     //加载页面完成后
20                     scope.fishLoad(htmlPath, pushState, search);
21
22
23                     view && view.onCreate.apply(view);
24                     //绑定事件
25                     if (view && view.events) {
26                         DF.bindEventAction.call(view, view.events);
27                     }
28
29
30                     view && view.onShow.apply(view);
31                     if (view.onAppear) {
32                         DF.onAppear = view.onAppear;
33                     }
34                     scope.updatePageid(view);
35
36
37                 });
js动态引入成功后,再执行单页的生命周期。
分别是
onCreate 页面创建的时候执行, 只执行一次
onShow 页面创建后会执行, 每次切换下一个页面会执行
onHide 页面切换的时候,上一个页面隐藏的时候会执行
然后资源加载成功,页面渲染成功后, 会pushSate,修改浏览器地址
 1     //fishLoad
 2     fishLoad: function (htmlPath, pushState, search) {
 3         //记录上一个页面
 4         if (this.curView) {
 5             this.preView = this.curView;
 6         } else {
 7             this.preView = DF.VIEWREF[htmlPath];
 8         }
 9
10         search = search || '';
11
12         //设置当前view
13         this.curView = DF.VIEWREF[htmlPath];
14
15         //console.log('curview ', this.curView.htmlPath, ' preView ', this.preView.htmlPath)
16
17         //渲染成功
18         if (pushState) {
19             history.pushState({
20                 'viewPath': htmlPath,
21                 'pro': 'spa',
22                 'url': htmlPath
23             }, "页面标题", htmlPath + search);
24         }
25
26     },
back回退的:
 1        back: function () {
 2            history.back();
 3        },
 4
 5         //history.back 会触发 popstate,然后会重新走loadView逻辑
 6         $(window).bind("popstate.pageview", function (e) {
 7
 8             //是单页spa操作  才触发
 9             if (this.getViewPath(location.href) != this.curView.htmlPath) {
10                 /*
11                  * 该干嘛干嘛
12                  */
13                 var pat = new RegExp(FHYBRID.appPath, 'i');
14                 DF.loadView(location.pathname.replace(pat, ''), false, false, true);
15             }
16
17         }.bind(this));
动画过渡:
 1     //动画执行方法
 2     /**
 3      * @param animInitClass  动画初始化时候的class
 4      * @param animBeforeClass  动画执行前的class
 5      * @param animEndClass  动画执行后的class
 6      */
 7     viewAnimation: function (opt) {
 8         var $static_el = opt.staticView;
 9         var $anim_el = opt.animView;
10         var $anim_init_class = opt.animInitClass;
11         var $anim_before_class = opt.animBeforeClass;
12         var $anim_end_rmclass = opt.animEndClass;
13         var anim_type = opt.animType || 'in';  //动画是进入 还是  出  ;  in  or out
14
15         $anim_el.addClass($anim_init_class);
16
17         //进入 动画节点 显示, 出, 对上一个页面显示
18         (anim_type == 'in') ? $anim_el.show() : $static_el.show();
19
20
21         setTimeout(function () {
22             $anim_el.addClass($anim_before_class);
23
24             $anim_el.on('webkitTransitionEnd', function () {
25                 //进入 对上一个页面隐藏;  出 动画节点 隐藏,
26                 (anim_type == 'in') ? $static_el.hide() : $anim_el.hide();
27
28                 $anim_el.removeClass($anim_end_rmclass);
29                 $anim_el.off('webkitTransitionEnd');
30             });
31         }, 0);
32
33
34     },
调用:
1                     //切换动画
2                     this.viewAnimation({
3                         staticView: this.preView.viewPort,
4                         animView: this.curView.viewPort,
5                         animType: 'in',
6                         animInitClass: 'ui-page-right ui-transition',
7                         animBeforeClass: 'ui-page-center-i',
8                         animEndClass: 'ui-page-right ui-transition ui-page-center-i'
9                     });
最后 请看我上面的事例,一共三个页面:
index.html
list.html
booking.html

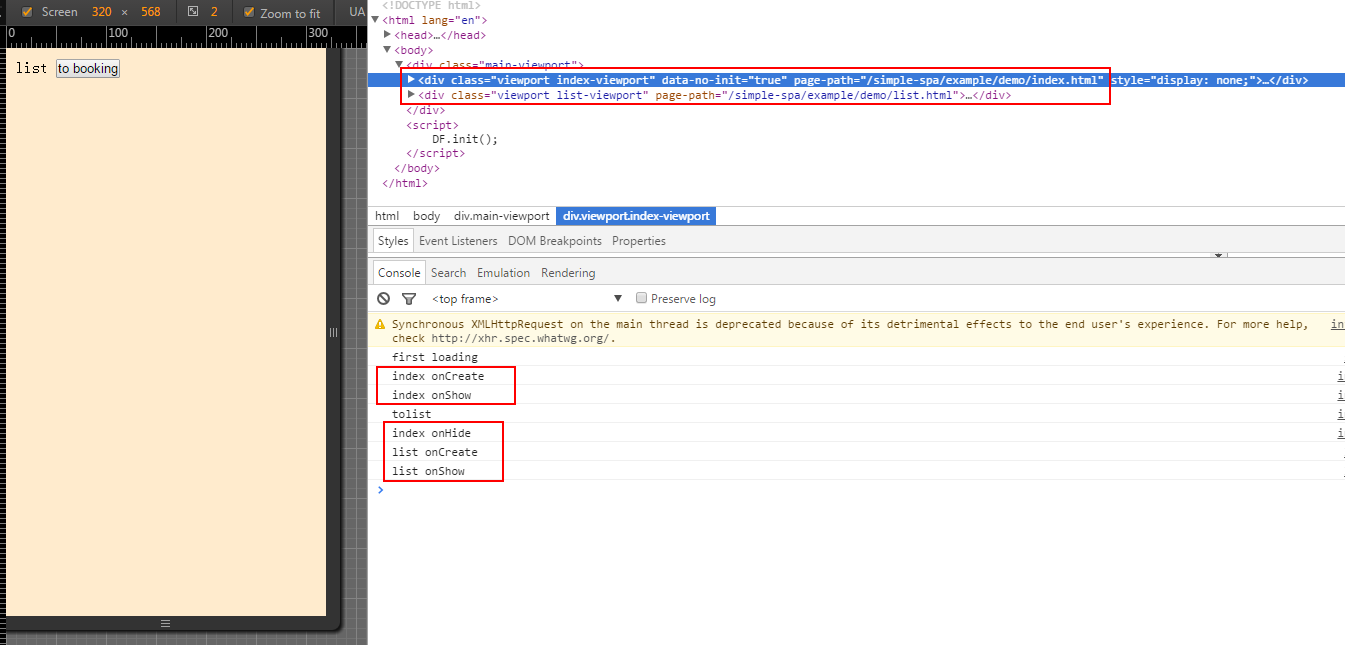
首先执行 index onCreate -> 然后执行 index onShow ;点击tolist; 执行 index onHide 然后执行 list onCreate-> list onShow;
