vs新建的.net core项目内置了依赖注入功能,本文简单地展示如何使用core的依赖注入,以及使用IOC容器(unity)来替换core自带的依赖注入容器。
1.使用core项目的依赖注入
新建.net core5 webapi 项目,创建MathBook.cs、EnglishBook.cs、Ibook.cs文件
using System;
using System.Collections.Generic;
using System.Linq;
using System.Threading.Tasks;

namespace app
{
    public class MathBook: Ibook
    {
        public string read()
        {
            return "看数学书";
        }
    }
}
using System;
using System.Collections.Generic;
using System.Linq;
using System.Threading.Tasks;

namespace app
{
    public class EnglishBook: Ibook
    {
        public string read()
        {
            return "看英语书";
        }
    }
}
using System;
using System.Collections.Generic;
using System.Linq;
using System.Threading.Tasks;

namespace app
{
    public interface Ibook
    {
        string read();
    }
}
在Startup.cs中尝试注册实例和调用实例。
namespace app
{
    public class Startup
    {
        public void ConfigureServices(IServiceCollection services)
        {
       //IserviceCollection提供注册
            services.AddSingleton<Ibook, MathBook>();
        }

        public void Configure(IApplicationBuilder app, IWebHostEnvironment env)
        {
       //IServiceProvider提供实例 app.ApplicationServices获取
       var provider = app.ApplicationServices;

            //// 输出
            var result = provider.GetService<Ibook>();
            Console.WriteLine(result.read());
        }
    }
}
运行程序,获得结果。

ServiceCollection注册实例有三个方法,AddTransient、AddSingleton、AddScoped。对应提供的实例会有不同生命周期。
Transient,每次调用GetServie方法都会创建一个新的实例。
Singleton,整个程序运行期间只创建一个实例。
Scoped,在同一个scope中,只创建一个实例。在一次http请求的整个过程中,默认共用一个scope。
.net core项目已经作了依赖注入的实现,直接使用便可。
public void ConfigureServices(IServiceCollection services)
        {
            services.AddSingleton<Ibook, MathBook>();//注册实例

            services.AddControllers();//使用api
        }
using Microsoft.AspNetCore.Http;
using Microsoft.AspNetCore.Mvc;
using System;
using System.Collections.Generic;
using System.Linq;
using System.Threading.Tasks;

namespace app.Controllers
{
    [Route("api/[controller]")]
    [ApiController]
    public class BookController : ControllerBase
    {
        private Ibook _book;
        public BookController(Ibook book)
        {
            this._book = book;
        }

        [Route("toRead")]
        [HttpGet]
        public string toRead()
        {
            return _book.read();
        }
    }
}
调用接口,可以获得结果。
2.替换成其它ioc容器
原有的依赖注入容器在面对大型项目会有些麻烦,原因是只能一个个进行注册实例,有可能光是引用命名空间就占了几百行。
这里使用unity进行替换。
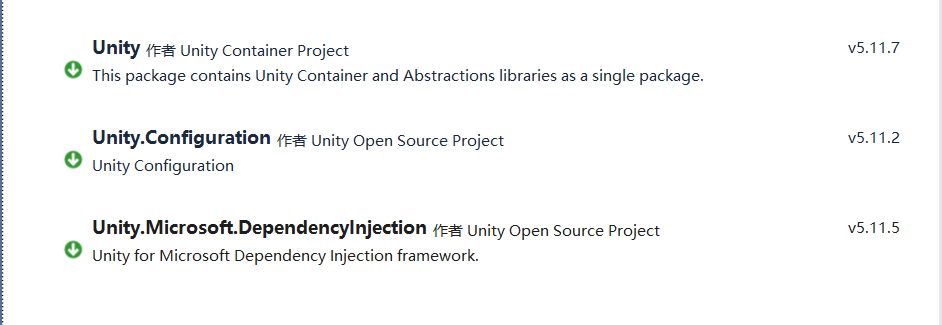
安装unity相关包
在Program.cs中添加UseUnityServiceProvider()。
using Microsoft.AspNetCore.Hosting;
using Microsoft.Extensions.Configuration;
using Microsoft.Extensions.Hosting;
using Microsoft.Extensions.Logging;
using System;
using System.Collections.Generic;
using System.Linq;
using System.Threading.Tasks;
using Unity;
using Unity.Microsoft.DependencyInjection;

namespace app
{
    public class Program
    {
        public static void Main(string[] args)
        {
            CreateHostBuilder(args).Build().Run();
        }

        public static IHostBuilder CreateHostBuilder(string[] args) =>
            Host.CreateDefaultBuilder(args)
                .UseUnityServiceProvider()
                .ConfigureWebHostDefaults(webBuilder =>
                {
                    webBuilder.UseStartup<Startup>();
                });
    }
}
在Startup.cs中添加ConfigureContainer方法,用来处理untiy容器,往容器中注册实例。
public void ConfigureContainer(IUnityContainer container)
        {
            ExeConfigurationFileMap fileMap = new ExeConfigurationFileMap();
            fileMap.ExeConfigFilename = Path.Combine(AppDomain.CurrentDomain.BaseDirectory + "unity.config");
            Configuration configuration = ConfigurationManager.OpenMappedExeConfiguration(fileMap, ConfigurationUserLevel.None);
            UnityConfigurationSection section = (UnityConfigurationSection)configuration.GetSection(UnityConfigurationSection.SectionName);

            section.Configure(container, "gContainer");//写法一:给容器加载在配置文件中name为“gContainer”的<container>
        }
上面是unity通过读取配置文件去注册,unity.config属性需要设置为始终复制。
<configuration>
  <configSections>
    <section name="unity" type="Microsoft.Practices.Unity.Configuration.UnityConfigurationSection, Unity.Configuration"/>
  </configSections>
  <unity>
    <assembly name="app"/>
    <containers>
      <container name="gContainer">
        <register type="app.Ibook" mapTo="app.MathBook" />
      </container>
    </containers>
  </unity>
</configuration>
Unity.Microsoft.DependencyInjection这个包的作用就是将unity的注册实例行为转化到.net core依赖容器,生成实例的生命周期是由.net core内置的容器进行管理。阅读该包源代码可以了解。
using Microsoft.AspNetCore.Hosting;
using Microsoft.Extensions.DependencyInjection;
using Microsoft.Extensions.DependencyInjection.Extensions;
using Microsoft.Extensions.Hosting;

namespace Unity.Microsoft.DependencyInjection
{
    public static class HostingExtension
    {
        private static ServiceProviderFactory _factory;


        public static IHostBuilder UseUnityServiceProvider(this IHostBuilder hostBuilder, IUnityContainer container = null)
        {
            _factory = new ServiceProviderFactory(container);

            return hostBuilder.UseServiceProviderFactory<IUnityContainer>(_factory)
                              .ConfigureServices((context, services) =>
                              {
                                  services.Replace(ServiceDescriptor.Singleton<IServiceProviderFactory<IUnityContainer>>(_factory));
                                  services.Replace(ServiceDescriptor.Singleton<IServiceProviderFactory<IServiceCollection>>(_factory));
                              });
        }

        public static IWebHostBuilder UseUnityServiceProvider(this IWebHostBuilder hostBuilder, IUnityContainer container = null)
        {
            _factory = new ServiceProviderFactory(container);

#if NETCOREAPP1_1
            return hostBuilder.ConfigureServices((services) =>
            {
                services.Replace(ServiceDescriptor.Singleton<IServiceProviderFactory<IUnityContainer>>(_factory));
                services.Replace(ServiceDescriptor.Singleton<IServiceProviderFactory<IServiceCollection>>(_factory));
            });
#else
            return hostBuilder.ConfigureServices((context, services) =>
            {
                services.Replace(ServiceDescriptor.Singleton<IServiceProviderFactory<IUnityContainer>>(_factory));
                services.Replace(ServiceDescriptor.Singleton<IServiceProviderFactory<IServiceCollection>>(_factory));
            });
#endif
        }
    }
}
大致就是,使用了UseUnityServiceProvider的拓展方法后,unity的注册实例,除了在unity自己的容器操作,同时还会对.net core的serviceCollection容器进行操作。
运行程序,调用api/Book/toRead接口,成功得到结果。
至此,成功使用unity去替换实现.net core中原有的依赖注入。