使用Vagrant搭建本地python开发环境
关于vagrant:
Vagrant是一个基于Ruby的工具,用于创建和部署虚拟化开发环境,它使用Oracle的开源VirtualBox虚拟化系统
也可以使用vmware来搭配使用,因为配置较为繁琐放弃了(貌似需要安装一个收费插件,还不如直接安装virtualbox)
详细操作步骤:
工具及环境介绍:
工具及环境 版本 下载地址
宿主机环境 win10 x86_64 家庭版 http://msdn.itellyou.cn/
VirtualBox VirtualBox-5.2.0 https://www.virtualbox.org/
vagrant vagrant_2.0.1 http://www.vagrantup.com/
box centos-6.6-x86_64.box http://www.vagrantup.com/
xshell xshell_5.0 build 1326 http://www.netsarang.com/download/main.html
1.下载并安装软件
①下载virtualbox虚拟机,很简单就不赘述(中途需要断网,需要注意)
http://download.virtualbox.org/virtualbox/5.2.0/VirtualBox-5.2.0-118431-Win.exe
②下载并安装Vagrant
https://releases.hashicorp.com/vagrant/2.0.1/vagrant_2.0.1_x86_64.msi
③centos-6.6-x86_64.box具体地址
https://github.com/tommy-muehle/puppet-vagrant-boxes/releases/download/1.0.0/centos-6.6-x86_64.box
2.将VirtualBox的路径配置到高级环境变量中
D:Program FilesOracleVirtualBox
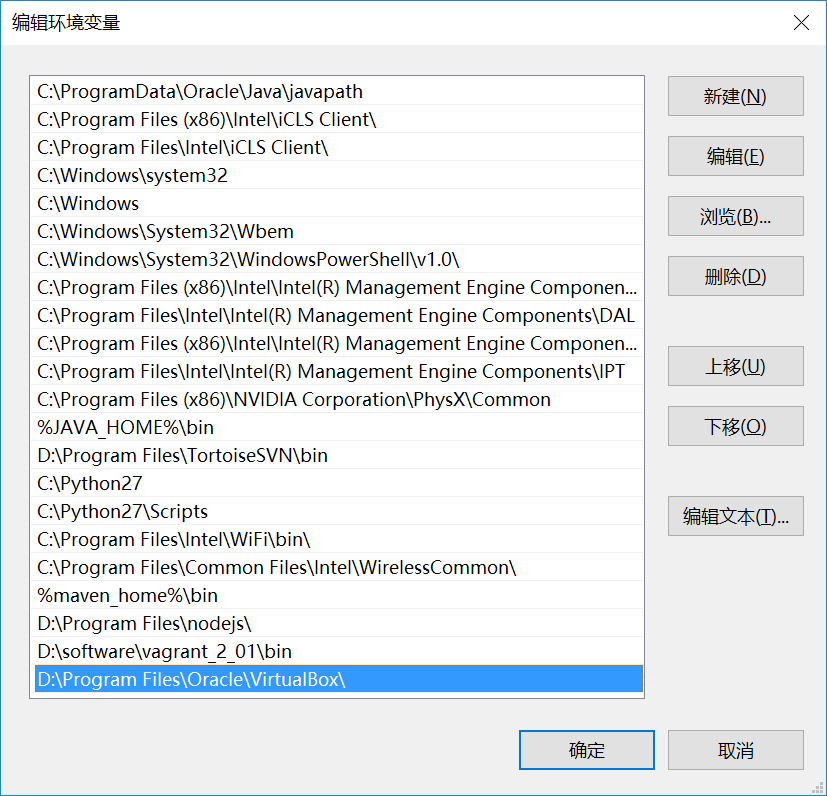
通过cmd直接运行VBoxManage.exe可以启动virtualbox虚拟机程序
3.下载centos-6.6-x86_64.box放到d:/data目录下
cmd命令窗口下:
d:
cd data
①创建centos6.6-x86_64镜像
D:data>vagrant box add "centos6.6-x86_64" centos-6.6-x86_64.box
==> box: Box file was not detected as metadata. Adding it directly...
==> box: Adding box 'centos6.6-x86_64' (v0) for provider:
box: Unpacking necessary files from: file://D:/data/centos-6.6-x86_64.box
box:
==> box: Successfully added box 'centos6.6-x86_64' (v0) for 'virtualbox'!
# 查看虚拟机列表
D:data>vagrant box list
centos6.6-x86_64 (virtualbox, 0)
③cd到devops2目录下初始化一个box
D:data>cd devops2
D:datadevops2>vagrant init "centos6.6-x86_64"
A `Vagrantfile` has been placed in this directory. You are now
ready to `vagrant up` your first virtual environment! Please read
the comments in the Vagrantfile as well as documentation on
`vagrantup.com` for more information on using Vagrant.
④启动虚拟机
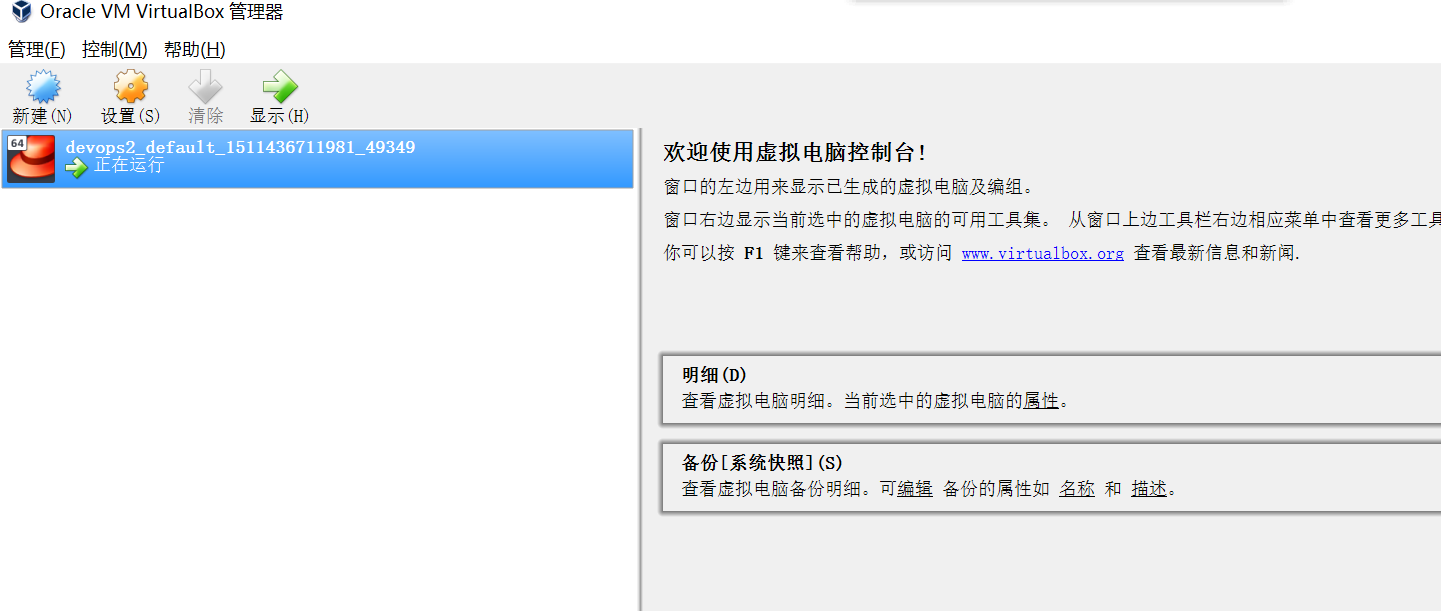
D:datadevops2>vagrant up
Bringing machine 'default' up with 'virtualbox' provider...
==> default: Importing base box 'centos6.6-x86_64'...
==> default: Matching MAC address for NAT networking...
==> default: Setting the name of the VM: devops2_default_1511436711981_49349
==> default: Clearing any previously set forwarded ports...
==> default: Clearing any previously set network interfaces...
==> default: Preparing network interfaces based on configuration...
default: Adapter 1: nat
==> default: Forwarding ports...
default: 22 (guest) => 2222 (host) (adapter 1)
==> default: Booting VM...
==> default: Waiting for machine to boot. This may take a few minutes...
default: SSH address: 127.0.0.1:2222
default: SSH username: vagrant
default: SSH auth method: private key
default: Warning: Connection reset. Retrying...
default: Warning: Connection aborted. Retrying...
default: Warning: Remote connection disconnect. Retrying...
default: Warning: Connection reset. Retrying...
default: Warning: Connection aborted. Retrying...
default: Warning: Remote connection disconnect. Retrying...
default: Warning: Connection aborted. Retrying...
default: Warning: Connection reset. Retrying...
default: Warning: Connection aborted. Retrying...
default: Warning: Connection reset. Retrying...
default: Warning: Connection aborted. Retrying...
default: Warning: Remote connection disconnect. Retrying...
default:
default: Vagrant insecure key detected. Vagrant will automatically replace
default: this with a newly generated keypair for better security.
default:
default: Inserting generated public key within guest...
default: Removing insecure key from the guest if it's present...
default: Key inserted! Disconnecting and reconnecting using new SSH key...
==> default: Machine booted and ready!
==> default: Checking for guest additions in VM...
default: The guest additions on this VM do not match the installed version of
default: VirtualBox! In most cases this is fine, but in rare cases it can
default: prevent things such as shared folders from working properly. If you see
default: shared folder errors, please make sure the guest additions within the
default: virtual machine match the version of VirtualBox you have installed on
default: your host and reload your VM.
default:
default: Guest Additions Version: 4.3.28
default: VirtualBox Version: 5.2
==> default: Mounting shared folders...
default: /vagrant => D:/data/devops2
# 可以看到启动了虚拟机
④启动ssh
D:datadevops2>vagrant ssh
Last login: Sat May 30 12:27:44 2015 from 10.0.2.2
Welcome to your Vagrant-built virtual machine.
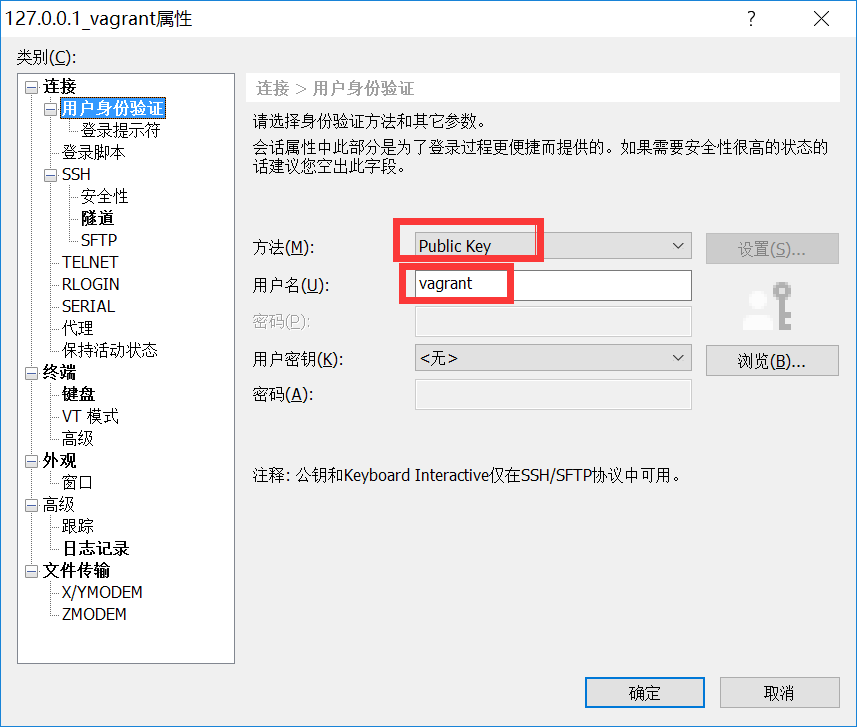
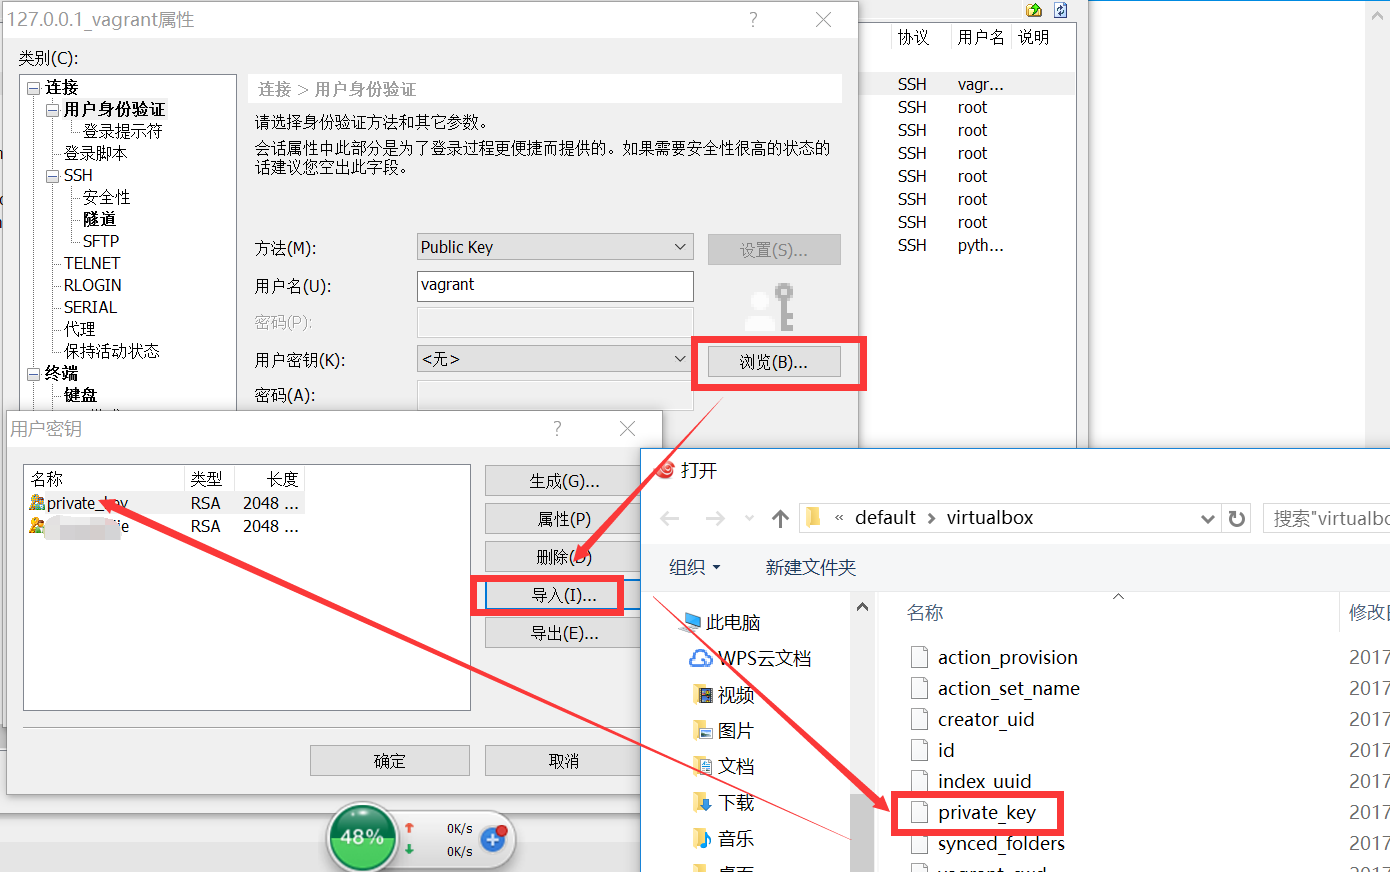
也可以通过ssh工具连接比如xshell连接127.0.0.1 的2222端口,用户名为vagrant密码选择public key选择安装目录的private_key导入即可

[vagrant@localhost ~]$ pwd
/home/vagrant
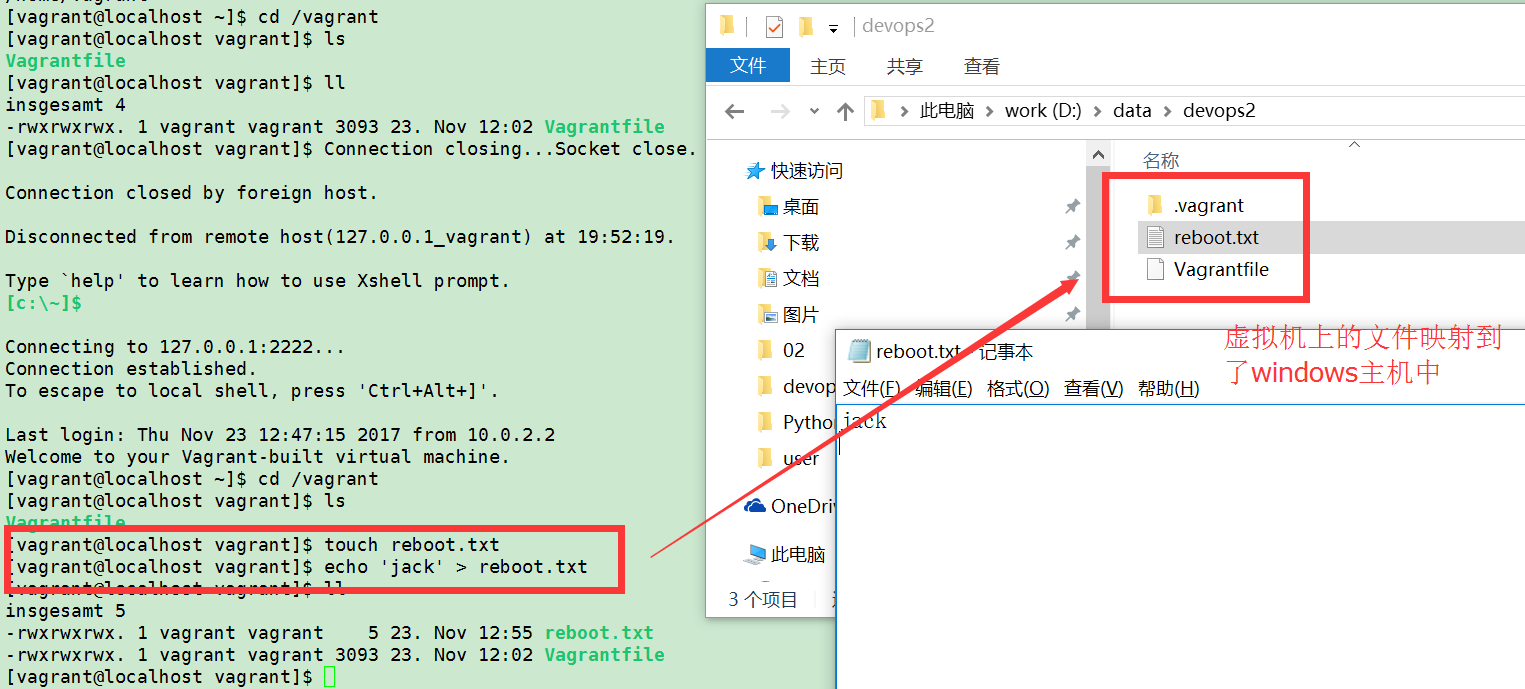
[vagrant@localhost ~]$ cd /vagrant

# 默认会把目录映射到/vagrant目录下
[vagrant@localhost vagrant]$ ll
insgesamt 4
-rwxrwxrwx. 1 vagrant vagrant 3093 23. Nov 12:02 Vagrantfile
[vagrant@localhost vagrant]$ touch reboot.txt
[vagrant@localhost vagrant]$ echo 'jack' > reboot.txt
[vagrant@localhost vagrant]$ ll
insgesamt 5
-rwxrwxrwx. 1 vagrant vagrant 5 23. Nov 12:55 reboot.txt
-rwxrwxrwx. 1 vagrant vagrant 3093 23. Nov 12:02 Vagrantfile
⑤关闭虚拟机
关机D:datadevops2>vagrant halt