一、绘制一个带有多张图片和文字的canvas。要求将一张矩形的图片,放置进去显示为圆角矩形的图片
解决方案,先把图片处理成圆角矩形的样子,再放进去就可以了
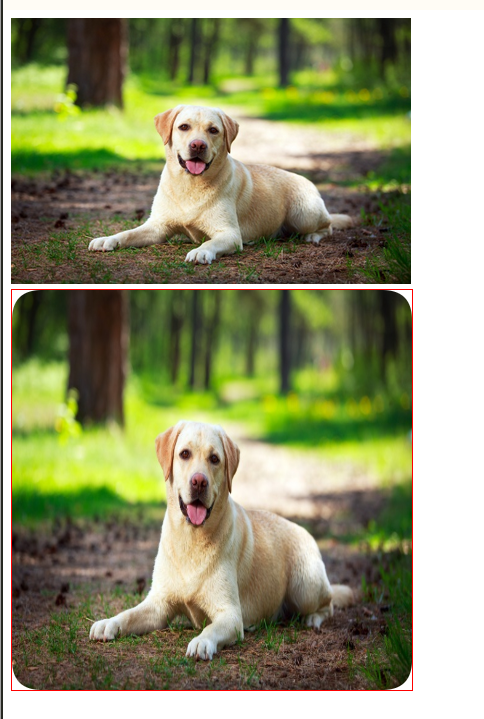
绘制圆角矩形图片的解决方案
效果如下图
<img src="http://pics.sc.chinaz.com/files/pic/pic9/201505/apic11973.jpg" width="400" />
<!--canvas的默认画布大小为300×150-->
<canvas id="j-tab4-canvas" style="border: 1px solid red;">
        当前浏览器不支持canvas,请更换浏览器后再试
</canvas>
<script>
    window.onload = function() {
        var canvas = document.getElementById("j-tab4-canvas");
        canvas.width = 400;
        canvas.height = 400;
        var context = canvas.getContext("2d");

        //绘制圆角矩形
        context.roundRect(0, 0, 400, 400, 30, true);

        var img = new Image();

        img.src = "img/dog.jpg";
        img.onload = function() {
            context.globalCompositeOperation = 'source-in';
            context.drawImage(img, 0, 0, canvas.width, canvas.height);
            //最后输出一张base64格式的图片url,成功生成一张圆角矩形的图片
            console.log(canvas.toDataURL('image/jpeg',0.92))

        }
    }

    //圆角矩形
    CanvasRenderingContext2D.prototype.roundRect = function(x, y, width, height, radius, fill, stroke) {
        if(typeof stroke == "undefined") {
            stroke = true;
        }
        if(typeof radius === "undefined") {
            radius = 5;
        }
        this.beginPath();
        this.moveTo(x + radius, y);
        this.lineTo(x + width - radius, y);
        this.quadraticCurveTo(x + width, y, x + width, y + radius);
        this.lineTo(x + width, y + height - radius);
        this.quadraticCurveTo(x + width, y + height, x + width - radius, y + height);
        this.lineTo(x + radius, y + height);
        this.quadraticCurveTo(x, y + height, x, y + height - radius);
        this.lineTo(x, y + radius);
        this.quadraticCurveTo(x, y, x + radius, y);
        this.closePath();

        if(stroke) {
            //线条颜色
            this.strokeStyle = "rgba(0,0,0,0)";
            this.stroke();
        }
        if(fill) {
            //填充颜色
            this.fillStyle = "rgba(0,0,0,1)";
            this.fill();
        }
    };
</script>
踩坑说明 :
1、在行间使用style="300px;height:200px",是无效的。强烈建议用js来设置canvas的宽高
1、绘制图片的 drawImage()方法。在把图片绘制的时候,自带了图片压缩功能。绘制图片的时候尽量使用质量高一点的图片(上传一张5M的图片,最后输出300k)。不然容易出现图片模糊的现象。另外就是无法控制压缩的程度
2、canvas生成图片的方法toDataURL('image/jpeg',0.92),带有2个参数。这个方法在生成图片的时候,也是自带图片压缩功能
这两个值是参数的默认值。参数一是设置生成图片的格式,可以是png,jpg。参数二,是设置压缩图片的程度,范围是0-1,1为不压缩,越靠近0,压缩的越厉害
3、toDataURL()有跨域问题。
假如绘制的图片跨域了,就会提示 "Uncaught SecurityError: Failed to execute 'toDataURL' on 'HTMLCanvasElement': Tainted canvases may not be exported."(被污染的画布无法输出)
解决办法:访问的服务器允许,资源跨域使用,也就是说设置了CORS跨域配置,Access-Control-Allow-Origin(启用了 CORS 的图片 )
绘制图片如下所示:设置img.src要放下onload()的后面
var img = new Image();
//访问的服务器允许,资源跨域使用,也就是说设置了CORS跨域配置,Access-Control-Allow-Origin
img.setAttribute('crossOrigin', 'anonymous');

img.onload = function() {
	context.globalCompositeOperation = 'source-in';
	context.drawImage(img, 0, 0, canvas.width, canvas.height);
	//最后输出一张base64格式的图片url,成功生成一张圆角矩形的图片
	console.log(canvas.toDataURL('image/jpeg',0.92))
}
img.src="http://pics.sc.chinaz.com/files/pic/pic9/201505/apic11973.jpg"
4、canvas绘图模糊的问题
解决办法原理,将canvas画布放大来绘画,再缩小显示。详情请参考以下两篇博文
https://segmentfault.com/a/1190000003730246,
https://www.jianshu.com/p/4c4312dc7fc5
这里粗略讲一下我的解决过程。我创建一个canvas画布,画了一个圆和写了一句话,可以看到圆和字线条上都是有点模糊的。

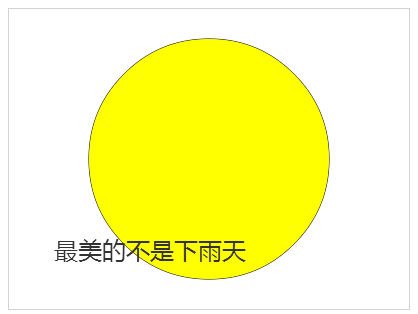
为了解决模糊的问题
2、代码如下所示,绘画一张图片。经验证,该方法只对绘制图片才有效。对文字和绘画图形效果不大
<!--canvas的默认画布大小为300×150-->
<canvas id="j-tab4-canvas" style="border: 1px solid red;">  当前浏览器不支持canvas,请更换浏览器后再试</canvas>
<script>
	window.onload = function() {
		var canvas = document.getElementById("j-tab4-canvas");
		canvas.width = 400;
		canvas.height = 400;
		var context = canvas.getContext("2d");

		var getPixelRatio = function(context) {
			var backingStore = context.backingStorePixelRatio ||
				context.webkitBackingStorePixelRatio ||
				context.mozBackingStorePixelRatio ||
				context.msBackingStorePixelRatio ||
				context.oBackingStorePixelRatio ||
				context.backingStorePixelRatio || 1;

			return(window.devicePixelRatio || 1) / backingStore;
		};

		var ratio = getPixelRatio(context);
		console.log(ratio);

		var img = new Image();
		img.onload = function() {
			context.drawImage(img, 0, 0, canvas.width, canvas.height);
		}
                img.src = "img/min.png";
	}
</script>
这样也就没有更好的办法了,那就剩下一个,把canvas画布设置的宽高值大一点就是了。
大概也就这么多了!
参考博客:https://blog.csdn.net/qingchunweiliang/article/details/71305352