SpringBoot Web开发
jar:webapp!
自动装配:创建应用,选择模块
springboot到底帮我们配置了什么?我们能不能进行修改?能修改哪些东西?能不能扩展?
- xxxAutoConfiguration.. 向容器中自动配置组件
- xxxProperties:自动配置类,装配配置文件中自定义的一些内容
要解决的问题
- 导入静态资源 html css
- 首页
- jsp,模板引擎 Thymeleaf
- 装备扩展 SpringMVC
- 增删改查
- 拦截器
- 国际化
静态资源
WebMvcAutoConfiguration.java
public void addResourceHandlers(ResourceHandlerRegistry registry) {
	if (!this.resourceProperties.isAddMappings()) {
		logger.debug("Default resource handling disabled");
		return;
	}
	Duration cachePeriod = this.resourceProperties.getCache().getPeriod();
	CacheControl cacheControl = this.resourceProperties.getCache().getCachecontrol().toHttpCacheControl();
	if (!registry.hasMappingForPattern("/webjars/**")) {
		customizeResourceHandlerRegistration(registry.addResourceHandler("/webjars/**")
.addResourceLocations("classpath:/META-INF/resources/webjars/").setCachePeriod(getSeconds(cachePeriod)).setCacheControl(cacheControl));
	}
	String staticPathPattern = this.mvcProperties.getStaticPathPattern();
	if (!registry.hasMappingForPattern(staticPathPattern)) {
		customizeResourceHandlerRegistration(registry.addResourceHandler(staticPathPattern).addResourceLocations(getResourceLocations(this.resourceProperties.getStaticLocations())).setCachePeriod(getSeconds(cachePeriod)).setCacheControl(cacheControl));
	}
}
- 第一种方法:添加webjars依赖拿到静态资源
<dependency>
	<groupId>org.webjars</groupId>
	<artifactId>jquery</artifactId>
	<version>3.4.1</version>
</dependency>
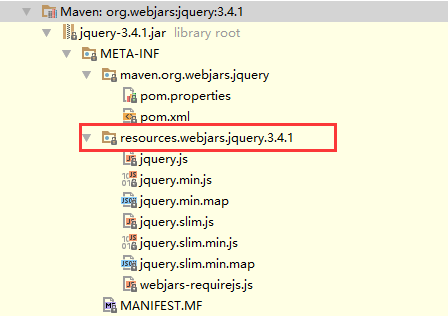

- 第二种方法
ResourceProperties.java 类定义了几个资源地址的静态全局变量

按照源码新建文件夹,在该文件下的所有目录都直接能被取到

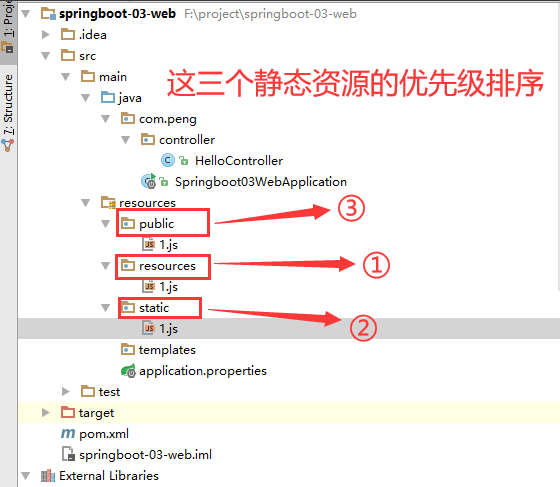
- 总结
- 在springboot,我们可以使用以下方式处理静态资源
- webjars:
localhost:8080/webjars/ - public,static,resource,/**,这些都在
localhost:8080/下
- webjars:
- 优先级:resource>static(默认的)>public
首页定制
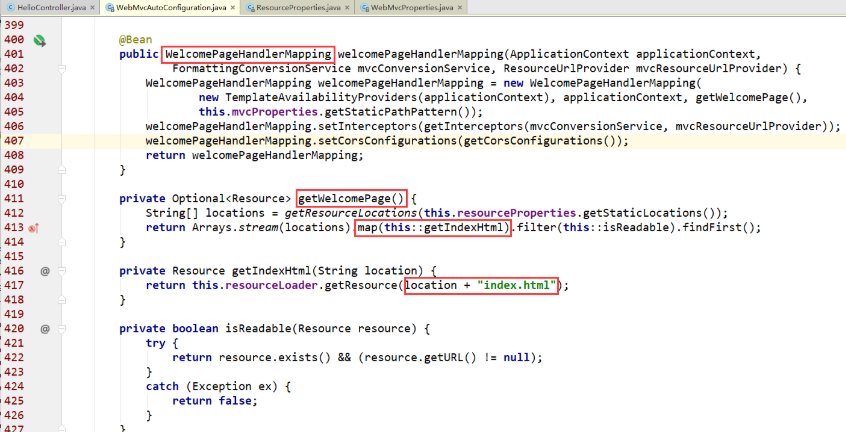
看源码,意思是在任意资源目录添加 index.html 文件,我这里添加到了 public 文件夹下

启动后
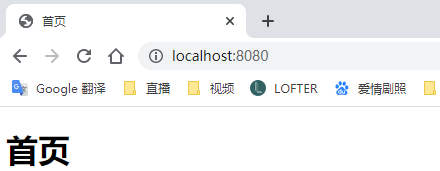
经测试,index.html 文件放到三个子目录下都能生成主页,直接放到上级的 resources 里不生效,一般主页都放到 static 文件夹下
模板引擎 Thymeleaf
导入依赖
<!--thymeleaf 以后都是基于3.x开发-->
<dependency>
	<groupId>org.thymeleaf</groupId>
	<artifactId>thymeleaf-spring5</artifactId>
</dependency>
<dependency>
	<groupId>org.thymeleaf.extras</groupId>
	<artifactId>thymeleaf-extras-java8time</artifactId>
</dependency>
源码
public class ThymeleafProperties {
   private static final Charset DEFAULT_ENCODING = StandardCharsets.UTF_8;
   public static final String DEFAULT_PREFIX = "classpath:/templates/";
   public static final String DEFAULT_SUFFIX = ".html";
   ...
}
从源码看出,Thymeleaf 能取到 templates 目录下的 .html 文件


结论:只要需要使用 thymeleaf,只需要导入对应的依赖就可以了!我们将html放在我们的 templates 目录下即可!
<!DOCTYPE html>
<!--特定的声明-->
<html lang="en" xmlns:th="http://www.thymeleaf.org"/>
<head>
    <meta charset="UTF-8">
    <title>Title</title>
</head>
<body>
<h1>test</h1>

<!--所有的htmL元素都可以被thymeleaf 替换接管 th:元素名-->
<div th:text="${msg}"></div>

</body>
</html>
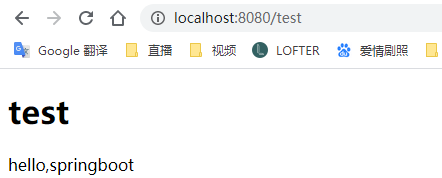
@Controller
public class IndexController {

    @RequestMapping("/test")
    public String test(Model model){
        model.addAttribute("msg","hello,springboot");
        return "test";
    }
}
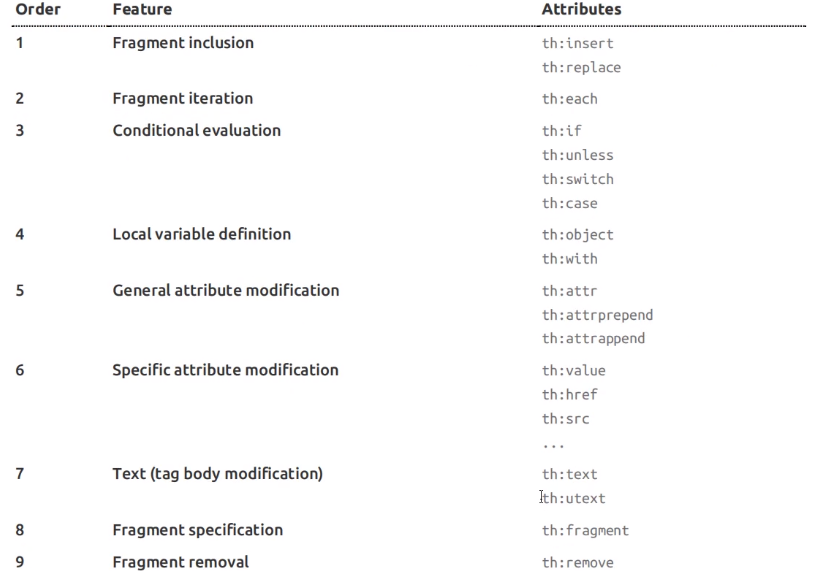
- thymeleaf语法
测试
<!DOCTYPE html>
<!--特定的声明-->
<html lang="en" xmlns:th="http://www.thymeleaf.org"/>
<head>
    <meta charset="UTF-8">
    <title>Title</title>
</head>
<body>
<h1>test</h1>

<!--所有的htmL元素都可以被thymeleaf 替换接管 th:元素名-->
<div th:text="${msg}"></div>
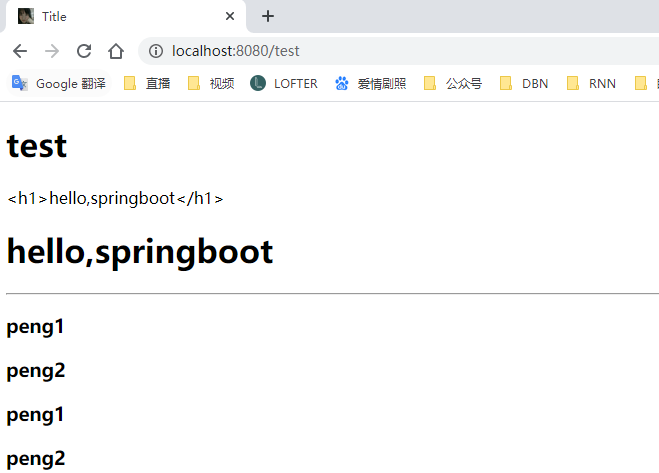
<!--utext表示转义-->
<div th:utext="${msg}"></div>

<hr>

<!--遍历取值-->
<h3 th:each="user:${users}" th:text="${user}"></h3>
<h3 th:each="user:${users}">[[${user}]]</h3><!--不建议使用-->

</body>
</html>
@Controller
public class IndexController {

    @RequestMapping("/test")
    public String test(Model model){
        model.addAttribute("msg","<h1>hello,springboot</h1>");
        model.addAttribute("users", Arrays.asList("peng1","peng2"));
        return "test";
    }
}
结果
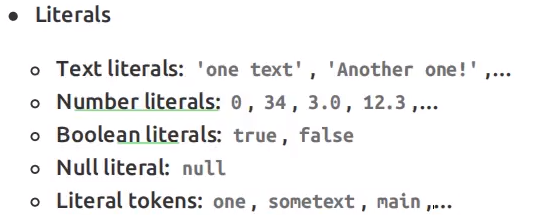
更多语法



SpringMVC自动配置
自己扩展的mvc配置类 com.peng.config/WebMvcConfigurer.java
//如果,你想diy一些定制化的功能,只要写这个组件,
//然后将它交给springboot, springboot会帮我们自动装配!
//扩展  springmvc       dispatchservlet
@Configuration
public class MyConfig implements WebMvcConfigurer {

    //ViewResolver实现了视图解析器按口的类,我们就可以把它看做视图解析器
    @Bean
    public ViewResolver myViewResolver(){
        return new MyViewResolver();
    }

    //自定义了一个自己的视图解析器
    public static class MyViewResolver implements ViewResolver{
        @Override
        public View resolveViewName(String s, Locale locale) throws Exception {
            return null;
        }
    }
}
在 springboot 中, 有非常多的xxxx Configuration帮助我们进行扩展配置,只要看见了这个东西,我们就要注意了!
一个例子:
	//视图跳转
    @Override
    public void addViewControllers(ViewControllerRegistry registry) {
        registry.addViewController("/peng").setViewName("test");
    }